In this article, we will get started on working with AWS S3 using ASP.NET Core Web API to upload, download and delete files from Amazon’s Super Scalable S3! Apart from that, we will also learn more about Amazon’s S3, the problem it solves, dive a bit into the AWS Console for S3 Management, AWS CLI, and Credentials Store, Generate Access Keys for accessing S3 via SDKs, Creating and Deleting S3 buckets, a bit about pre-signed URLs and so on!
We will be building a .NET 6 Web API that demonstrated all of the above topics. This API would allow you to create and delete S3 Buckets, and upload and delete files from specific Amazon S3 Buckets. You can find the complete source code of the AWS S3 .NET 6 Web API project here.
Amazon S3 - In Short
S3 or Simple Storage Service by Amazon is a super scalable solution for one’s storage needs with ultra-high availability, thanks to Amazon’s Servers spread across the globe. On top of this awesome storage service, Amazon provides management features so that you can optimize, secure, and organize your data best suited for your business goals.
To learn more about AWS S3, visit here.
To move along with this tutorial, you need to understand a bit about S3 Buckets, objects, and permissions. So, Buckets in AWS S3 are like folders/spaces which are given to you by AWS S3 where you would place your objects. Object refers to files. By default, the objects are not accessible to the public. Using IAM - Identity And Access Management, we will create a new user who has complete access rights to the S3 service, generate the user credentials, and use them via the AWS SDK for .NET to build our application.
This tutorial assumes that you already have your AWS account set up. If not, click here to sign up for your FREE AWS Account. The registration steps are quite straightforward and shouldn’t take you more than 10 mins to get started. Note that the FREE tier provided by Amazon is more than enough for this tutorial.
AWS Free Tier lets you work with up to 5GB of data in S3 for 12 months which is more than sufficient for testing all aspects before moving into a paid plan.
Update: Here is a video that I recently uploaded to my youtube channel where I built an ASP.NET Core Web API (.NET 7) application to perform read/write operations over S3 Bucket & Objects. Watch the video here - https://www.youtube.com/watch?v=2q5jA813ZiI
https://www.youtube.com/embed/2q5jA813ZiI
Creating User & Generating Access Keys via AWS IAM
Let’s start with the security part.
As mentioned earlier, we are going to work with AWS SDK to perform operations over S3 via our .NET Application. Thus, the first requirement is to have a way to access AWS S3 via the 3rd party application ( our Web API ). IAM or the Identity & Access Management from AWS is responsible for creating users and granting access to the users with specific privileges.
First up, sign in to the AWS Console.
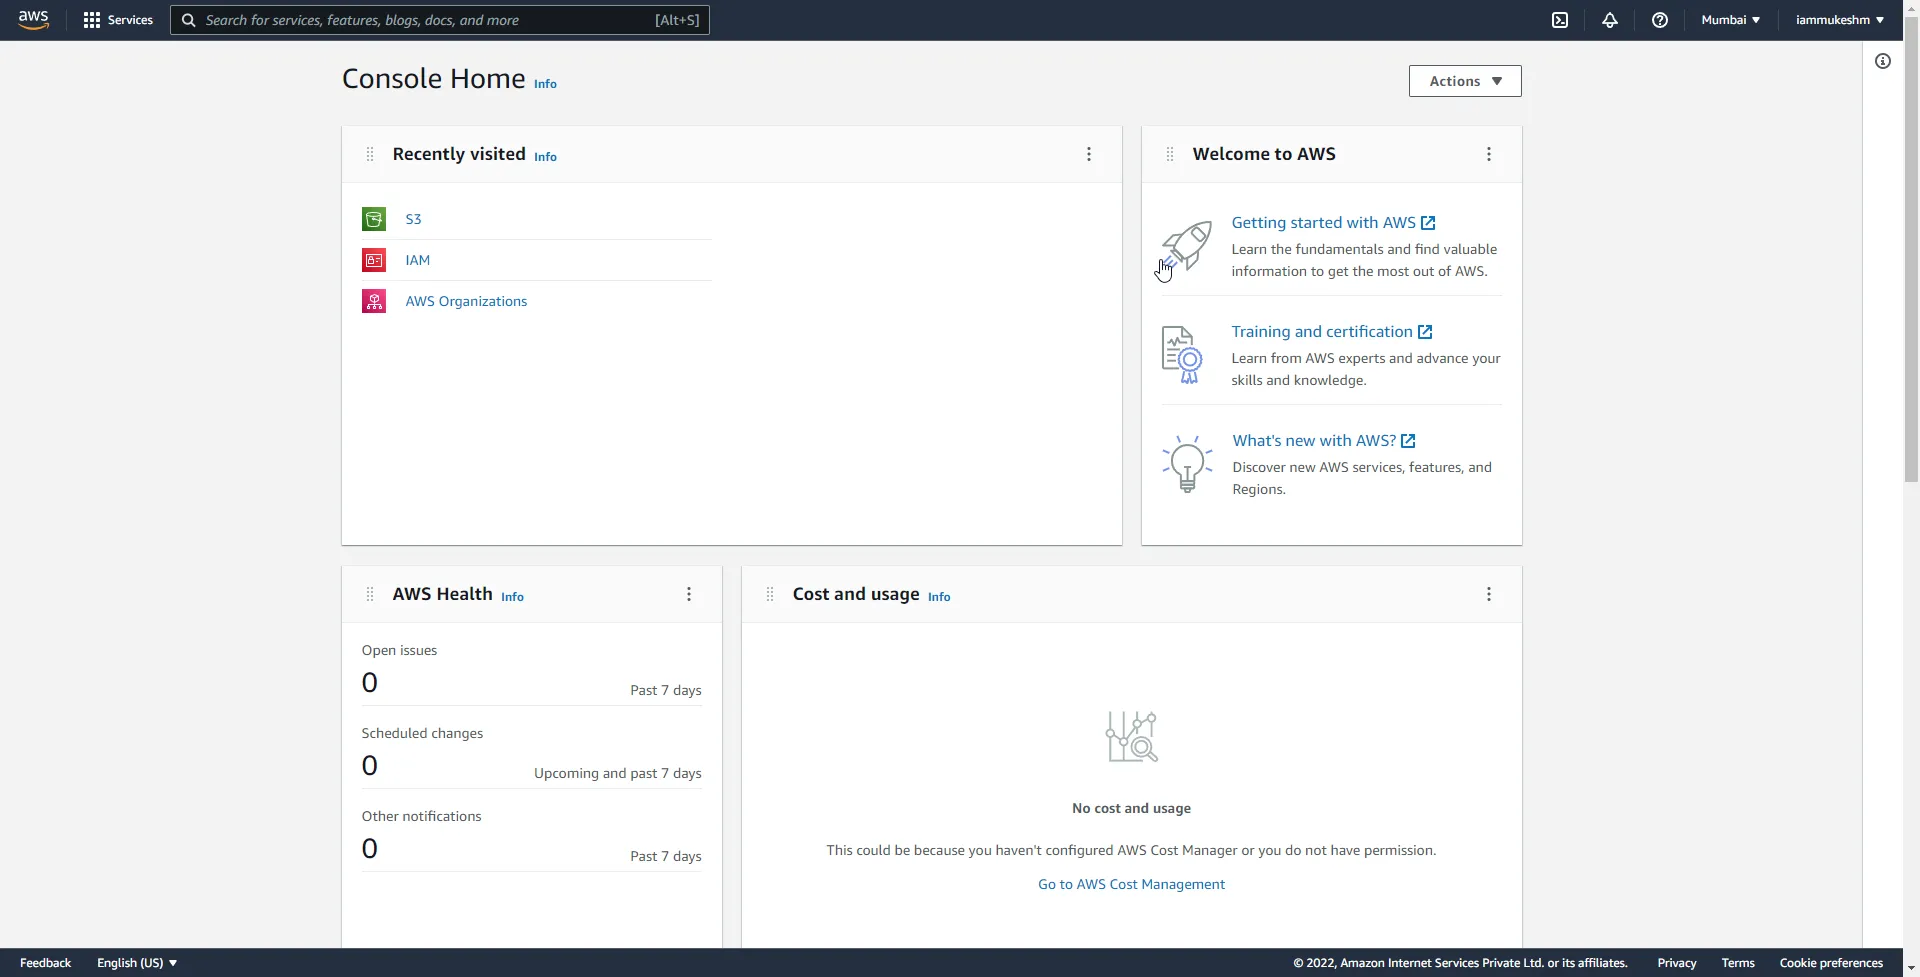
In the search bar, search for IAM and open it. IAM helps you manage security for AWS resources in general.
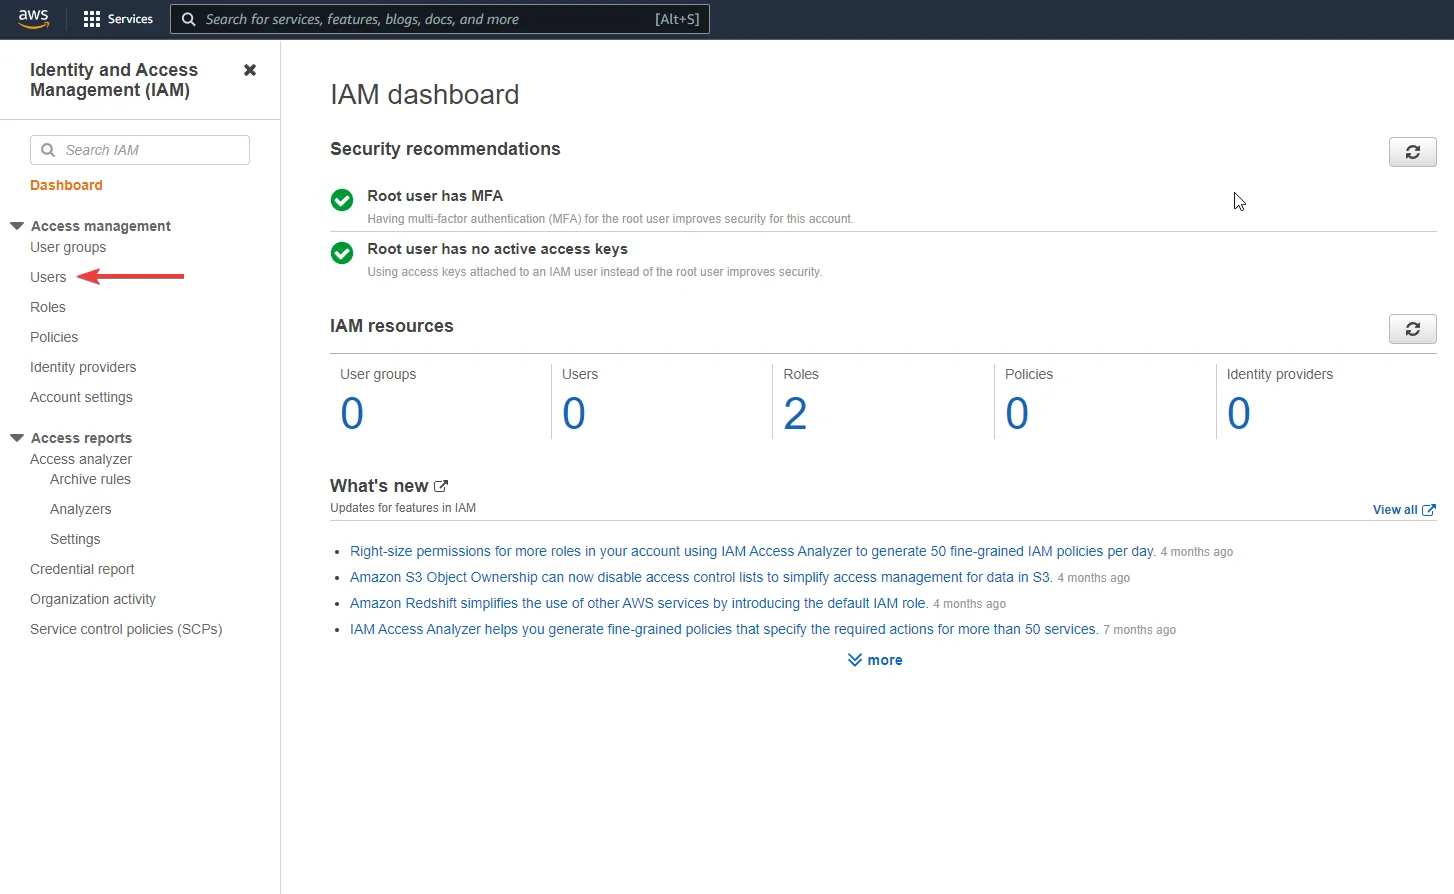
Once IAM loads up, click on users. Our intention is to create a new user that has full access rights to perform operations with the AWS S3 Service.
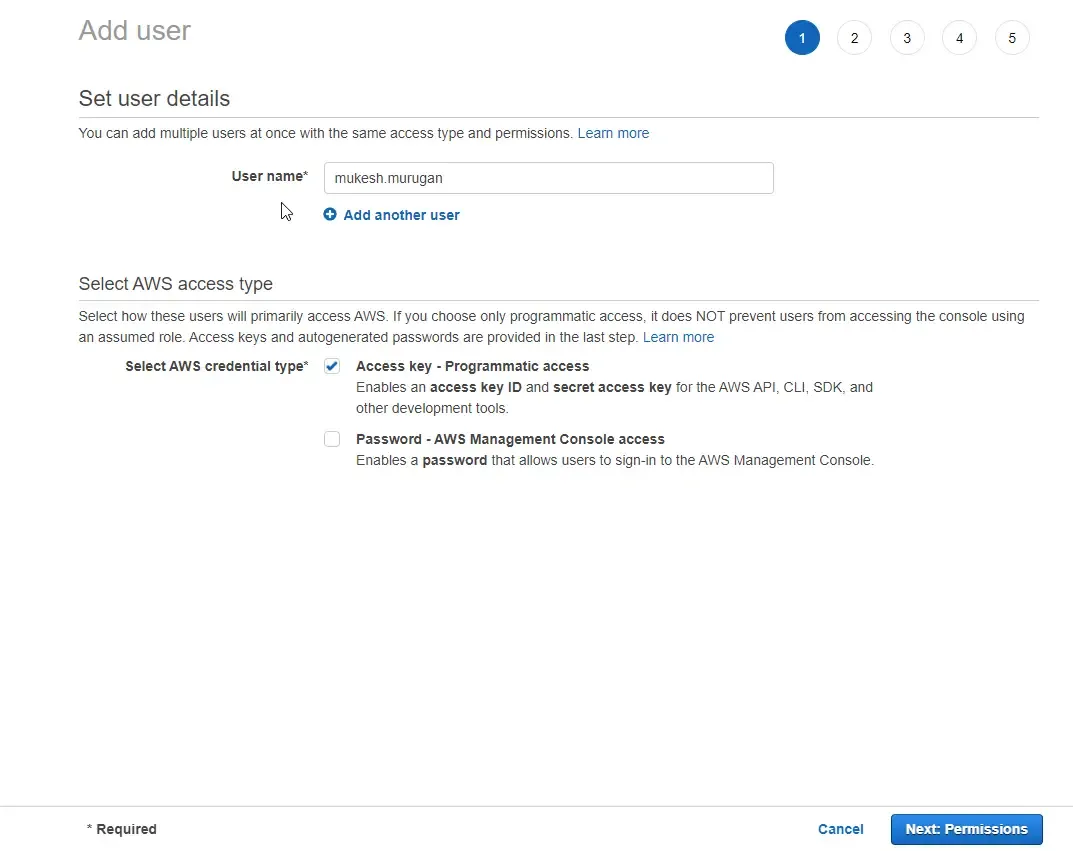
In the next form, add your user name and make sure to select the AWS Credential type as Access Key. This enables us to use the generated keys for SDK / API-related development works.
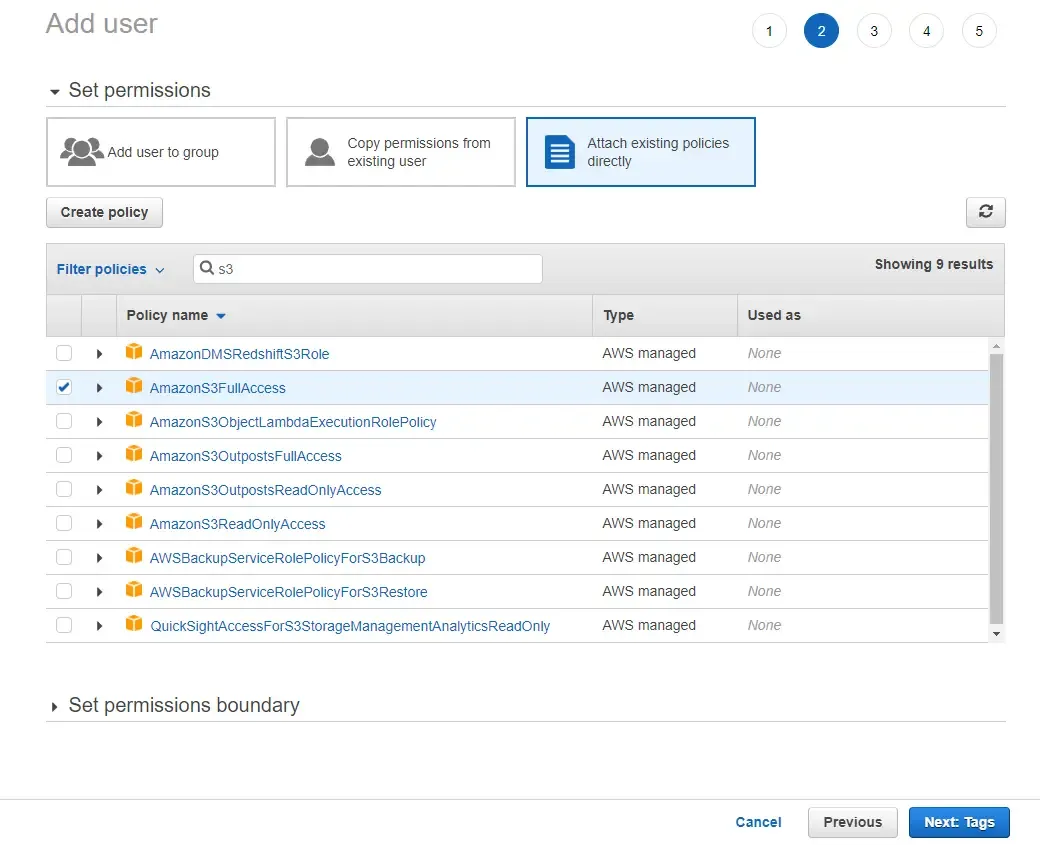
Next, we have to attach policies/permissions to this user. Search for S3 add select AmazonS3FullAccess. You can choose to add more if you want. But for this article, we only need this policy to be added.
On the next screen, you get an option to add tags to the user. This can be useful for billing/monitoring purposes. But for now, we can skip this step.
Finally, Review the details that you added and click on Create User.
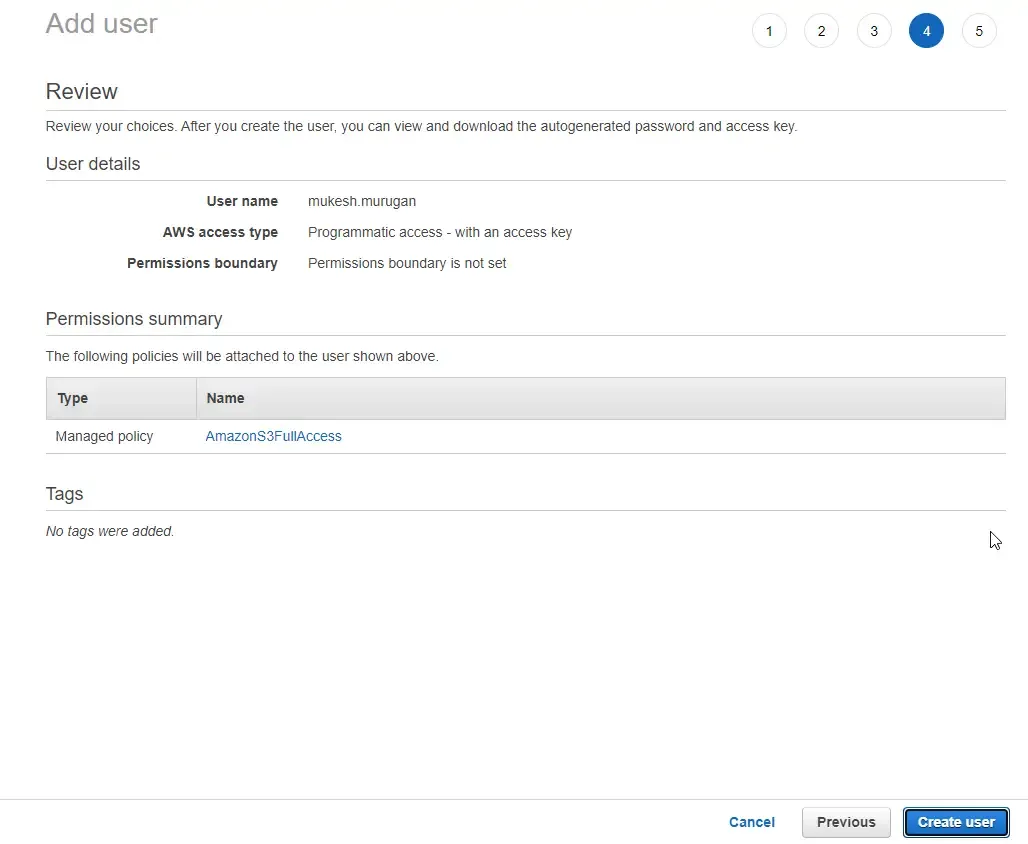
That’s it. A new user will be created for you.
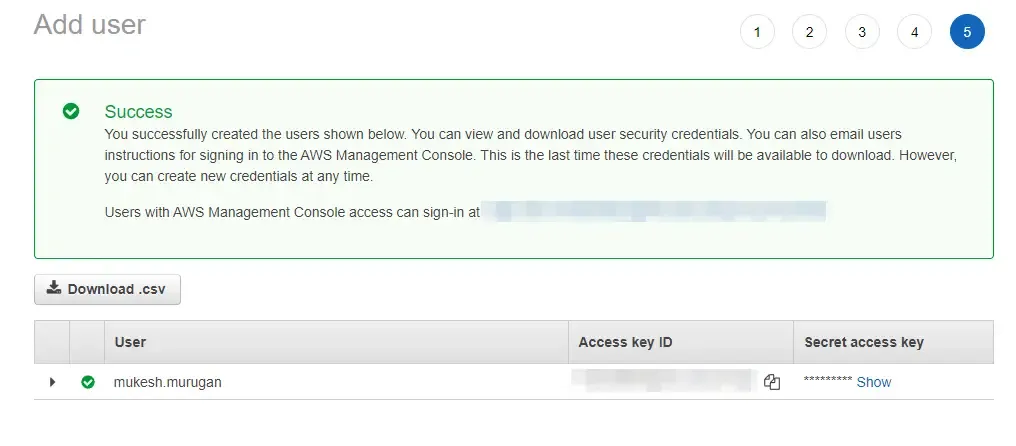
As the next step, make sure to download the generated CSV for safekeeping. This usually has your Access Key Id and Secret Access Key. We need these details later on when we try to integrate our code with AWS S3 Service.
Creating your First AWS S3 Bucket via AWS Console
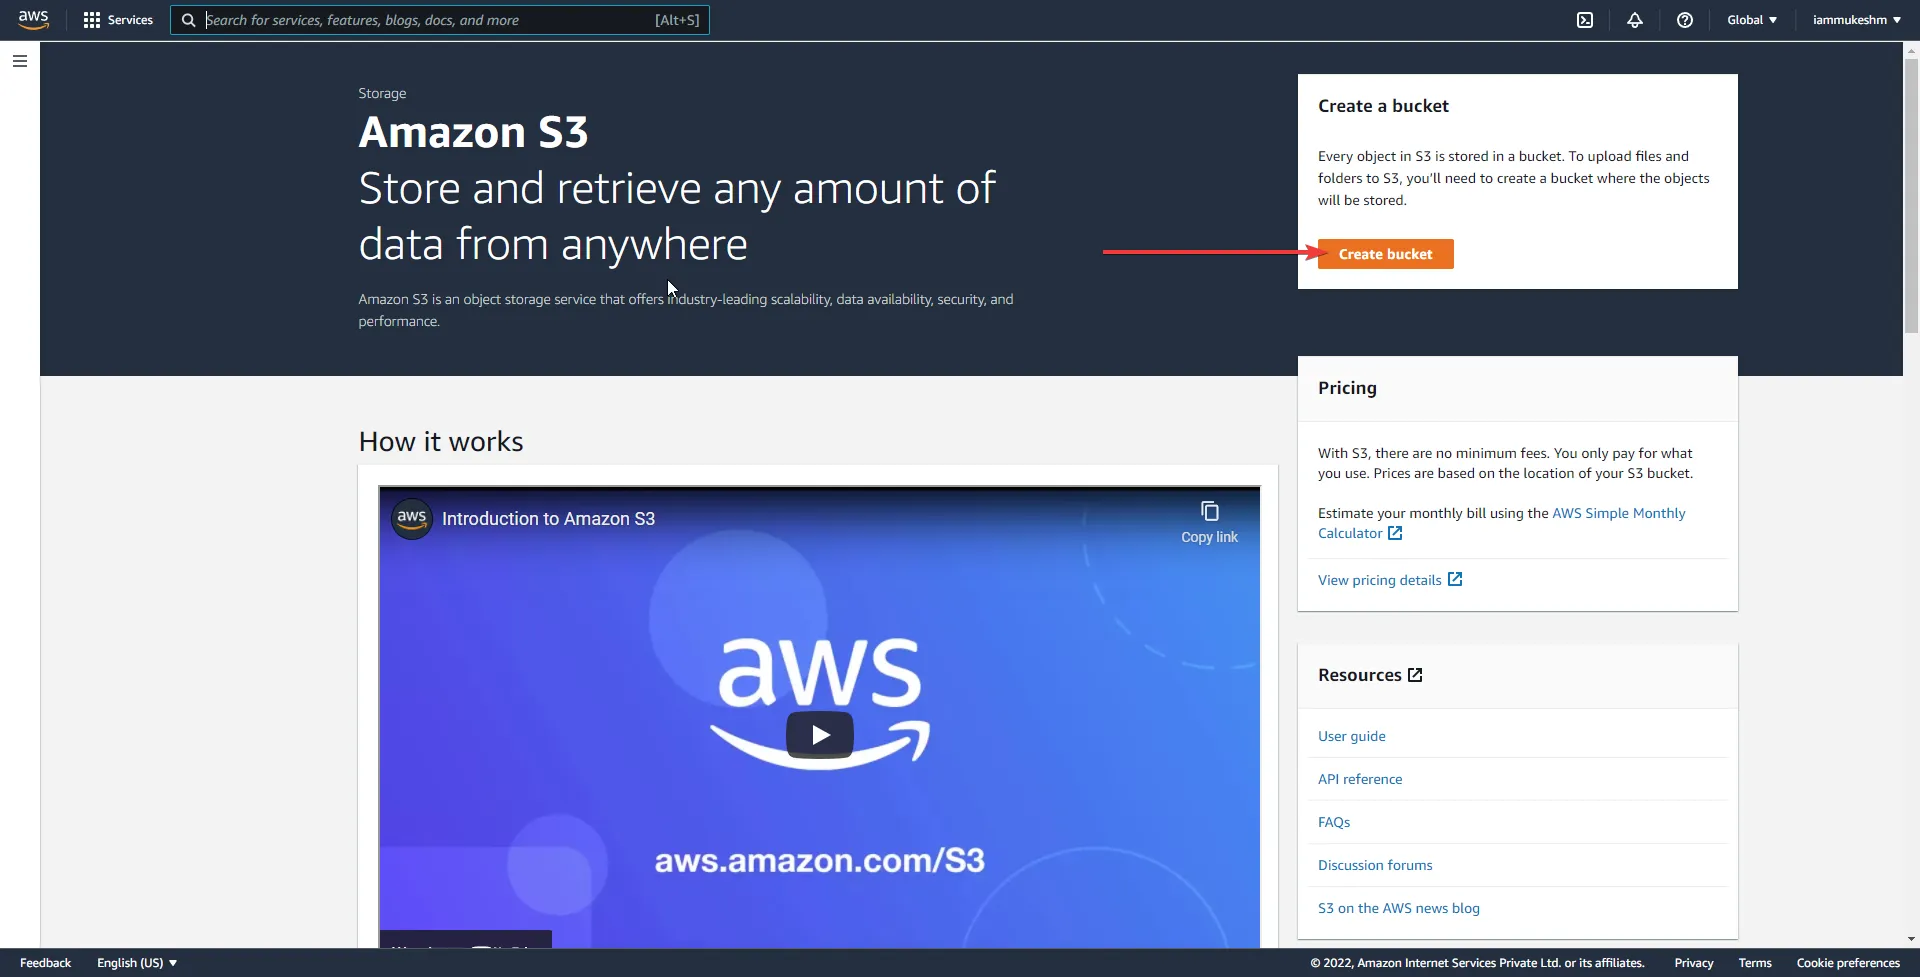
With the user created, Let’s explore a bit of the AWS S3 Console. Search for S3 in the top search bar and open up the first result.

As discussed earlier, we will start with creating S3 Buckets via the console. In the later part, we will see how to create and delete S3 buckets via .NET.
So, Click on Create bucket.
There are a few rules to be followed while naming your new S3 Bucket. The most important rule is that your bucket name should be globally unique.
As for the AWS region, select the region close to you for optimal transfer speeds.
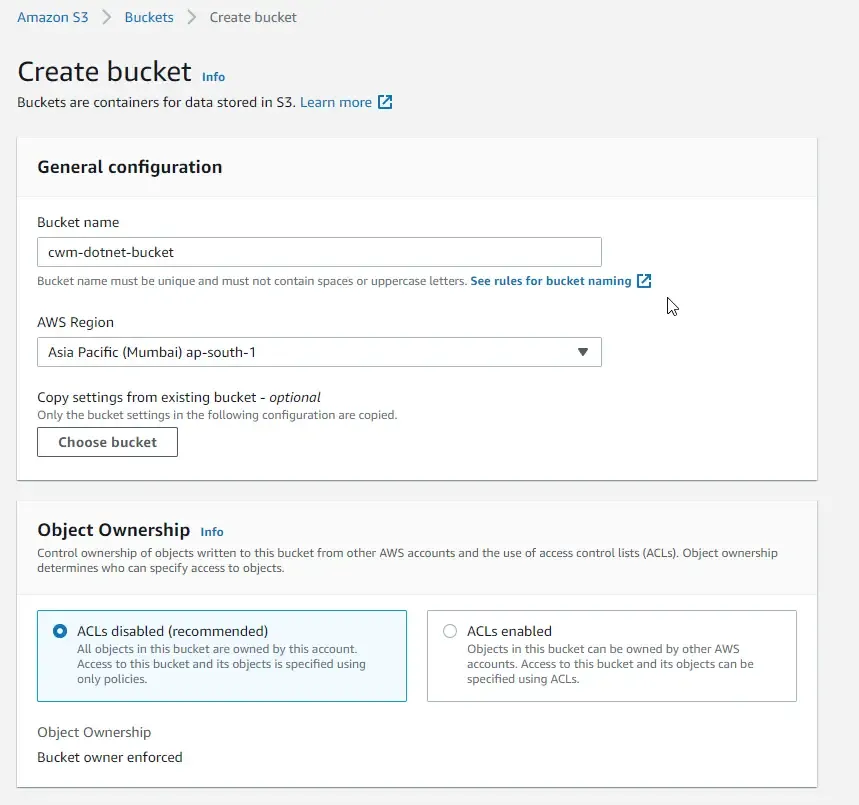
You can leave everything else as it is.
By default, AWS blocks all kinds of public access into the bucket. Let’s keep it that way. Further in the tutorial, we will learn a way with .NET to generate URLs to your uploaded files that expire after a given amount of time.
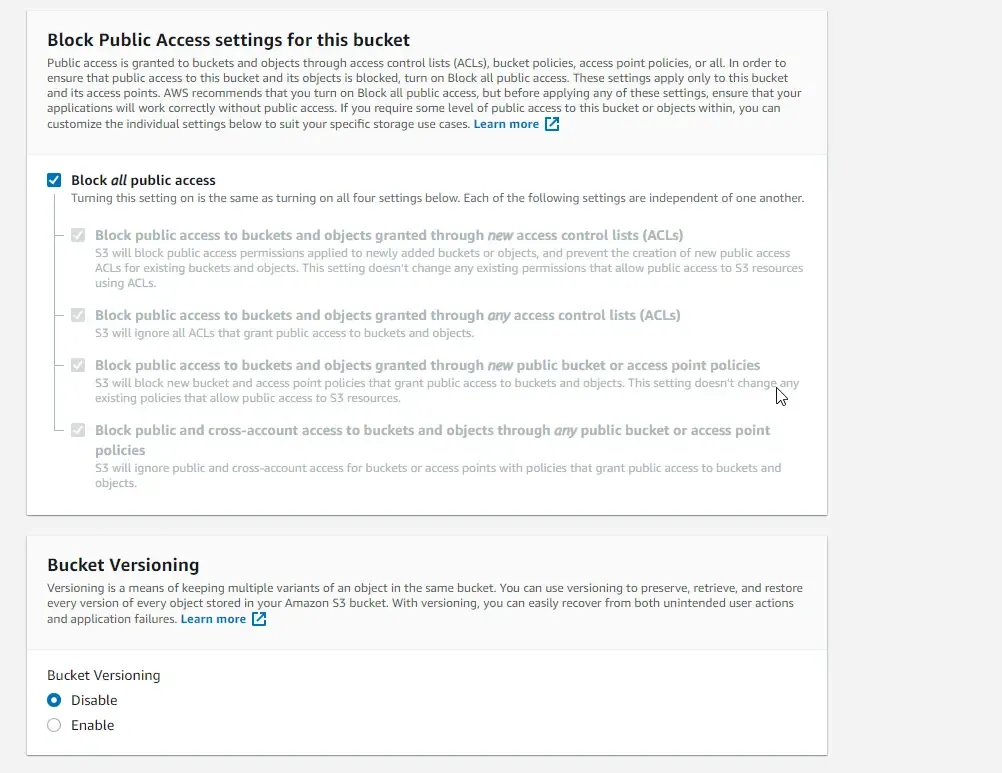
Here too, tags are optional.
That’s it. Review your changes and hit on Create Bucket.
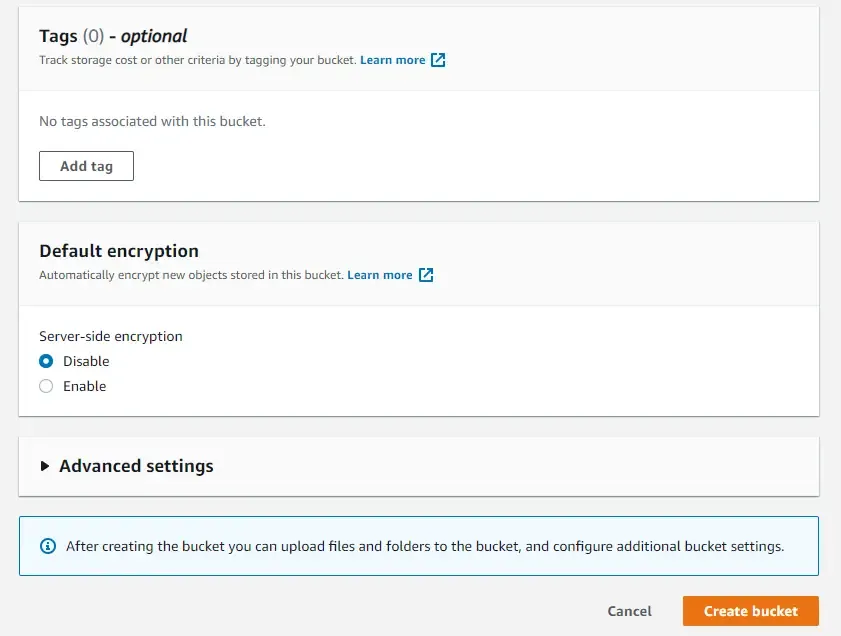
The below screenshot shows that your new S3 bucket is available.

As a simple exercise, you can play around with the dashboard and try to upload some files into it. Below, I uploaded a Blog banner into my S3 bucket.
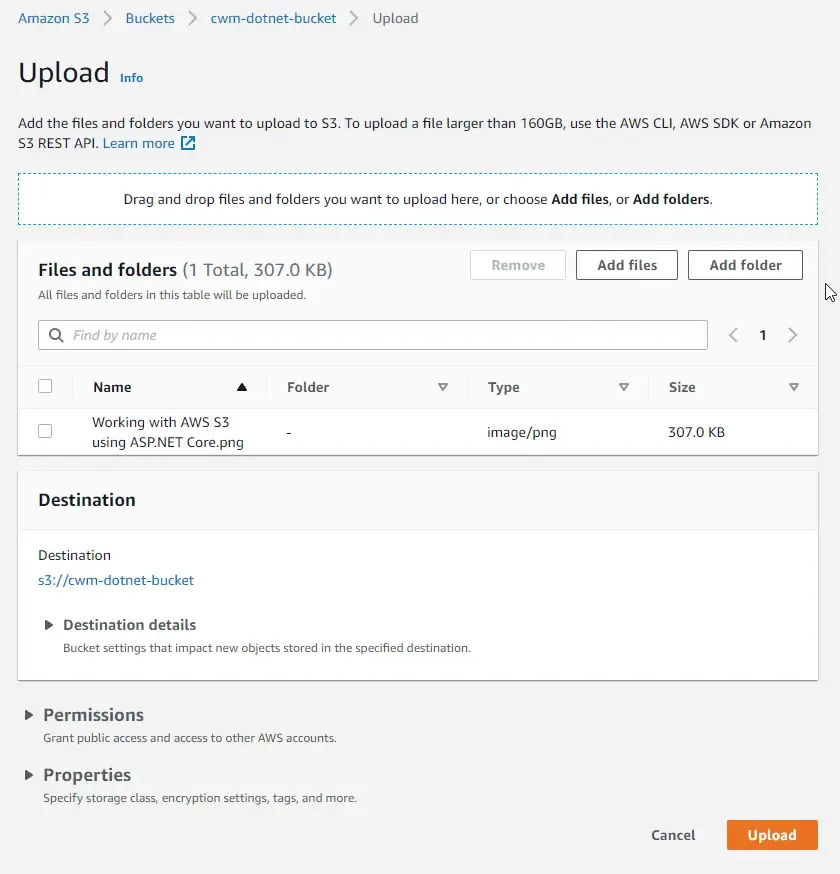
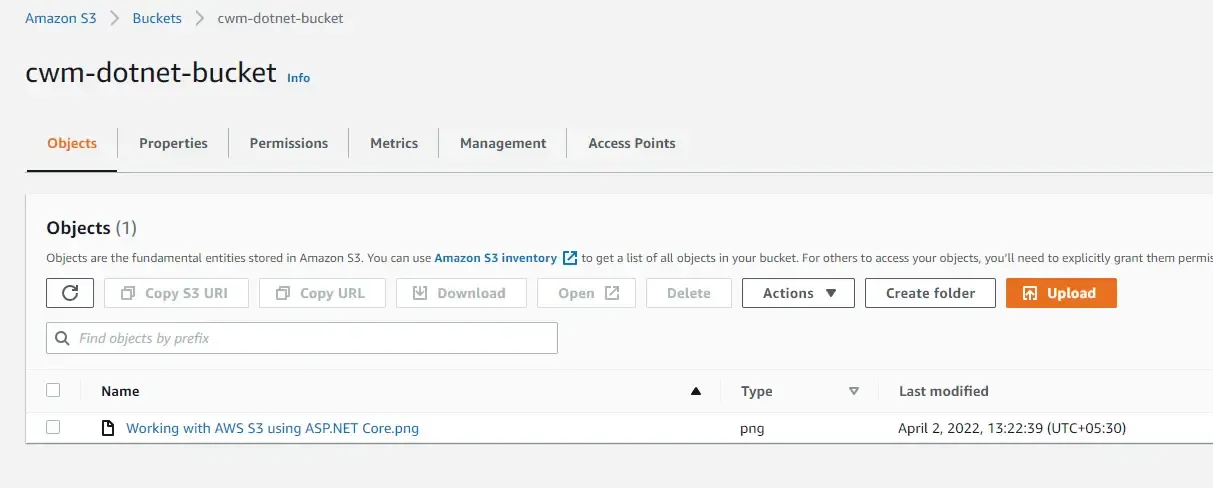
Moreover, you can also create folders in your bucket and upload objects to it. Playing around with the S3 Dashboard should get you familiar with using it.
Now, let’s see how to build our ASP.NET Core Web API to work with AWS S3.
AWS Configurations & CLI
As you know that we already have the secret keys with us, let’s talk about how to use them for .NET Applications. Now, AWS CLI provides some real secure ways to store your secret keys. Traditionally, one would place the access keys within the appsettings.json of the web application, or to the secret store. With AWS CLI, there is a dedicated AWS Local store that manages your credentials and configurations.
To get started with it, first, install the AWS CLI on your machine. Note that the below screenshots are for Windows Machines.
Note that the above link has downloadable installers for Windows, Mac, and Linux Operating Systems.
I wrote a dedicated article to set up AWS Credentials for your development machine - Read it here.
For the video version, watch it here - https://youtu.be/oY0-1mj4oCo
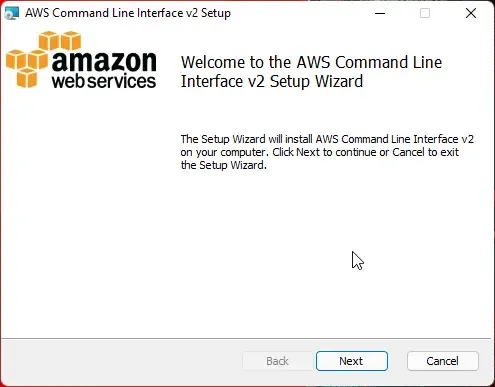
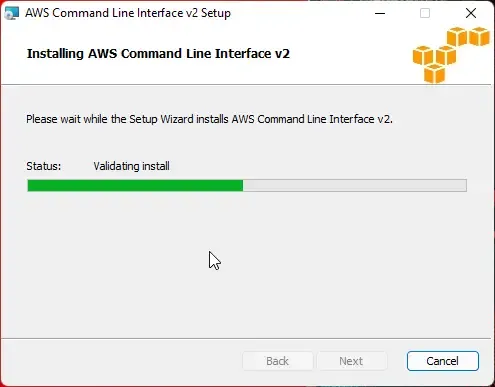
Once you have downloaded and installed the AWS CLI, make sure to restart any open command prompts/terminals. After that, type in aws —version to check if the CLI tool has been installed properly on your machine. If you see something like the one below, you are probably good to go.

With that done, let’s create a new AWS Local Configuration profile which will be used by our .NET application to read in the credentials and other configuration stuff. Type in the following command to get started with creating an AWS local profile.
aws configure --profile "my-profile-name"You can name your profile something like s3-demo or so. This is just for our identification. With that, you will be prompted to enter the access id and the secret. Remember we downloaded a CSV file earlier? while creating a new user. This is when that CSV file would come in handy. Paste in the Access Key and Secret Access Key.
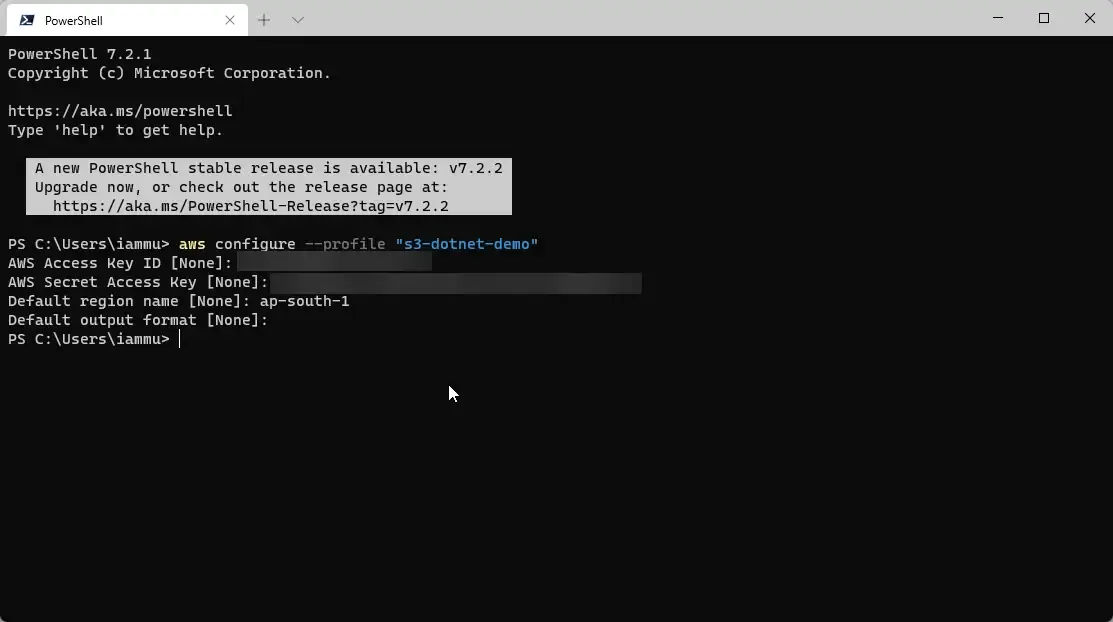
As for the default region name, make sure to give the same region that you used while creating our new S3 bucket. If you are unsure, simply navigate to the S3 dashboard, select your newly created bucket, and check its properties. You will get the region details.
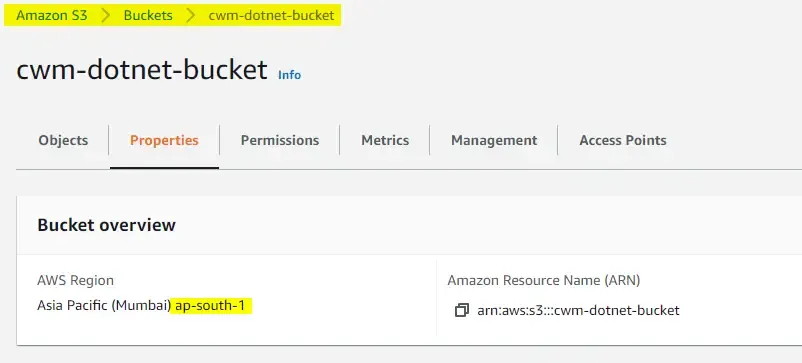
In case you gave in some details while setting up the configurations, nothing to worry about. Re-enter the profile creation command and AWS will take you again through the configurations.
Now, whatever data you gave will be stored securely under your user folder in the below path. Feel free to explore the files.

Note that you have to use this profile name while working with the .NET application. The SDK would pull in the credentials related to the profile name you give. You will understand more when we set up the appsettings.json for our .NET Web API.
Working with AWS S3 using ASP.NET Core - Getting Started
Next, let’s start with the development part! For this demonstration, I will be using Visual Studio 2022 Community as my IDE with the latest stable release of .NET 6 SDK installed on my machine.
Setting up the Project
Create a new ASP.NET Core Web API solution with .NET 6.0. We will be using the traditional API controllers approach for this sample project. Note that we have also enabled the OpenAPI support, which will configure the Swagger UI for us, which in turn will help our API Documentation and Testing easily.
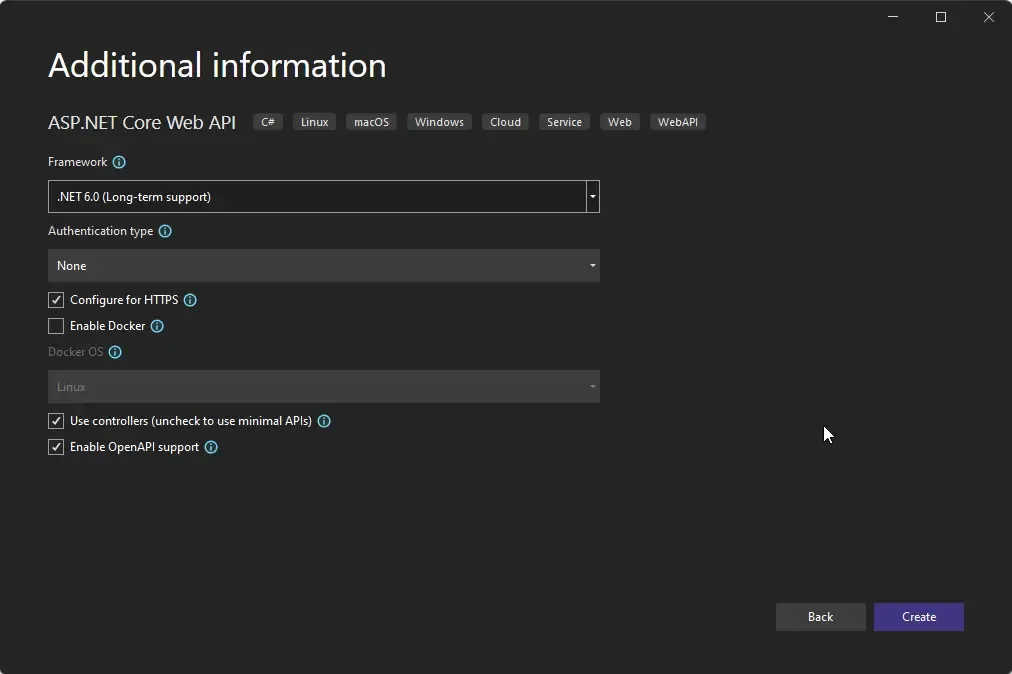
First up, let’s modify the appsettings.json of the Web API project. Make sure that your appsettings.json looks like the one below. Ensure that you are populating the Profile and Region fields with the values you configured earlier in the AWS CLI.
{ "Logging": { "LogLevel": { "Default": "Information", "Microsoft.AspNetCore": "Warning" } }, "AllowedHosts": "*", "AWS": { "Profile": "s3-dotnet-demo", "Region": "ap-south-1" }}Note that s3-dotnet-demo is the name of the profile I created locally on my machine, and ap-south-1 is the closest region to where I am and also is the region where my test S3 bucket is created.
Run the following commands via Visual Studio to install the required AWS NuGet packages.
Install-Package AWSSDK.S3Install-Package AWSSDK.Extensions.NETCore.SetupWith that done, let’s register the AWS Service into the .NET application’s Container. Open up the Program.cs and make the modifications as below. You might have to use the Amazon.S3 namespace while referencing the below changes.
builder.Services.AddEndpointsApiExplorer();builder.Services.AddSwaggerGen();builder.Services.AddDefaultAWSOptions(builder.Configuration.GetAWSOptions());builder.Services.AddAWSService<IAmazonS3>();var app = builder.Build();Line 3 Loads the AWS Configuration from the appsettings.json into the application’s runtime.
Line 4 Adds the S3 Service into the pipeline. We will be injecting this interface into our controllers to work with Bucket and Objects!
Working with Amazon S3 Bucket using .NET AWS SDK
Earlier we created buckets using the AWS Console. This time around, let’s do the same thing with .NET!
Create a new API Controller under the Controllers folder and name it BucketsController. After that make sure to inject the IAmazonS3 interface into the constructor of the controller as mentioned before. Refer to the below code snippet.
[Route("api/buckets")][ApiController]public class BucketsController : ControllerBase{ private readonly IAmazonS3 _s3Client; public BucketsController(IAmazonS3 s3Client) { _s3Client = s3Client; }}Let’s start adding Endpoints to our newly created BucketsController.
Creating Amazon S3 Buckets via .NET
Now, to create a new bucket, all we need from the user as input is the bucketName.
[HttpPost("create")]public async Task<IActionResult> CreateBucketAsync(string bucketName){ var bucketExists = await _s3Client.DoesS3BucketExistAsync(bucketName); if (bucketExists) return BadRequest($"Bucket {bucketName} already exists."); await _s3Client.PutBucketAsync(bucketName); return Ok($"Bucket {bucketName} created.");}Line 4 checks if the provided Bucket Name already exists in S3, If it exists, the Handler will fail with a Bucket Already Exists Exception.
Line 5 Creates the bucket for you with the given name.
Getting a List of Amazon S3 Buckets via .NET
Next, let’s add an endpoint that would essentially get a list of S3 buckets available under your AWS account.
[HttpGet("get-all")]public async Task<IActionResult> GetAllBucketAsync(){ var data = await _s3Client.ListBucketsAsync(); var buckets = data.Buckets.Select(b => { return b.BucketName;}); return Ok(buckets);}Line 4 returns a List of ListBucketResponse in which each object would contain details per Bucket.
Line 5 filters out the Bucket Names from this List and returns it as a list of strings.
Deleting an Amazon S3 Bucket via .NET
Finally, an endpoint to delete an EMPTY S3 Bucket. The user would simply have to provide the bucket name. The only catch is that you can delete Buckets only if they are empty.
[HttpDelete("delete")]public async Task<IActionResult> DeleteBucketAsync(string bucketName){ await _s3Client.DeleteBucketAsync(bucketName); return NoContent();}Testing Amazon S3 Bucket Operations
Since we finished the first Controller - BucketsController, let’s test it. Run the application and open up Swagger. (localhost:XXXX/swagger)
For the first test, I tried to create a new Bucket named “test-2022-1994”.
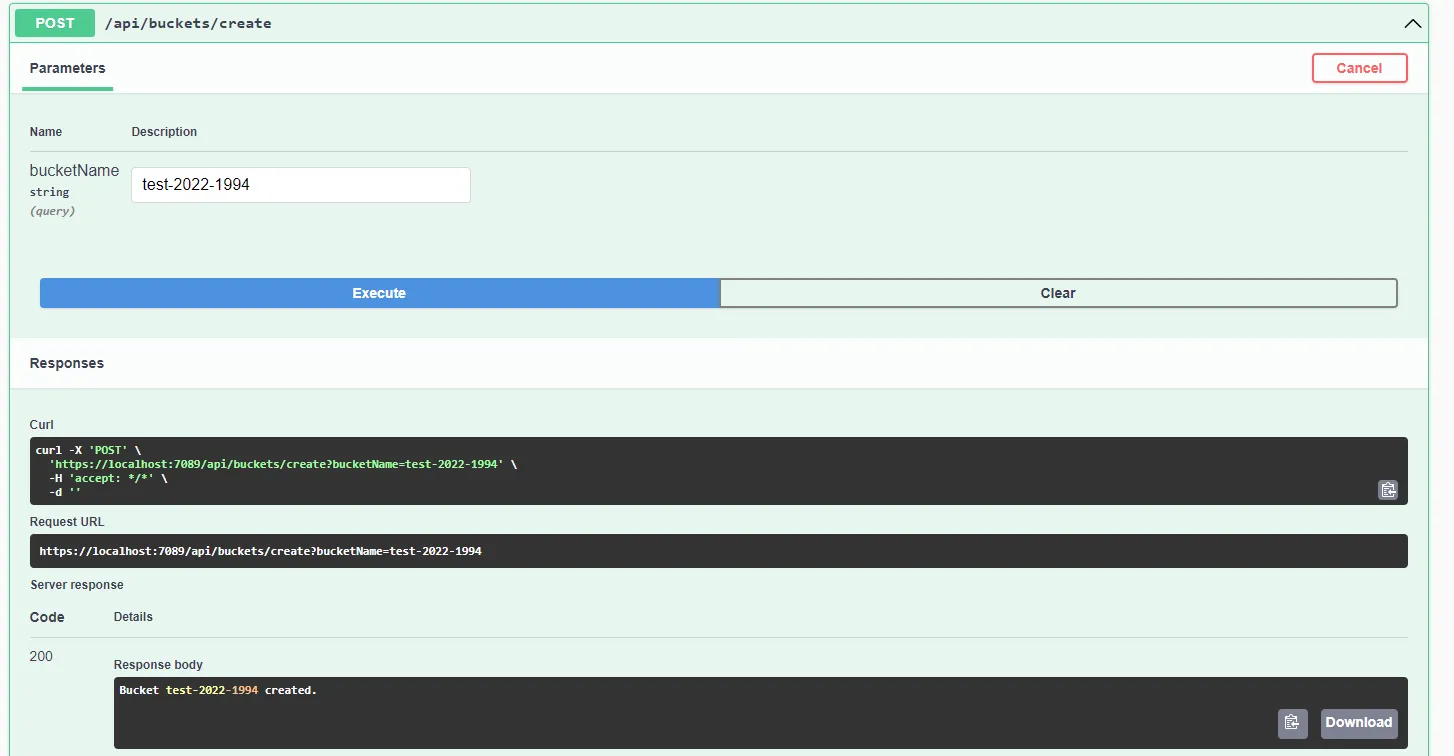
Opening S3 Dashboard I can see that the Bucket has been created.

Next, testing the get-all endpoint of the BucketsController, I get the list of all Buckets available in my S3 Account as a list of strings.

Finally, testing the DELETE endpoint, I get a 204 response when I tried to delete the newly created S3 Bucket. You can verify this with S3 Dashboard as well!

File Operations in AWS S3 using ASP.NET Core
With the Bucket Operations done, let’s get started with File Operations in AWS using ASP.NET Core. The idea will be to create a new Controller named FilesController, which can essentially take in a bucket name, folder name (prefix), and file binaries which can upload, delete and get a list of objects available per S3 bucket.
So, let’s create a new API controller under Controllers and name it FilesController.cs. Here also, you would need to inject the IAmazonS3 interface into the constructor of the FileController.
[Route("api/files")][ApiController]public class FilesController : ControllerBase{ private readonly IAmazonS3 _s3Client; public FilesController(IAmazonS3 s3Client) { _s3Client = s3Client; }}How to Upload Files to AWS S3 using ASP.NET Core?
First up, is an endpoint to Upload Files to a specific Bucket in AWS S3.
The simple flow will be,
-
The user passes the File, the name of the bucket, and a folder name to this endpoint.
-
The code should first check if such a BucketName exists in the S3 account. If not, it returns an exception. You could also modify the code to create an S3 Bucket for you if the entered Bucket Name doesn’t exist.
-
Finally, creates a request object and sends it to Amazon Service which would upload the file into S3 for you.
Here is what the code would look like.
[HttpPost("upload")]public async Task<IActionResult> UploadFileAsync(IFormFile file, string bucketName, string? prefix){ var bucketExists = await _s3Client.DoesS3BucketExistAsync(bucketName); if (!bucketExists) return NotFound($"Bucket {bucketName} does not exist."); var request = new PutObjectRequest() { BucketName = bucketName, Key = string.IsNullOrEmpty(prefix) ? file.FileName : $"{prefix?.TrimEnd('/')}/{file.FileName}", InputStream = file.OpenReadStream() }; request.Metadata.Add("Content-Type", file.ContentType); await _s3Client.PutObjectAsync(request); return Ok($"File {prefix}/{file.FileName} uploaded to S3 successfully!");}Line 2: The Controller method would take in IFormFile, bucket name, and an optional prefix (folder name) as the input parameters.
Line 4-5: Check if the provided Bucket Name actually exists within your S3 account. If not, an error is returned.
Line 6-11: Creates a new PutObjectRequest object and fills in the object with the name of the Bucket, Key (which is the complete name of the file including the folder name if provided), and finally the actual binary content of the file. For this, the stream of the file is captured.
Line 12: Object Metadata is yet another concept in S3, where we can add custom properties to our objects while we are uploading them. Metadata is a simple <string, string> Dictionary type. Here we are just adding sample metadata.
Line 13: Uploads the request into AWS S3.
How to Get All the Files in an AWS S3 Bucket using ASP.NET Core?
Next, is an endpoint to get a list of files that are available in an AWS S3 Bucket.
For this, let’s create a new DTO class that will be returned as a response. Ideally, we need a list of File Details which will be the Name of the File and a URL that can be accessed by the public. Create a new folder named Models and create a new class under it named S3ObjectDto.cs
namespace S3.Demo.API.Models{ public class S3ObjectDto { public string? Name { get; set; } public string? PresignedUrl { get; set; } }}With that done, let’s create our Controller method that can take in bucket names and optional prefixes to return a list of File Details.
[HttpGet("get-all")]public async Task<IActionResult> GetAllFilesAsync(string bucketName, string? prefix){ var bucketExists = await _s3Client.DoesS3BucketExistAsync(bucketName); if (!bucketExists) return NotFound($"Bucket {bucketName} does not exist."); var request = new ListObjectsV2Request() { BucketName = bucketName, Prefix = prefix }; var result = await _s3Client.ListObjectsV2Async(request); var s3Objects = result.S3Objects.Select(s => { var urlRequest = new GetPreSignedUrlRequest() { BucketName = bucketName, Key = s.Key, Expires = DateTime.UtcNow.AddMinutes(1) }; return new S3ObjectDto() { Name = s.Key.ToString(), PresignedUrl = _s3Client.GetPreSignedURL(urlRequest), }; }); return Ok(s3Objects);}Line 4-5: Like before, we are just checking if the provided Bucket Name is valid.
Line 6-10: Creates a new ListObjectsV2Request with the provided Bucket Name and Prefix Name. So, if you wanted to upload a file to /test/April/2, your prefix name will be /test/April/2. This would create the folders under the S3 Bucket and upload the file for you under this path.
Line 11 returns the list of objects but in a RAW format.
Line 12-25: We will map the response to a new list of S3ObjectDto objects that we created earlier.
Understanding Pre signed URLs in AWS S3
So, as mentioned many times, the objects that you upload to S3 Buckets are secured and cannot be accessed or viewed by the public. But as per our requirement, we need to expose an URL that can open up / preview the S3 object to the public, but limit access to just about a minute or so, after which the link would be expired. This is where the Pre Signed URLs come into the picture. It’s possible to define the amount of time after which the link would expire.
In Line 18, I have set the expiration timeout to be 1 Min.
Line 23: The URL request is formed using the bucket name, Key (entire file name of the object), and the expiration parameter. This method would return a pre-signed URL.
How to Download Files from AWS S3 using ASP.NET Core?
Next, is a simple endpoint that can preview the file in Swagger. Here also, we will be passing the bucket name and key of the object (entire file name) and we expect the endpoint to return the binary of the uploaded file back to the user.
[HttpGet("get-by-key")]public async Task<IActionResult> GetFileByKeyAsync(string bucketName, string key){ var bucketExists = await _s3Client.DoesS3BucketExistAsync(bucketName); if (!bucketExists) return NotFound($"Bucket {bucketName} does not exist."); var s3Object = await _s3Client.GetObjectAsync(bucketName, key); return File(s3Object.ResponseStream, s3Object.Headers.ContentType);}Line 6: Gets the S3 object and returns the content as a File.
How to Delete Files from AWS S3 using ASP.NET Core?
Finally, let’s delete some objects from our S3 Bucket. Here too, we would have to pass the bucket name and key of the file.
[HttpDelete("delete")]public async Task<IActionResult> DeleteFileAsync(string bucketName, string key){ var bucketExists = await _s3Client.DoesS3BucketExistAsync(bucketName); if (!bucketExists) return NotFound($"Bucket {bucketName} does not exist"); await _s3Client.DeleteObjectAsync(bucketName, key); return NoContent();}Line 6: Simply delete the object by key and then returns a 204 status code.
Testing File Operations
That’s it. Let’s run our application and launch Swagger to perform Testing over File Operations.

First, let’s use the upload endpoint. Here is my request on Swagger.
You can see that I used the bucket name cwm-dotnet-bucket , prefix as test, meaning that I would like to upload the file into the test folder of the bucket. Finally, I select a dummy file, which is named logo.webp. Let’s run the request.
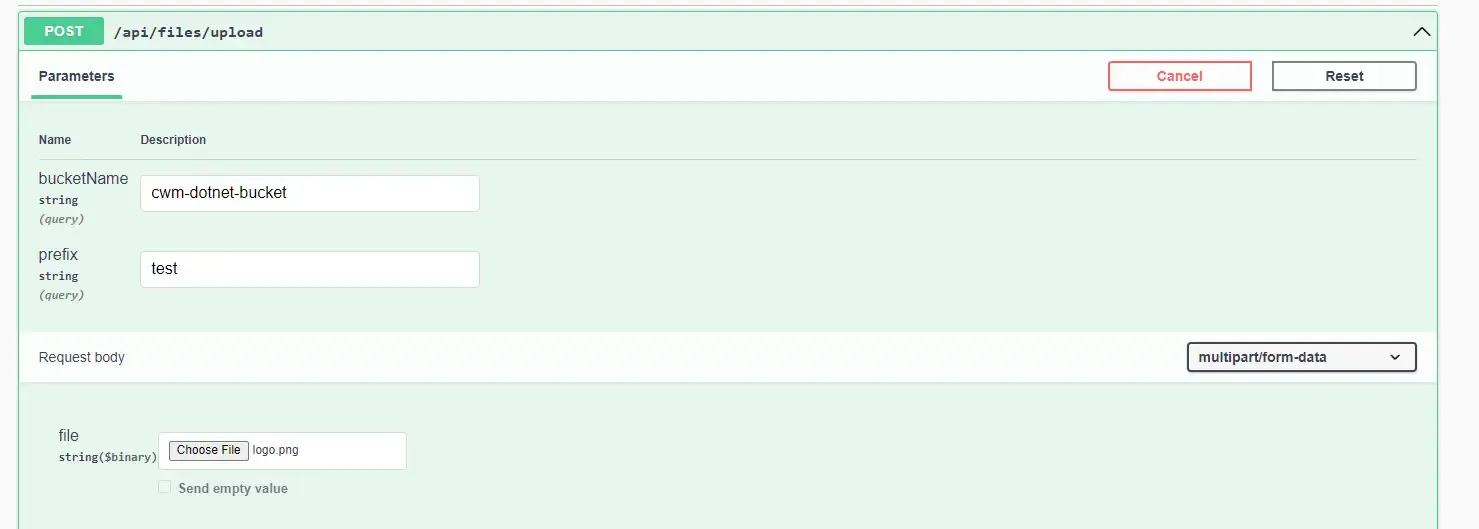
You can see that we get a 200 Status Code with a message that the file has been uploaded to the desired S3 path.

Let me open up the S3 bucket to check if the file actually gets uploaded into the test folder. There you go.
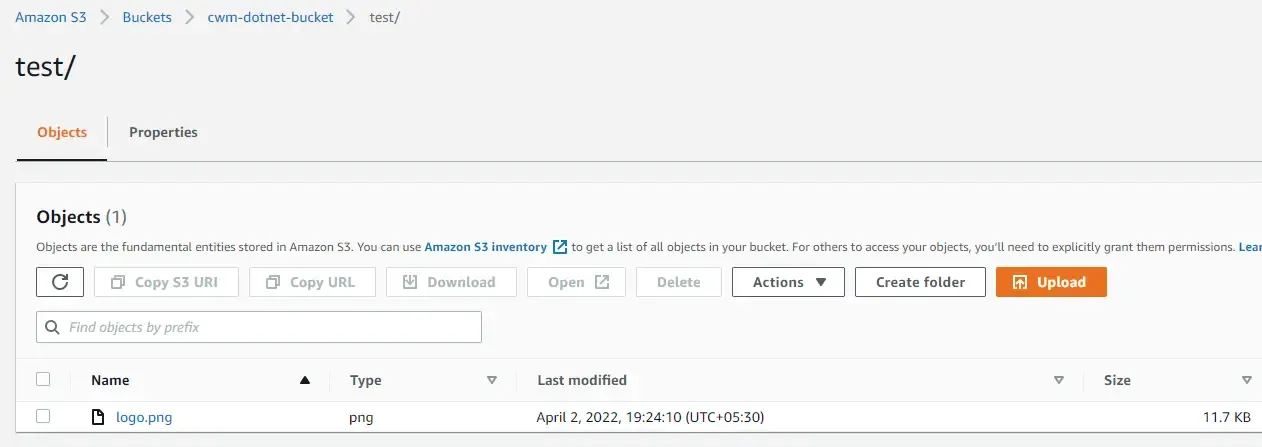
Next, let’s test the “get-all” endpoint. To this endpoint, I am sending the parameter as cwm-dotnet-bucket (bucket name) and an empty prefix. This should ideally return to me all the files that exist in the S3 Bucket.
This is what the response looks like. We get a list of S3ObjectDto which has both the name of the file as well as a pre-signed URL that should expire in about 1 minute of every request.

Let’s copy a URL and check if it works.
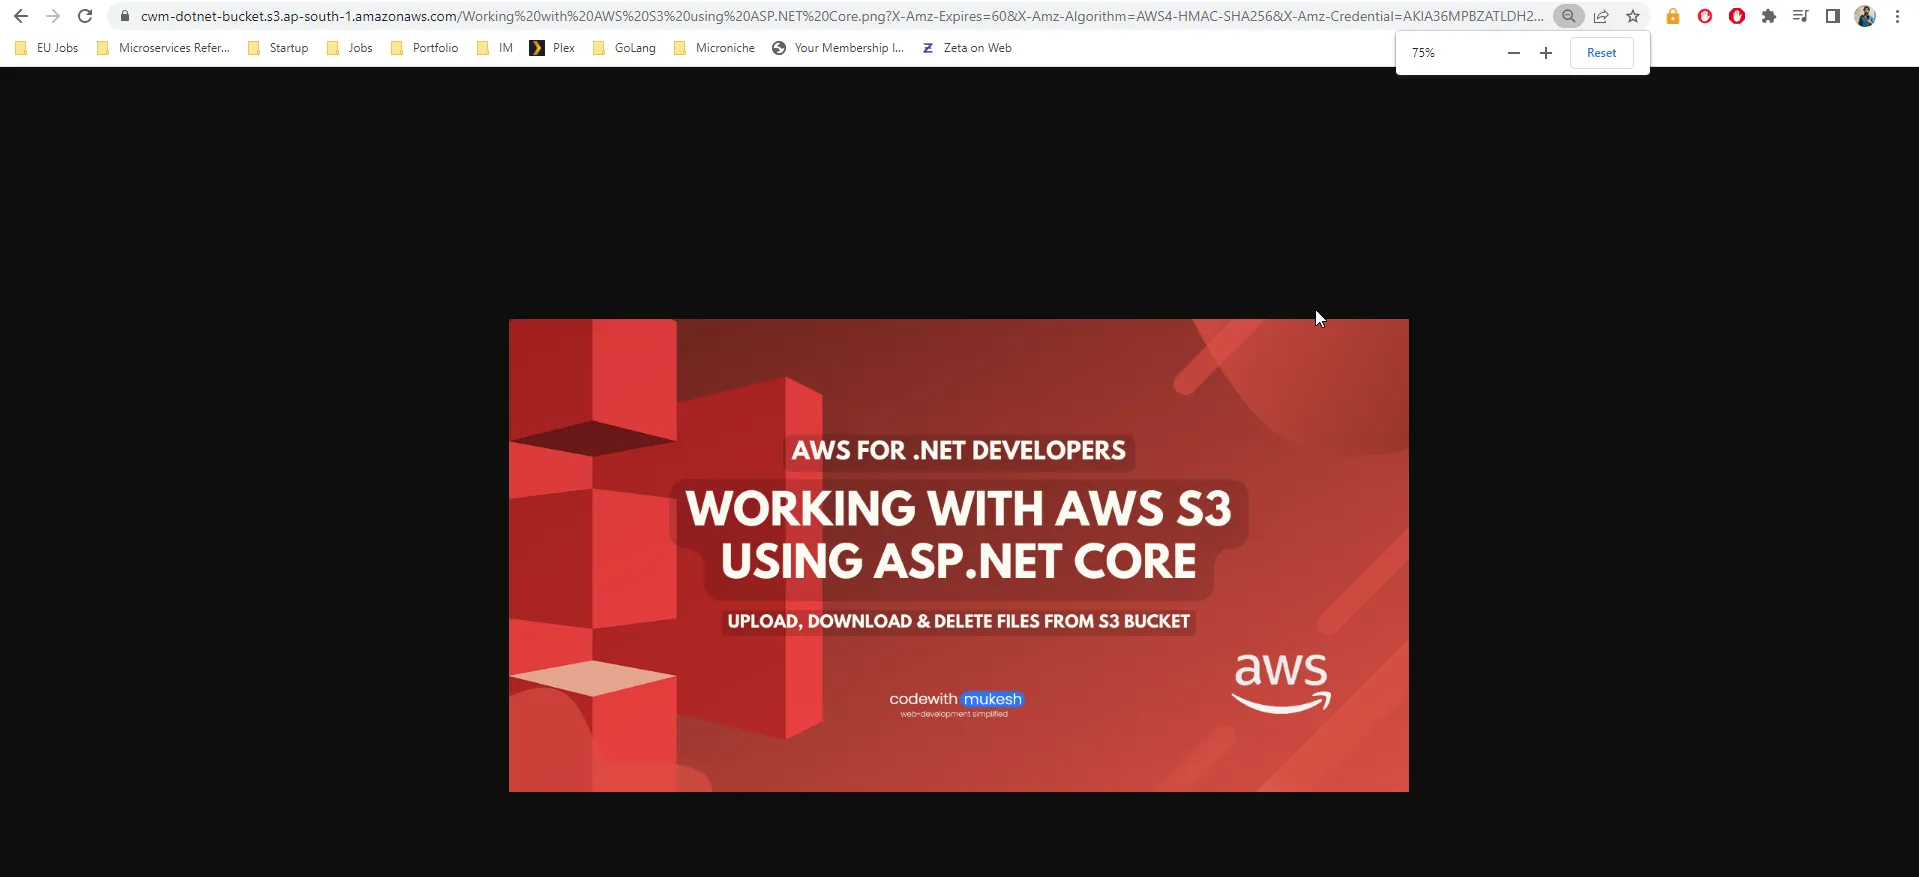
There you go!
For the next endpoint, get-by-key. Here is the request and response.
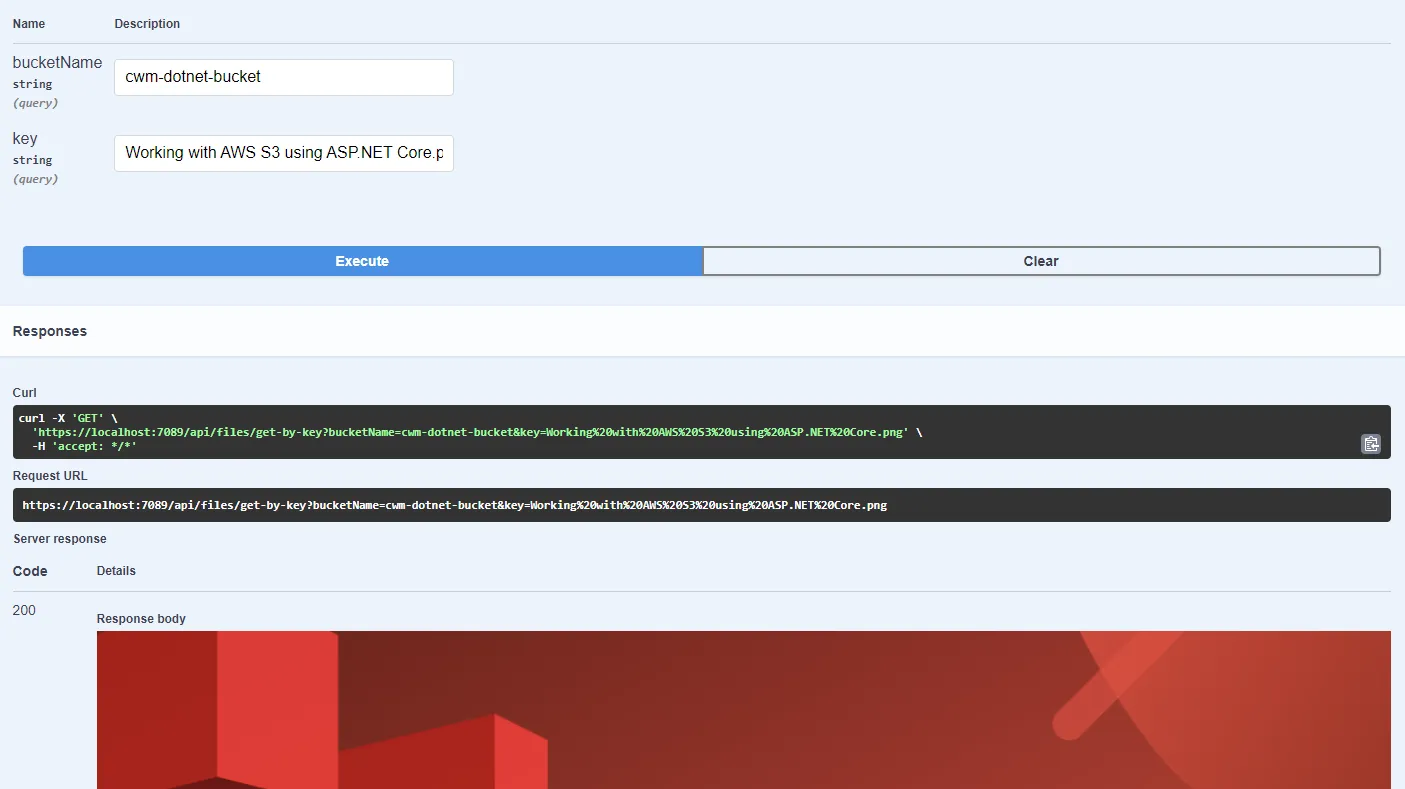
As for the final test, let’s delete a file from our S3 Bucket.
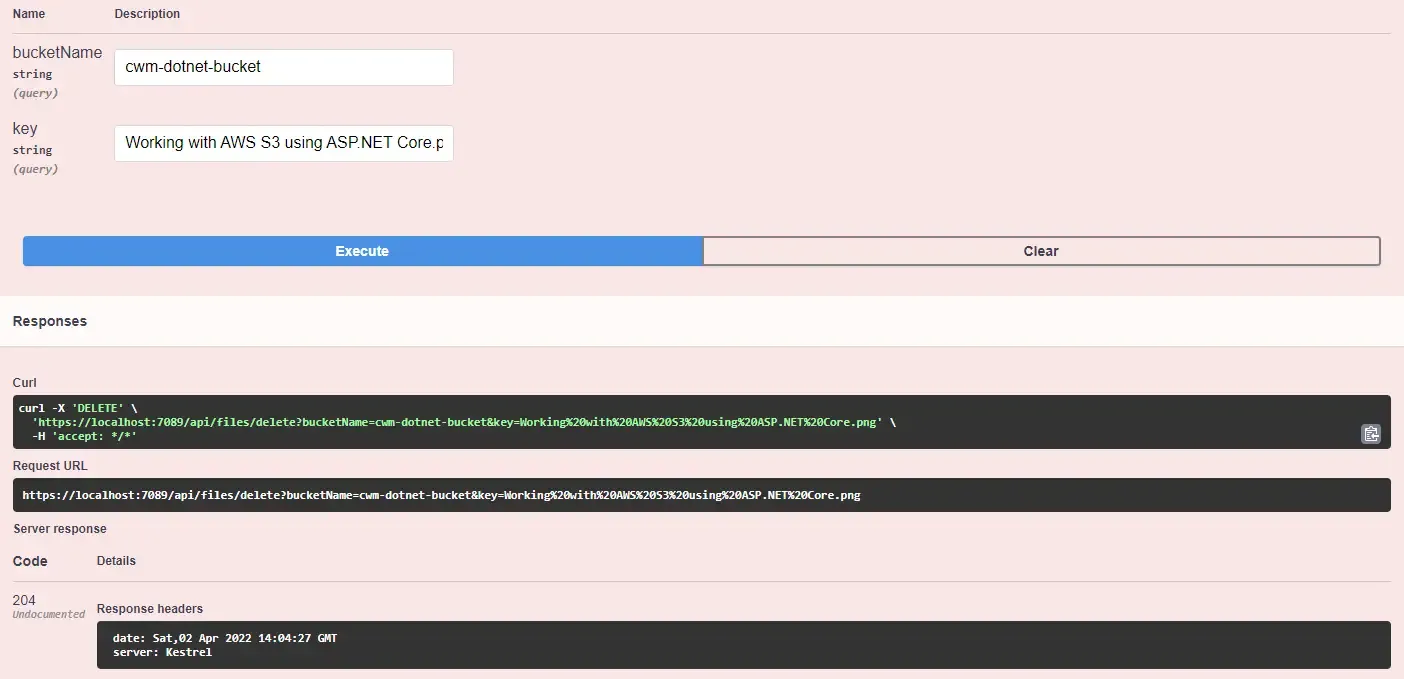
We get a 204 response code. On checking the S3 Bucket, the file no longer exists. That’s a wrap to our comprehensive guide on Working with AWS S3 using ASP.NET Core!
That’s a wrap for this article. Hope you liked it!
Summary
In this article, we learned about Working with AWS S3 using ASP.NET Core. We covered various aspects like Creating Users and Keys via AWS IAM, Creating Buckets via AWS Console, Storing configurations via AWS CLI, Creating/Deleting Buckets via .NET, and Uploading/Downloading and Deleting Files from AWS S3 via our .NET Application, and a lot’s more.
You can also watch the video version of this tutorial on my youtube channel: https://www.youtube.com/watch?v=2q5jA813ZiI
Do share this article with your colleagues and dev circles if you found this interesting. You can find the source code of the project here. Thanks!
