In this article, we will learn about yet another AWS Service, Amazon Cloudwatch. We will learn about logging to Amazon Cloudwatch with Serilog in .NET Application with ease. Serilog is an awesome logging framework for modern .NET Applications, about which I have already written an article for the .NET developers. Here, we will discuss more on Amazon Cloudwatch service and how Serilog Sinks can be used to log into Cloudwatch seamlessly from a .NET Application. It’s a pretty easy and intuitive process altogether!
This article is sponsored by AWS. Huge thanks for helping me produce more .NET on AWS content!
Prerequisites
As always, here is the set of requisites needed for this tutorial.
- The basic idea of how Logging would work in .NET Applications.
- .NET 6 SDK Installed
- AWS Account. Free Tier is enough.
- AWS CLI Installed and configured. Here’s how.
- Visual Studio 2022 Installed.
What is Amazon Cloudwatch?
Amazon Cloudwatch is a service provided by Amazon for monitoring our Applications. This is a much-needed service for monitoring and observability and is of high importance to application maintainers, especially DevOps engineers. It basically collects all the logs and metrics emitted from your application to help detect any anomalies, visualize logs, improve performance, troubleshoot issues, and so on. Apart from being a centralized service to store logs, Cloudwatch also has a pretty fluent UI that makes filtering and searching for logs super easy. We will see about this further in the article.
Cloudwatch also can react to events. For example, when a particular event occurs, it can be configured to raise an alarm that notifies the DevOps team! This improves the visibility of all your related AWS Services. We will have a separate article for this specifically!
We know that any application can be integrated to use Cloudwatch to dump logs with a couple of API / Library use. Apart from this, even other AWS Resources can be configured to use Cloudwatch for logging purposes including Load Balancers, EC2, Databases, S3, and so on.
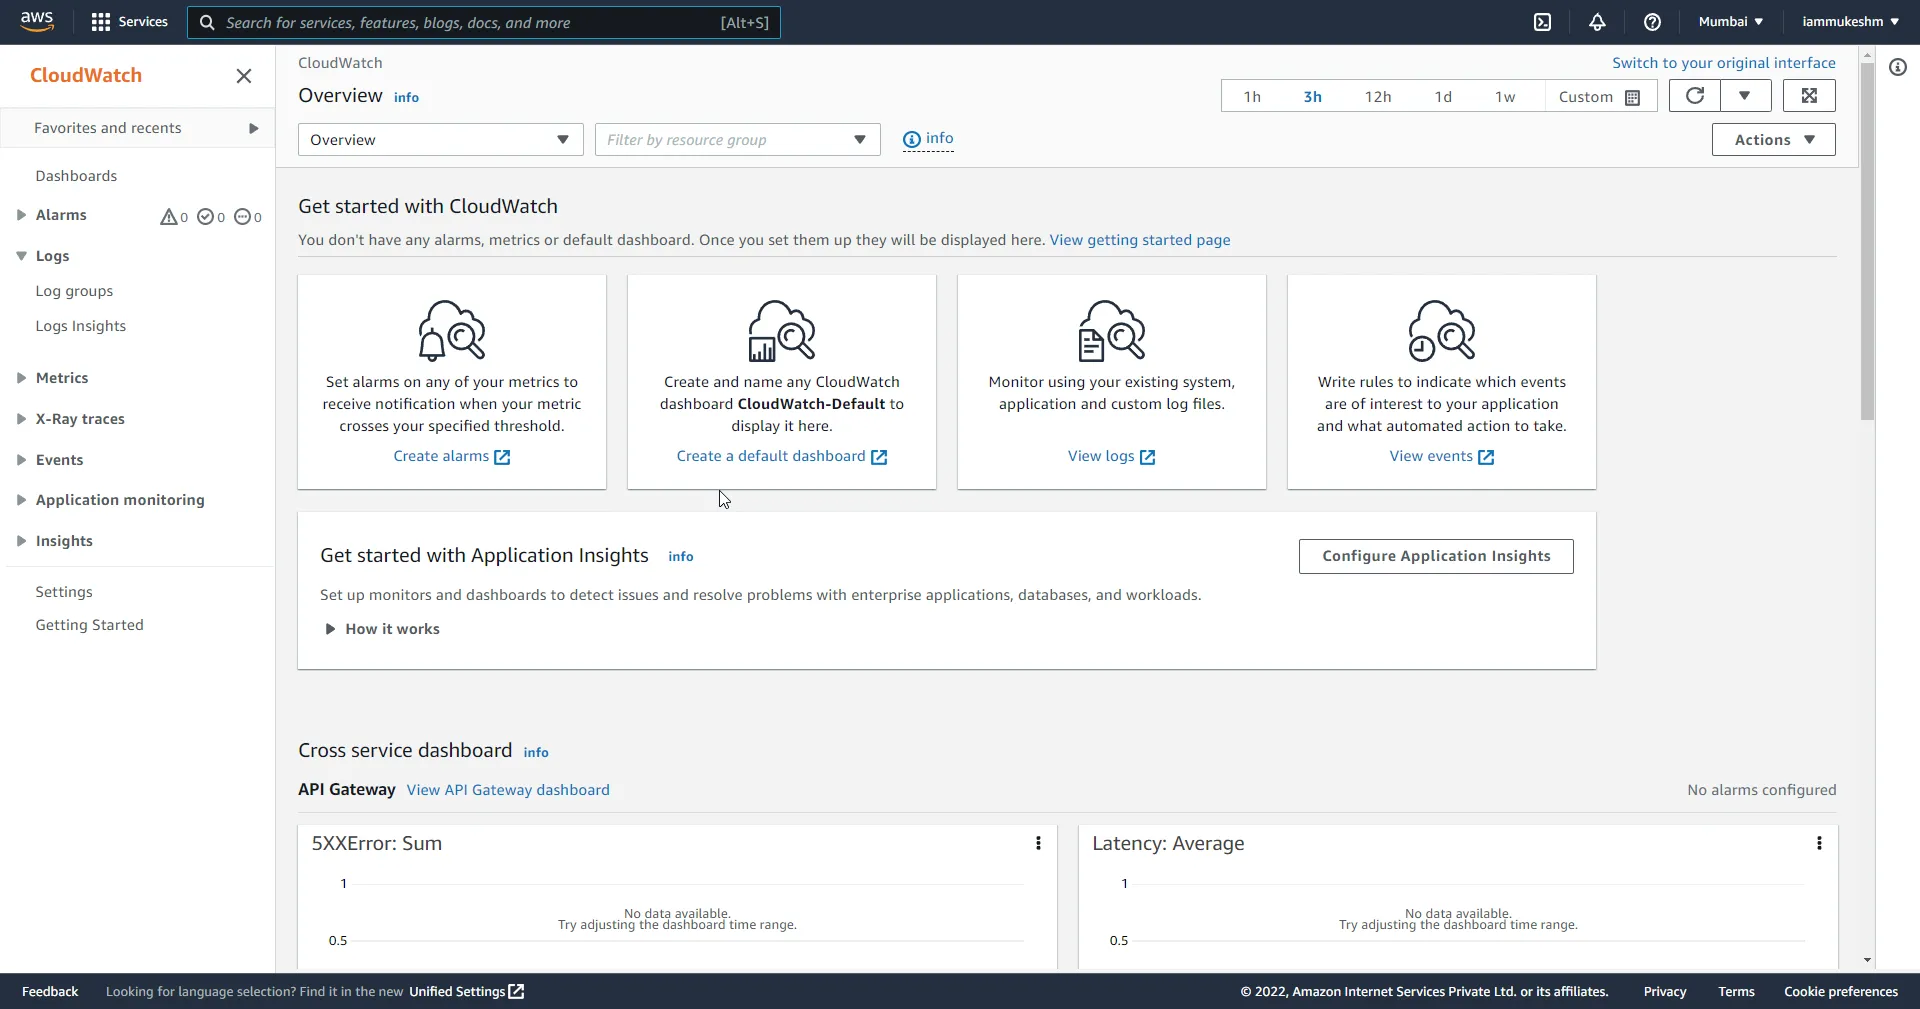
Here are a couple of core concepts related to Amazon Cloudwatch that you would need to know to understand the service.
- Metrics - You probably would have seen this in the projects you already work with. This is a time-ordered set of data points that can be published to Cloudwatch (in this context). It’s more or less like a variable to monitor over time. For example, you can have a metric (variable) that records the number of times an event has occurred in your application. Let’s say, within your application, you have some kind of retry mechanism, which is wired up with a metric. For every retry, the metric value is incremented. When it hit’s a predefined threshold, Cloudwatch can notify you with the help of alarms. This is a pretty interesting and crucial component when it comes to maintaining and monitoring customer-facing applications.
- Log Event - This is a record of activity sent in by the resource under surveillance.
- Log Stream - A collection of Log Events that share the same source/context in time ordered fashion.
- Log Group - Group of Log Streams that share the same Monitoring control.
You will get to see all of these down the road in this article. Meanwhile, here are a couple of features of this awesome AWS Service.
Features of Cloudwatch
- Log Retention - By default, logs are preserved indefinitely within Cloudwatch. You can further customize this to your requirement, that is, change the retention period to anywhere between 1 day to up to 10 years. Properly configuring the retention period also helps save some dollars in your monthly AWS Bill, especially for Production applications.
- Querying - Advanced Querying for Analytics and other Reporting needs.
- Storage - The logs are stored in highly reliable storage managed by AWS.
- Rich Integration - This service can be easily integrated into your projects regardless of the stack you use.
With that clear, let’s start coding.
Now, there are a couple of ways to get started with Logging into Amazon Cloudwatch in the .NET Application. The most basic way is to use the SDK Library provided by Amazon itself. It would be something like creating our own logging wrappers and calling the Cloudwatch SDK to start logging. Although this is a pretty sweet approach, it can get a bit hectic during maintenance and create a sort of coupling of your code and increase dependency. We will take an easier route as usual.
Logging to Amazon Cloudwatch with Serilog in .NET
This is a more preferable way, the reason being that you must be already using a popular logging framework like Serilog or NLog in your application. In such cases, where Serilog is already a part of your application code base, using the same library to log into AWS Cloudwatch makes more sense. Also, design-wise, it’s a much better approach, since your logging interface will not depend on AWS SDK, but rather on Serilog, which is a much more flexible way to design a system. Decoupled design, remember?
Please find the source code of this implementation here.
First up, let’s create a simple .NET Web API, a fundamental one. I will be using Visual Studio 2022 for this demonstration. Note that I am using .NET 6.
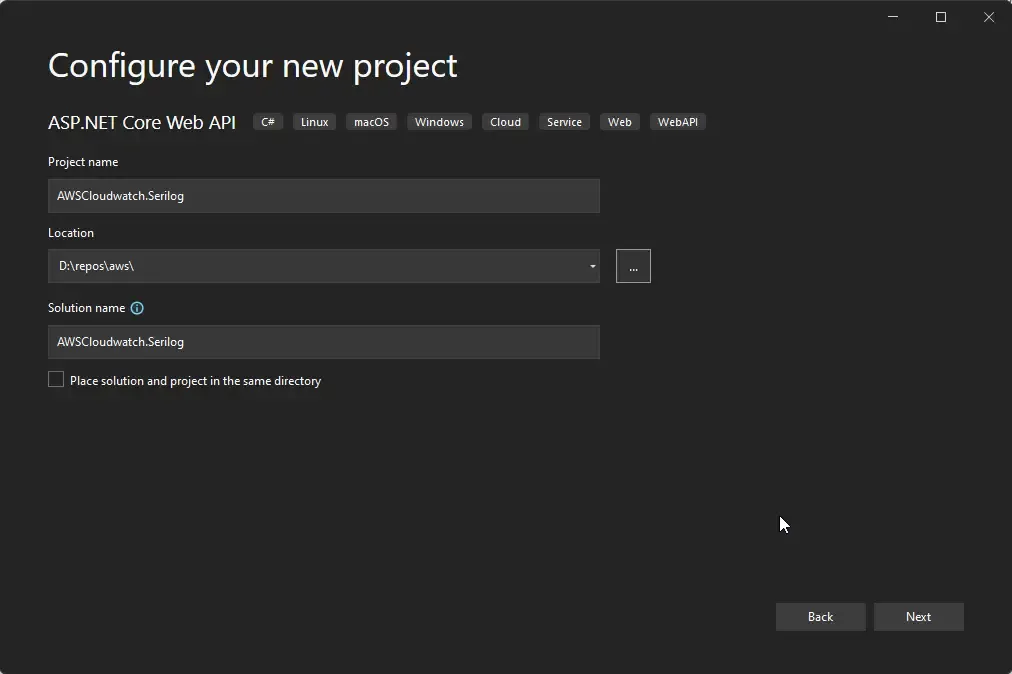
Let’s install the required packages for Serilog and the Cloudwatch Sinks provided by AWS. Open up the package manager and run the following commands
Install-Package AWS.Logger.SeriLogInstall-Package Serilog.AspNetCoreInstall-Package Serilog.Settings.ConfigurationInstall-Package Serilog.Sinks.ConsoleJust for demo purposes, we are adding the console sink package to our project. Apart from that, the other packages are related to Serilog, its Configurations, and a package from AWS that’s intended to be used for Serilog logging. Once the packages are installed, let’s navigate to Program.cs and add the startup code to attach Serilog to the .NET application.
Soon after the AddSwaggerGen code, paste in the following. You might need to resolve the required dependencies related to Serilog.
builder.Host.UseSerilog((_, loggerConfig) =>{ loggerConfig.WriteTo.Console().ReadFrom.Configuration(builder.Configuration);});So, there are two ways to configure Serilog for any .NET application. One, via the code within the startup method, where we have to explicitly mention the configurations like where to log the data and stuff. The other one is via appsettings. You can also use a mix of both these options as per your requirement. We will be using the more convenient appsettings way of doing things. It’s just simple to configure your loggers this way! But first, let’s understand what the startup code means.
Line #1, we are attaching the Serilog Middleware to the ApplicationBuilder. This would set Serilog as the logging provider for the application.
Line #3, we are instructing the Serilog Middleware to write logs to the console by default, as well as read the configurations from the appsettings. This is the most common way of doing things.
Let’s add the appsettings sections next. Open up appsettings.json and add the following section named Serilog.
{ "Logging": { "LogLevel": { "Default": "Information", "Microsoft.AspNetCore": "Warning", "Microsoft": "Warning" } }, "AllowedHosts": "*", "Serilog": { "LogGroup": "/log/demo", "Region": "ap-south-1", "MinimumLevel": { "Default": "Debug", "Override": { "Microsoft": "Error", "System": "Error", "Microsoft.Hosting.Lifetime": "Information" } }, "WriteTo": [ { "Name": "AWSSeriLog", "Args": { "textFormatter": "Serilog.Formatting.Json.JsonFormatter, Serilog" } } ] }}Log Group is something that we discussed earlier. It’s a kind of segregation at the AWS Cloudwatch level, so as to separate logs. Ideally, you would want a separate log group for each application or use case depending on your system design. In this case, we have supplied a dummy string. Apart from that, we have the standard Serilog options like the Minimum Level, which we have overridden for specific purposes.
Another AWS-specific parameter is the Region, which is actually optional here since the application would anyways fetch it from the configured AWS profile.
To Prettify the logs, I have added the text formatter as well which would throw out a pretty clean JSON message as your log with additional information. This is pretty cool if you are looking for structured logging.
Apart from that, we have the WriteTo section, which defines to which Sink the logger would write. This property would accept a list of sinks. In our case, I have just mentioned the AWSSerilog Sink which would write to the Cloudwatch Logs!
That’s actually it! Do this much and your application is supercharged to write logs to Amazon Cloudwatch seamlessly. Next, let’s add a dummy controller to test the entire setup.
Under the Controllers folder, add a new API Controller named something like HelloController.
using Microsoft.AspNetCore.Mvc;namespace AWSCloudwatch.Serilog.Controllers{ [Route("api/[controller]")] [ApiController] public class HelloController : ControllerBase { private readonly ILogger<HelloController> _logger; public HelloController(ILogger<HelloController> logger) { _logger = logger; } [HttpGet("{id:int}")] public IActionResult GetAsync(int id) { _logger.LogDebug("Received Request with id as {id}", id); _logger.LogInformation("Processing your request"); _logger.LogError("Some Errors occcured."); return Ok("Logged"); } }}So, the first thing is the Controller’s construction Injection. Here we just take out the Logger instance from the DI Container and inject it within the controller. Next, we added a simple GET endpoint that accepts an ID of type integer. This controller would just log some dummy messages for demo purposes. We have added the Debug, Information, and Error Log Levels here. Let’s run the application and invoke the /hello/1 endpoint to test our implementation.
I have tested this via Postman as you can see below.

Now that we have a 200 Success status code from the API endpoint, what is the expected behavior of the application?
- A log group named /log/demo would be created on AWS Cloudwatch.
- All logs would be logged into this newly created log group.
Let’s open up AWS Management Console and navigate to Cloudwatch.
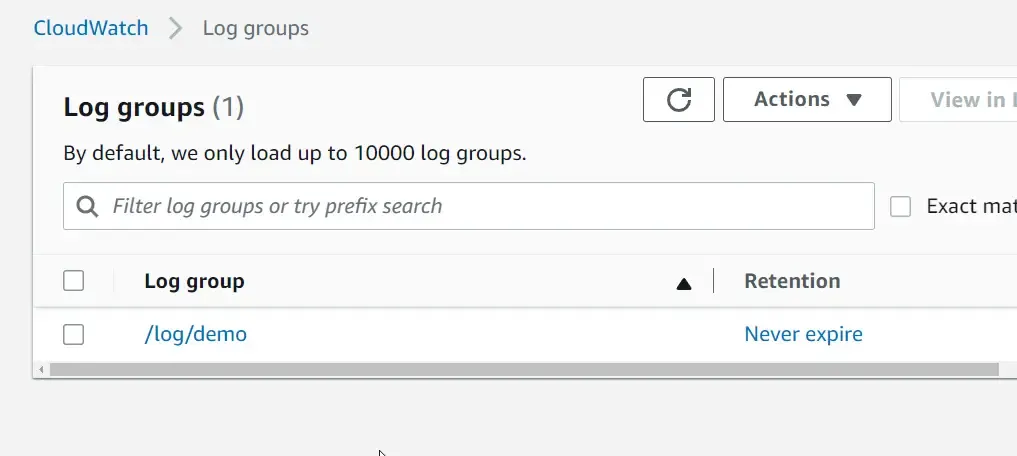
You can see that the new group is created as expected. Click on the log group name to see what logs it contains. This will contain a list of log streams which are segregated by timestamps. it’s more like a collection of logs.

We can see that 1 log stream has been created now. Open it up to see the application logs. Here you can see some nicely formatted log messages.
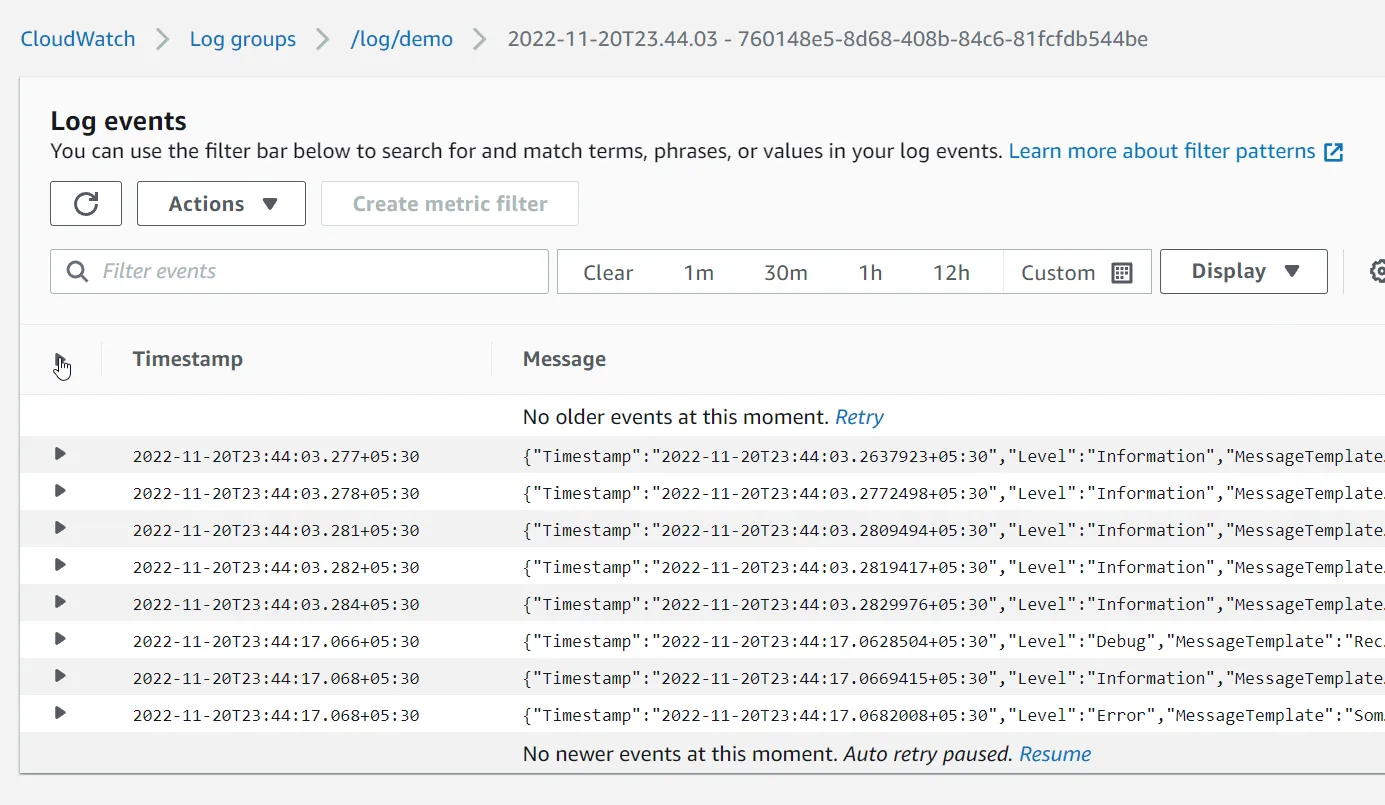
Structured Logging by default! As mentioned earlier, this comes with Structured logging, wherein you get to see the logged properties individually. In our case, it’s the ID property.
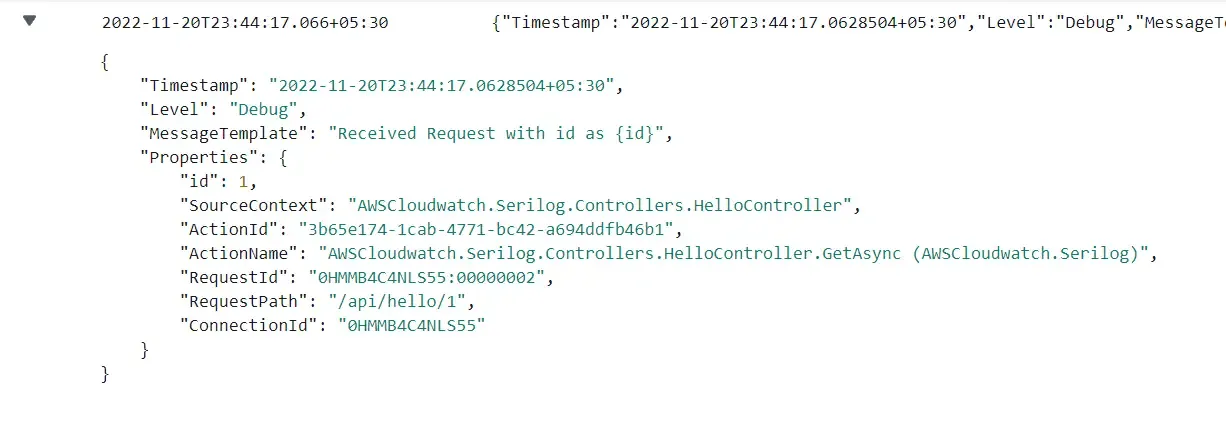
This is a very robust mechanism to have your .NET application log to Amazon Cloudwatch.
What if you want to log only the message with Error Level to Cloudwatch while logging everything to the Console as it is? This can be handy for cost saving as well for your AWS Monthly bills. Open up your appsettings.json and make this tiny modification.
"Name": "AWSSeriLog","Args": { "textFormatter": "Serilog.Formatting.Json.JsonFormatter, Serilog", "restrictedToMinimumLevel": "Error"}The 4th line of the above snippet tells the application’s logger to only push the messages with the minimum level of Error to be pushed into the respective sink, which here is the Amazon Cloudwatch! This way, you can restrict the logs into your cloudwatch log stream quite easily.
That’s it for this tutorial.
Summary
In this article, we got introduced to Amazon CLoudwatch and its basics. Apart from that, we learned about Logging to Amazon Cloudwatch with Serilog in .NET! You can find the source code of this implementation here. Make sure to share this article with your colleagues if it helped you! Helps me get more eyes on my blog as well. Thanks!
Stay Tuned. Do share this article with your colleagues and dev circles if you found this interesting. Thanks!

