
In this article, we will take a deep dive into .NET Aspire and see how it helps you build cloud-ready .NET applications with opinionated defaults, first-class observability, and a much better local development experience.
If you have ever tried to build a modern distributed system in .NET with multiple APIs, background workers, databases, queues, and caches, you already know how quickly things get messy. Each service ends up with its own logging configuration, its own way of handling health checks, its own connection strings, and its own deployment story. Local development becomes painful because you have to juggle a bunch of processes, ports, and environment variables just to reproduce production-like behaviour.
With Aspire 13 and the latest .NET 10 SDK, the .NET team gives us a way to treat the entire application as a single unit. Instead of wiring everything manually in every project, Aspire lets you describe your application once, wire up dependencies in one place, and get a unified view of what is going on.
In this deep dive, we will first clarify what Aspire actually is, then walk through its core building blocks, real-world use cases, and when you should not use it. We will also see how a typical Aspire solution looks when you create it from scratch, how observability and configuration are handled, and how this model fits with cloud platforms like AWS.
By the end, you should have a clear mental model of Aspire and when to bring it into your .NET projects.
If you’re new to some of the technologies we’ll use in this tutorial, these articles will help:
You can follow along with the complete source code for this implementation at https://github.com/iammukeshm/getting-started-with-aspire. If you find it helpful, do consider starring the repository – it really helps support the project.
What is .NET Aspire? (2026 Overview)
.NET Aspire is an opinionated, cloud-ready application model for .NET. You can learn more from the official .NET Aspire documentation and the .NET Aspire GitHub repository. Instead of giving you just a single project template, Aspire gives you a way to describe the entire application in one place. It knows about your services, your infrastructure dependencies, and how everything fits together.
At the heart of Aspire you will find an application host project. This host is responsible for orchestrating multiple services, wiring up shared resources like databases and queues, and applying common configuration and observability settings across the board. You still build regular ASP.NET Core Web APIs, worker services, and front-ends, but you no longer treat them as isolated islands.
Aspire also comes with a resource model that lets you define the things your application needs to talk to, such as SQL databases, caches, message brokers, and external systems. These resources are modelled once and then consumed by services in a consistent way.
On top of that, Aspire ships with sensible defaults for logging, tracing, health checks, and resilience using OpenTelemetry as the observability standard. Instead of reinventing the wheel in every project, you rely on the same patterns everywhere. Finally, there is a dashboard and tooling experience that gives you a unified view of your running application, especially during local development.
The key takeaway is this: Aspire understands your application as a whole, not just as a collection of separate projects. That is what makes it particularly interesting for cloud-ready .NET systems.
.NET Aspire Core Concepts: AppHost, Resources & Service Defaults
To get the most out of Aspire, you need to understand a few core pieces: the app host, service projects, resource modelling, and how cross-cutting concerns are handled.
App host and orchestration
The app host is the brain of an Aspire solution. It is responsible for registering services, wiring dependencies, and bootstrapping the application for local development. Instead of each service deciding how to start, what ports to use, and how to discover its dependencies, the app host coordinates all of that for you.
This means the app host knows which APIs, workers, and front-ends belong to the application. It also knows which databases, queues, and caches are part of the picture. When you hit F5 locally, the host can bring up the entire application graph in a predictable way.
Service projects
Service projects in Aspire are still the familiar building blocks you are used to in .NET. You have ASP.NET Core Web APIs, background worker services, and front-end projects like Blazor or Razor Pages. The difference is how these projects are composed.
Instead of letting each project figure out its own configuration and infrastructure, you register these services with the app host. The host then provides them with the right connection strings, endpoints, and secrets via Aspire’s resource model. This keeps individual projects focused on business logic, while the app host deals with wiring and environment-specific details.
Resource modelling
Modern applications rely on a lot of infrastructure: SQL databases, NoSQL stores, caches, message queues, storage accounts, and so on. In many solutions, knowledge about these resources is scattered across multiple configuration files and projects.
Aspire introduces a consistent resource model. In the app host you describe the resources your application depends on, such as an AppDatabase, a queue for background work, or a cache for frequently accessed data. Services then declare that they depend on these resources, and Aspire takes care of flowing the right configuration values into each service.
This becomes particularly helpful as your solution grows, because you have a single place where resources are defined and can be mapped to actual cloud services later on.
Cross-cutting concerns and defaults
Cross-cutting concerns like logging, tracing, health checks, and resilience policies are often treated as afterthoughts. Every team configures them slightly differently, and every project ends up with its own flavour of logging and metrics.
With Aspire, you set up service defaults once and allow the app host to apply them across all services. You decide how logs should look, how traces should flow through the system, and what health checks need to be in place. Then the rest of the application benefits from those decisions without duplicating configuration.
When to Use .NET Aspire - Ideal Use Cases
Aspire is designed for multi-service, cloud-ready applications. If your solution has a single API, a small database, and nothing else, Aspire might feel heavy. But as soon as you have a couple of services talking to each other and relying on shared infrastructure, the value becomes clear.
A common scenario is an application that has an API, a background worker, and a front-end all working together. The API handles incoming HTTP requests, the worker processes messages off a queue, and the front-end talks to the API. All three share a database and a cache. Without Aspire, each project would need its own configuration and wiring. With Aspire, you express this whole graph once in the app host and let the platform handle the details.
Another good fit is when your team wants consistent logging, tracing, and metrics across services. Aspire’s defaults give you a unified story rather than a patchwork of different logging frameworks and conventions.
If you are already building systems that span multiple projects and environments, Aspire can remove a lot of glue code and reduce the amount of bespoke wiring you have to maintain.
When NOT to Use .NET Aspire
Even though Aspire is powerful, it is not always the right tool. There are scenarios where it simply adds more moving parts than you need.
If you are building a very small or simple application – for example a single Web API with a database and no other services – you will likely be faster using a regular ASP.NET Core template. Prototypes, learning projects, and throwaway experiments typically do not need the extra structure.
Aspire can also overlap with existing internal platforms. If your organization already has a strong opinionated platform that standardizes observability, configuration, and deployment, introducing Aspire on top of that might duplicate concepts and confuse teams.
Finally, some environments are very constrained from an infrastructure point of view. In those cases, adding an orchestrator-type component may not be desirable.
The rule of thumb is simple: use Aspire where its opinionated model clearly reduces friction. Avoid it when it would just be another abstraction layer you need to explain and maintain.
.NET Aspire Tutorial: Building a Book Store API with PostgreSQL
Now that the concepts are clear, let us build something concrete together. In this section, we will create a new Aspire solution in Visual Studio 2026, add a .NET 10 Web API for a simple book store, wire it up to a PostgreSQL database through Aspire’s PostgreSQL resource, and then run everything through the Aspire app host and dashboard.
The idea is that, by the time you reach the end of this section, you will have an Aspire solution that can perform CRUD over a Books table in PostgreSQL, waits for the database to be healthy before the API starts serving traffic, and is fully wired into Aspire’s service defaults for logging, OpenTelemetry, and health checks.
Creating the Aspire solution in Visual Studio
Open up Visual Studio 2026 and create a new project. From the list of templates, search for the Aspire templates and pick the one that creates an app host with a starter Web API and a Blazor Web Frontend. Make sure you target .NET 10 for all the projects in the solution. Give the solution a clear name, such as BookStoreAspire.

At the time of writing this article, Aspire 13 is the latest stable version available.

Once the template has finished, you should see at least three projects in your solution explorer. The names will vary by template, but the idea is the same:
- An app host project that orchestrates the solution.
- A service defaults project that centralises cross-cutting concerns like logging, OpenTelemetry, and health checks.
- One or more application projects, such as a starter Web API and Blazor Web App.

Open the app host project first. This is where your application composition lives. You will see code that registers the service projects and pulls in the service defaults. Spend a minute reading through it so that you understand which services are being added to the app host and how Aspire is wiring things up.
A minimal Program.cs in the app host often looks similar to this:
var builder = DistributedApplication.CreateBuilder(args);
var apiService = builder.AddProject<Projects.BookStoreAspire_ApiService>("apiservice")    .WithHttpHealthCheck("/health");
builder.AddProject<Projects.BookStoreAspire_Web>("webfrontend")    .WithExternalHttpEndpoints()    .WithHttpHealthCheck("/health")    .WithReference(apiService)    .WaitFor(apiService);
builder.Build().Run();
Here DistributedApplication.CreateBuilder creates the Aspire app host, which becomes the single place where you compose the application. The apiService line registers your API project with the host and tells Aspire that it exposes a health endpoint at /health. The next block registers the front-end project, marks its HTTP endpoints as externally reachable, adds its own health check, and, importantly, references and waits for the API service. This tells Aspire that the web front-end depends on the API and should not be considered healthy until the API is up and responding. Finally, builder.Build().Run() starts the whole distributed application using these relationships.
Next, open the service defaults project. This is where Aspire templates usually centralise the wiring for OpenTelemetry, logging, metrics, and health checks. You will see extension methods that add OpenTelemetry to the service collection, configure exporters, and register health checks. This is a core part of the Aspire experience: instead of configuring these pieces in every project, you do it once here and reuse it across services.
The core of that project often looks like this:
using Microsoft.AspNetCore.Builder;using Microsoft.AspNetCore.Diagnostics.HealthChecks;using Microsoft.Extensions.DependencyInjection;using Microsoft.Extensions.Diagnostics.HealthChecks;using Microsoft.Extensions.Logging;using Microsoft.Extensions.ServiceDiscovery;using OpenTelemetry;using OpenTelemetry.Metrics;using OpenTelemetry.Trace;
namespace Microsoft.Extensions.Hosting;
public static class Extensions{    private const string HealthEndpointPath = "/health";    private const string AlivenessEndpointPath = "/alive";
    public static TBuilder AddServiceDefaults<TBuilder>(this TBuilder builder) where TBuilder : IHostApplicationBuilder    {        builder.ConfigureOpenTelemetry();
        builder.AddDefaultHealthChecks();
        builder.Services.AddServiceDiscovery();
        builder.Services.ConfigureHttpClientDefaults(http =>        {            http.AddStandardResilienceHandler();            http.AddServiceDiscovery();        });
        return builder;    }
    public static TBuilder ConfigureOpenTelemetry<TBuilder>(this TBuilder builder) where TBuilder : IHostApplicationBuilder    {        builder.Logging.AddOpenTelemetry(logging =>        {            logging.IncludeFormattedMessage = true;            logging.IncludeScopes = true;        });
        builder.Services.AddOpenTelemetry()            .WithMetrics(metrics =>            {                metrics.AddAspNetCoreInstrumentation()                    .AddHttpClientInstrumentation()                    .AddRuntimeInstrumentation();            })            .WithTracing(tracing =>            {                tracing.AddSource(builder.Environment.ApplicationName)                    .AddAspNetCoreInstrumentation(tracing =>                        tracing.Filter = context =>                            !context.Request.Path.StartsWithSegments(HealthEndpointPath)                            && !context.Request.Path.StartsWithSegments(AlivenessEndpointPath)                    )                    .AddHttpClientInstrumentation();            });
        builder.AddOpenTelemetryExporters();
        return builder;    }
    private static TBuilder AddOpenTelemetryExporters<TBuilder>(this TBuilder builder) where TBuilder : IHostApplicationBuilder    {        var useOtlpExporter = !string.IsNullOrWhiteSpace(builder.Configuration["OTEL_EXPORTER_OTLP_ENDPOINT"]);
        if (useOtlpExporter)        {            builder.Services.AddOpenTelemetry().UseOtlpExporter();        }
        return builder;    }
    public static TBuilder AddDefaultHealthChecks<TBuilder>(this TBuilder builder) where TBuilder : IHostApplicationBuilder    {        builder.Services.AddHealthChecks()            .AddCheck("self", () => HealthCheckResult.Healthy(), ["live"]);
        return builder;    }
    public static WebApplication MapDefaultEndpoints(this WebApplication app)    {        if (app.Environment.IsDevelopment())        {            app.MapHealthChecks(HealthEndpointPath);
            app.MapHealthChecks(AlivenessEndpointPath, new HealthCheckOptions            {                Predicate = r => r.Tags.Contains("live")            });        }
        return app;    }}
In very simple terms, AddServiceDefaults is what you call from each service to opt into the common behaviour that Aspire gives you: OpenTelemetry-based logging, metrics, and tracing, a default liveness health check, service discovery, and resilient HTTP clients. ConfigureOpenTelemetry wires up the actual OTEL pipeline, including ASP.NET Core and HTTP client instrumentation, and respects an OTEL_EXPORTER_OTLP_ENDPOINT setting to decide where to send telemetry. AddDefaultHealthChecks adds a basic self-check tagged as live, and MapDefaultEndpoints exposes /health and /alive endpoints in development so you can see how the application is doing while you build it.
Finally, open the starter Web API project. We will turn this into a simple book store API backed by PostgreSQL.
Building the Book Store Web API
In the Web API project, start by creating a simple Book entity that represents the data you want to store. A basic version could have an identifier, title, author, and price.
Before writing any code, make sure you have the right packages installed in this API project. You will need the EF Core runtime and tools, plus the PostgreSQL provider. If you prefer using the command line, you can run commands like:
dotnet add package Microsoft.EntityFrameworkCoredotnet add package Microsoft.EntityFrameworkCore.Designdotnet add package Npgsql.EntityFrameworkCore.PostgreSQLIf you are using Visual Studio’s NuGet UI instead, search for and install these packages into the Web API project. The Aspire-specific packages for the app host are usually added for you by the template, so here we only focus on what the API needs to talk to PostgreSQL through EF Core.
public sealed class Book{    public Guid Id { get; private set; } = Guid.NewGuid();    public string Title { get; private set; } = default!;    public string Author { get; private set; } = default!;    public decimal Price { get; private set; }
    public Book(string title, string author, decimal price)    {        Title = title;        Author = author;        Price = price;    }
    public void Update(string title, string author, decimal price)    {        Title = title;        Author = author;        Price = price;    }}
Next, add an EF Core DbContext that exposes a DbSet<Book> and uses PostgreSQL as the provider. Make sure this project targets .NET 10 and references the EF Core and Npgsql packages for PostgreSQL.
public sealed class BookStoreDbContext : DbContext{    public DbSet<Book> Books => Set<Book>();
    public BookStoreDbContext(DbContextOptions<BookStoreDbContext> options)        : base(options)    {    }
    protected override void OnModelCreating(ModelBuilder modelBuilder)    {        modelBuilder.Entity<Book>(builder =>        {            builder.HasKey(b => b.Id);            builder.Property(b => b.Title)                .IsRequired()                .HasMaxLength(200);            builder.Property(b => b.Author)                .IsRequired()                .HasMaxLength(200);            builder.Property(b => b.Price)                .HasColumnType("numeric(10,2)");        });    }}
At this point, if you were building a standalone API, you would normally add a connection string to appsettings.json and configure EF Core in Program.cs. With Aspire, we want to let the app host own the database configuration instead. The API will simply read a connection string that Aspire provides, typically via builder.Configuration.
In Program.cs, wire up the BookStoreDbContext and add a set of minimal API endpoints for CRUD operations:
var builder = WebApplication.CreateBuilder(args);
builder.AddServiceDefaults();
var connectionString = builder.Configuration.GetConnectionString("booksDb")    ?? throw new InvalidOperationException("Connection string 'booksDb' not found.");
builder.Services.AddDbContext<BookStoreDbContext>(options =>    options.UseNpgsql(connectionString));
var app = builder.Build();
if (app.Environment.IsDevelopment()){    using var scope = app.Services.CreateScope();    var db = scope.ServiceProvider.GetRequiredService<BookStoreDbContext>();    db.Database.Migrate();}
app.MapGet("/books", async (BookStoreDbContext db) =>    await db.Books.AsNoTracking().ToListAsync());
app.MapGet("/books/{id:guid}", async (Guid id, BookStoreDbContext db) =>    await db.Books.FindAsync(id) is { } book ? Results.Ok(book) : Results.NotFound());
app.MapPost("/books", async (BookDto request, BookStoreDbContext db) =>{    var book = new Book(request.Title, request.Author, request.Price);    db.Books.Add(book);    await db.SaveChangesAsync();    return Results.Created($"/books/{book.Id}", book);});
app.MapPut("/books/{id:guid}", async (Guid id, BookDto request, BookStoreDbContext db) =>{    var book = await db.Books.FindAsync(id);    if (book is null) return Results.NotFound();
    book.Update(request.Title, request.Author, request.Price);    await db.SaveChangesAsync();    return Results.NoContent();});
app.MapDelete("/books/{id:guid}", async (Guid id, BookStoreDbContext db) =>{    var book = await db.Books.FindAsync(id);    if (book is null) return Results.NotFound();
    db.Books.Remove(book);    await db.SaveChangesAsync();    return Results.NoContent();});
app.MapDefaultEndpoints();
app.Run();
public sealed record BookDto(string Title, string Author, decimal Price);
This gives you a clean, minimal API that can perform CRUD operations over a PostgreSQL-backed Books table. The important detail for Aspire is that the connection string is resolved from configuration under the name booksDb, which the app host will supply.
Here we also call Database.Migrate() during startup when the app is running in the Development environment. This is a convenient way to keep the schema in sync with your EF Core model both when you run the API directly and when you run it through Aspire, because it always uses whatever connection string is resolved for booksDb. Be careful with this pattern in production: running migrations automatically at startup can be risky in multi-instance deployments or tightly controlled environments. It is usually best to keep automatic migrations limited to development and handle production schema changes through a separate, explicit deployment step.
Preparing the PostgreSQL database with migrations
Before you start wiring everything through Aspire, it is a good idea to create the database schema using EF Core migrations. The easiest way to do this while developing locally is to add a connection string to the API’s appsettings.json and run migrations against your PostgreSQL instance.
In appsettings.json, add a ConnectionStrings section like this (adjust the values for your environment):
{ "ConnectionStrings": { "booksDb": "Host=localhost;Port=5432;Database=booksDb;Username=postgres;Password=yourpassword" }}With that in place, you can add a migration and update the database. If you prefer the .NET CLI, run these commands from the API project folder:
dotnet ef migrations add InitialCreatedotnet ef database updateIf you are using the Package Manager Console in Visual Studio instead, the equivalent commands are:
Add-Migration InitialCreateUpdate-DatabaseThis creates the Books table in your booksDb PostgreSQL database based on the BookStoreDbContext model. Once the schema is in place, Aspire can reuse the same connection string name (booksDb) and inject the correct value at runtime when you run the app host.
Adding a PostgreSQL resource in the app host
Switch back to the app host project. Here, you will add a PostgreSQL resource that represents the database for your book store and wire it into the API and web projects.
The exact code will depend on the version of Aspire and the extensions you use, but the idea is straightforward: you declare a PostgreSQL resource in the app host, attach a data volume so that data survives container restarts, and then reference that resource from the Web API project. Aspire will then ensure that the API gets a valid connection string that points to the PostgreSQL instance and that it waits for the database to be healthy before it starts serving requests.
For our book store scenario, the app host setup looks like this:
var builder = DistributedApplication.CreateBuilder(args);
var postgres = builder    .AddPostgres("postgres")    .WithDataVolume("app-postgres-data")    .AddDatabase("booksDb");
var apiService = builder    .AddProject<Projects.BookStoreAspire_ApiService>("bookstore-api")    .WithReference(postgres)    .WaitFor(postgres)    .WithHttpHealthCheck("/health");
builder    .AddProject<Projects.BookStoreAspire_Web>("bookstore-web")    .WithExternalHttpEndpoints()    .WithHttpHealthCheck("/health")    .WithReference(apiService)    .WaitFor(apiService);
builder    .Build()    .Run();
Important: for this Aspire setup to work, you need a running Docker daemon (for example Docker Desktop on your development machine). Aspire uses it to start the PostgreSQL container defined by AddPostgres, so if Docker is not running the app host will not be able to bring the database up.
Here the app host declares a PostgreSQL container named postgres, attaches a named volume called app-postgres-data, and creates a database resource called booksDb. The bookstore-api project is added to the application and marked as depending on that database, so Aspire knows to generate a connection string for booksDb and pass it into the API. The web front-end is then registered as bookstore-web, marked as externally reachable, and set up to depend on the API. When you run the app host, Aspire brings up PostgreSQL first, waits for it to be healthy, then starts the API, and finally brings up the web project once its dependencies are ready.
Important: the name you use for the database resource (booksDb in this example), the key you pass to GetConnectionString("booksDb") in the API, and the key you use in appsettings.json all need to match. If they do not, Aspire will not be able to override your local connection string, and your API will keep talking to whatever connection string it finds in configuration instead of the Aspire-managed database.
Making the API wait for PostgreSQL to be healthy
One of the nicest features of Aspire is its ability to understand dependencies between services and resources. When the Web API declares that it depends on the booksDb PostgreSQL resource, Aspire can ensure that the database is started and reported as healthy before the API starts accepting requests.
This means that, during local development, you are not racing the database. You run the app host, Aspire brings up PostgreSQL, waits for it to be reachable and healthy, and only then spins up the Web API. From your perspective, you just press F5 and hit the API, without worrying about connection errors caused by a half-started database.
Once this wiring is in place, you are ready to run the app host and exercise the API. Before we do that, let us add a couple of HTTP files so that you can quickly test the endpoints, first by running just the API project, and then by running everything through Aspire.
Testing the API with HTTP files
To make testing easier, create a file in your solution called BookStoreApi.http. This file represents the API running on its own, without Aspire, in the default development URL. A simple version looks like this:
@host = https://localhost:5001
### Get all booksGET {{host}}/books
### Get a single bookGET {{host}}/books/{{bookId}}
### Create a new bookPOST {{host}}/booksContent-Type: application/json
{  "title": "The Pragmatic Programmer",  "author": "Andrew Hunt, David Thomas",  "price": 42.00}
### Update an existing bookPUT {{host}}/books/{{bookId}}Content-Type: application/json
{  "title": "The Pragmatic Programmer (2nd Edition)",  "author": "Andrew Hunt, David Thomas",  "price": 49.00}
### Delete a bookDELETE {{host}}/books/{{bookId}}
Run only the API project from Visual Studio, then use the HTTP file support to send these requests. Start by creating a book, copy the returned id into the {{bookId}} placeholder, and then try the GET, PUT, and DELETE requests. This is the fastest way to verify that your CRUD logic and PostgreSQL integration are working as expected.
In the next sections, once you have Aspire running, you can just change the @host variable to point to the Aspire hosted API URL and repeat the same tests, this time going through the full Aspire orchestration.
Exploring service defaults and OpenTelemetry
Earlier, we saw how the service defaults project centralises logging, health checks, and HTTP client configuration. The other big piece it gives you is OpenTelemetry support.
OpenTelemetry (often shortened to OTEL) is an open standard for collecting telemetry data from applications. Instead of every framework inventing its own logging and tracing format, OpenTelemetry gives you a common language for traces, metrics, and logs that can be sent to a wide range of backends. This is one of the reasons it has become the default choice in modern cloud-native systems: you can instrument your app once and send telemetry to whatever tool your team prefers, without rewriting your code.
In the context of Aspire, OpenTelemetry means that your Web API and any other services in the solution automatically participate in distributed tracing and metrics, without you having to wire everything manually in each project. You get a consistent story for diagnostics across the whole application, and you can plug in exporters (via OTEL_EXPORTER_OTLP_ENDPOINT or other options) without changing the application code.
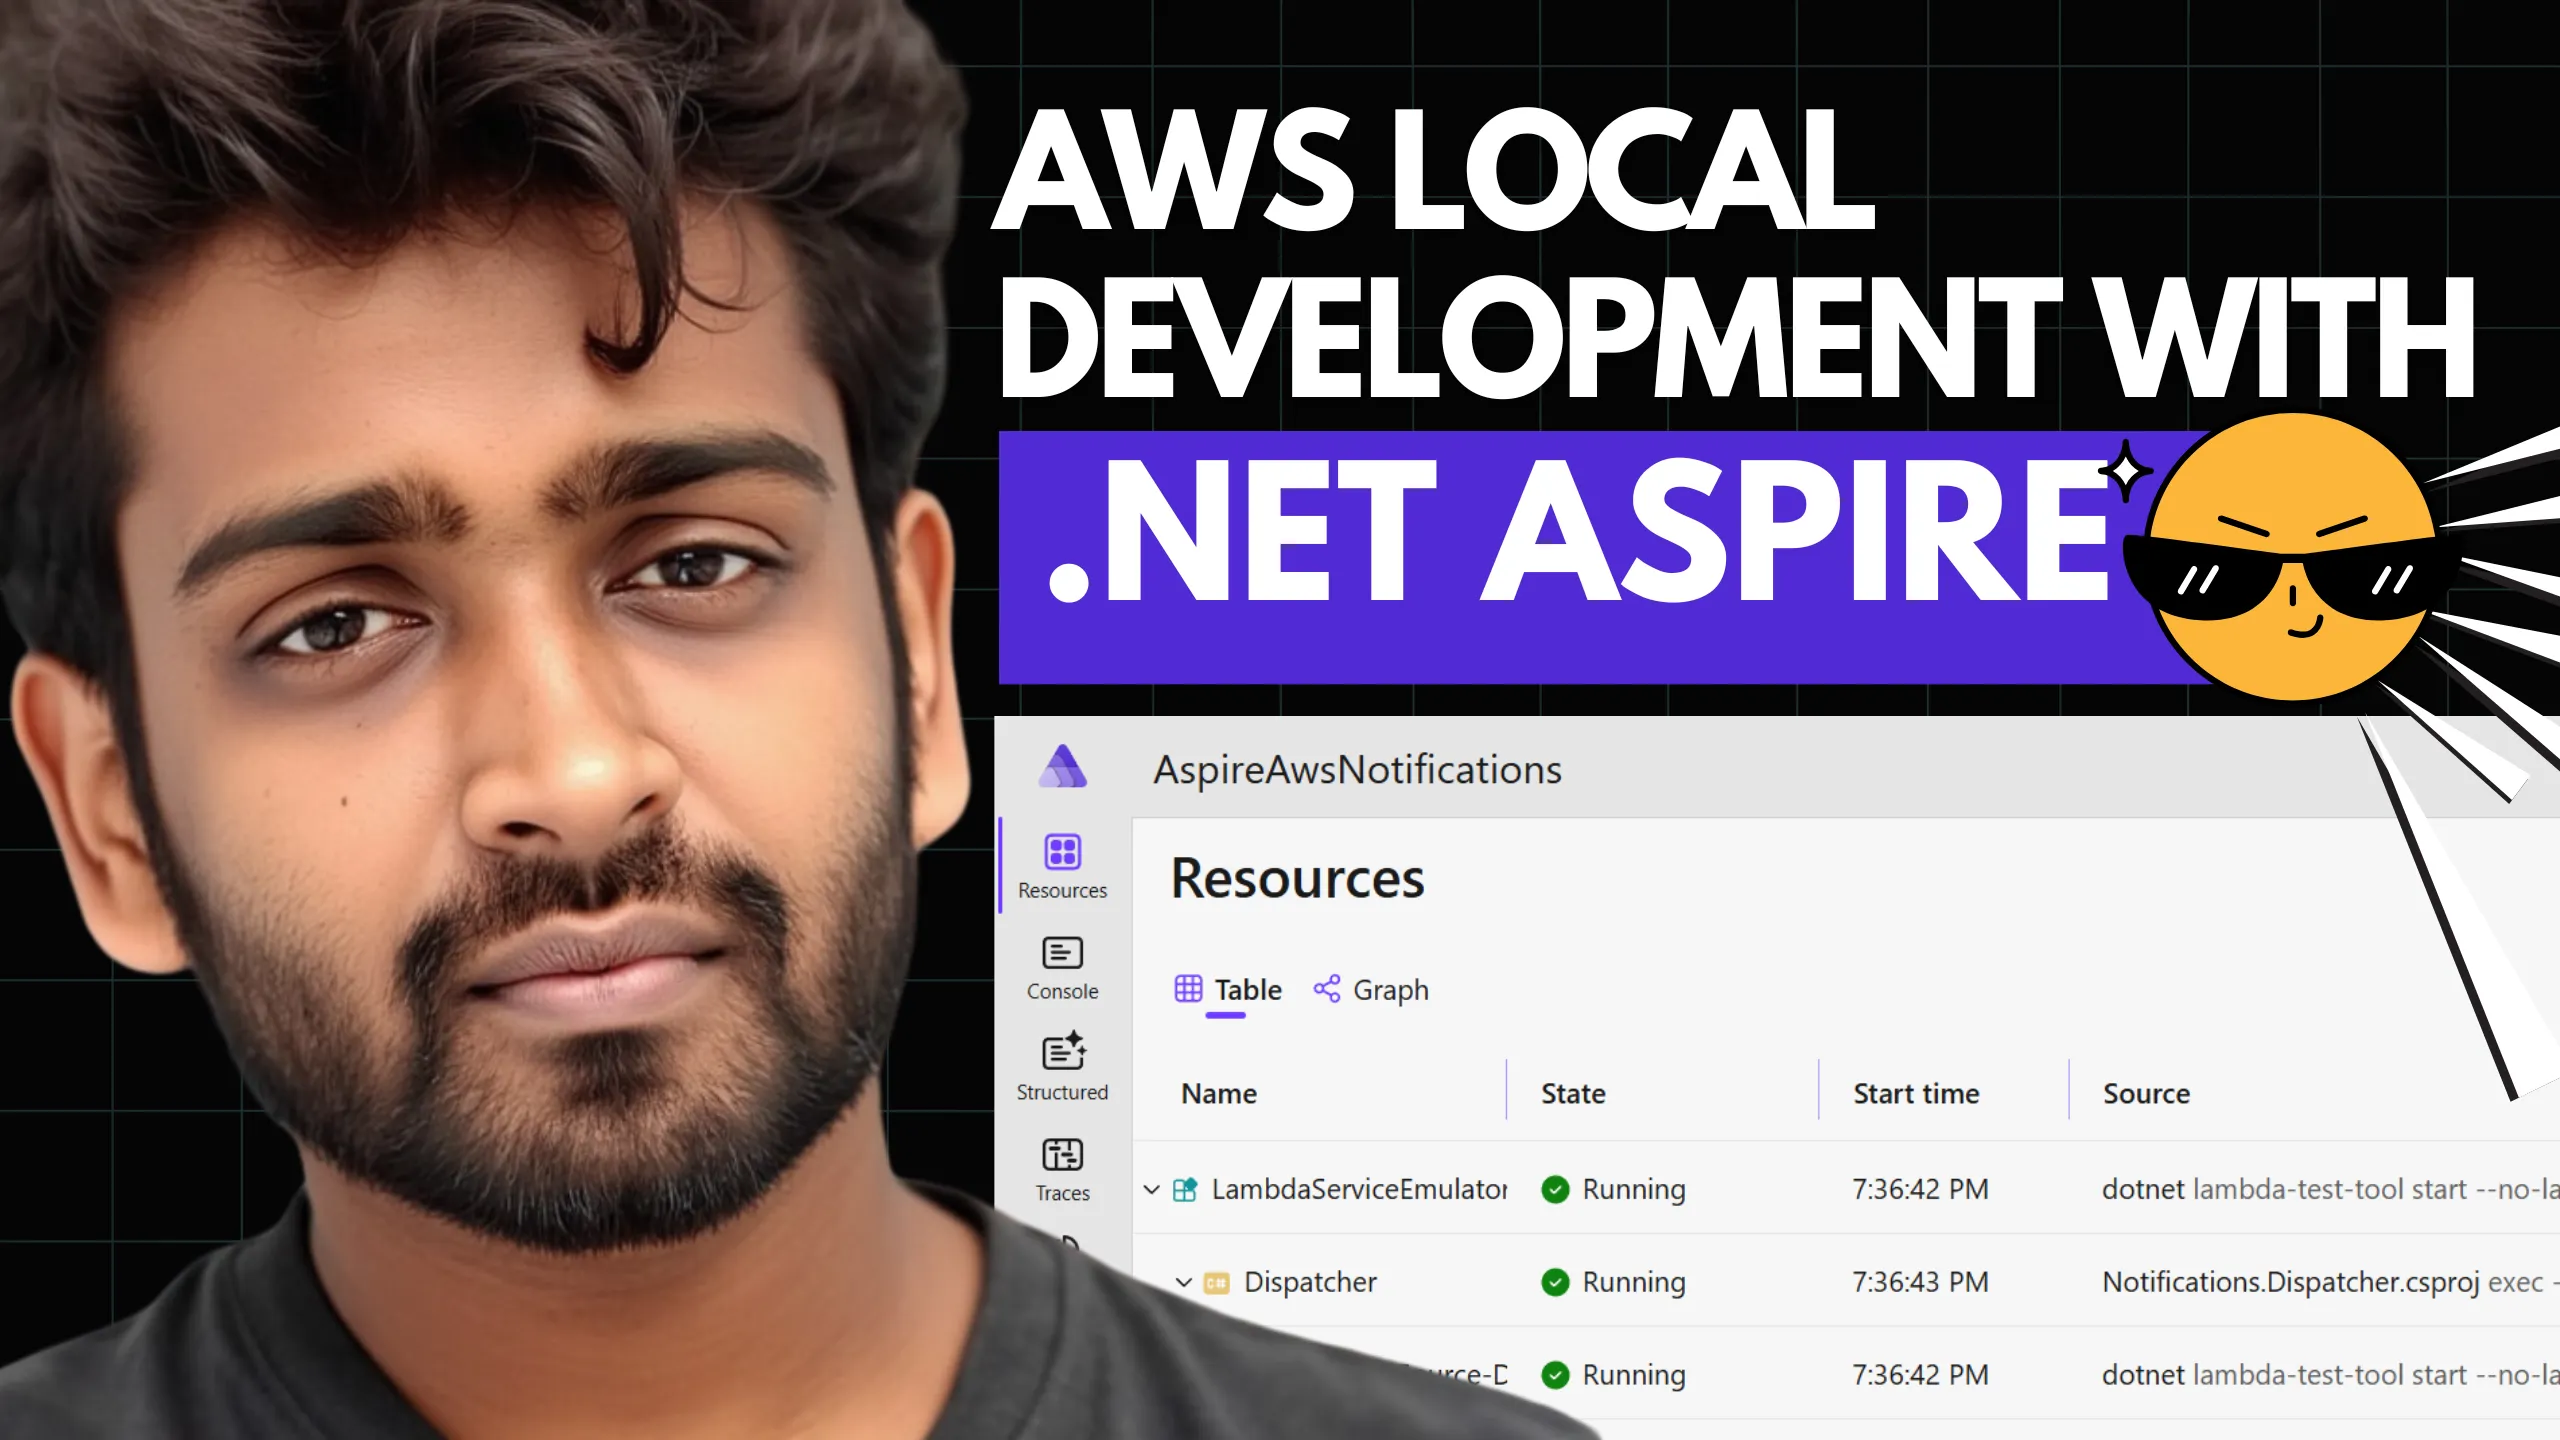
Running .NET Aspire and Exploring the Dashboard
Once your app host, API, and PostgreSQL resource are wired together, it is time to run Aspire and see everything in action. In Visual Studio 2026, set the app host project as the startup project and press F5. Aspire will bring up the Postgres container, wait until it is healthy, start the API, and finally the web front-end. If you prefer the command line, you can run the app host with dotnet run from the app host project folder.

When the app host starts, the Aspire dashboard will be available in your browser. You will see your Web API, the PostgreSQL resource, and the web front-end as separate components in a simple graph. Spend a bit of time hovering over the dependencies, reading the names you chose, and checking which services depend on which resources.
From the dashboard you can drill into each service to see its environment, configuration, health status, and logs. You can also see HTTP endpoints exposed by the API and the web front-end and open them in a new browser tab. As you send requests using your HTTP files, you will see those calls show up in the dashboard, which makes it much easier to understand how traffic flows through the system.
As you work with Aspire, a few simple best practices go a long way. Give your services and resources clear, descriptive names so the dashboard stays readable. Keep your service defaults project as the single place for cross-cutting concerns like logging, OpenTelemetry, and health checks, rather than reconfiguring them per service. Let the app host own infrastructure wiring, and keep your application projects focused on business logic like handling HTTP requests and implementing CRUD for your entities.
Once you have an Aspire solution like this up and running, the leap from local development to a cloud environment becomes much smaller. You already have a clear picture of services, resources, and dependencies, and you are relying on OpenTelemetry and health checks from day one.
If you get stuck at any point, you can always compare your code with the reference implementation in the GitHub repo: https://github.com/iammukeshm/getting-started-with-aspire. And if this walkthrough saves you time, please star the repository to show your support.

Once you click on the API service in the Aspire dashboard, you can see its health status, environment variables, and live logs. This makes it easy to debug issues without switching between multiple tools.
.NET Aspire Observability: Logs, Traces & Metrics with OpenTelemetry
Modern distributed systems live or die by their observability. When a request hops between multiple services and touches several resources along the way, you need a way to see that journey clearly. Aspire treats observability as a first-class concern rather than something you sprinkle in at the end.
Aspire standardises how logs are produced across services. You get structured logs with consistent formatting and correlation identifiers, which makes it much easier to trace a single request as it moves through the system. Instead of stitching together logs from different projects manually, you can view them in one place.
On top of logging, Aspire emits distributed traces that show how a request flows through multiple services. These traces highlight where time is spent, where calls fail, and how dependencies are chained together. This is extremely valuable when you are troubleshooting latency issues or unexpected errors.
Metrics and health checks are also part of the story. Aspire encourages you to expose health endpoints and gather service-level metrics that can later be hooked up to your cloud platform’s monitoring tools. This is important not only for local debugging but also for production readiness.
During development, the Aspire dashboard brings all of this together. You get a visual view of your services and resources, along with live logs, traces, and metrics. Instead of switching between multiple tools, you have a single pane of glass for understanding what your Aspire-based application is doing.
Logging
Under Structured Logging, Aspire uses OpenTelemetry to provide consistent, structured logs across all services. Each log entry includes important context such as timestamps, log levels, service names, and correlation IDs. This structure makes it easier to filter and search logs when diagnosing issues.

Traces
Aspire automatically instruments your services to emit distributed traces using OpenTelemetry. Each trace captures the journey of a request as it flows through multiple services, showing how long each operation takes and where errors occur. This is invaluable for diagnosing performance bottlenecks and understanding complex interactions.

Metrics
Aspire collects key metrics from your services, such as request counts, error rates, and latency distributions. These metrics can be visualised in dashboards or integrated with your cloud platform’s monitoring tools to provide insights into the health and performance of your application. You can additional system or custom metrics as needed in the service defaults project.

Let me know if you want a deeper dive into OpenTelemetry and how to get the most out of Aspire’s observability features in future articles.
.NET Aspire Configuration, Secrets & Environment Management
Configuration and secrets are always tricky in multi-service applications. Each environment has its own values, and each service needs a subset of those values. If you are not careful, configuration becomes scattered and hard to reason about.
Aspire gives you a structured way to think about configuration at the application level. You define configuration in the app host, then let services consume what they need. You can override settings per environment, so local development can look different from staging and production, without losing track of what changed where.
Here is a sample from my FSH Playground API project that shows how to wire up PostgreSQL and Redis resources through Aspire, while also configuring OpenTelemetry and environment-specific settings:
builder.AddProject<Projects.Playground_Api>("playground-api") .WithReference(postgres) .WithEnvironment("ASPNETCORE_ENVIRONMENT", "Production") .WithEnvironment("OpenTelemetryOptions__Exporter__Otlp__Endpoint", "https://localhost:4317") .WithEnvironment("OpenTelemetryOptions__Exporter__Otlp__Protocol", "grpc") .WithEnvironment("OpenTelemetryOptions__Exporter__Otlp__Enabled", "true") .WithEnvironment("DatabaseOptions__Provider", "POSTGRESQL") .WithEnvironment("DatabaseOptions__ConnectionString", postgres.Resource.ConnectionStringExpression) .WithEnvironment("DatabaseOptions__MigrationsAssembly", "FSH.Playground.Migrations.PostgreSQL") .WaitFor(postgres) .WithReference(redis) .WithEnvironment("CachingOptions__Redis", redis.Resource.ConnectionStringExpression) .WaitFor(redis);This approach significantly reduces configuration drift. Instead of having three different versions of the same value floating around various appsettings files, you see configuration defined in one place and flowing through the application in a predictable way.
Secret management is handled in a similar spirit. Database passwords, API keys, and access tokens should never be committed to source control. Aspire makes it natural to integrate with external secret stores and vaults so that sensitive values are injected at runtime via configuration and resource bindings. It fits neatly into the security expectations of modern cloud-native systems.
.NET Aspire with AWS, Azure & Kubernetes
Although Aspire is built by Microsoft, it is not an Azure-only technology. The application model is cloud-agnostic. You use Aspire to describe and compose your application, but you are free to run those services on Azure, AWS, on-premises infrastructure, Kubernetes, or anywhere else that can host .NET.
Aspire’s responsibility is to help you model the application, wire up dependencies, and give you a strong local development experience with consistent cross-cutting behaviour. The cloud platform’s responsibility is to provide the actual managed services – databases, queues, caches, storage, compute – and to handle networking, security, and monitoring at the infrastructure level.
In other words, Aspire makes the application cloud-ready. Your platform of choice then makes the infrastructure production-grade. The two work together, but they play different roles.
In upcoming articles, we will look specifically at how Aspire-based .NET applications run on AWS, how to map Aspire resources to AWS services like RDS, SQS, SNS, S3, and CloudWatch, and how to deploy those services onto AWS container platforms.
.NET Aspire Pros, Cons & Decision Checklist
Before adopting any new platform, it is worth looking honestly at the trade-offs.
On the positive side, Aspire gives you opinionated defaults for complex, multi-service applications, which means you spend less time reinventing cross-cutting plumbing in every project. Observability is built in, local development becomes much smoother, and the overall application model translates well to cloud deployment because you have a clear map of services and dependencies.
On the other hand, Aspire is an additional abstraction layer on top of ASP.NET Core, worker services, and your existing deployment tooling. You have to learn new concepts and project structures. For very small apps, this is overkill, and if you already have a mature internal platform that standardizes logging, configuration, and deployment, Aspire may overlap with that investment.
As a rule of thumb, Aspire is a strong choice when you are building multi-service, cloud-ready applications and you care deeply about observability and consistency across services. If you are working on a single, simple API or your organisation already has a robust platform that solves the same problems, sticking with traditional templates might be the better option.
Summary & Next Steps
In this article, we explored .NET Aspire as a way to build cloud-ready .NET applications with Aspire 13 and .NET 10. We looked at what Aspire is, how the app host, service projects, and resource model fit together, and how it improves observability, configuration, and local orchestration. We also discussed when Aspire is a good fit and when it might not be necessary.
Aspire does not replace your cloud platform or hosting environment. Instead, it gives you a consistent way to model and compose your applications so they are easier to develop, observe, and operate.
In the upcoming article “Aspire + AWS - Building Cloud-Ready .NET Apps with AWS Services”, we will take the concepts from this deep dive and apply them specifically to AWS. We will map Aspire resources to AWS services like RDS, SQS, SNS, S3, and CloudWatch, and discuss design and deployment strategies for running Aspire-based applications on AWS.
Until then, you can start thinking about how Aspire fits into your existing .NET architectures, and how it might simplify the next multi-service solution you build.
Continue Your .NET Aspire Journey
Ready to take your Aspire skills further? Check out these hands-on tutorials:
Frequently Asked Questions
Is .NET Aspire only for Azure?
No, .NET Aspire is cloud-agnostic. While Microsoft builds and maintains Aspire, you can deploy Aspire-based applications to AWS, Google Cloud, any Kubernetes cluster, or your own on-premises infrastructure. Aspire handles local orchestration and the application model - your cloud platform of choice handles the actual hosting.
.NET Aspire vs Docker Compose - Which should I use?
Docker Compose is a container orchestration tool that manages containers. .NET Aspire is an application orchestration tool that understands your .NET projects natively. Aspire can run .NET projects directly without containerizing them during development, provides built-in observability with OpenTelemetry, and offers a developer dashboard with logs, traces, and metrics. Docker Compose is language-agnostic and more widely used in production. For local .NET development, Aspire provides a better experience. For production deployments, you might still use Docker Compose, Kubernetes, or cloud-native container services.
Do I need .NET Aspire for small projects?
For single-API projects with just a database, Aspire adds unnecessary overhead. The sweet spot for Aspire is when you have multiple services that need to communicate, shared infrastructure (databases, caches, message queues), a need for consistent observability across services, or complex local development setup that you want to simplify. If your project is a single Web API with a database, a standard ASP.NET Core template is simpler and faster to work with.
What version of .NET do I need for Aspire?
.NET Aspire requires .NET 8.0 or later. This tutorial uses .NET 10 and Aspire 13, which is the latest stable version as of 2026. You also need a container runtime like Docker Desktop or Podman installed on your development machine.
Can I add Aspire to an existing .NET project?
Yes! You don't need to start from scratch. You can use the aspire init command to incrementally add Aspire orchestration to existing .NET solutions. The official Microsoft documentation has a detailed guide on adding Aspire to existing applications at learn.microsoft.com/en-us/dotnet/aspire/get-started/add-aspire-existing-app.


What's your Feedback?
Do let me know your thoughts around this article.