With the release of .NET 9, you might have noticed that Swagger Gen is no longer included by default in web API templates. This means that when you create a new .NET 9 WebAPI, you no longer have the fancy green Swagger UI to test your API Endpoints. If you’re wondering why and what this means for your projects, you’re not alone! But don’t worry—Microsoft has introduced a new way to handle API documentation that makes things even better. Want to know what’s next, the alternatives, and how it will affect your work? Keep reading to find out!
Why Did Microsoft Drop Swagger Support in .NET 9?
For years, Swashbuckle has been the go-to solution for generating OpenAPI documentation in ASP.NET Core. Microsoft even included it by default in Web API templates, making it easy to document and test APIs. However, over time, Swashbuckle faced maintenance challenges. With core contributors stepping away, unresolved issues piled up, and by the release of .NET 8, it lacked full support—leaving developers facing compatibility issues and uncertainty.
To address this, Microsoft is moving away from Swashbuckle and introducing a native solution with .NET 9 via the Microsoft.AspNetCore.OpenApi package. This shift aims to provide a more sustainable, well-supported, and tightly integrated experience without relying on third-party tools. This is an awesome move from Microsoft to make more first class integrations for the aspects that we work with on a regular basis!
With improved built-in features like .http file support in Visual Studio and the Endpoints Explorer, developers now have more native ways to test and document APIs—making Swagger UI less of a necessity.
Here is Microsoft’s take on this: Read
Other advantages include,
- Native Support of OpenAPI.
- Lesser dependency.
- Full support for Minimal APIs.
- Backward compatibility.
What exactly changed?
The Swagger UI that you used to see is technically built on top of the Swagger / OpenAPI specification, which is generated by the Swashbuckle dependency. This API specification generation is what got replaced in .NET 9. Using Microsoft.AspNetCore.OpenApi, Microsoft is replacing the entire Open API document generation process. This way, there is no external dependency for the OpenAPI document, and the generation process is completely native.
In .NET 8, here is how the default ASP.NET Core WebAPI project template would look like, with Swagger Support.
builder.Services.AddEndpointsApiExplorer();builder.Services.AddSwaggerGen();
...
if (app.Environment.IsDevelopment()){    app.UseSwagger();    app.UseSwaggerUI();}
And here is how it is on a shiny new .NET 9 project.
builder.Services.AddOpenApi();
...
if (app.Environment.IsDevelopment()){    app.MapOpenApi();}
As you can see, now Microsoft will natively support the OpenAPI document generation.
I created a .NET 9 WebAPI, and ran it. You can access the OpenAPI specification by navigating to the /openapi/v1.json endpoint.
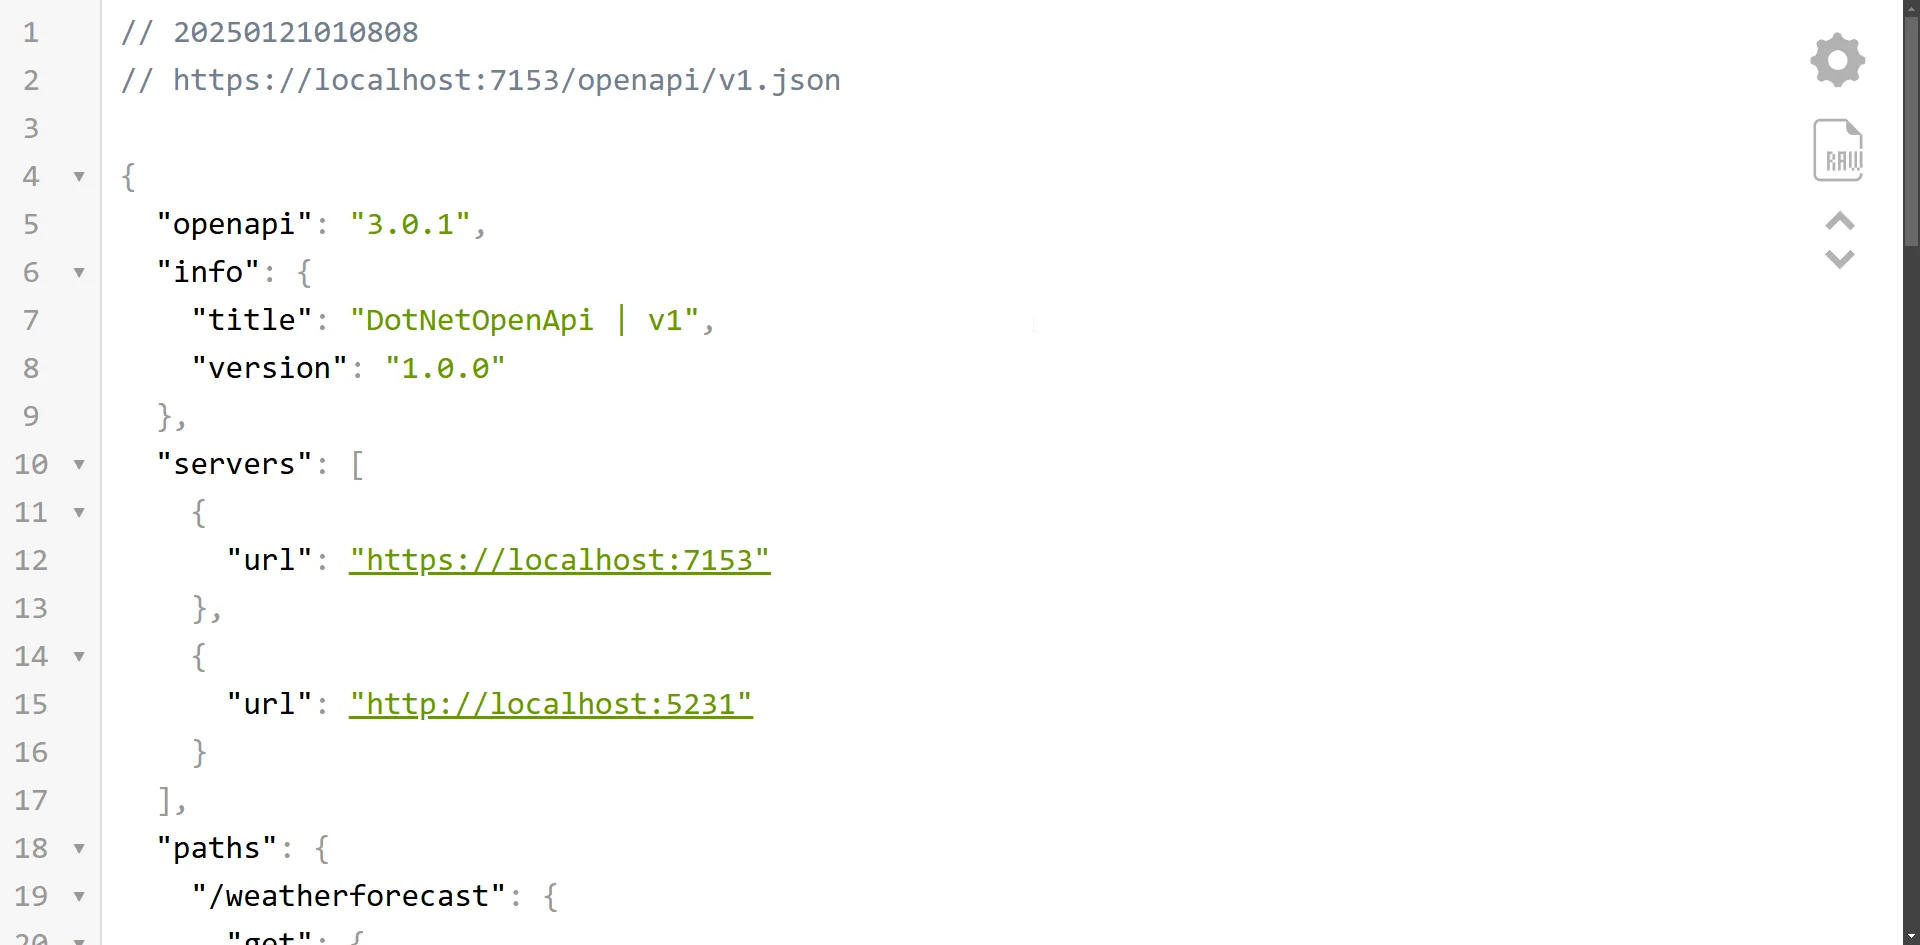
You’ll see an OpenAPI document that includes paths, operations, and schemas generated from your application’s code. However, it may lack important details like descriptions and examples. To include these, you’ll need to add metadata manually, as explained in the next section.
Also note that now there is no UI by default that can visualize this specification.
You can still use Swagger!
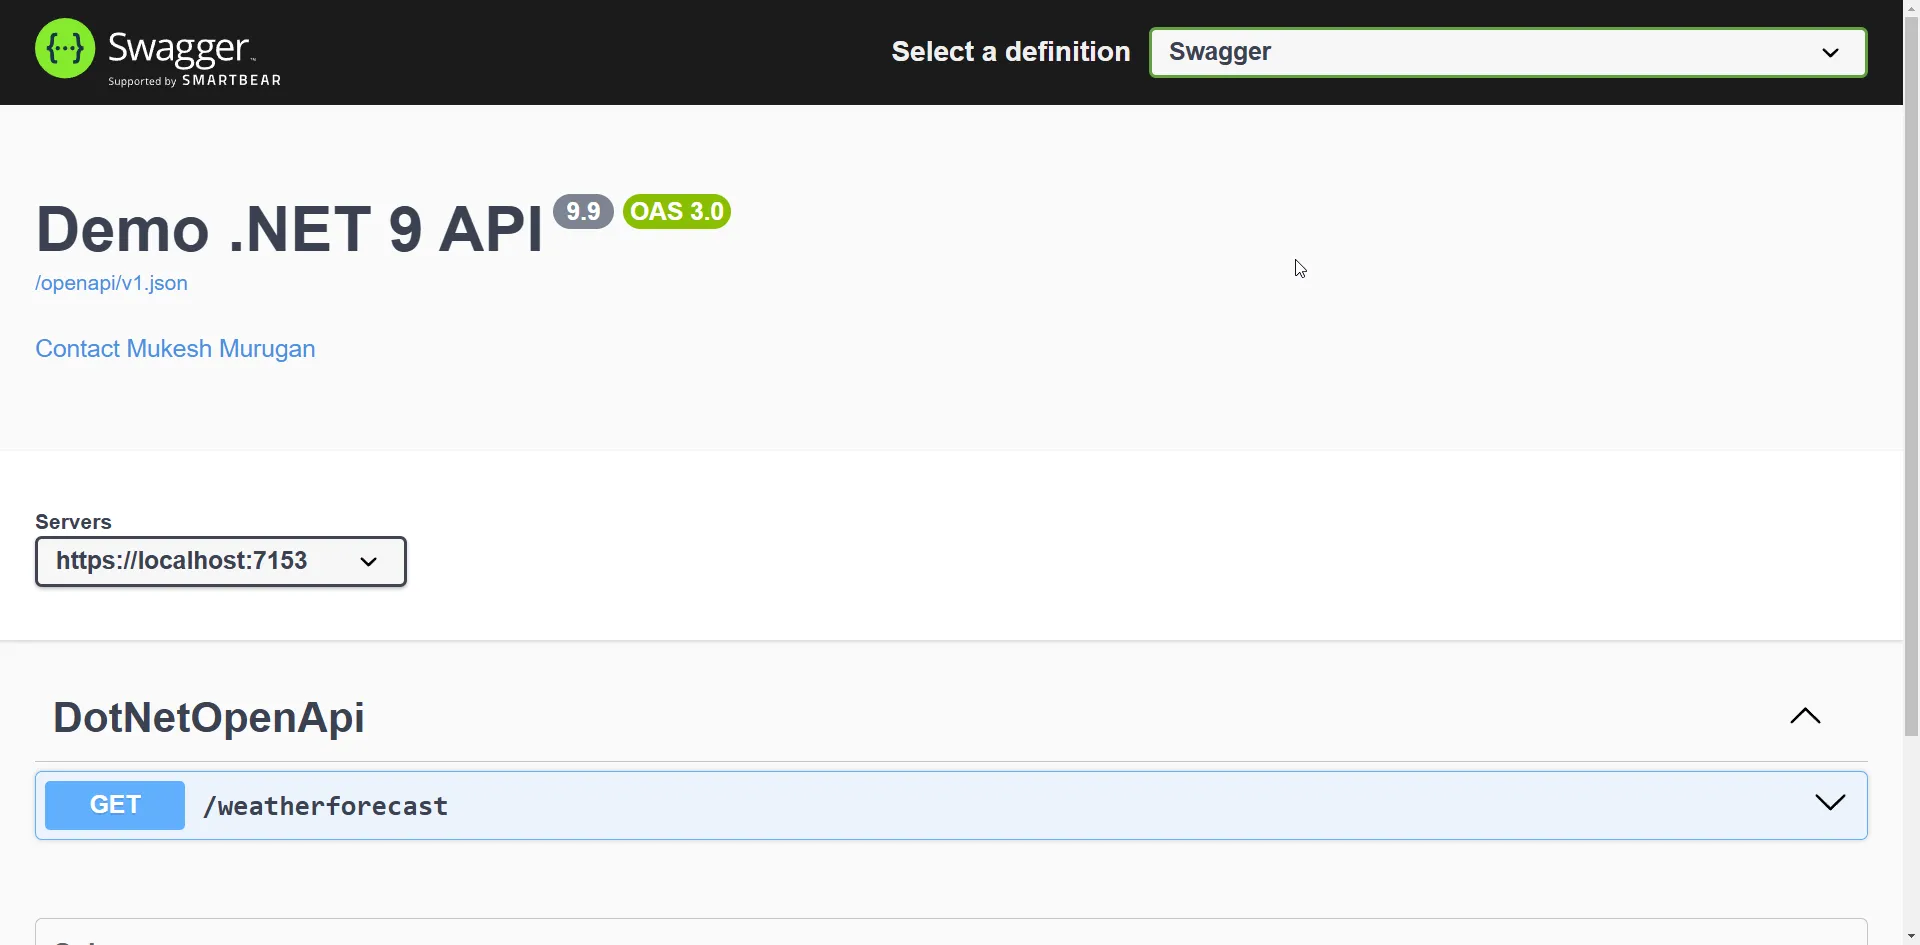
It’s important to understand that Microsoft has just removed the Swashbuckle dependency from their templates. Developers are still free to add it back to their projects, by installing the NuGet package. Or better, since we already know that the OpenAPI specification is now generated by the Microsoft.AspNetCore.OpenApi package, you can simply attach SwaggerUI to read the new OpenAPI spec.
Simply install the Swashbuckle.AspNetCore package to your project, and add the following to your Program.cs.
app.UseSwaggerUI(options => options.SwaggerEndpoint("/openapi/v1.json", "Swagger"));Here, we point SwaggerUI to the new OpenAPI URL.
Now SwaggerUI will be accessible at /swagger.
What is OpenAPI?
OpenAPI is a widely adopted specification for defining and documenting HTTP APIs. It offers a standardized approach to describing API endpoints, request and response structures, authentication methods, and other critical details. By providing a clear and consistent format, OpenAPI enhances API readability and usability, enabling developers to collaborate more effectively and build reliable applications with greater ease.
Customizing OpenAPI Specification
As we used to do with Swagger, you can customize the specifications here as well.
Here’s how you can continue customizing your OpenAPI specification further in your .NET 9 project. You can add descriptions, terms of service, license details, and more to the OpenAPI document.
builder.Services.AddOpenApi(options =>{ options.AddDocumentTransformer((document, context, cancellationToken) => { document.Info.Version = "9.9"; document.Info.Title = "Demo .NET 9 API"; document.Info.Description = "This API demonstrates OpenAPI customization in a .NET 9 project."; document.Info.TermsOfService = new Uri("https://codewithmukesh.com/terms"); document.Info.Contact = new OpenApiContact { Name = "Mukesh Murugan", Url = new Uri("https://codewithmukesh.com") }; document.Info.License = new OpenApiLicense { Name = "MIT License", Url = new Uri("https://opensource.org/licenses/MIT") }; return Task.CompletedTask; });});You can also customize server URLs, security definitions, and schemas if needed:
options.AddDocumentTransformer((document, context, cancellationToken) =>{    document.Servers.Add(new OpenApiServer    {        Url = "https://api.codewithmukesh.com/v1",        Description = "Production Server"    });
    return Task.CompletedTask;});
This way, you can fully customize your OpenAPI documentation just like you did with Swagger.
Add OpenAPI Metadata to Endpoints
You can further customize OpenAPI metadata for minimal API endpoints in ASP.NET Core using attributes and fluent methods like WithSummary, WithDescription, and WithTags. Here’s an extended example that includes additional OpenAPI metadata such as request and response examples, and security definitions.
app.MapGet("/{name}", ( [Description("Your Name.")] [DefaultValue("mukesh")] string name ) => Results.Ok(new { Message = $"Hello {name}!" }) ) .WithName("GetGreeting") // Assigns an operation ID .WithSummary("Greet the user by name") // Provides a short summary for the endpoint .WithDescription("This endpoint takes a name as input and returns a personalized greeting.") // Longer description .WithTags("Greetings") // Adds tags to categorize the endpoint .Produces(200, typeof(object)) // Defines a successful response with the expected type .Produces(400) // Defines possible HTTP 400 responses .ProducesProblem(500) // Defines a problem details response for failures .RequireAuthorization(); // Requires authentication for the endpoint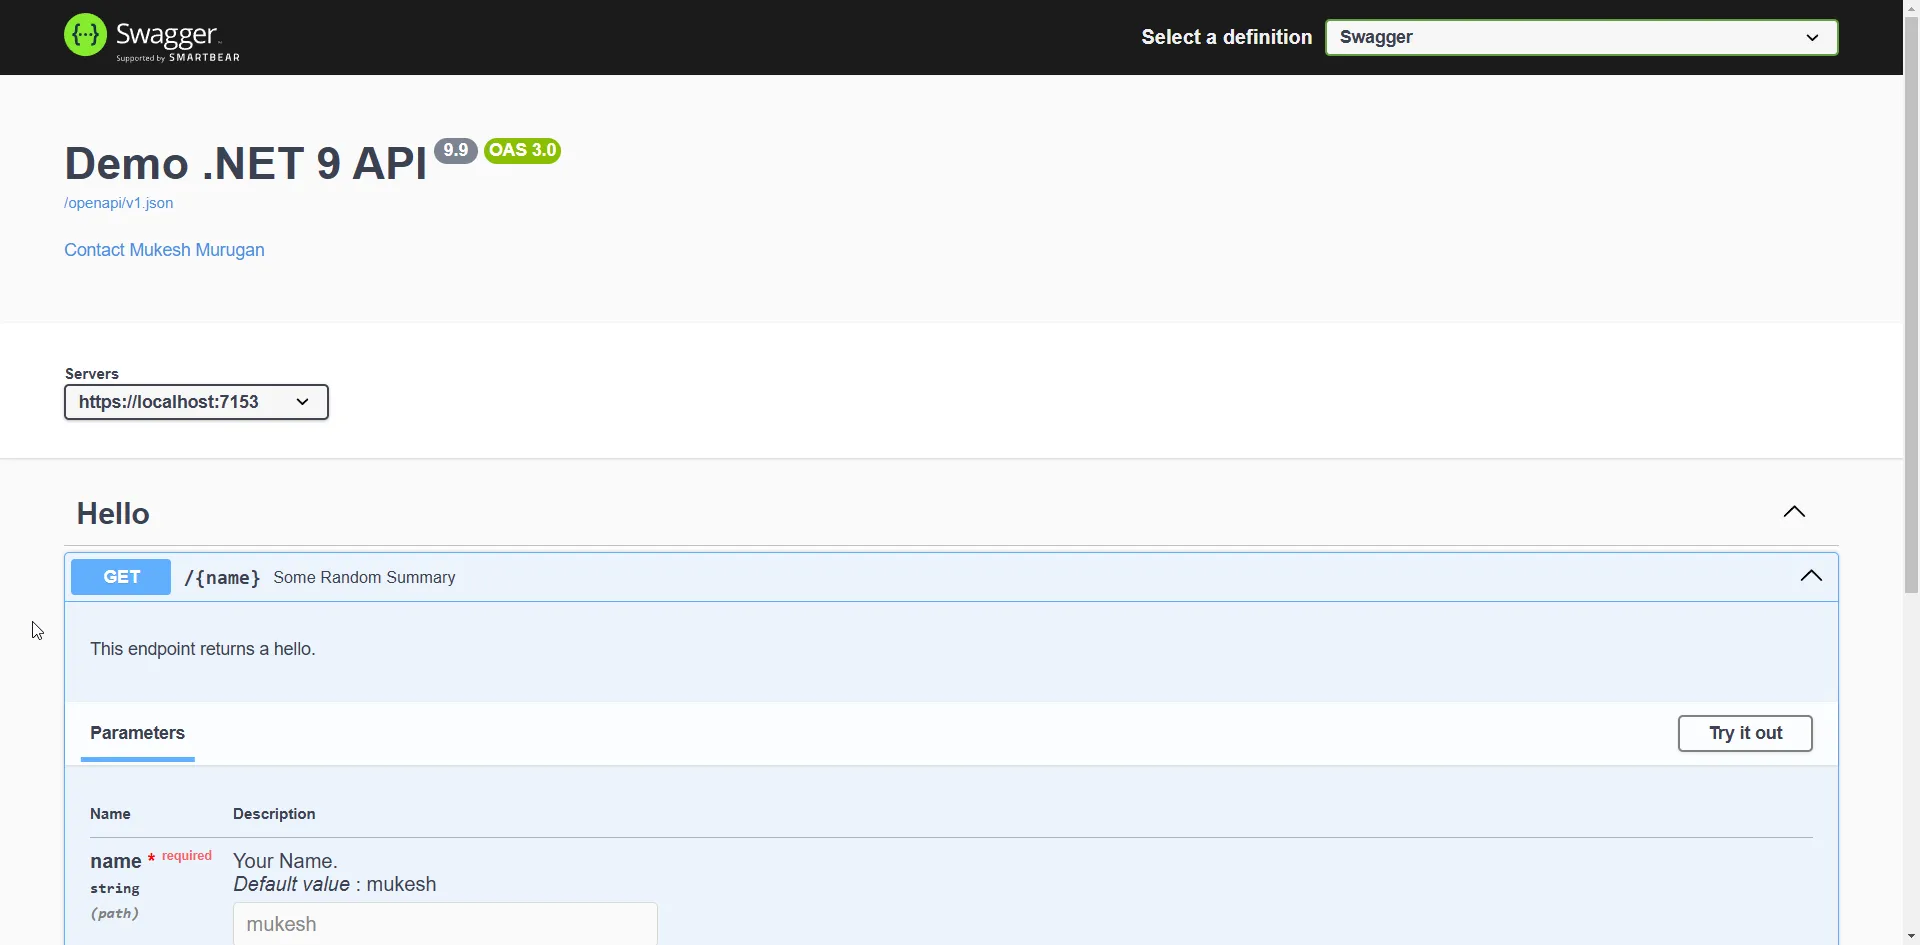
Alternatives to Swagger for API Testing
If for some reason you are not very comfortable with SwaggerUI, here are some of the community favorites for replacing Swagger from your .NET Projects.
Scalar - The New Crowd Favorite
Scalar has recently gotten popular in the .NET Community, as a solid alternative to SwaggerUI.
Microsoft moved away from the Swagger UI, and if you try Scalar, you’ll likely see why. Scalar offers a more modern and user-friendly design, making it easier to configure. It provides powerful features such as generating client code for various programming languages, and it allows you to seamlessly add cookies, headers, and query parameters to API requests.
Scalar is an open-source platform for documenting and interacting with RESTful APIs. It offers an intuitive and interactive interface, making API exploration effortless. Scalar supports both OpenAPI and Swagger specifications, ensuring seamless integration with existing API ecosystems. With close to 10K stars on GitHub, it has gained significant popularity among developers for its user-friendly design and powerful features.
Check out the repo 👉 Scalar on GitHub.
Let’s get Scalar installed to your .NET 9 WebAPI.
Open up NuGet package manager, and install the Scalar.AspNetCore package.
Next, add the highlighted line of code to Program.cs.
At this point, you are free to remove any references to Swagger.
if (app.Environment.IsDevelopment()){ app.MapOpenApi(); app.MapScalarApiReference();}I also went ahead and modified my launchSettings.json to launch Scalar UI as soon as the app is launched.
"https": { "commandName": "Project", "dotnetRunMessages": true, "launchBrowser": true, "launchUrl": "scalar/v1", "applicationUrl": "https://localhost:7153;http://localhost:5231", "environmentVariables": { "ASPNETCORE_ENVIRONMENT": "Development" }}That’s it! Now build and run your .NET 9 Web API. Navigate to /scalar to view your super cool new API Tester / Documentation.
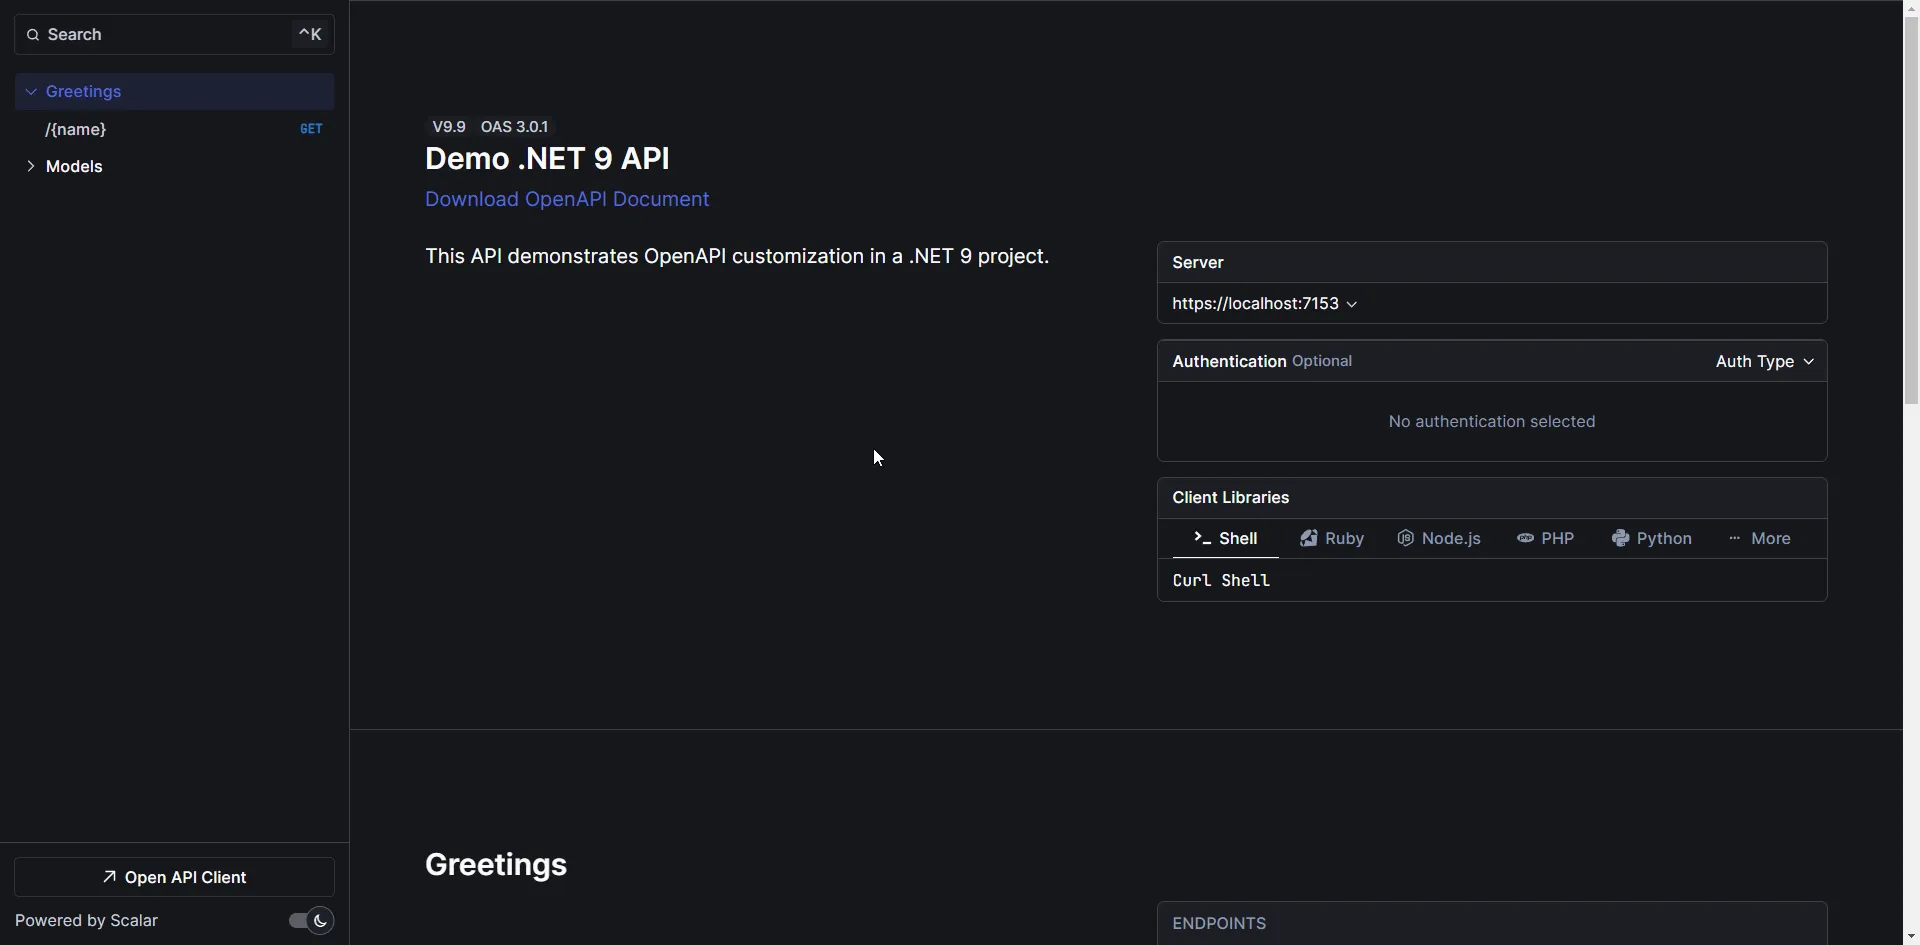
To the right side, you can see all the available endpoints listed, along with the related models. In our case, the Model is ProblemDetails, which we added as part of our Greetings Endpoint.
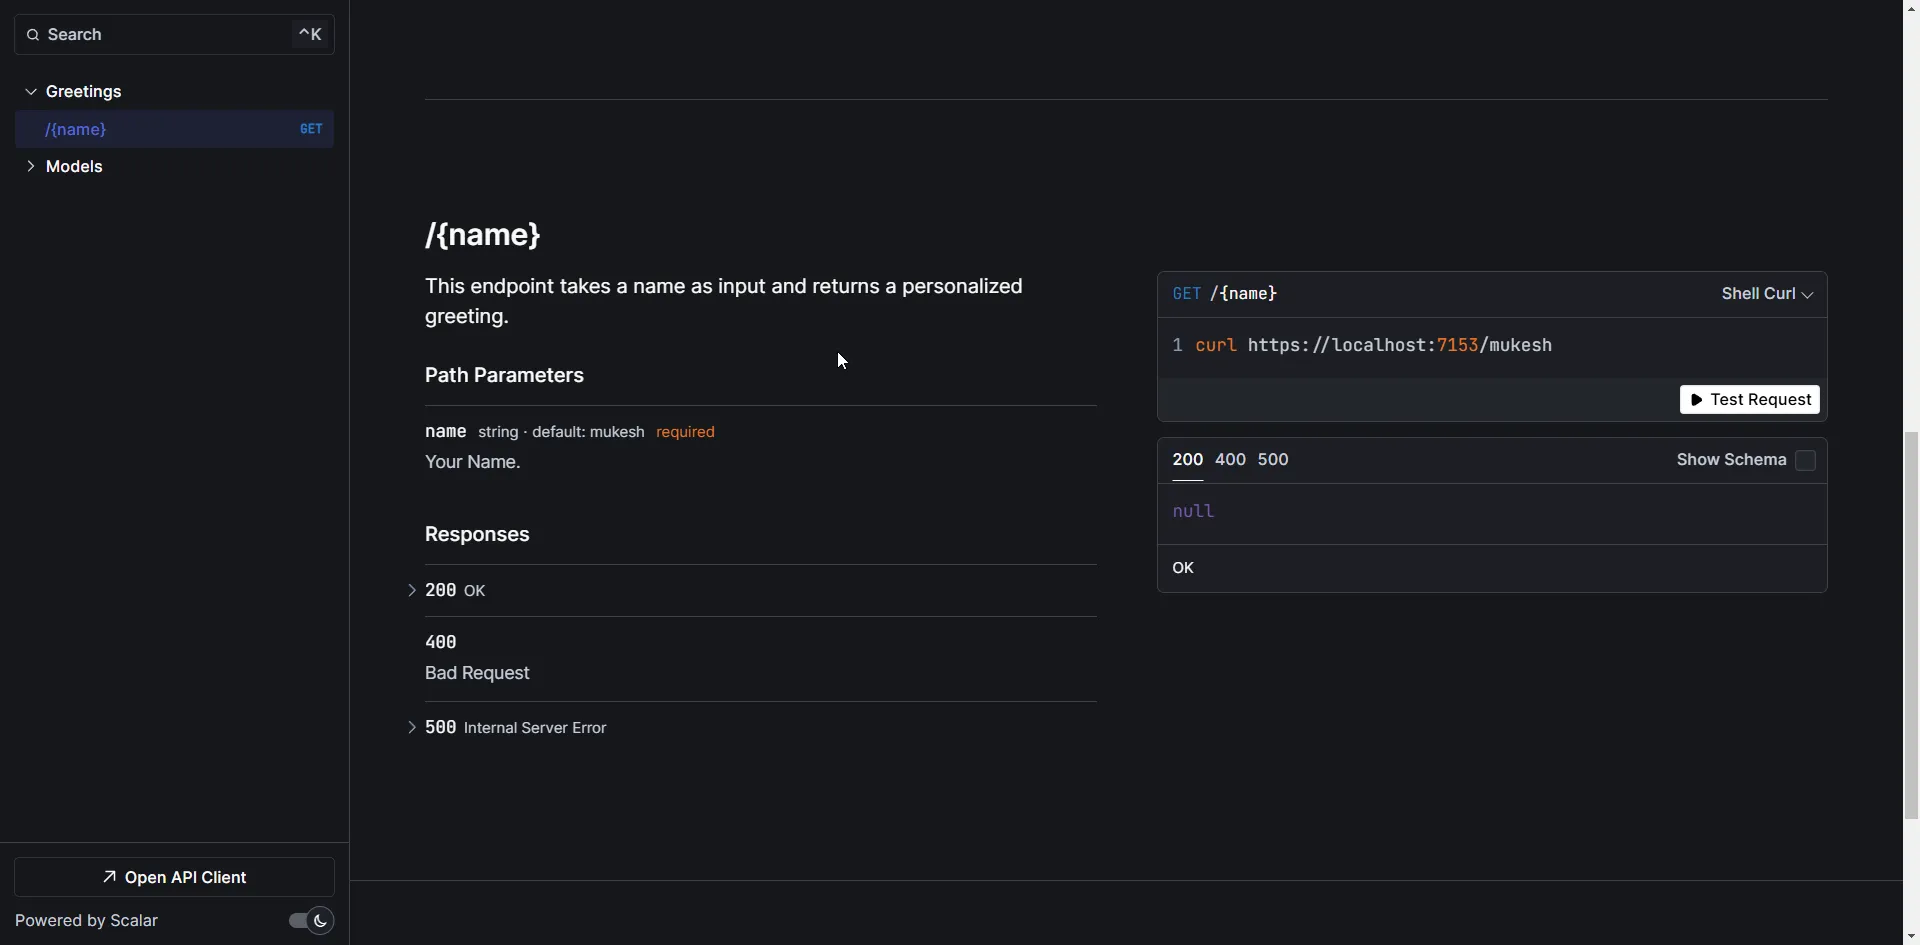
You can click on the Greetings GET Endpoint, and hit on Test Request. Also note that the client codes are included to access the API.
Here is the response I got while testing out the greetings endpoint.
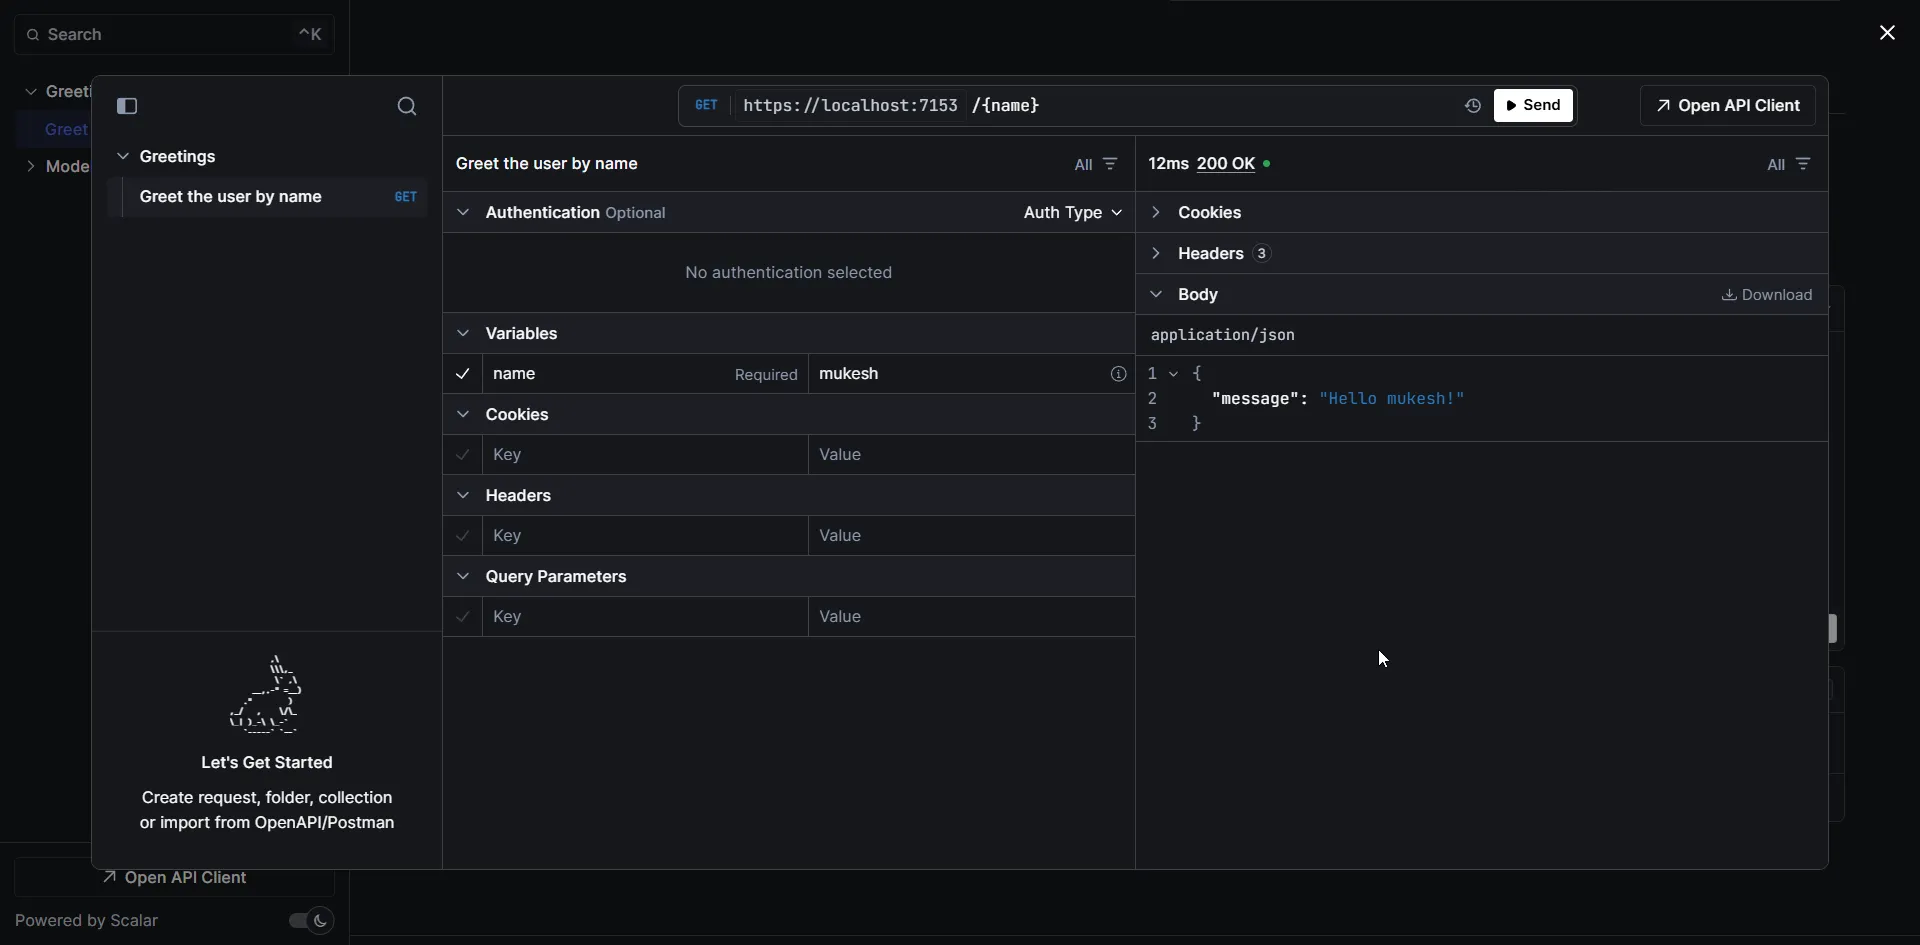
Customizing Scalar
The best part of Scalar is the amount of customizations possible, right from the theme, to dark mode toggles, to CSS, everything can be changed. Even authentication can be configured using this.
app.MapScalarApiReference(options =>{ options .WithTheme(ScalarTheme.Kepler) .WithDarkModeToggle(true) .WithClientButton(true);});You can further customize the looks of Scalar by the following: Read
Let me know if you want a deep dive article about Scalar in .NET!
Postman - Evergreen!
Postman remains one of the most popular tools for API testing and development, offering powerful features to simplify the process. One such feature is the ability to import OpenAPI specifications, allowing developers to quickly test and interact with their APIs without manual setup.
Importing an OpenAPI Spec into Postman
To import your .NET API’s OpenAPI specification into Postman, follow these simple steps:
-
Export the OpenAPI Specification:
- In your
.NETapplication, ensure that OpenAPI (Swagger) is enabled by adding it inProgram.cs:builder.Services.AddOpenApi()app.MapOpenApi(); - Run the application and navigate to
/openapi/v1.jsonto get the OpenAPI specification file.
- In your
-
Import the Spec into Postman:
- Open Postman and click on “Import” in the top-left corner.
- Choose the “Link” option and paste the URL to your Swagger JSON file (e.g.,
https://localhost:5001/openapi/v1.json). - Alternatively, download the
v1.jsonfile and import it directly.
-
Explore and Test the API:
- Once imported, Postman will automatically generate a collection of endpoints based on the OpenAPI spec.
- You can easily send requests, view responses, and test different endpoints without manually configuring them.
- Postman allows adding authentication, headers, query parameters, and body data effortlessly.
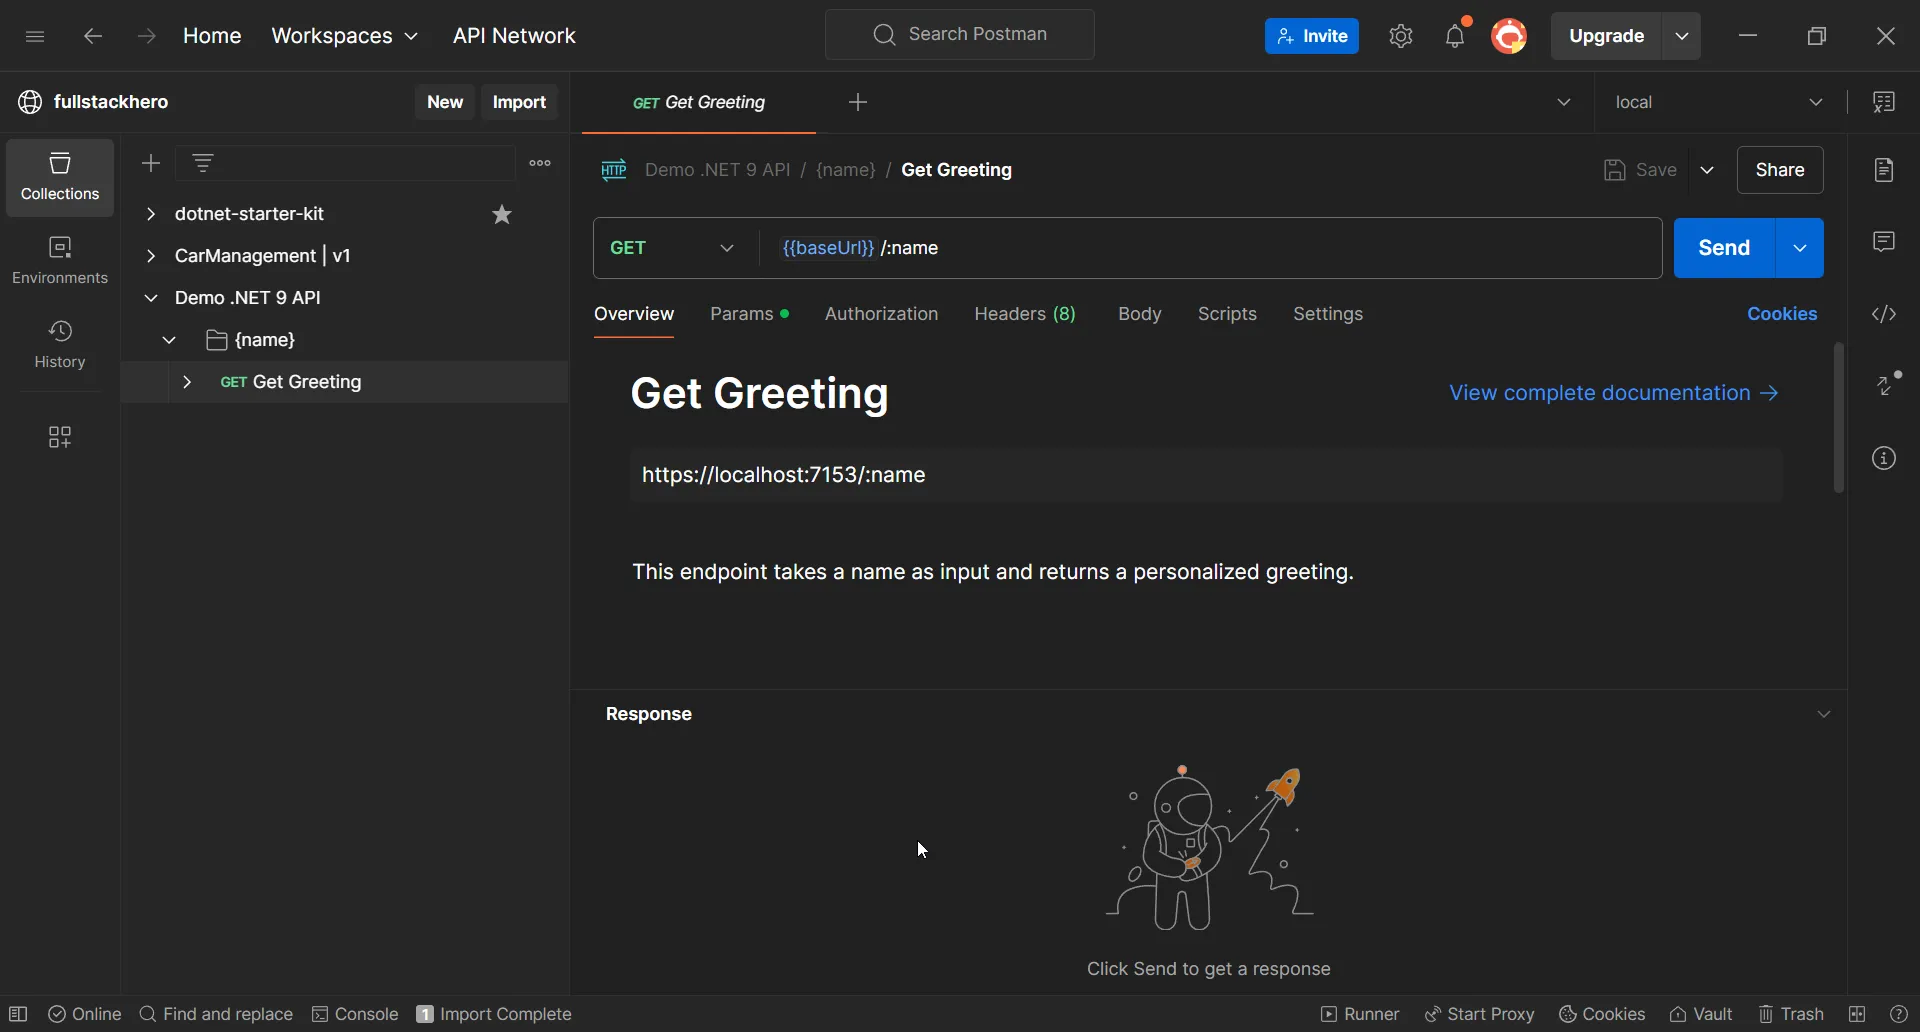
Benefits of Using Postman for .NET API Testing
- Automated Request Generation: No need to manually configure requests; Postman sets everything up based on the spec.
- Environment Variables: Easily switch between development, staging, and production environments.
- Collaboration: Share API collections with your team to streamline testing efforts.
- Monitoring & Automation: Schedule API tests and monitor performance over time.
By leveraging Postman’s OpenAPI import feature, you can streamline your API testing workflow, making it easier to validate and debug your .NET APIs efficiently.
Summary
In this article, we learned about Microsoft’s strategic shift in .NET 9, where they’ve moved away from including Swagger/Swashbuckle by default in Web API templates. Instead, they’ve introduced a native solution through Microsoft.AspNetCore.OpenApi, which generates OpenAPI specifications without third-party dependencies. This change addresses previous maintenance challenges while providing better integration with .NET’s ecosystem.
We also explored several alternatives for API documentation and testing in .NET 9. While developers can still manually add Swagger UI to their projects, exciting alternatives like Scalar have emerged, offering modern interfaces and rich features like client code generation. Additionally, the article demonstrated how established tools like Postman can seamlessly integrate with the new OpenAPI specifications.
If you found this information valuable for your .NET development journey, please share this article with your fellow developers and let them know about these important changes! #dotnet #webapi #development


