Let’s automate the deployment of a brand-new .NET 9 Web API to Amazon ECS using a GitHub Actions CI/CD pipeline. In this guide, we’ll walk through building a .NET 9 Docker image directly on GitHub, pushing it to Amazon Elastic Container Registry (ECR), creating an ECS task definition, and configuring an ECS service to fetch and deploy the latest Docker image. By the end, your application will be up and running on ECS with a fully automated workflow. Let’s get started!
This article is sponsored by AWS. Huge thanks for helping me produce more .NET on AWS content!
What we’ll Build?
In this article we will be building a simple production grade deployment workflow that can automate the entire process.
- The Source Code will be maintained on GitHub (private repository).
- The CI/CD pipeline will be powered by GitHub Actions.
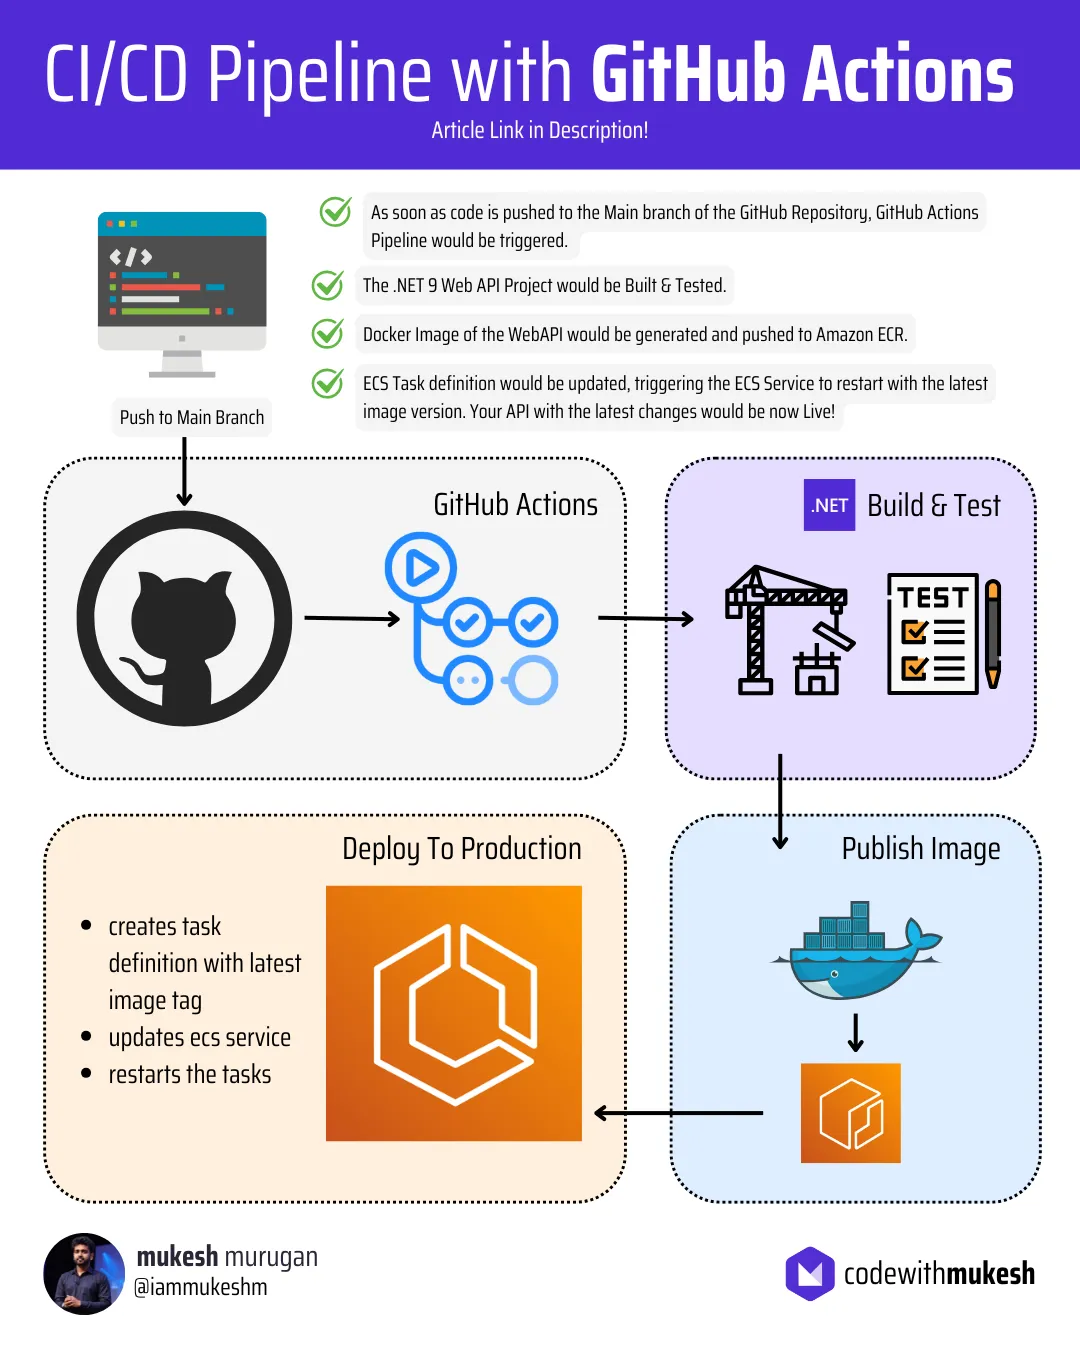
- As part of the pipeline, whenever there is a new code push to the main branch of the repository,
- The .NET 9 Web API will be built.
- Test cases would be run, if any exists.
- Docker Image of the WebAPI would be generated and pushed to Amazon ECR.
- An ECS Task Definition will be created to define how the containerized application runs.
- An ECS Service will be configured to automatically fetch and deploy the latest Docker image.
- The latest version of your API will now be in Production.
What is CI/CD?
CI/CD stands for Continuous Integration and Continuous Deployment (or Delivery). It is a set of practices and automation processes designed to streamline the development, testing, and deployment of software applications.
Continuous Integration (CI)
CI focuses on automating the integration of code changes from multiple contributors into a shared repository. Developers frequently commit their changes, and each change triggers an automated process that:
- Builds the application.
- Runs automated tests to detect bugs or issues early.
The goal of CI is to ensure that new code integrates smoothly with the existing codebase, reducing integration problems and improving software quality.
Continuous Deployment (CD)
CD extends CI by automating the delivery of the application to production or staging environments. After passing all tests and validations in the CI phase, the code is automatically deployed.
There are two common forms of CD:
- Continuous Delivery: Ensures the application is always ready for release but requires a manual approval step for production deployment.
- Continuous Deployment: Fully automates the release process, deploying updates to production without manual intervention.
Benefits of CI/CD
- Faster and more reliable software delivery.
- Early detection of bugs and integration issues.
- Reduced manual effort and human error in the deployment process.
- Increased developer productivity and collaboration.
- Shortened feedback loops and improved customer satisfaction.
CI/CD pipelines are essential for modern software development and deployment workflows, particularly in agile and DevOps environments. Tools like GitHub Actions, Jenkins, GitLab CI, and AWS CodePipeline make it easier to implement CI/CD for a wide range of applications.
Why GitHub Actions?
GitHub Actions is a built-in CI/CD tool for GitHub, offering seamless integration with repositories to automate build, test, and deployment workflows.
Key Benefits:
- Native Integration: Directly connected to GitHub events like commits and pull requests.
- Custom Workflows: Define tailored pipelines using simple YAML files.
- Action Marketplace: Access prebuilt actions for common tasks.
- Cross-Platform Support: Build and test on Linux, Windows, and macOS.
- Scalability: Use hosted or self-hosted runners for flexible performance.
- Cost-Effective: Generous free-tier for public and private repositories.
- Secure: Features encrypted secrets and auditable logs.
GitHub Actions is an efficient, cost-effective solution for automating deployments. If you are new to CI/CD Pipelines, GitHub Actions is the best option to start with!
Pre-Requisites
As usual, here are the pre-requisites for this article.
- .NET 9 SDK installed on your machine.
- Visual Studio
- Visual Studio Code (I prefer this to write anything apart from C# code. We will be using VS Code to write YML files.)
- AWS Account
- GitHub Account
- Working knowledge of ECS, ECR, and IAM in general.
Let’s get started!
Setting up the Basics
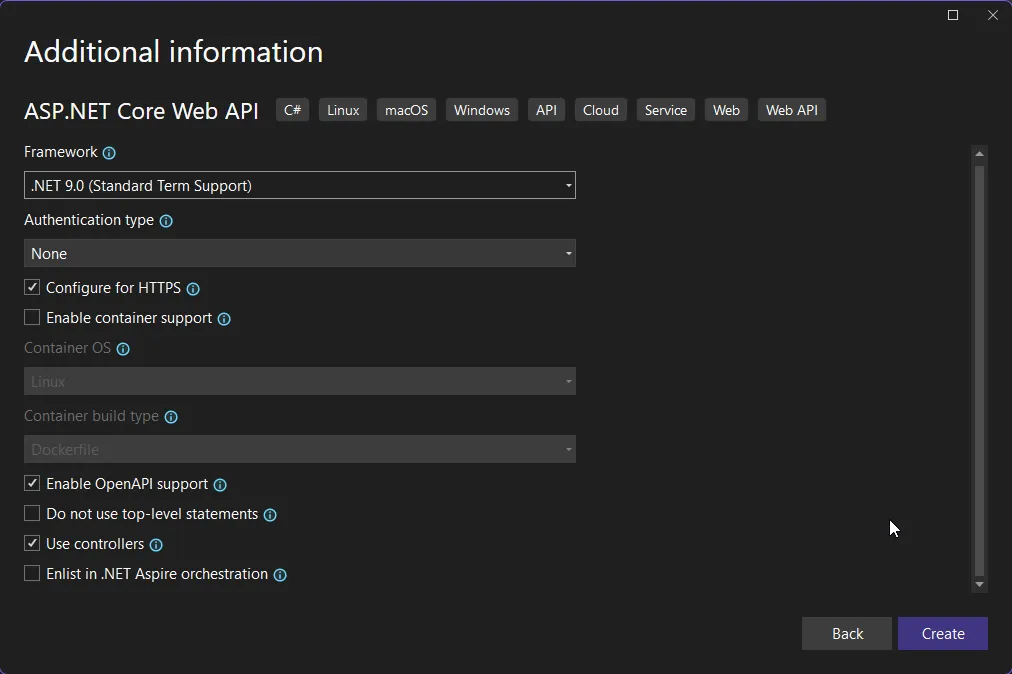
First up, let’s create a .NET 9 ASP.NET Core Web API Project via Visual Studio IDE. I will name my project as BookManager. We are not going to have any other functionalities for this API, as this guide is to only demonstrate the pipeline deployment. I will just add a single endpoint that returns a Hello World message.
And here is the code I have on Program.cs.
var builder = WebApplication.CreateBuilder(args);var app = builder.Build();app.MapGet("/", () => "Hello World!");app.Run();It’s incredible how compact and efficient .NET has become over the years. With just a single file and about four lines of code, you can spin up a fully functional API server! The evolution is truly remarkable.
Configuring Docker Support
Next we need to add Containerization support for this API. For this, simply open up the .csproj file and add the below highlighted code.
<Project Sdk="Microsoft.NET.Sdk.Web"> <PropertyGroup> <TargetFramework>net9.0</TargetFramework> <Nullable>enable</Nullable> <ImplicitUsings>enable</ImplicitUsings> <ContainerImageTags>1.0.0;latest</ContainerImageTags> <ContainerRepository>bookmanager</ContainerRepository> <PublishProfile>DefaultContainer</PublishProfile> </PropertyGroup></Project>Here, we define the required name for the generated docker image, it’s tagged version, and the PublishProfile.
To test this out, simply run the following command at the root of your csproj! Make sure that you have Docker Desktop running, as this process requires Docker Daemon.
dotnet publish --os linux --arch x64
Now, open up Docker Desktop Images, and you can see our newly published BookManager Image!

Configuring GitHub Actions for CI/CD
Now, let’s focus on the core tasks of this article. I prefer to use VS Code for writing scripts / YAML configuration files. We’ll have to create a .github/workflows directory and add a file called deploy.yml.
name: Deploy 🚀
on:  workflow_dispatch:  push:    branches:      - main
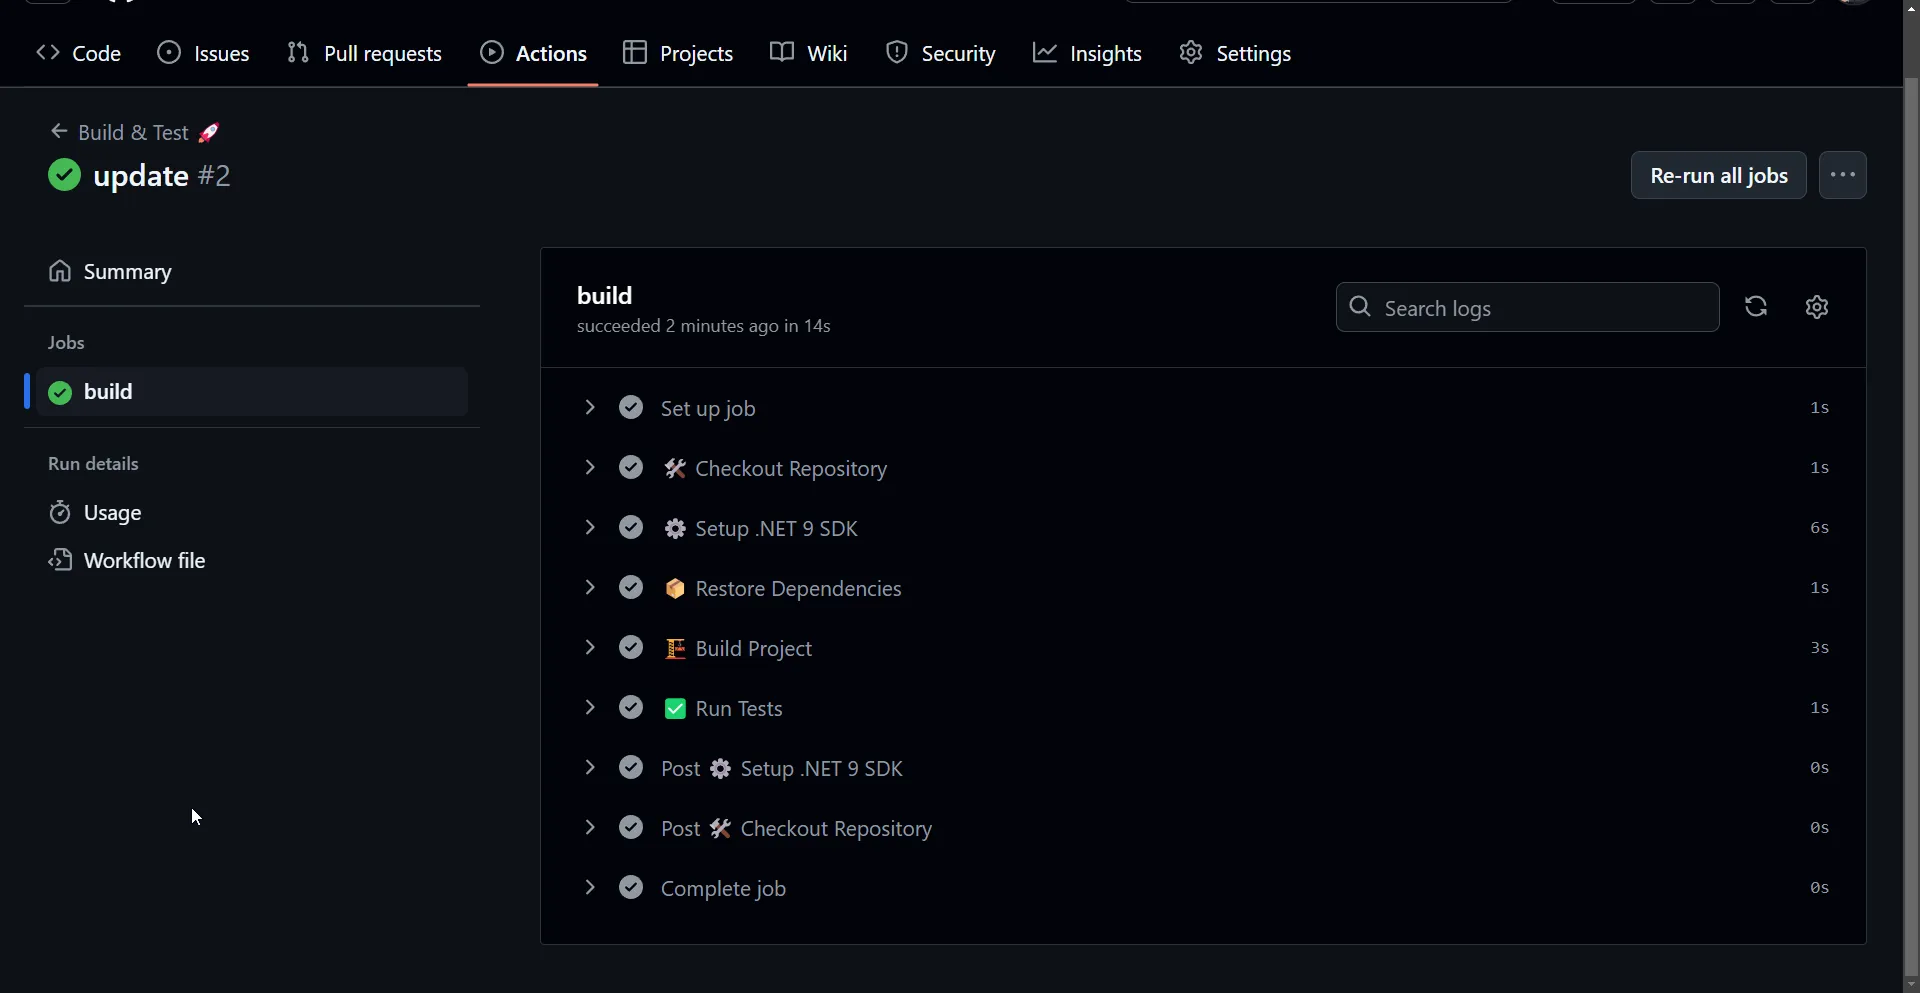
jobs:  build:    runs-on: ubuntu-latest    steps:      - name: 🛠️ Checkout Repository        uses: actions/checkout@v4      - name: ⚙️ Setup .NET 9 SDK        uses: actions/setup-dotnet@v4        with:          dotnet-version: 9.x      - name: 📦 Restore Dependencies        run: dotnet restore ./BookManager/BookManager.csproj      - name: 🏗️ Build Project        run: dotnet build ./BookManager/BookManager.csproj --no-restore      - name: ✅ Run Tests        run: dotnet test ./BookManager/BookManager.csproj --no-build --verbosity normal
As soon as I commit any changes into the main branch, the deploy workflow will be triggered.
Building and Pushing Docker Images to Amazon ECR
As the next step, we need to add a new job to the deploy pipeline to build and publish the container image to Amazon ECR. For this, first let’s login to AWS Management Console, and create a new Image Repository on ECR.
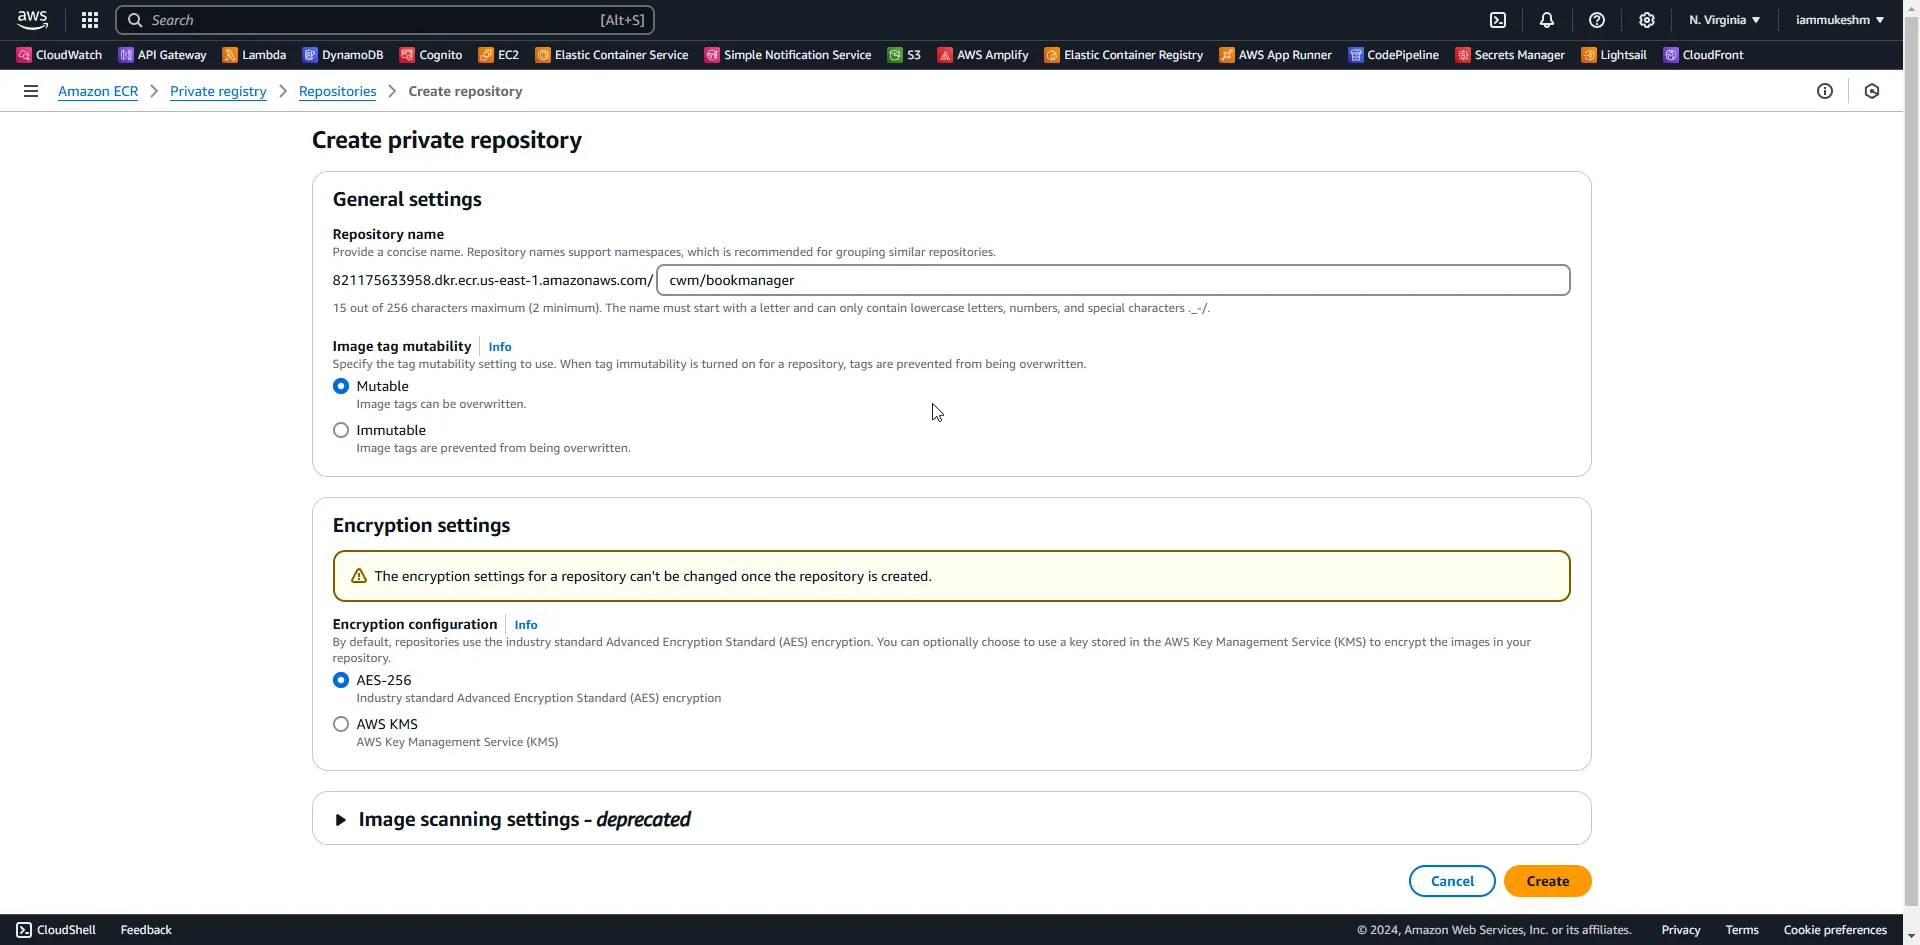
Once created, copy and keep the URI of the newly created repository.
We’ll also need AWS credentials that GitHub Actions would need, to push to Amazon ECR. For this, open up IAM on AWS Management Console, and add a new user.
I have added a new user named github.actions and assigned the AmazonEC2ContainerRegistryFullAccess permissions to it, so that this user has complete permissions to access ECR.
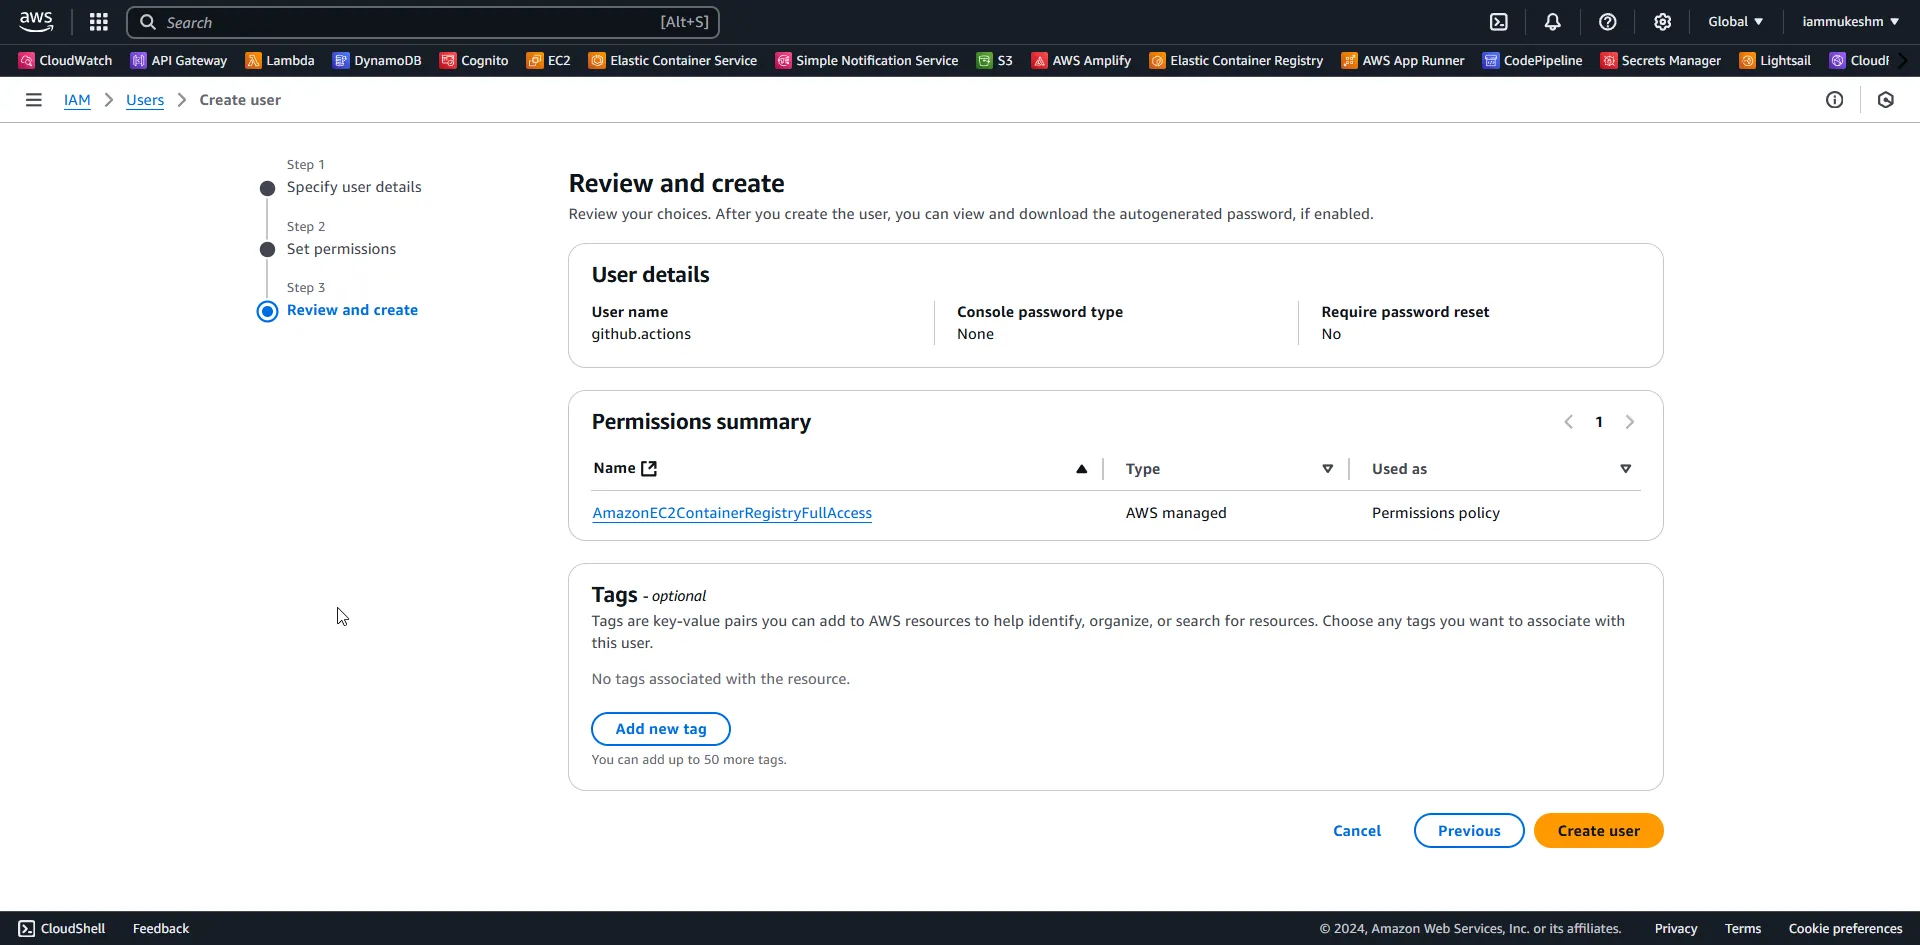
Once the user is created, let’s generate a set of credentials / access keys for it. Open up the newly created user from IAM, navigate to the Security Credentials tab, Under Access Key, create a new access key. It will allow you to download a CSV file for safe keeping.
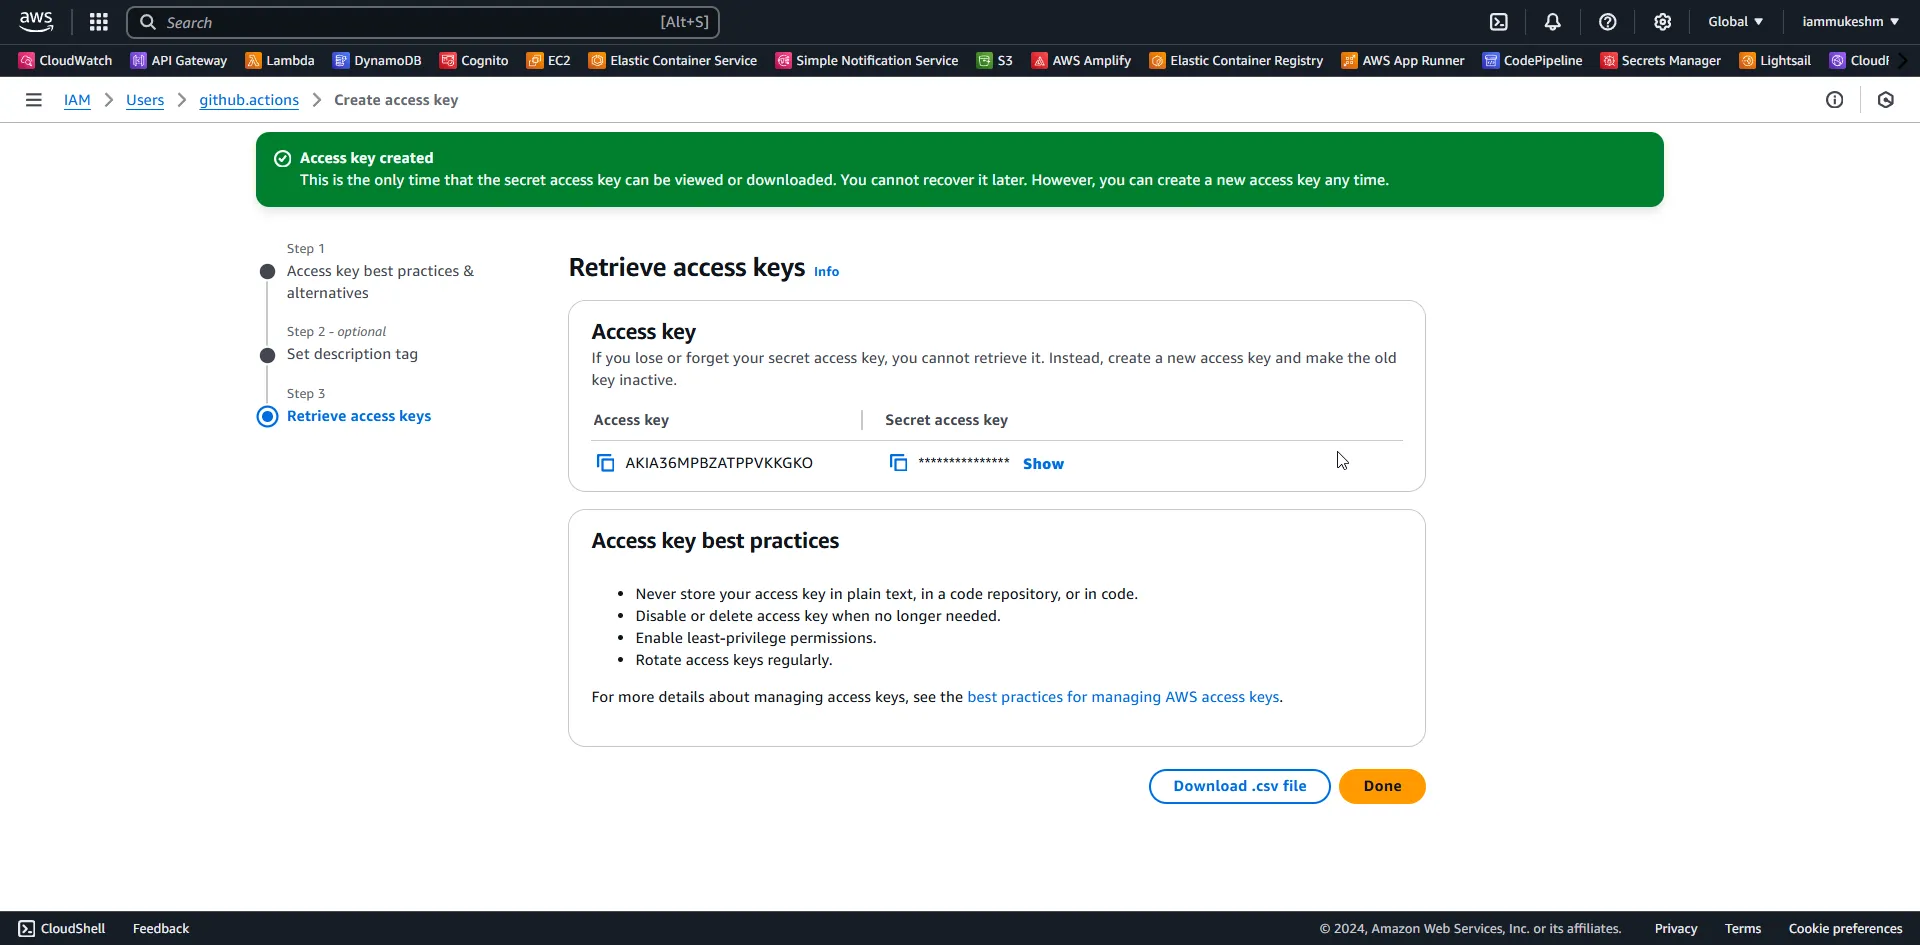
Next, we need to store these credentials as secrets on GitHub. Navigate to your GitHub repository, and click on Settings. Here, under Security, expand Secrets and variables, and open up Actions. We will add 3 Secrets to this repository.
- AWS_ACCESS_KEY_ID - ID from the downloaded CSV file.
- AWS_SECRET_ACCESS_KEY - Secret Key from the downloaded CSV file.
- REPOSITORY - The value of this will be the URI that we copied earlier from Amazon ECR.
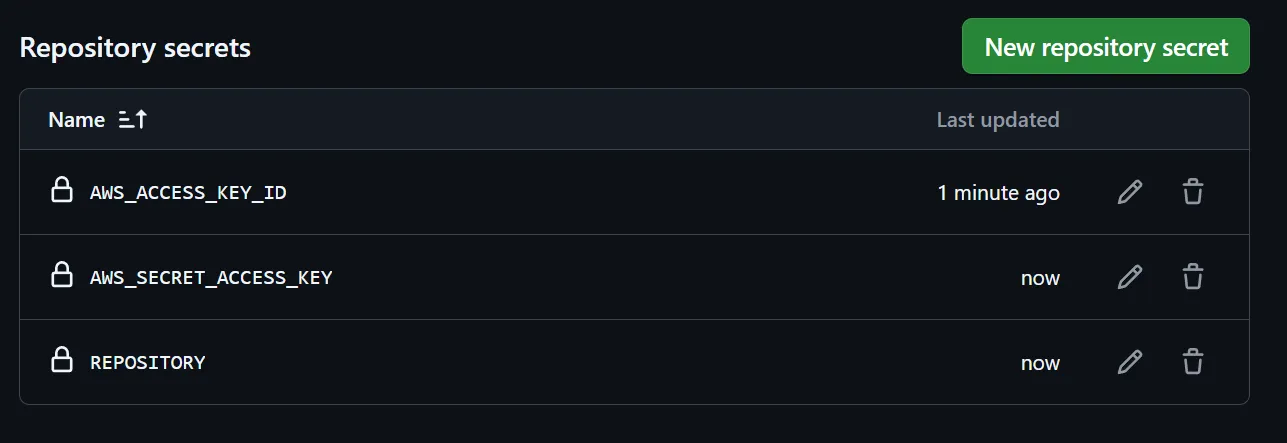
With all the configured, let’s go back to VS Code, and continue writing the publish job in the deploy pipeline.
  publish:    needs: build    if: github.event_name == 'push' || github.event_name == 'workflow_dispatch'    runs-on: ubuntu-latest    steps:      - name: 🛠️ Checkout Repository        uses: actions/checkout@v4
      - name: ⚙️ Setup .NET 9 SDK        uses: actions/setup-dotnet@v4        with:          dotnet-version: 9.x
      - name: 🔐 Configure AWS Credentials        uses: aws-actions/configure-aws-credentials@v4        with:          aws-access-key-id: ${{ secrets.AWS_ACCESS_KEY_ID }}          aws-secret-access-key: ${{ secrets.AWS_SECRET_ACCESS_KEY }}          aws-region: us-east-1
      - name: 🔑 Login to Amazon ECR        run: aws ecr get-login-password --region us-east-1 | docker login --username AWS --password-stdin ${{ secrets.REPOSITORY }}
      - name: 📦 Publish Docker Image to Amazon ECR        working-directory: ./BookManager/        run: |          dotnet publish -c Release -p:ContainerRepository=${{ secrets.REPOSITORY }} -p:RuntimeIdentifier=linux-x64          docker push ${{ secrets.REPOSITORY }} --all-tags
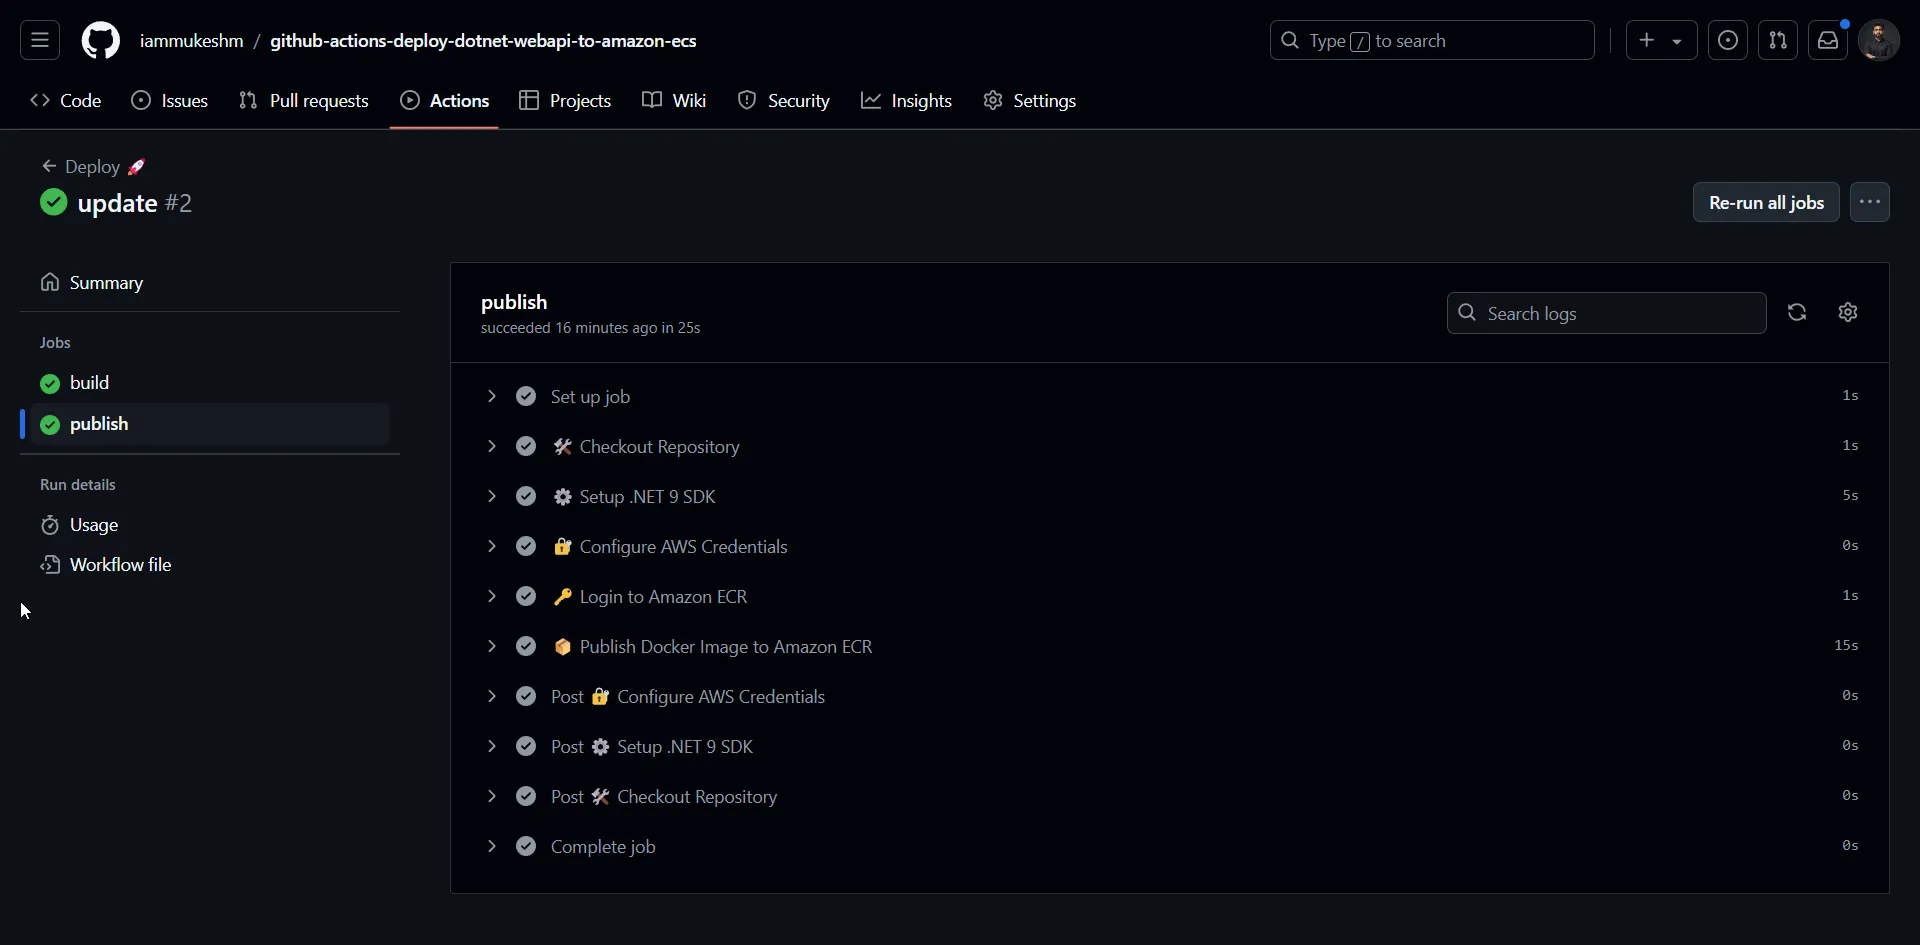
The publish job handles publishing a Docker image of a .NET 9 application to Amazon Elastic Container Registry (ECR). Here’s a step-by-step explanation of what it does:
- Configure AWS Credentials:
- Sets up AWS credentials (access key, secret key, and region) required to interact with AWS services using the
aws-actions/configure-aws-credentialsaction. These credentials are securely stored in GitHub Secrets.
- Sets up AWS credentials (access key, secret key, and region) required to interact with AWS services using the
- Login to Amazon ECR:
- Authenticates with Amazon ECR (container registry) using AWS credentials. It retrieves a login token and uses it to log into Docker.
- Publish Docker Image to Amazon ECR:
- Changes to the
BookManager/directory and publishes the application as a Docker image using the.NET publishcommand. - Specifies:
-c Release: The release build configuration.-p:ContainerRepository: The ECR repository name.-p:RuntimeIdentifier=linux-x64: The target platform.- Pushes the resulting Docker image to the specified Amazon ECR repository, including all associated tags. The tags will be retrieved from the csproj file, remember?
- Changes to the
Upto here, we have automated the process of building, containerizing, and uploading the .NET application image to an ECR Repository.
Once these changes are pushed to the main branch, the pipeline will be triggered, and the publish jon will start soon after the build job. Here is the publish job.
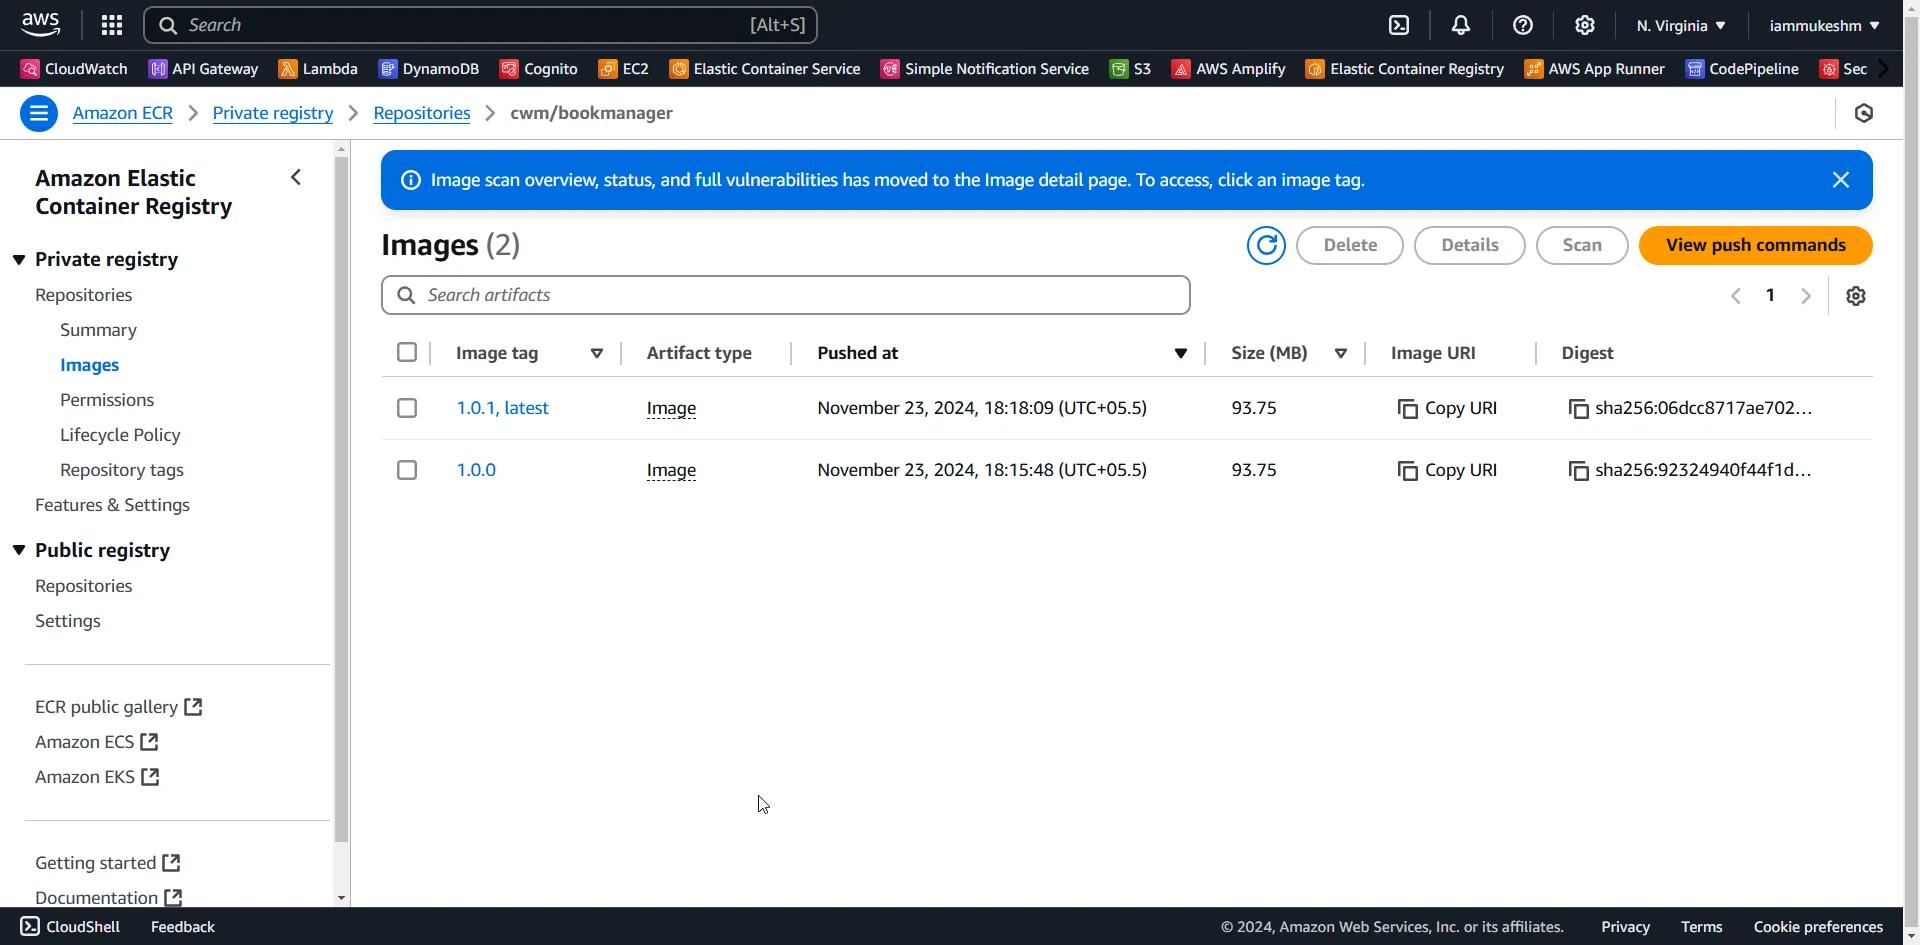
After the pipeline run is completed, navigate to ECR to see the new images pushed to the repository as below.
Deploying to ECS Fargate
For the deployment process, there are a bit of manual steps involved. We will have to go to AWS Management Console and create the following :
- ECS Cluster
- ECS Task Definition
- ECS Service
Note that you will have to do this only for the first time, and the subsequent pushes will be entirely automated.
I hope you already have enough knowledge to create the required ECS Resources. If not, please follow along with the below article.
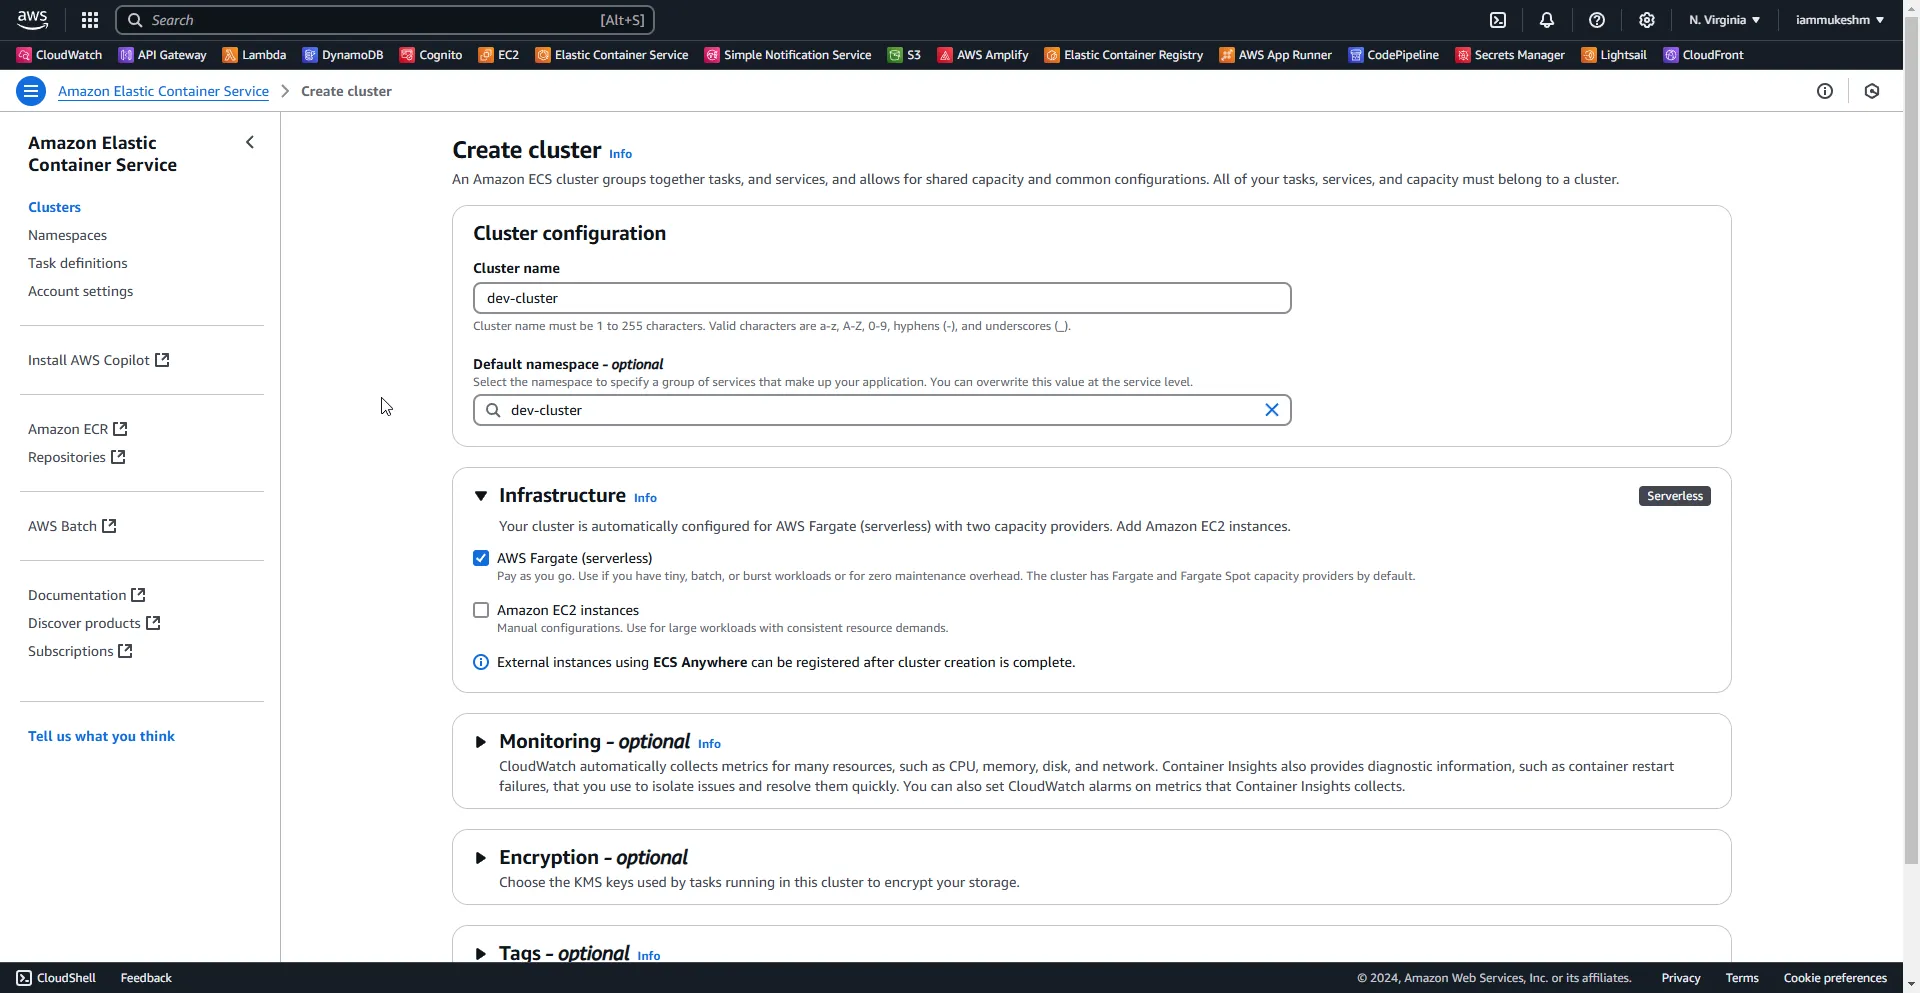
Creating the Cluster
I will name the cluster as bookmanager and leave everything else to the default.
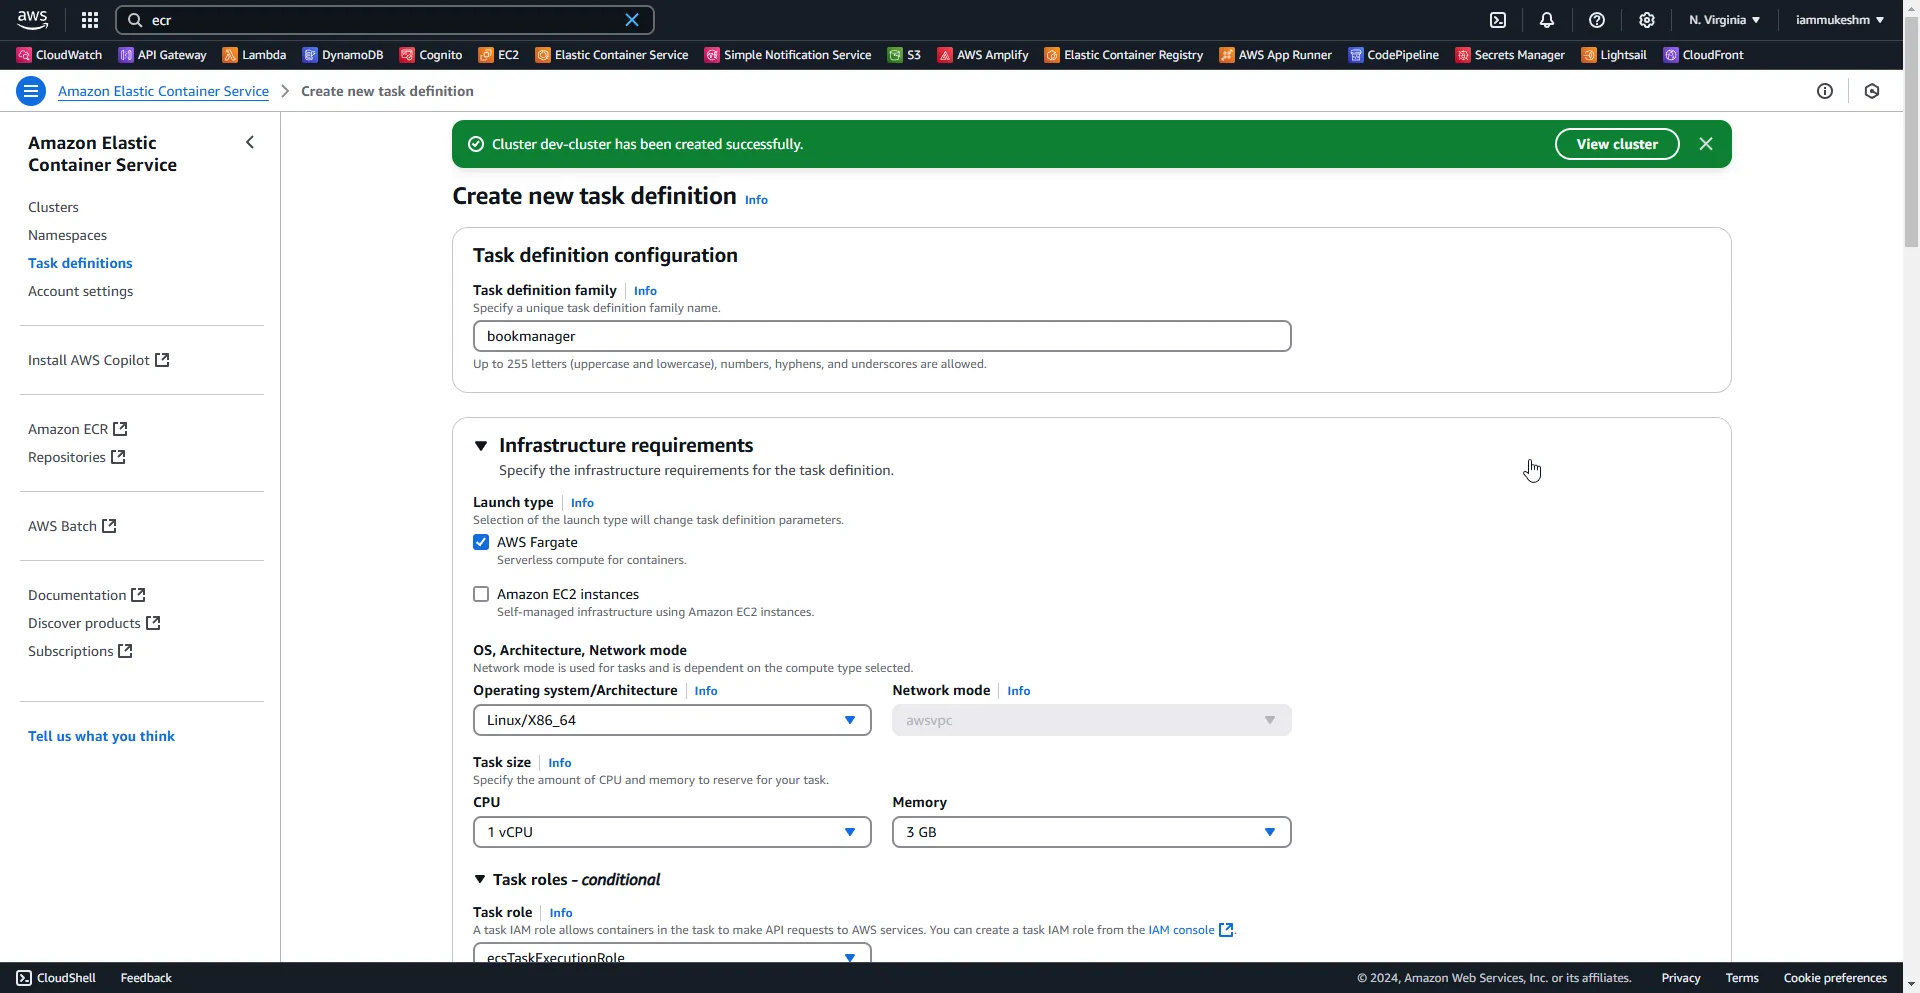
Creating the Task Definition
A simple task definition named bookmanager where I specify the CPU, Memory, Container Image URI (ECR), and other basic configurations.
Once the task definition is created, we will need to copy it’s JSON content to our GitHub repository. This is because we will need the content of this file for our Deployment Job in GitHub actions.
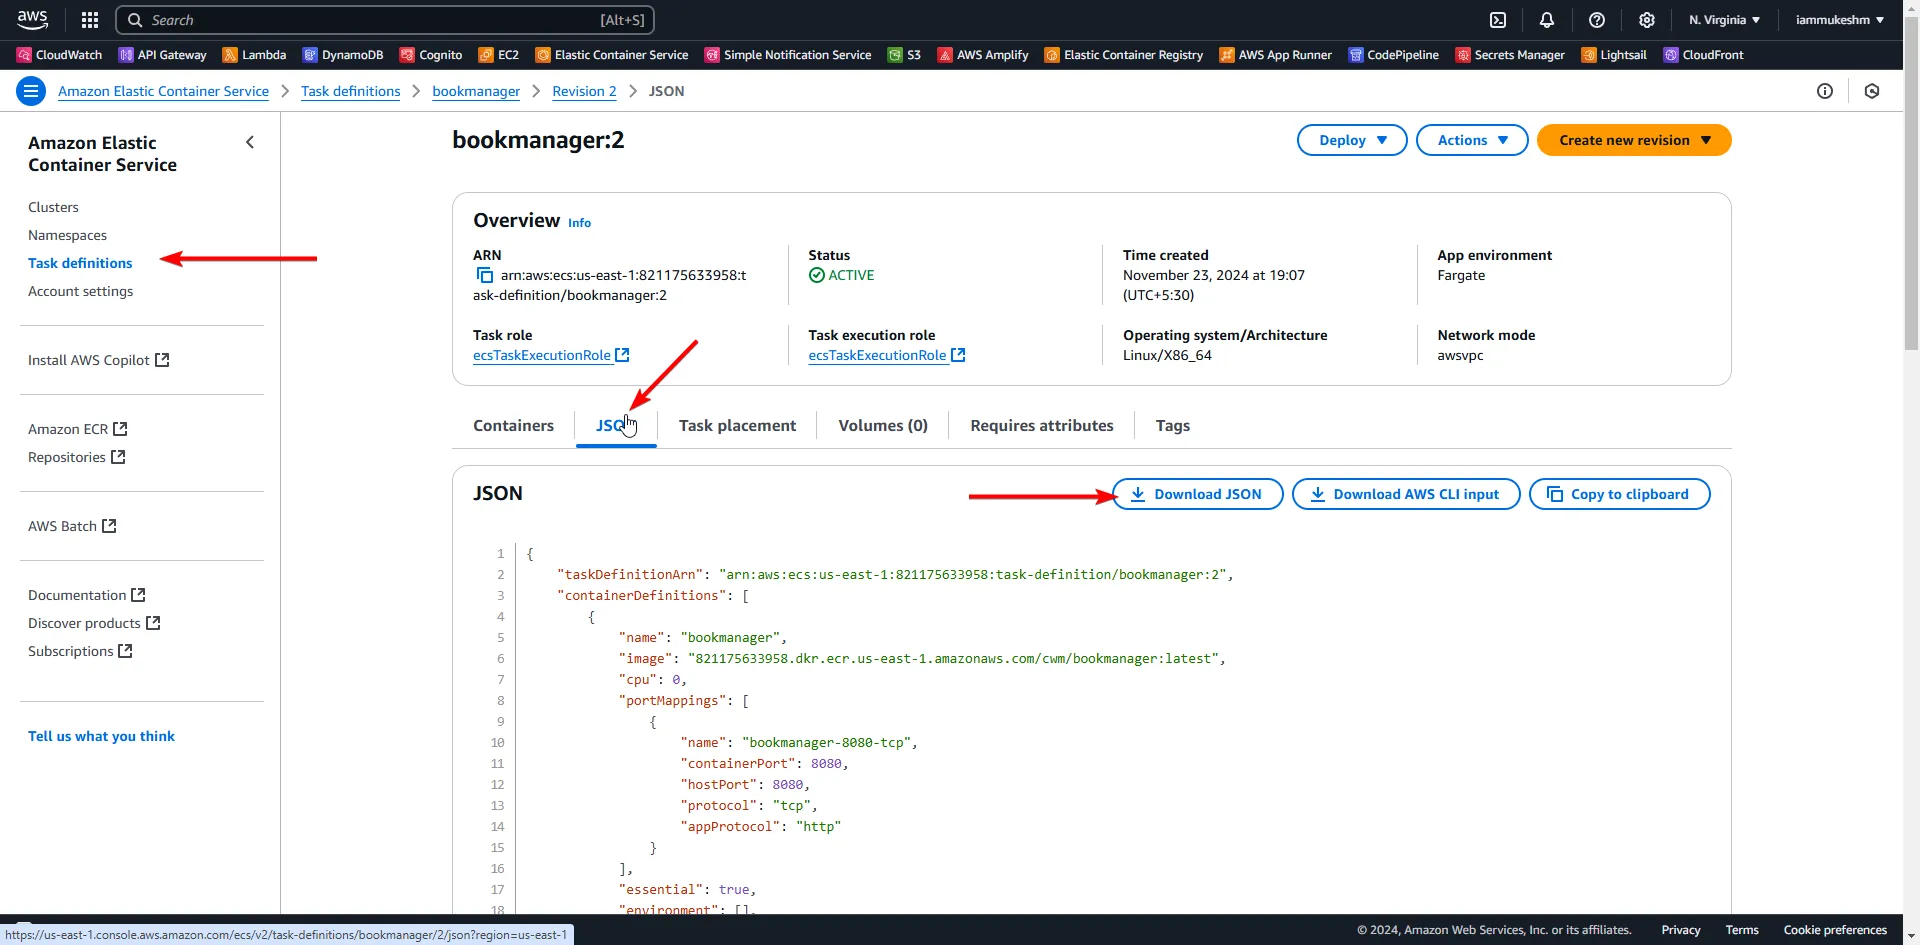
I downloaded and copied this file to ./deployments/ecs-task-definition.json. We will be using this path later in the article.
Creating the ECS Service with Application Load Balancer
Finally, we need to create an ECS Service.
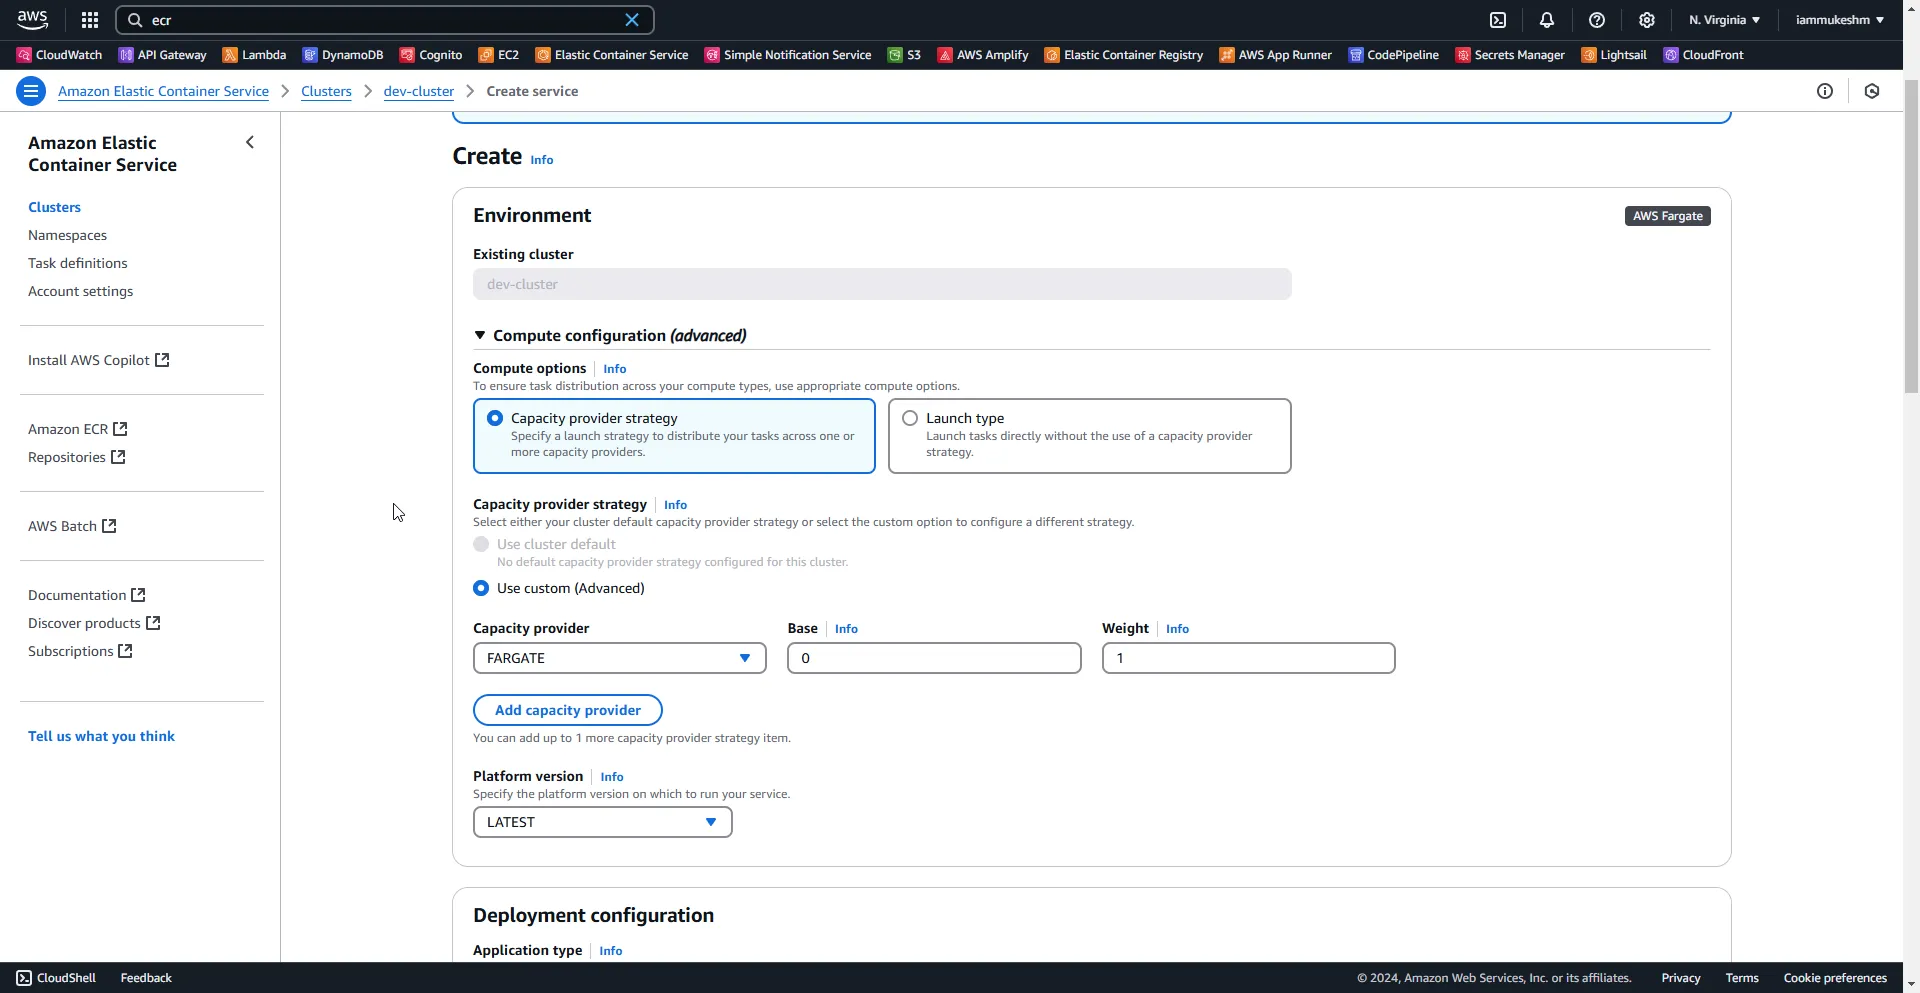
The only additional configuration here is to add an Application Load Balancer. This is to get a scalable system. You can avoid this step if you want.
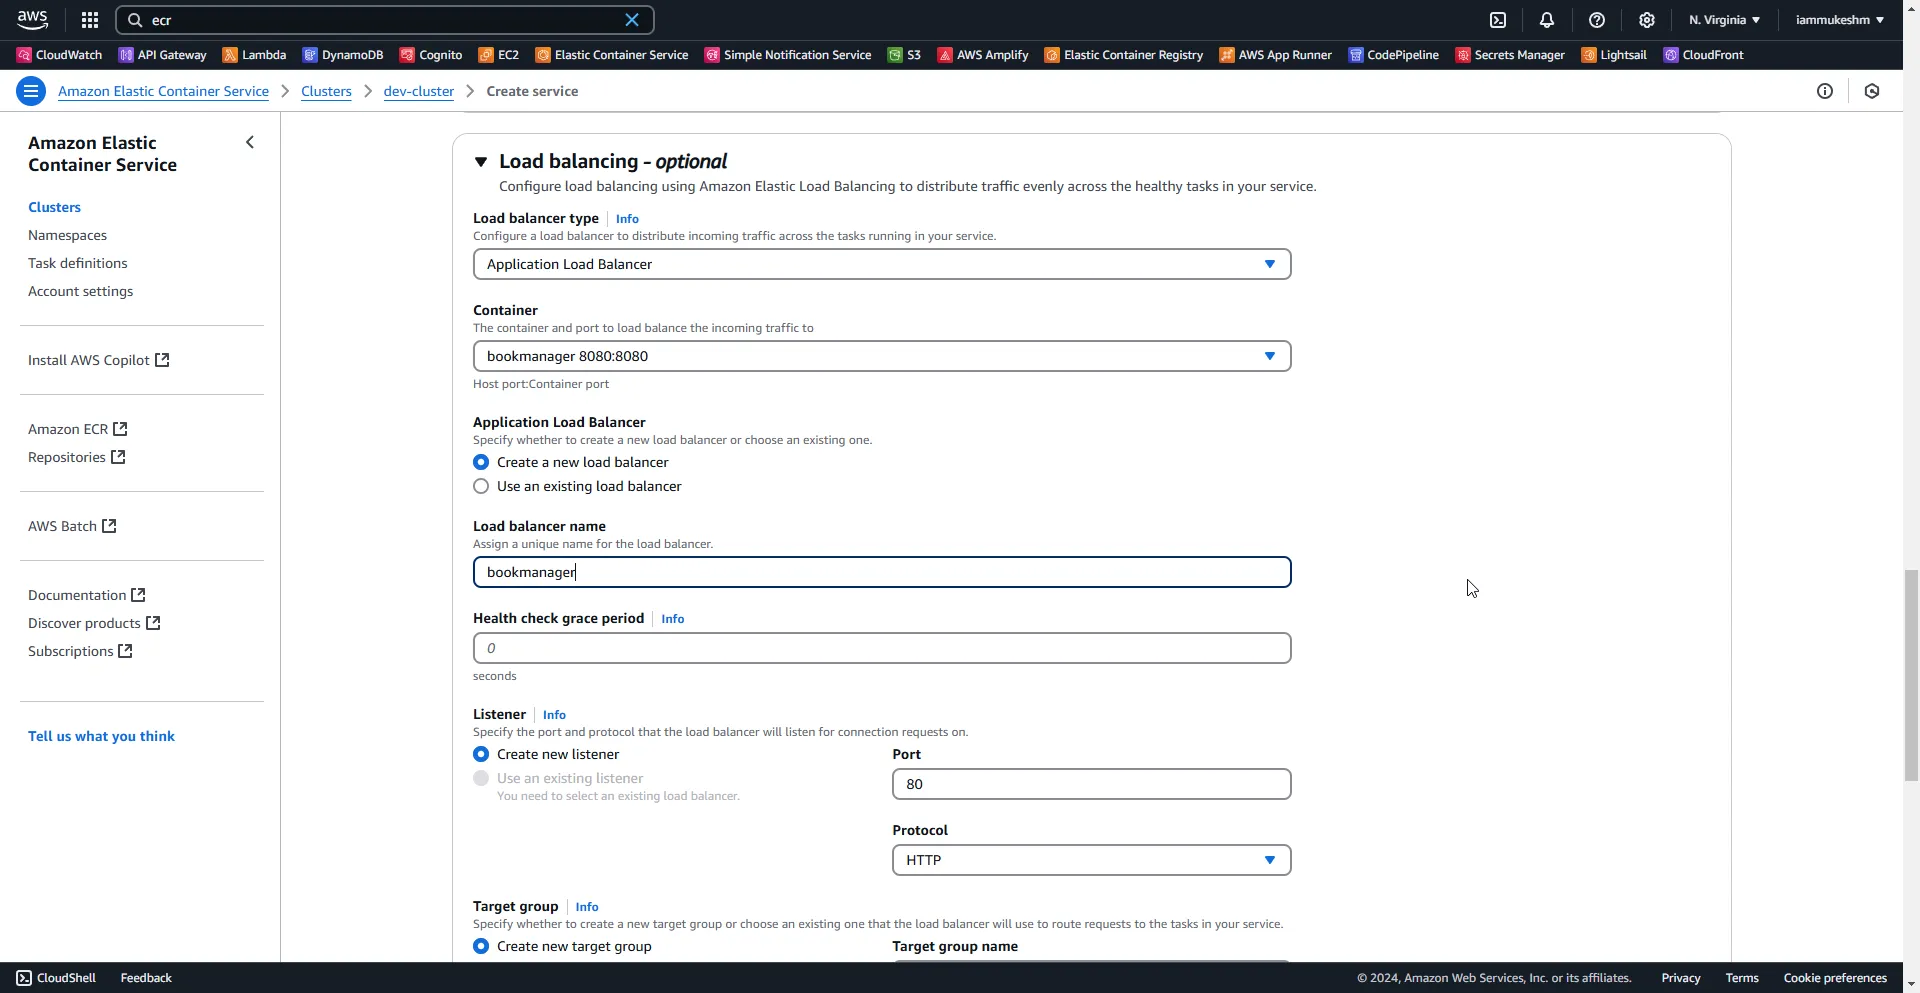
With that done, you app would be up and running on ECS Fargate in a couple of minutes. To grab the URL of the deployed .NET Web API , simply go into the cluster -> services -> configuration and networking tab, and copy the DNS name from the Network Configuration section.

There is one final thing to do - add permissions to the earlier created github.actions user to work with ECS.I have added the AmazonECS_FullAccess policy to this user as you see below.

With all the infrastructure concerns taken care of, let’s write the deploy job in our pipeline.
  deploy:    needs: publish    if: github.event_name == 'push' || github.event_name == 'workflow_dispatch'    runs-on: ubuntu-latest    steps:      - name: 🛠️ Checkout Repository        uses: actions/checkout@v4
      - name: 🔐 Configure AWS Credentials        uses: aws-actions/configure-aws-credentials@v4        with:          aws-access-key-id: ${{ secrets.AWS_ACCESS_KEY_ID }}          aws-secret-access-key: ${{ secrets.AWS_SECRET_ACCESS_KEY }}          aws-region: us-east-1      - name: 🚀 Deploy to Amazon ECS        uses: aws-actions/amazon-ecs-deploy-task-definition@v2        with:          task-definition: ./deployments/ecs-task-definition.json          service: bookmanager          cluster: dev-cluster          wait-for-service-stability: true
This will be final job in our pipeline, and would only run after the build and publish jobs are completed. Here, we will checking out the repository first, since we are dependant on the ecs-task-definition.json file. Next, as usual, we need to configure the AWS Credentials.
The final step is Deploy to Amazon ECS. Here we will use the aws-actions/amazon-ecs-deploy-task-definition, and pass the task definition json file path, the service name, and cluster name. Along with this we will set the wait-for-service-stability flag to true, so that the pipeline would be marked as completed only when the ECS Service is stable.
Let’s see it in action!
Triggering the Deployment Pipeline & Testing
Before doing any changes, let’s open up the copied DNS url and open it up on our browser. You can see the “Hello World” Message.
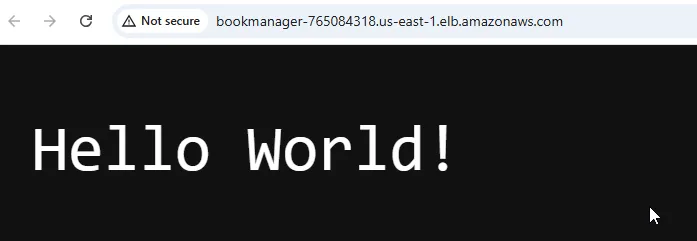
Let’s now change this message to Hello World V2! and push the changes, and watch our GitHub Actions Pipeline.
What’s expected now?
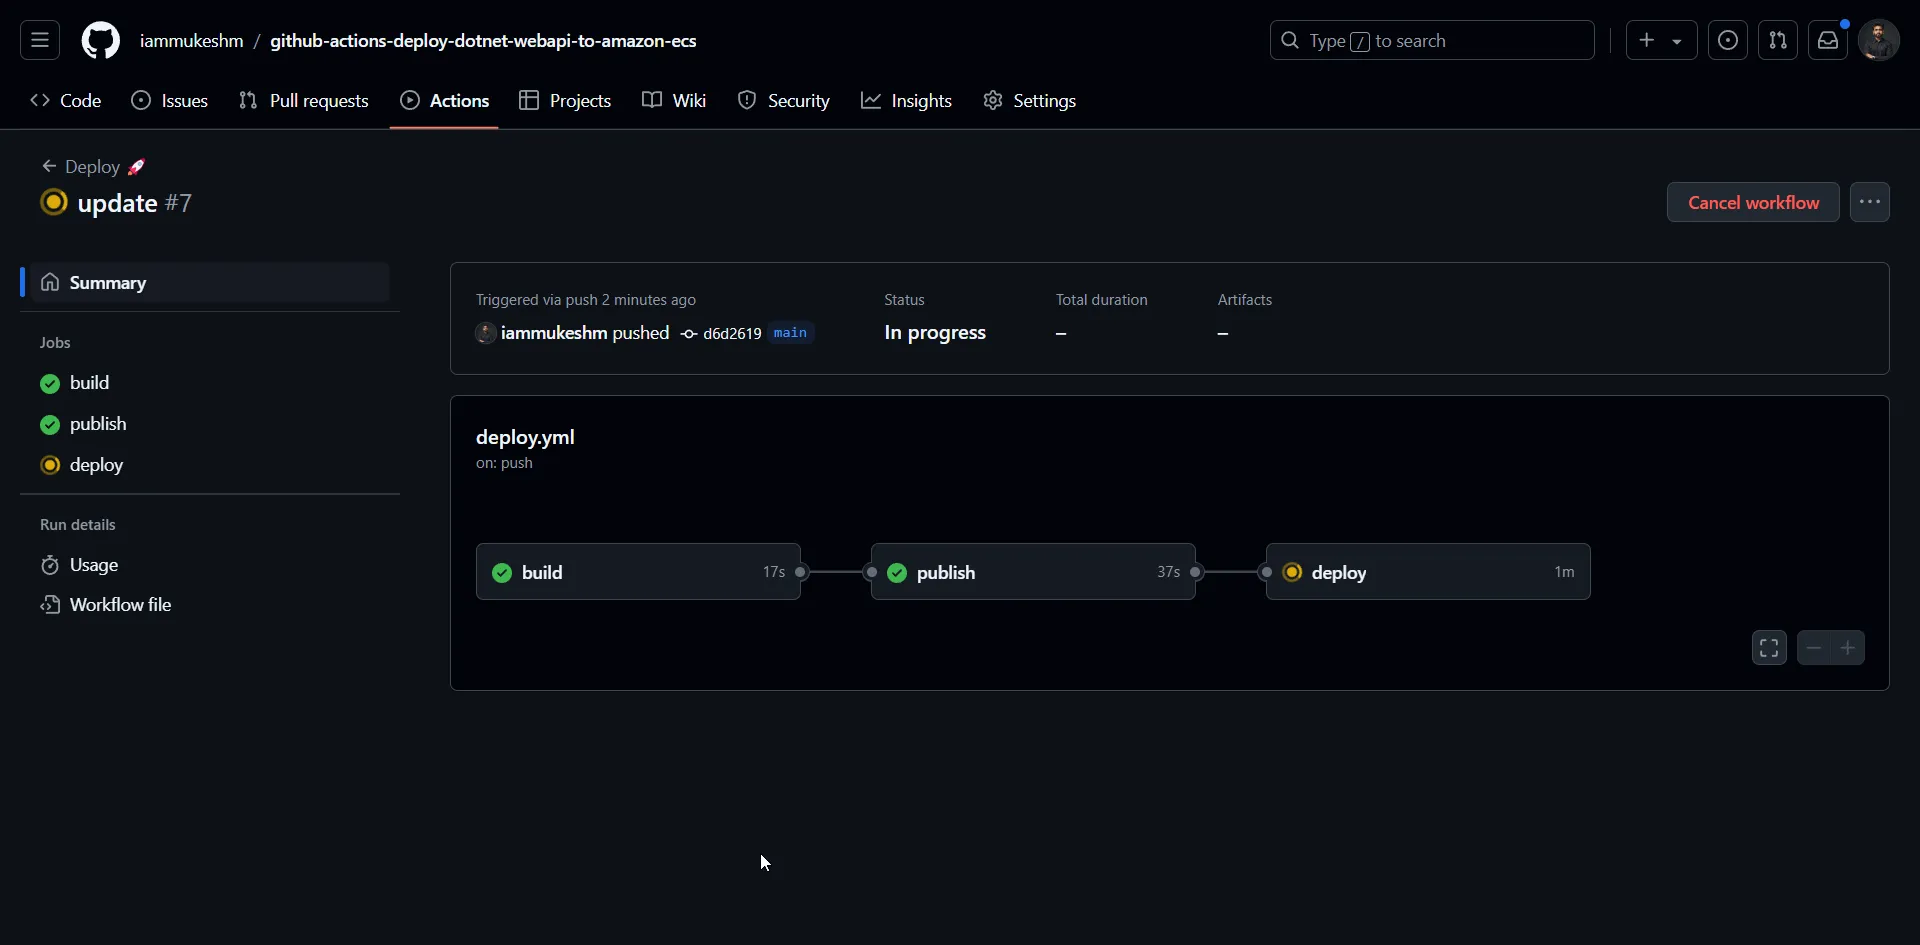
- As soon as I push to the main branch, the
deploypipeline would be triggered. - The code would be built against the .NET 9 SDK.
- A new Image containing the changes would be published to the ECR Repository.
- Finally, the a new task definition would be created, which would trigger a new ECS Deployment.
- Our changes would be online!
Here is the current pipeline’s progress.
And here is the Deploy Job.
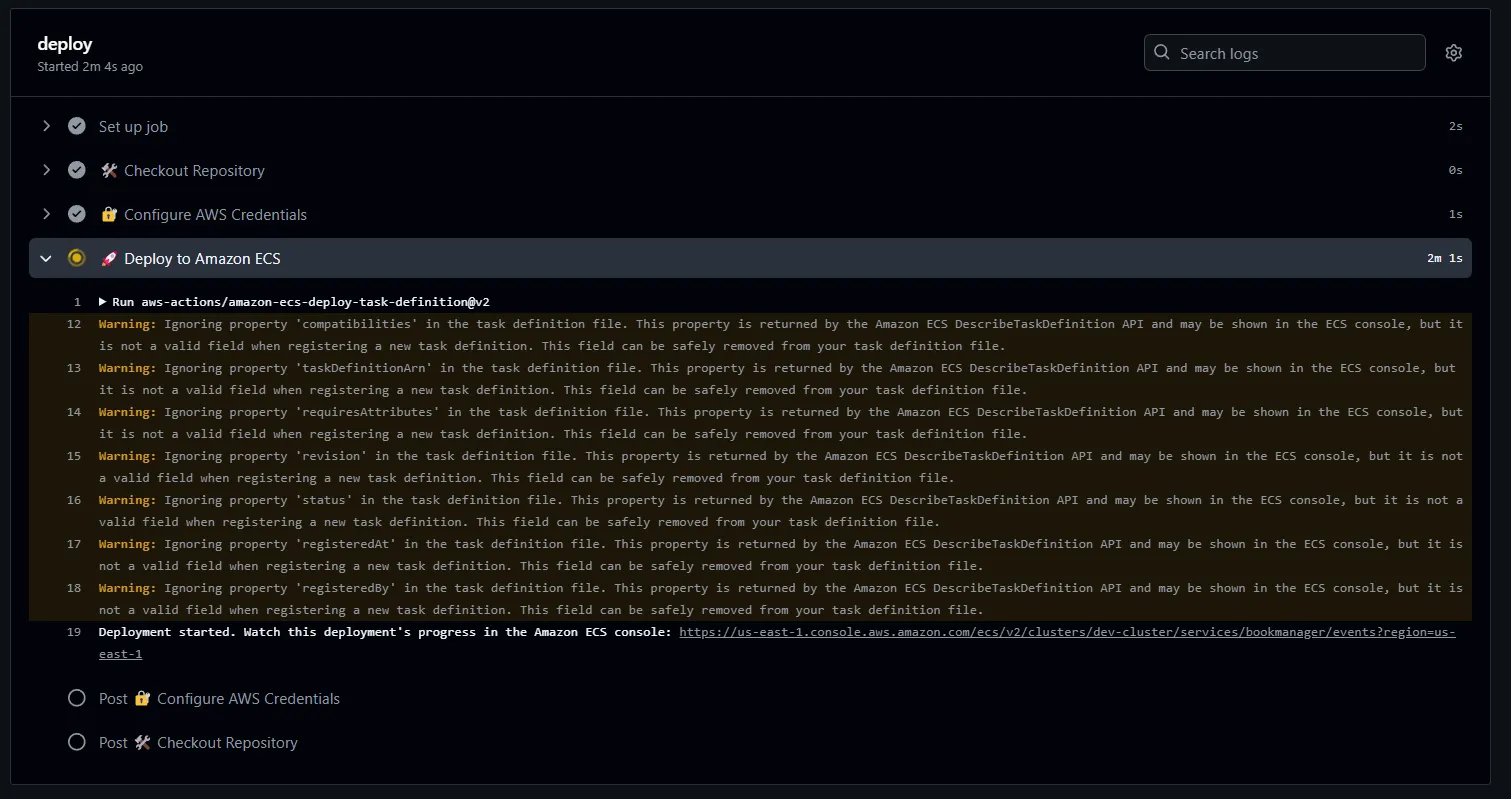
Give it about ~2 minutes, and your deployment would have completed.
Here are the recorded events. So everything has worked as expected.
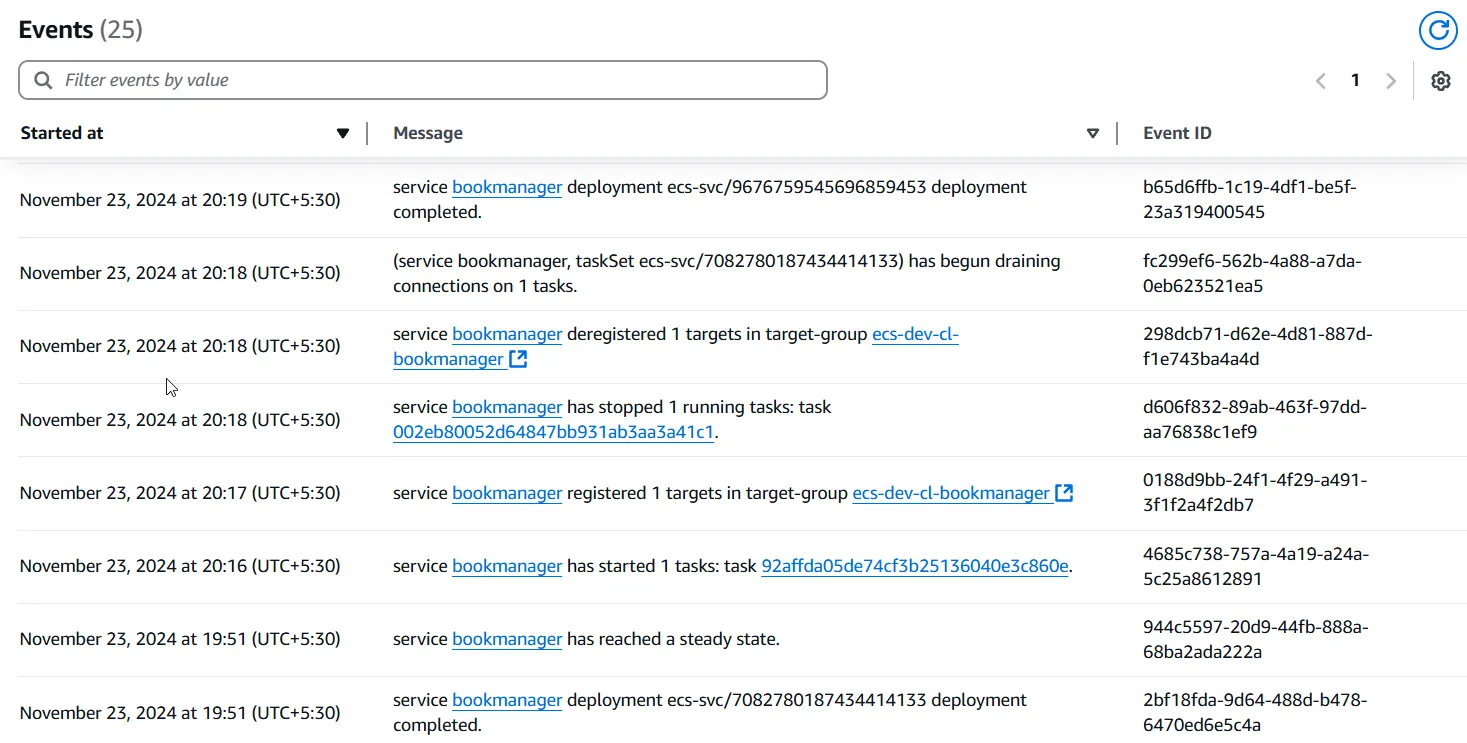
Let’s check if our changes have reflected.
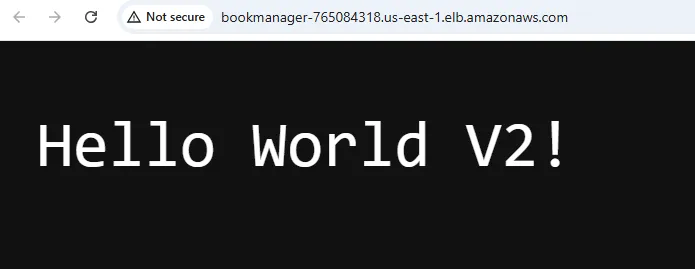
There you go! This is the easiest way to integrate a fully functional CI/CD Pipeline into your Workflow. ECS is just an example destination. It can be deployed anywhere you want to, like an AWS Lambda, AppRunner Instance, Azure AppService, anything!
Wrapping Up: Key Takeaways
In this comprehensive guide, we built a robust, production-ready CI/CD pipeline using GitHub Actions. This pipeline seamlessly deploys a containerized .NET 9 Web API to an AWS ECS Fargate instance. Throughout this article, we covered key aspects of modern DevOps practices, including:
- Streamlined Build and Deployment: Leveraging GitHub Actions to automate the build, test, and deployment process ensures consistency and reduces manual intervention.
- AWS Integration: Configuring AWS credentials securely and deploying to Amazon ECS using task definitions allows for scalable, fault-tolerant applications.
- Containerization Best Practices: By publishing and pushing Docker images, we embraced the portability and flexibility that containers provide, making deployments repeatable and reliable.
- Extensibility: The pipeline setup we demonstrated is highly adaptable. With minimal adjustments, you can deploy applications to other container orchestration platforms like Kubernetes, AppRunner, etc. You can also tailor it for deploying to non-containerized environments such as virtual machines or serverless platforms like AWS Lambda.
This pipeline serves as a strong foundation for deploying modern, cloud-native .NET applications. Whether you’re building a microservice architecture, scaling a monolithic application, or experimenting with serverless solutions, the techniques used here can be easily adapted to meet your needs.
I hope this guide has helped you get started with CI/CD Pipelines and how to automate deployments. Thank you for following along, and do share this guide with your colleagues!

