Hi everyone, in this article, we will learn about Image Recognition in .NET with Amazon Rekognition! We will go through some concepts around this service and build an ASP.NET Core Web API that can recognize people/objects from images, blur out faces for privacy concerns, and do some additional operations. I will also walk you through other APIs offered, like Facial Analysis, Label Detection, Image Moderation, and so on.
I found it really interesting while exploring this service from AWS, and I am sure you will also have a nice read! This is a good starting point if you are new to the world of AI and ML! It’s like giving your applications a pair of digital eyes that can interpret the visual world, and it’s all possible via Amazon Rekognition and the developer-friendly .NET SDK from Amazon.
This article is sponsored by AWS. Huge thanks for helping me produce more .NET on AWS content!
You can find the source code of the entire implementation here.
What is Amazon Rekognition?
Amazon Rekognition is a fully managed computer vision service that offers video and image analysis with highly scalable AI & ML technology. And to get started you don’t really need any Machine Learning experience. This makes it easy to extract valuable information from visual content at scale. This super-cool service from AWS also provides various APIs and SDKs for developers to easily integrate these super-powers into your applications with ease. It’s widely used across various industries for a range of image and video analysis tasks.
Pricing
There are around 4 types of different pricing groups, for usage type. Since this article is mostly about Image Recognition, let’s understand Image Pricing. As usual, the Free Tier lets you analyze over 5,000 images per month for free (for the first 12 months). You can refer to the in-depth price breakdown here - https://aws.amazon.com/rekognition/pricing/
Use Cases
So, why would you need a service like Amazon Rekognition?
- Having someone moderate the user-uploaded images on a public-facing website, social media or content-sharing platforms is not only costly but also very time-consuming. Content Moderation is a solid use case of services like Amazon Rekognition.
- Sentiment Analysis can help you gauge the emotional sentiment quotient of individuals, for service analysis and various other reasons.
- You can use this to digitally describe an image to visually impaired users.
- Predict Age, Gender, and other attributes for research purposes.
- In the rising digital market, you can have some cool features where your users can search for products on your online store by simply uploading images, or describing the product.
- Recognize objects and scenes in images and videos for cataloging, content organization, or automated tagging.
- Security and Surveillance purposes.
- And a plethora of other use cases.
Exploring the Amazon Rekognition Dashboard
Before building our ASP.NET Core Web API for Image Recognition, let’s explore the Amazon Rekognition Dashboard to get a better grasp of this service. Login to your AWS Management Console, search for Rekognition, and open it up. It’s always better to perform some basic operations on the AWS Management Console before trying to write code.
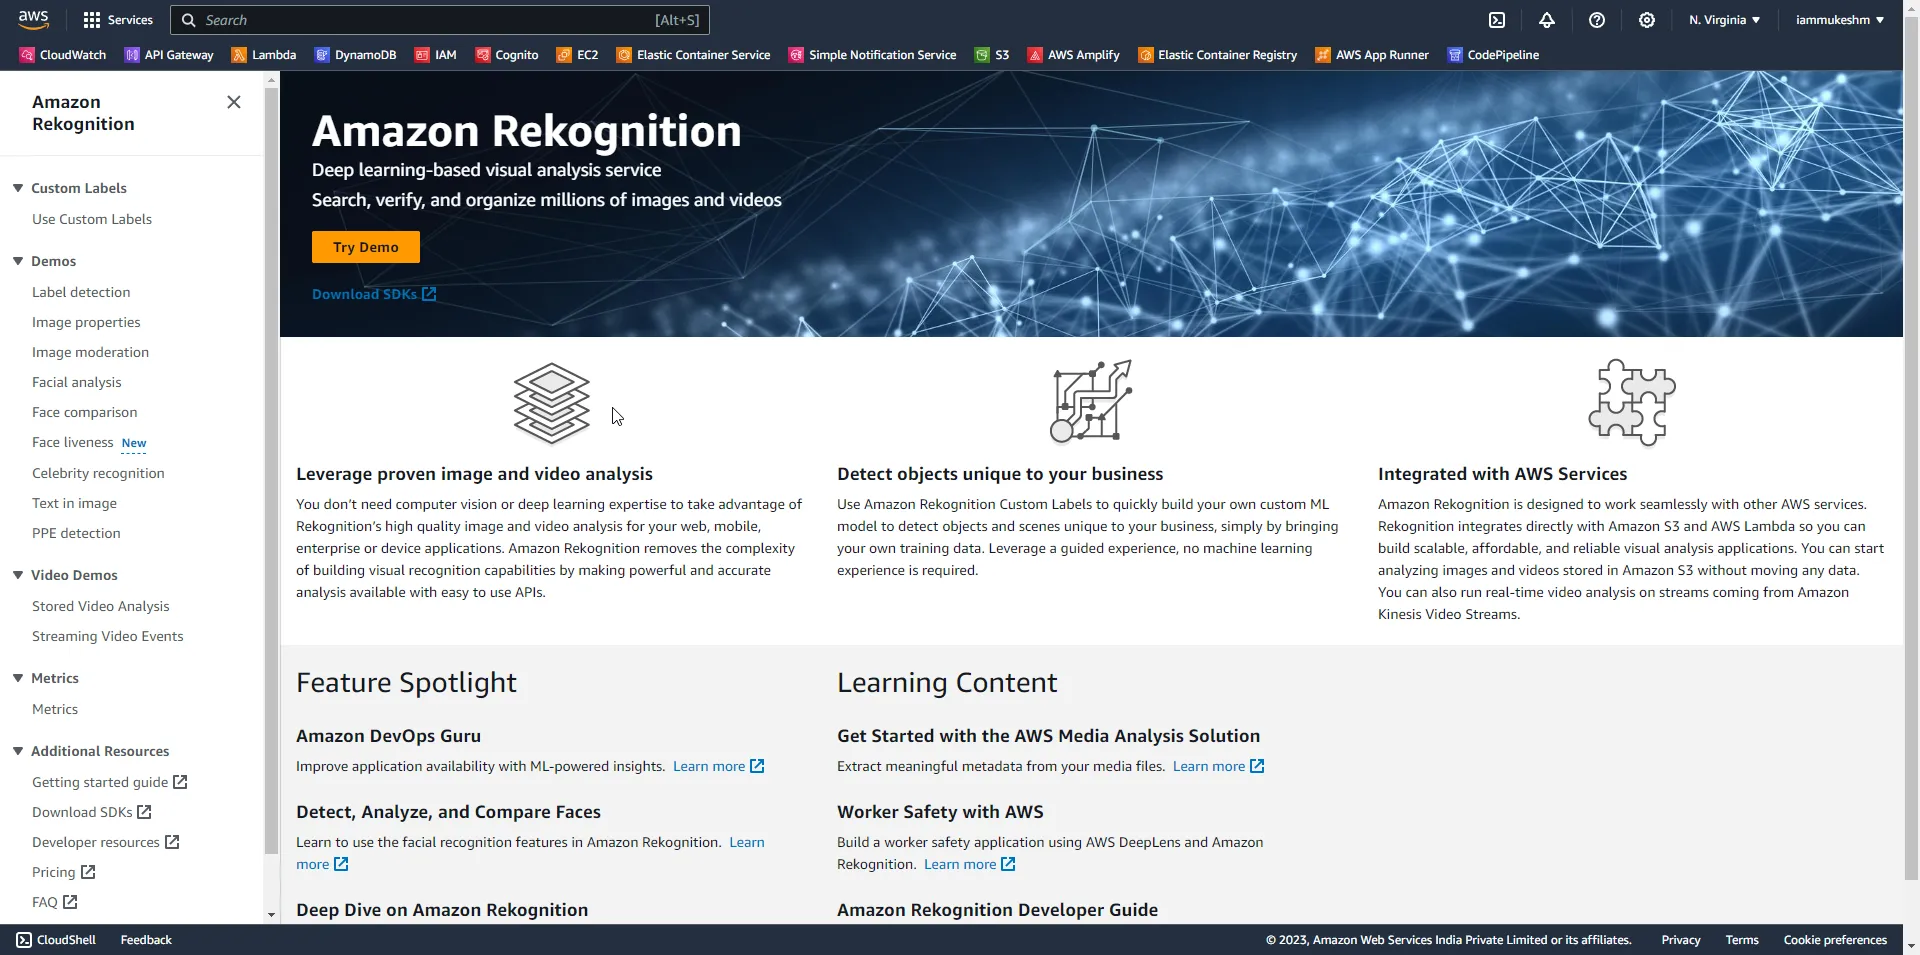
Amazon lets you try out this service using some demos. As you can see, there are several provisions like Label detection, Image properties, Image Moderation, Facial Analysis, etc. First up, Label Detection.
Label Detection
Amazon Rekognition automatically labels objects and actions in your images, along with their location in the image (via bounding boxes), confidence score, and other various attributes. Let’s open it up and upload a sample image.
Here is a cute picture of a puppy and a kitten that I found on the internet. As you see, Amazon Rekognition was able to label these pictures with keys like animals, canine, dog, mammal, kitten, and so on.
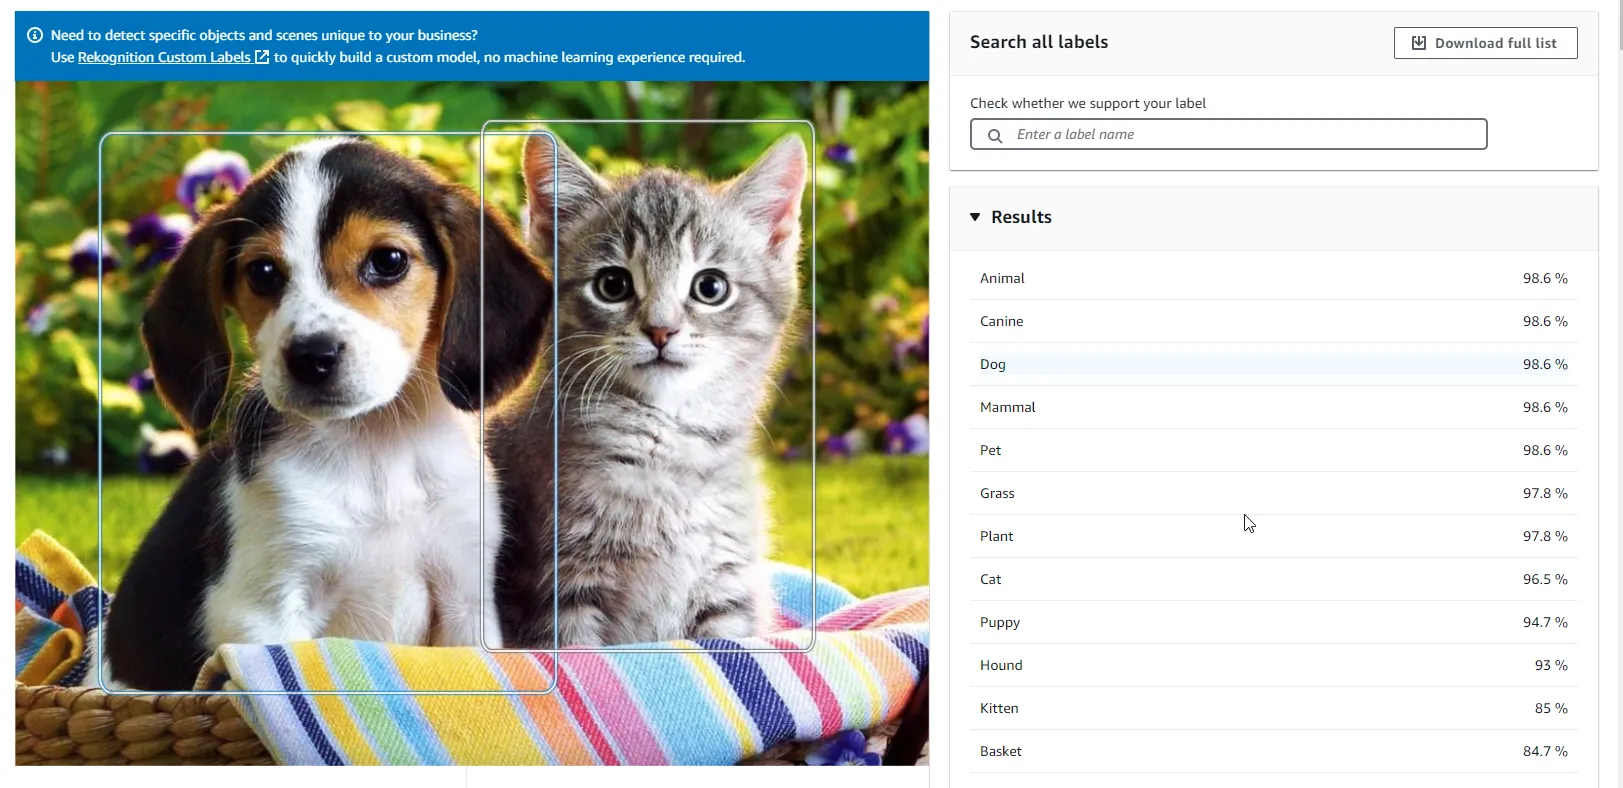
If you scroll more, you will get to see the exact request and response JSONs from this API.
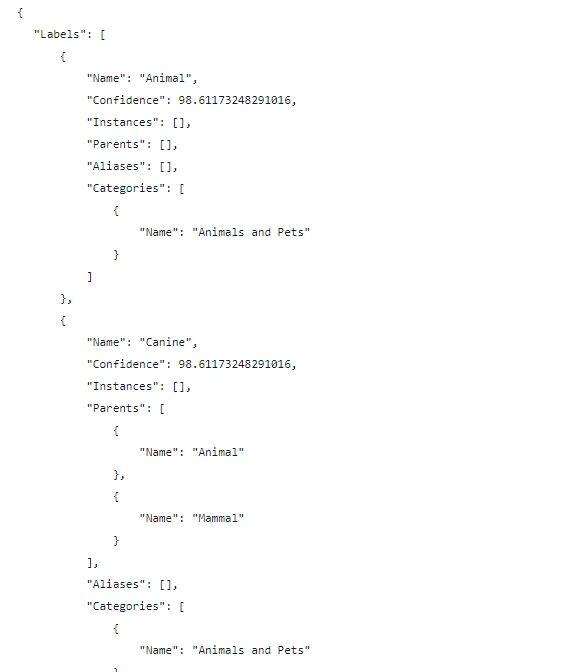
This is how you get to know how confident Amazon Rekognition is with a particular label. This Confidence score can be used in your application to properly segregate what the object can be. For example, I would write a code to store these labels in a database table only if the confidence score is well above 95%.
Image Properties
Next comes Image Properties, which allows you to find the technical specifications of an image including its color components, saturation levels, brightness, and more.
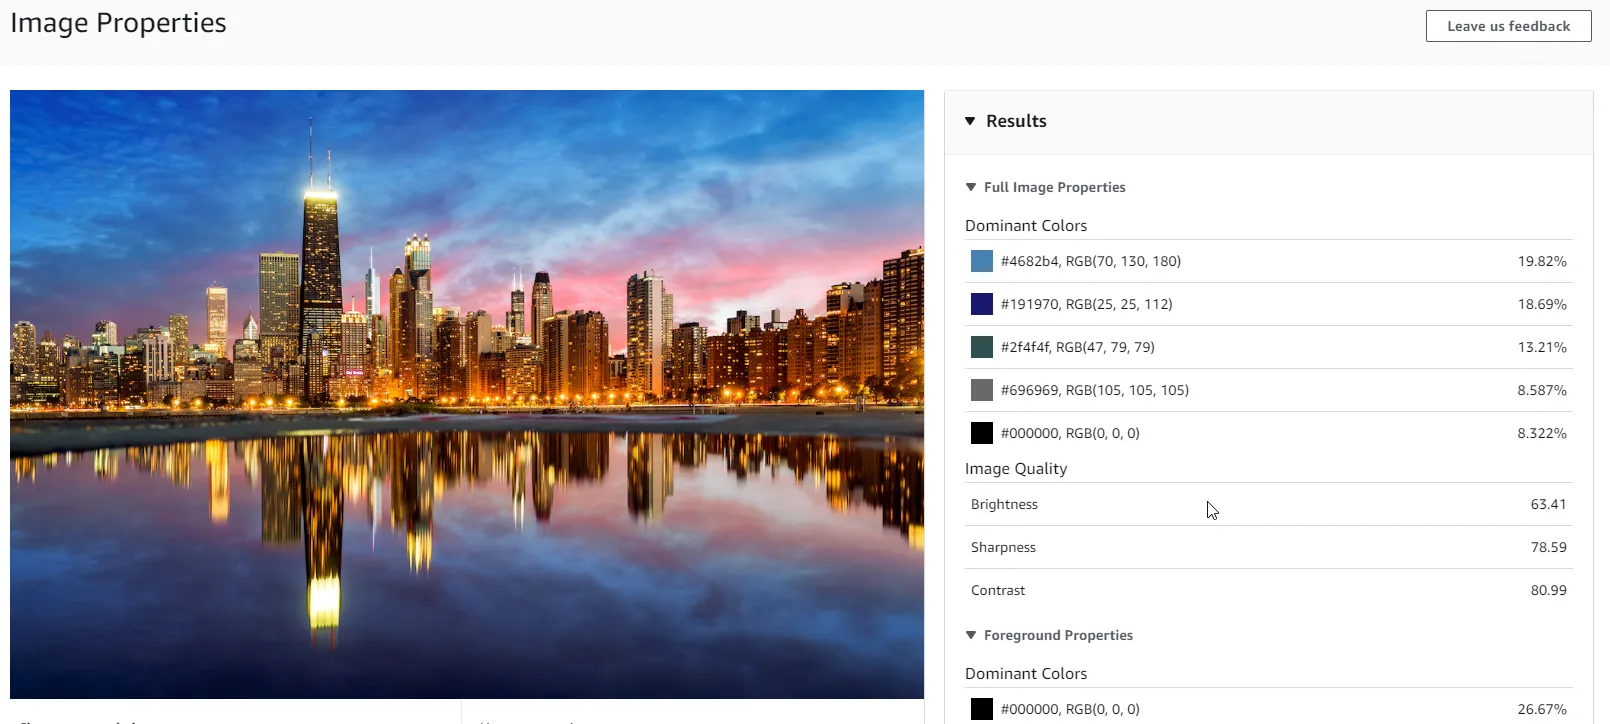
Image Moderation
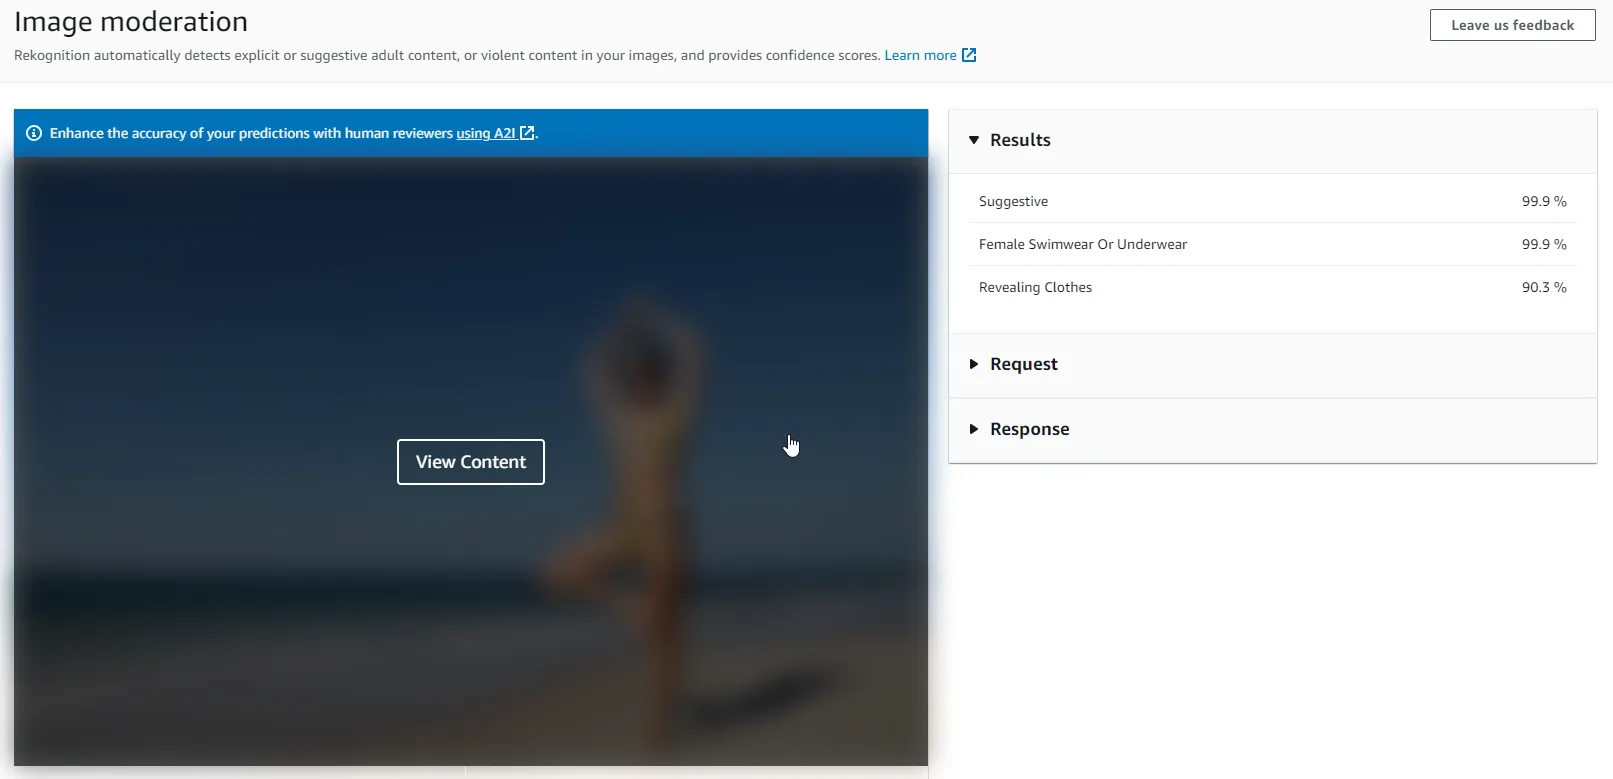
This is a very vital use case for image recognition. Amazon Rekognition is capable of detecting suggestive/inappropriate content and giving it a confidence score. In the below image, the service determines that the content is suggestive and has given a confidence score of 99%+. Later in this article, we will include this API to moderate content. This is mostly used in public-facing websites where users are allowed to share images. Rather than having someone sitting and manually reviewing the posted content, it’s much cheaper and smarter to make use of AI and ML capabilities to get the moderation job done.
Facial Analysis
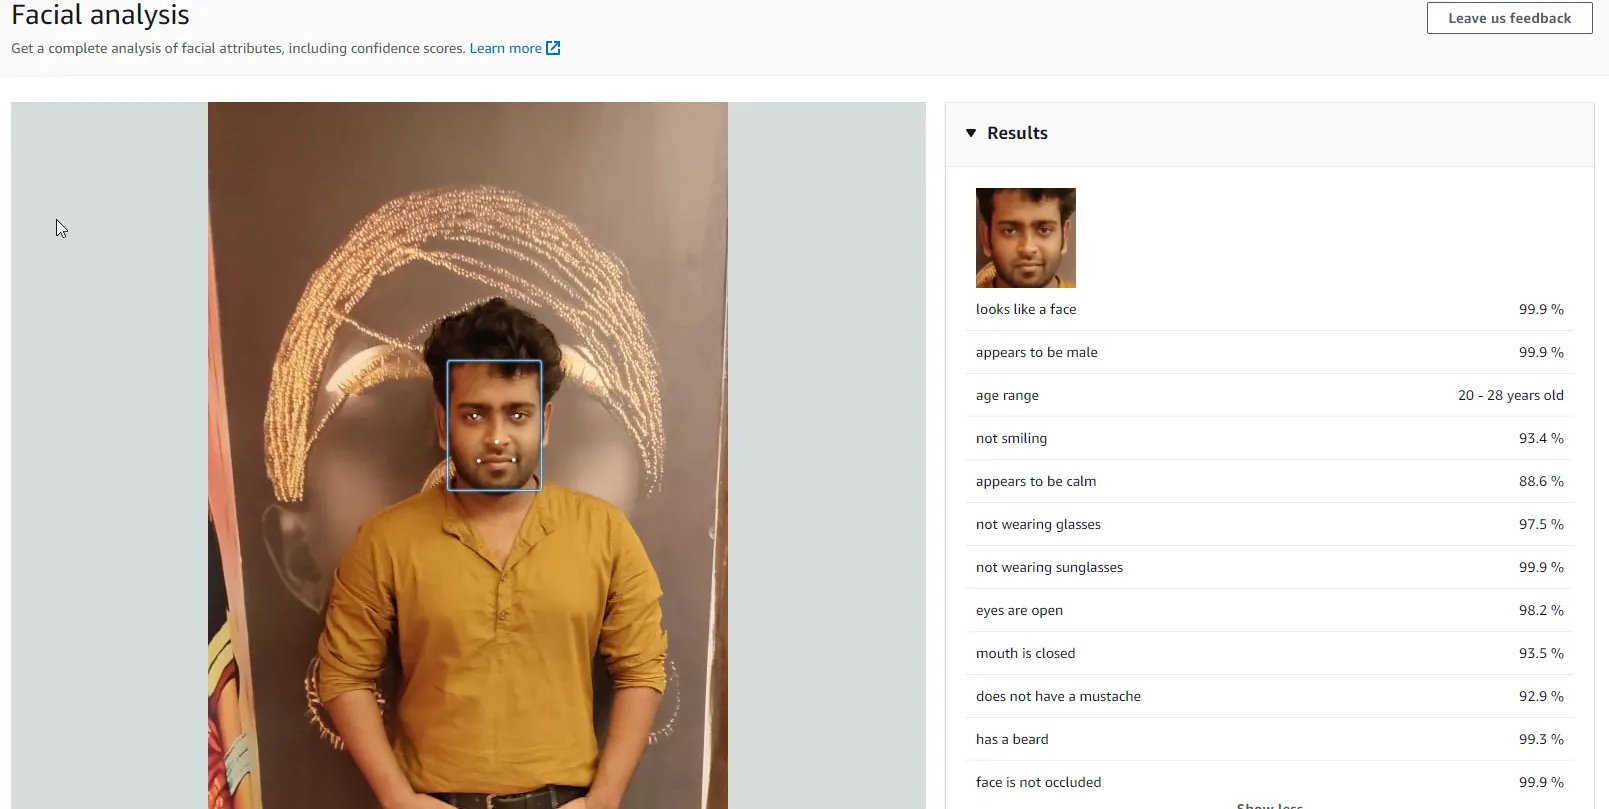
This is another super cool API. Amazon Rekognition is capable of facial analysis and determining various attributes like gender, age ranges, emotions, and other features. Here are the results of my face analysis.
Imagine generating such attributes, and passing this data to AI services like ChatGPT that can create rich descriptions of images using the attributes as the input data. Thinking about this, if you reverse engineer this, and add some image generation capabilities, you will be able to describe how a picture should look like, and your service should generate the image for you. This is mostly how the Generative AI tech products like MidJourney work! Also, I should learn to smile better in pictures😢
Similarly, you have other APIs like Celebrity Recognition, Text Extraction and so much more to check out. Next, we will open up Visual Studio IDE and build an ASP.NET Core WebAPI that uses the Amazon Rekognition SDK to perform Label Detection, Image Moderation, and my personal favorite - Blurring out Faces from an Image.
Image Recognition in .NET with Amazon Rekognition - ASP.NET Core Web API
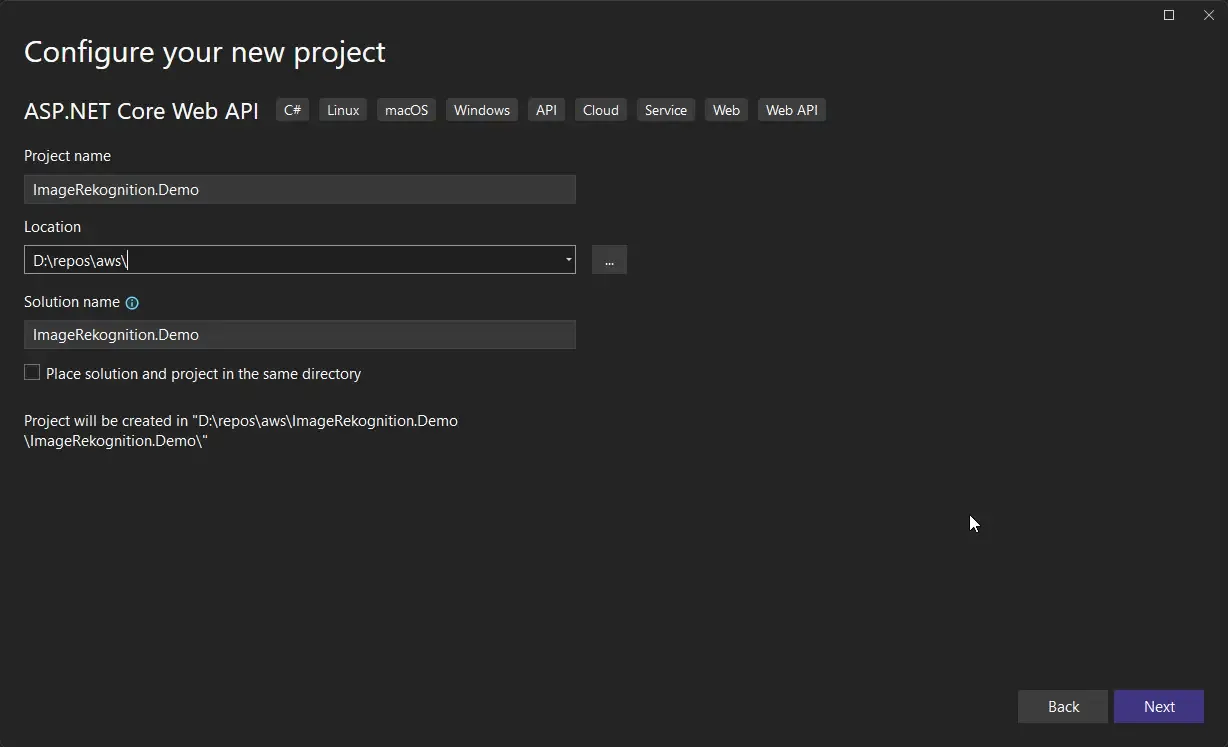
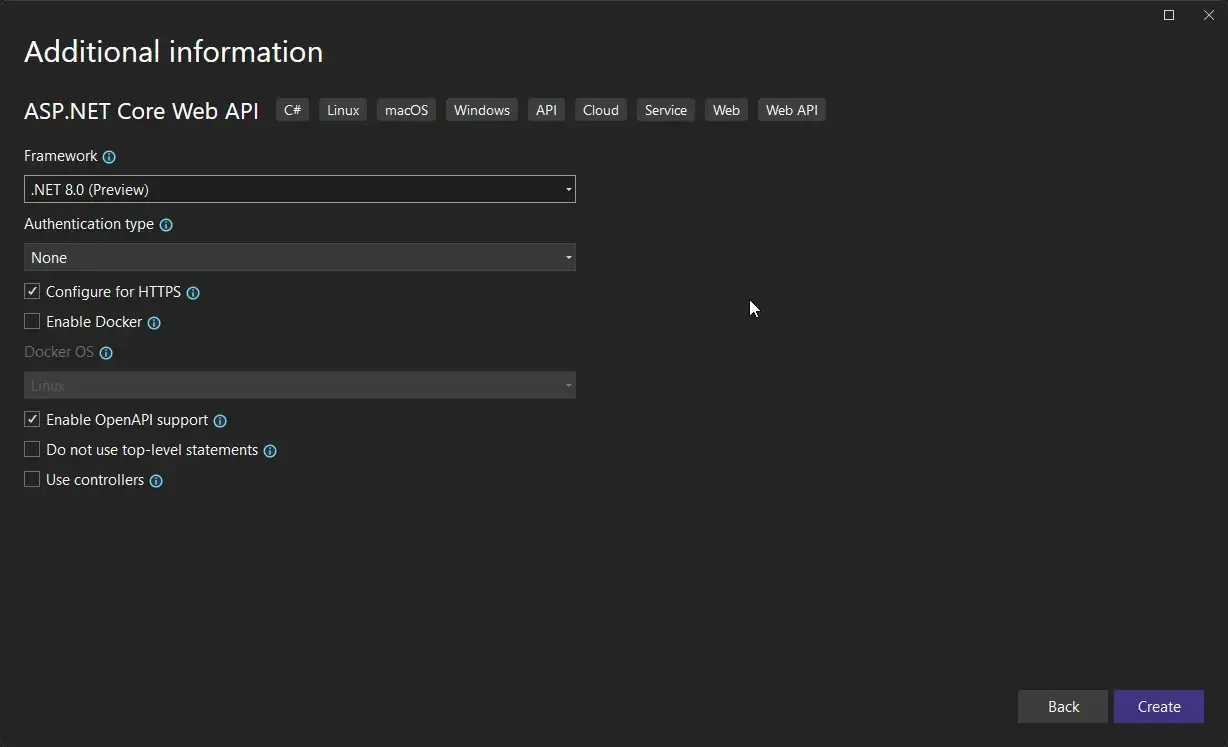
Open up Visual Studio, and create a new ASP.NET Core Web API. I am currently using Visual Studio 2022 Community Preview, and my latest installed SDK is .NET 8 RC1.
Once the project is created, let’s install the required NuGet packages. You can run the following commands on the Package Manager Console to get the required packages installed.
Install-Package AWSSDK.Extensions.NETCore.SetupInstall-Package AWSSDK.RekognitionInstall-Package SixLabors.ImageSharpInstall-Package SixLabors.ShapesNext, we will have to register the Rekognition Service within our Application DI Container. For this, open up Program.cs and add in the following.
builder.Services.AddDefaultAWSOptions(builder.Configuration.GetAWSOptions());builder.Services.AddAWSService<IAmazonRekognition>();Finally, you will have to ensure that your machine is authenticated to use AWS Services. For this, you can follow my YouTube video where I show various ways to set up authentication. Watch it here. I personally use the AWS CLI Profiles to make my system access AWS for development purposes.
Once that is sorted, let’s start adding Endpoints to our API. I will be using Minimal API for this, as the development time is slightly quicker and doesn’t really need a full-fledged controller setup for our use case.
Label Detection API Endpoint
First up, is label detection. We should be able to take in an image file and return a list of labels that Amazon Rekognition is confident about. We will set the Minimum required confidence score to about 95% while sending out the request. Here is the code.
app.MapPost("/detect-labels", async (IFormFile file, IAmazonRekognition client) =>{ var memStream = new MemoryStream(); file.CopyTo(memStream); var response = await client.DetectLabelsAsync(new DetectLabelsRequest() { Image = new Amazon.Rekognition.Model.Image() { Bytes = memStream }, MinConfidence = 95 }); Console.WriteLine(JsonSerializer.Serialize(response)); var labels = new List<string>(); foreach (var label in response.Labels) { labels.Add(label.Name); } return Results.Ok(labels);}).DisableAntiforgery();-
Line #1 states that this is a POST endpoint with the route as /detect-labels, and the handler accepts IFormfile and uses IAmazonRekognition from DI that we had registered earlier.
-
Next up, we will have to convert the IFormFile into a Memory Stream. This is done in lines #3 and #4.
-
Then we create a DetectLabelsRequest and pass in the memory stream as bytes, and set the minimum confidence score to 95. This request object is then sent via the IAmazonRekognition service client against the DetectLabelsAsync method.
-
In the end, we extract each of the labels from the response, append it to a string array, and then return it as an API response.
-
Line #20, Ensure that you Disable AntiForgery for this demonstration. It took me some time for me to figure this out. More on this to follow.
Important: When I called my endpoint from Swagger, I was getting the below exception.
System.InvalidOperationException: Endpoint HTTP: POST upload contains anti-forgery metadata, but a middleware was not found that supports anti-forgery.
Configure your application startup by adding app.UseAntiforgery() in the application startup code. If there are calls to app.UseRouting() and app.UseEndpoints(…), the call to app.UseAntiforgery() must go between them. Calls to app.UseAntiforgery() must be placed after calls to app.UseAuthentication() and app.UseAuthorization().
After a couple of searches, figured out that starting from Preview 7 of .NET 8, Microsoft has enabled the AntiForgery tokens by default for all endpoints that have actions related to form data. If you are ok to ignore anti-forgery tokens, you can disable them by adding a DisableAntiforgery() extension method to the Endpoint. Otherwise, you might have to implement AntiForgery Tokens.
Note that, to keep things simple I am reading the file from the request itself. In ideal cases, your image would get uploaded into a storage service like Amazon S3, and the Object key would be passed to this API Endpoint, which reads the data. In our above code, Amazon.Rekognition.Model.Image() also accepts S3 Object Key!
With that done, let’s test this endpoint. Run the ASP.NET Core WEB API, and open up swagger at /swagger. Here. let’s send a request to the /detect-labels endpoint by passing an image to the request.
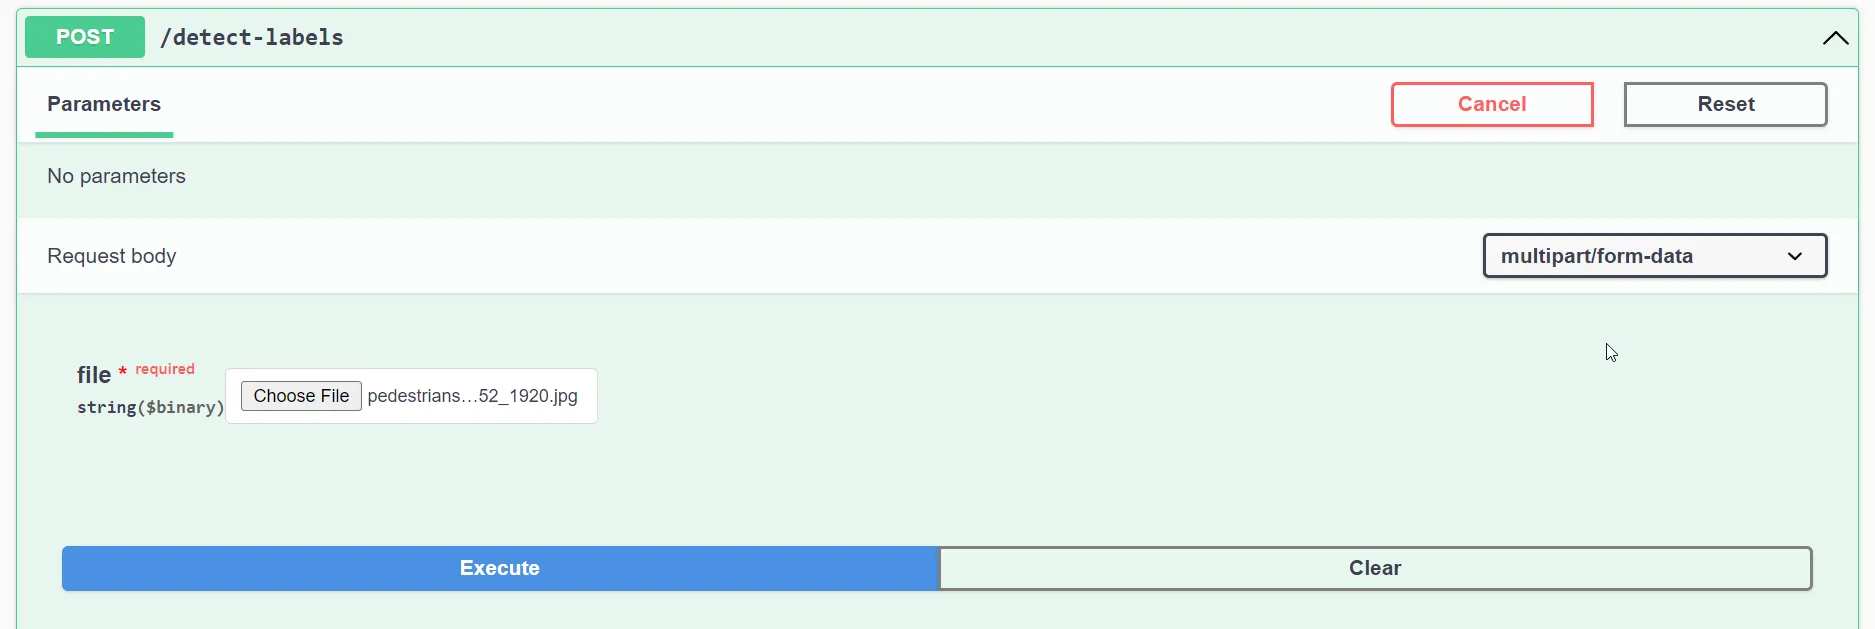
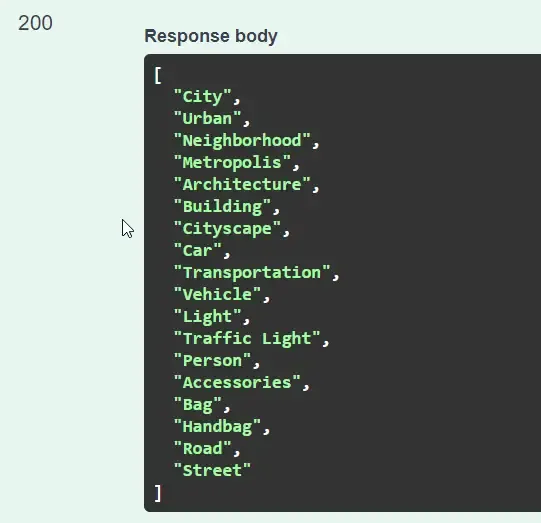
And here is the image I passed to the endpoint. Image Credits to Pixabay/Pexels.

As you see, here is a pretty accurate set of labels returned by our API.
Blur Faces API Endpoint 😎
This is probably the coolest section of this article, where we would send a detect-faces request to Amazon Rekognition. In response, we will get back the number of identified faces in the image, and the bounding box of each of the faces. Now we know the exact coordinates of every face in the image. We will then use this data to draw Blurred boxes over the image using the SixLabors.ImageSharp package. Thus, all the faces detected in the image will be blurred out, super easily. This can come in handy if you want to remove/blur faces from images for privacy concerns.
app.MapPost("/blur-faces", async (IFormFile file, IAmazonRekognition client) =>{ var memStream = new MemoryStream(); file.CopyTo(memStream); var response = await client.DetectFacesAsync(new DetectFacesRequest() { Image = new Amazon.Rekognition.Model.Image() { Bytes = memStream } }); if (response.FaceDetails.Count > 0) { var image = SixLabors.ImageSharp.Image.Load(file.OpenReadStream()); foreach (var face in response.FaceDetails) { var rectangle = new Rectangle() { Width = (int)(image.Width * face.BoundingBox.Width), Height = (int)(image.Height * face.BoundingBox.Height), X = (int)(image.Width * face.BoundingBox.Left), Y = (int)(image.Height * face.BoundingBox.Top) }; image.Mutate(ctx => ctx.BoxBlur(30, rectangle)); memStream.Position = 0; } image.Save(file.FileName, new webpEncoder()); }}).DisableAntiforgery();- Similar to the previous endpoint, we accept an IFormFile and use the IAmazonRekognition service.
- Line #5, we are creating a DetectFacesRequest and passing the Image bytes as seen in the previous endpoint implementation.
- Using the ImageSharp package, we load the image from the file stream.
- We then iterate over the detected faces (if any exists) from the response object. As mentioned earlier, Rekognition will return to us the Bounding box details of each of the detected faces. We can use this data to draw a rectangle (lines #17 to 23).
- I am going to draw over the existing image data using the Mutate helper. Here, we are going to use the BoxBlur feature of ImageSharp. I will give the radius of the blur as 20 (the higher, the more blurred the area will be. I found 20 to be the sweet spot). Also, pass the rectangle dimensions to this BoxBlur method. This would instruct the package to draw a blurred box of radius 20 over the analyzed image.
- Line #25, we reset the position of the cursor on the memory stream to 0, so that the new iteration can take place.
- Finally, in line #27, we will save the image to the root directory of the project.
- Do not forget to Disable Anti Forgery here as well.
Let’s test this now. Here are the results of 2 images that I had tried. Again, picture credits to Pixabay.


Perfect Accuracy, right?
This piece of code would be the perfect candidate for an AWS C# Lambda, that will be triggered every time an image is uploaded to an S3 Bucket. If you are not aware of how S3 Uploads can trigger/invoke an AWS Lambda, do refer to this article, where we built a simple system explaining this.
Moderation API Endpoint
Next up, setting up an API endpoint for moderating the incoming images. If there is any suggestive or inappropriate content detected, the API would return a message “unsafe”. Else, a “safe” message would be returned.
app.MapPost("/moderate", async (IFormFile file, IAmazonRekognition client) =>{ var memStream = new MemoryStream(); file.CopyTo(memStream); var response = await client.DetectModerationLabelsAsync(new DetectModerationLabelsRequest() { Image = new Amazon.Rekognition.Model.Image() { Bytes = memStream }, MinConfidence = 90 }); Console.WriteLine(JsonSerializer.Serialize(response)); var labels = new List<string>(); if (response.ModerationLabels.Count > 0) return Results.Ok("unsafe"); else return Results.Ok("safe");}).DisableAntiforgery();-
Here, we are creating DetectModerationLabelsRequest passing the image from IFormFile, and setting the minimum confidence required to 90 percent. This means that only when Amazon Rekognition is 90 percent or more sure that there is suggestive/inappropriate content detected in the image, it will return data related to the moderation labels.
-
Once you get the response from Rekognition, we will check if the count of Moderation Labels is greater than 0. If there are any labels returned, we can flag the image as unsafe, else return a safe message.
Here are the test results.
Image 1: A suggestive picture. In the response, you can see that the confidence level is 96%+. Hence the API endpoint returns an “unsafe” message.

Image 2: A weapon. Again, this is considered to be inappropriate and hence flagged as “unsafe” by the API.

That’s a wrap for this article. You can use the Rekognition SDK to add more features to this API, like Face comparison and celebrity Recognition, and to understand image properties.
Summary
In this interesting article, we learned about Image Recognition in .NET with Amazon Rekognition. We explored the Rekognition Dashboard features like Label Detection, Content Moderation, and Face Analysis. Then we set to develop an ASP.NET Core Web API that has multiple endpoints for image processing. We installed the required packages like ImageSharp and Rekognition SDK. Later, we built 3 endpoints (label-detection, moderation, blur-faces) and tested out each of them with sample data.
You can find the source code of the entire implementation here.
Make sure to share this article with your colleagues if it helps you! Helps me get more eyes on my blog as well. Thanks!

