Are you an ASP.NET Core developer looking for a reliable and efficient way to send emails from your web applications? Look no further! In this comprehensive guide, we will learn to send emails from ASP.NET Core using Amazon SES aka Amazon Simple Email Service, empowering you to effortlessly send emails with ease.
Email communication plays a pivotal role in modern web applications, allowing businesses to connect with users, deliver important notifications, and engage customers effectively. Leveraging Amazon SES, a highly scalable and cost-effective email delivery solution, can significantly enhance your email capabilities within your ASP.NET Core applications.
In this guide, we will delve into the step-by-step process of setting up and configuring Amazon SES with your ASP.NET Core project. We will cover everything you need to know, from obtaining the necessary credentials to integrating the SES API and implementing email-sending functionality in your application.
You can find the source code of the entire implementation here.
By following this guide, you will gain a solid understanding of how to leverage the power of Amazon SES within your ASP.NET Core applications, enabling you to send emails reliably, efficiently, and at scale. Let’s get started.
This article is sponsored by AWS. Huge thanks for helping me produce more .NET on AWS content!
Understanding Amazon SES - Amazon Simple Email Service
Amazon Simple Email Service (SES) is a cloud-based email delivery service provided by Amazon Web Services (AWS). It offers a reliable and scalable solution for sending emails from your web applications. At its core, Amazon SES simplifies the process of sending emails by providing a highly available infrastructure that takes care of email delivery. It handles tasks such as managing email servers, handling bounces and complaints, and maintaining sender reputation, ensuring that your emails have a higher chance of reaching recipients’ inboxes.
One of the significant advantages of using Amazon SES is its scalability. Whether you need to send a few hundred or millions of emails, SES can handle it effortlessly. It leverages the robust infrastructure of AWS, enabling you to scale your email-sending capacity based on your needs without worrying about infrastructure management.
Another notable feature of Amazon’s SES is its cost-effectiveness. With pay-as-you-go pricing, you only pay for the emails you send, without any upfront or minimum charges. This makes it an attractive choice for startups, small businesses, and enterprises alike, as you can effectively manage your email-sending costs based on your usage.
By understanding Amazon SES, you can leverage its robust infrastructure, scalability, cost-effectiveness, and advanced features to supercharge your email-sending capabilities in ASP.NET Core applications. The next sections of this guide will walk you through the process of setting up, integrating, and implementing Amazon SES within your ASP.NET Core projects.
Pricing
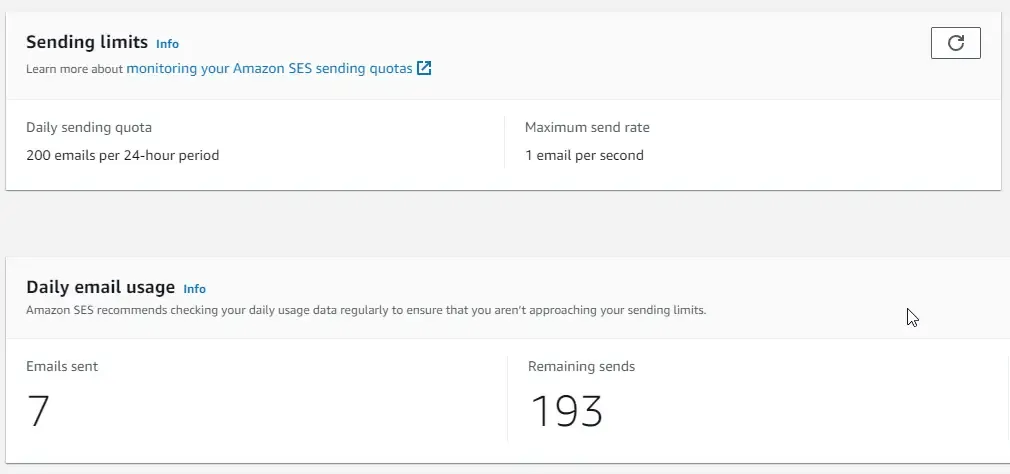
As mentioned earlier, Amazon SES follows a pay-as-you-go pricing model. The Free Tier is however very generous for you to try out. It’s always free for you to send almost 200 Emails every 24 hours forever (if you are sending it from an EC2 instance). In most cases, you will almost be charged nothing. Apart from this, you will have to pay $0.10 for every 1,000 emails you send or receive, which is again a quite nice deal. There will be an additional charge of almost $0.12 for each extra GB of data that you send as an attachment.
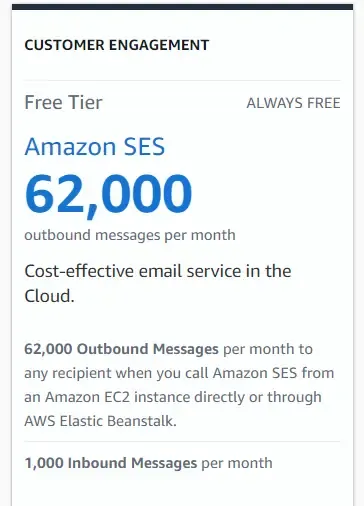
Here is the dashboard view of my FREE tier account.
Prerequisites
As always, here are the prerequisites before getting started with this article.
- AWS Account. Even a Free Tier would do. Grab your free account from here.
- Visual Studio IDE with AWS Toolkit Extensions installed.
- AWS CLI Profile should be configured to authenticate the .NET application into AWS. Follow this video to get your AWS CLI Profiles configured and ready to go.
- .NET 7+ SDK Installed.
- Have a spare email address. We will need an email id to register into Amazon SES. Amazon will then use this mail id as the sender.
Different ways to send Emails using Amazon SES
There are a bunch of ways for sending emails using Amazon Simple Email Service. They are as follows.
- using the AWS Management Console.
- using AWS CLI tool and JSON payload.
- using the SMTP interface
- using the AWS SDK for .NET (or any other framework/language)
Let’s check out the first two ways for now. The remaining two options, we will explore once we start building our ASP.NET Core Web API.
Exploring Amazon SES in AWS Management Console
Let’s log in to our AWS Management Console, and open up Amazon SES. Here is what it would look like if you are opening up this service for the first time.
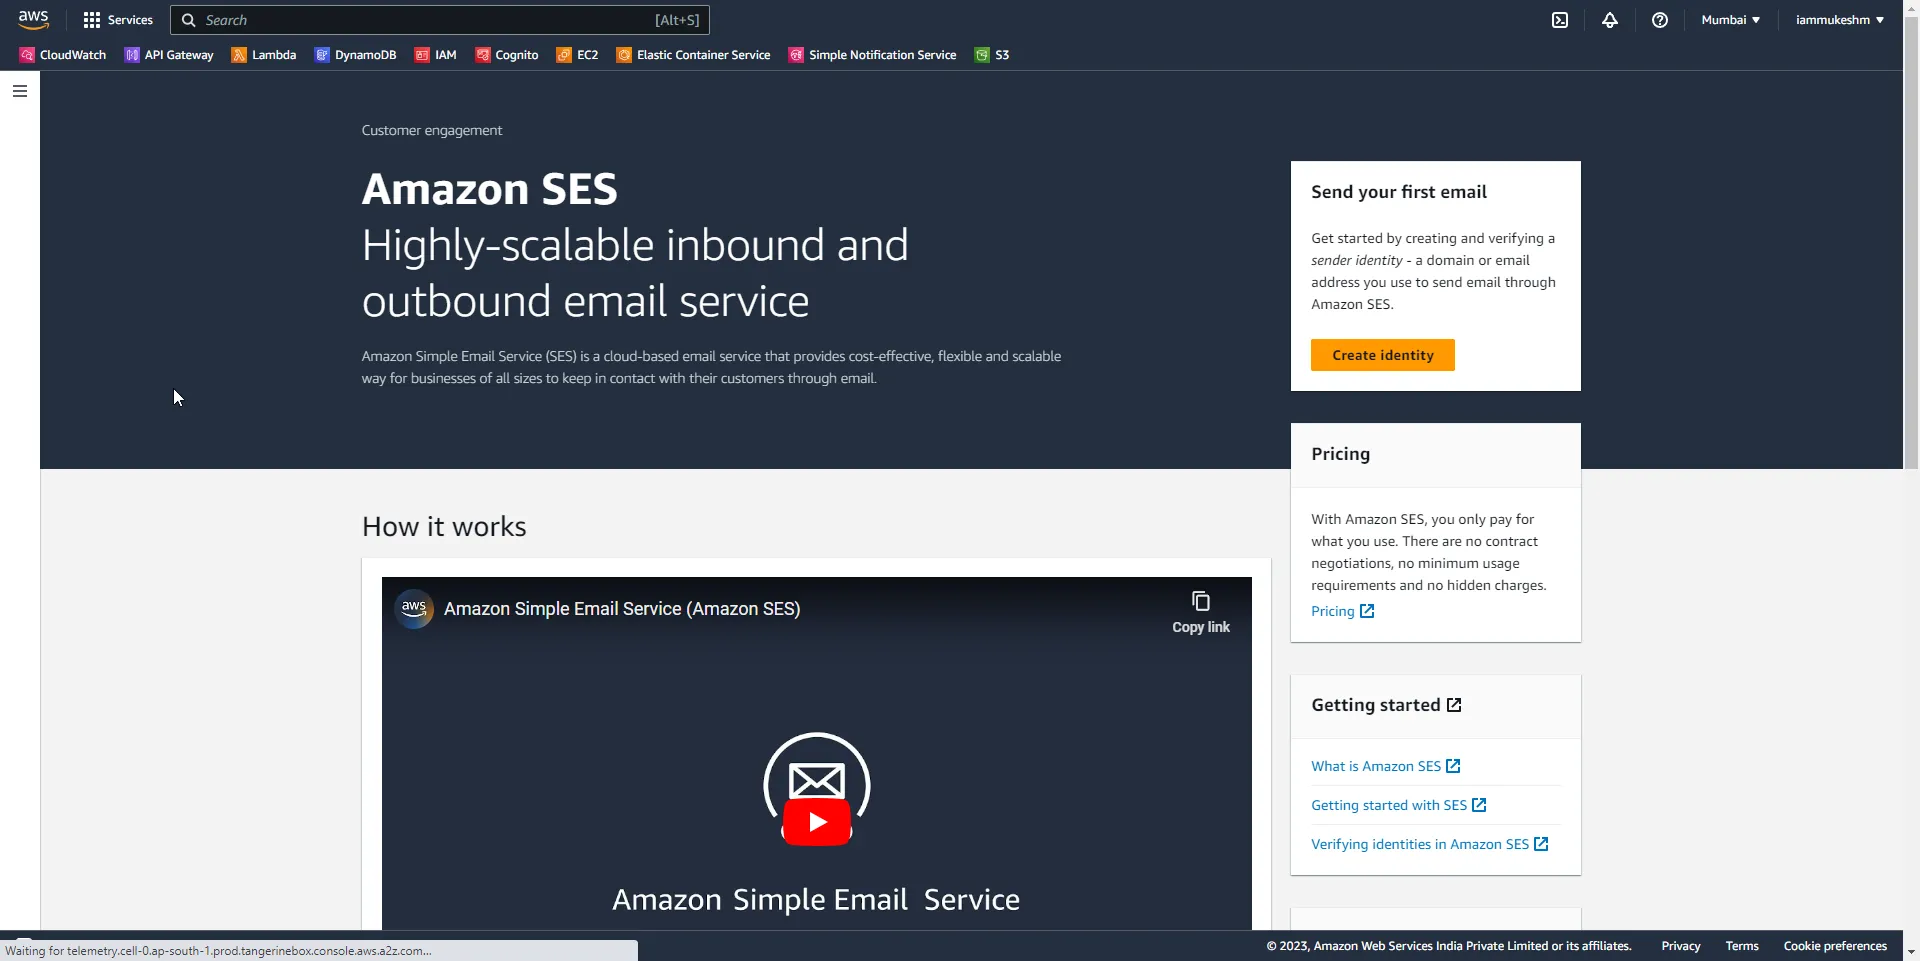
To start sending emails, we will have to first create a new sender identity using an already existing email id, and then get it verified as well. Post this, we will be able to send out emails using Amazon SES.
Registering SES Identity
An identity can be a domain, email address, or subdomain that will be used to send emails through Amazon SES. Click on Create Identity.
For this demonstration, I will use my spare mail address to verify my identity in Amazon SES. Note that once you register a mail id here, a verification mail will be sent to it for you to confirm the identity. So, ensure that your mailbox is accessible.
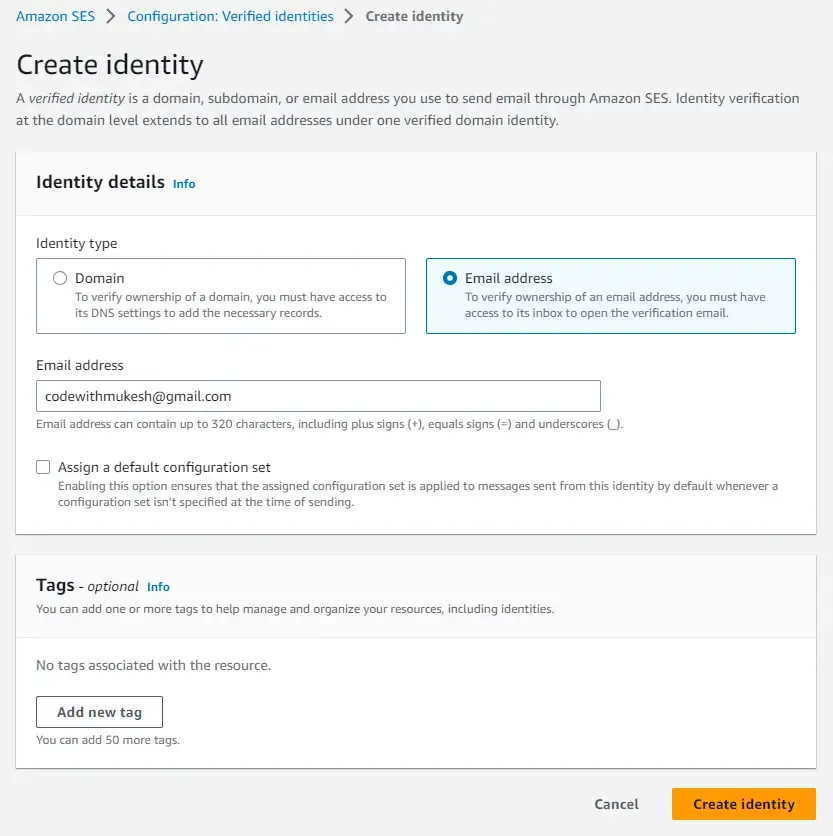
Simply select Email Address and type in your mail id, and then create identity. This would send you a verification email with a link.

Log in to your mailbox and verify your mail address.

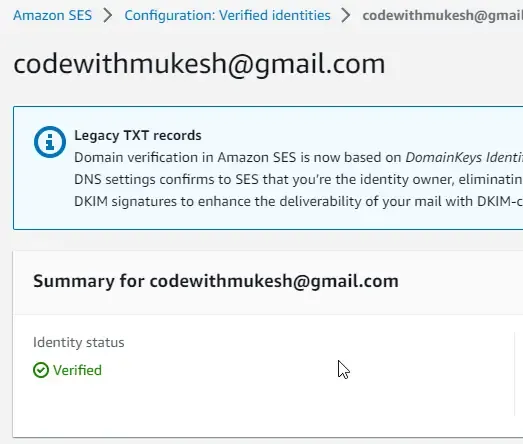
Navigate back to your AWS Management Console -> Amazon SES -> Verified Identities. You will be able to see that your mail id is now in verified status.
Sending Test Emails via AWS Management Console
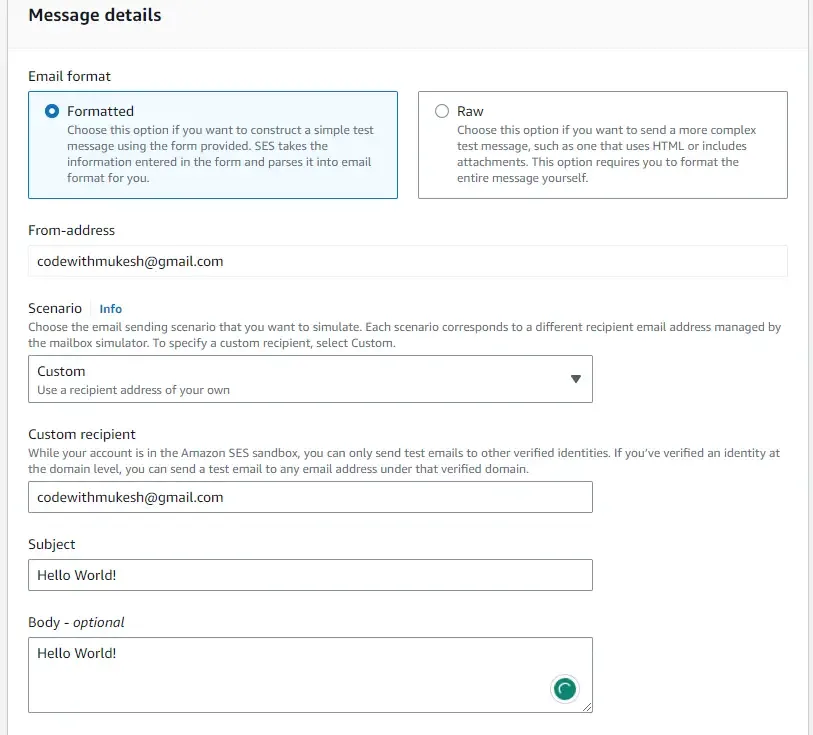
Now that we have registered our identity, let’s send a simple test mail using the AWS Management Console. The Amazon SES mailbox simulator lets you test how your application handles different email-sending scenarios.
- Set the Email Format as Formatted.
- Set the scenario to Custom. This allows you to specify a custom recipient for testing purposes.
- For the custom recipient, mention the mail address to whom you want to send your test mail. For demo purposes, I set it as the same email address.
- Finally, give some sample data for Subject and Body, and click on send.
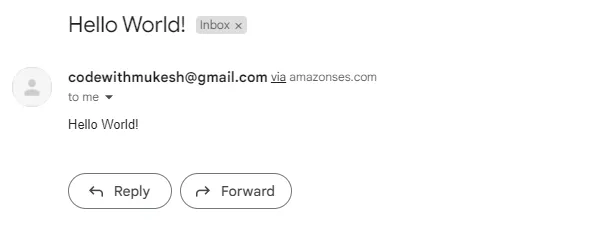
If you log in to your mailbox, you will be able to see the sample test mail.
Sending Email via AWS CLI
Apart from this, we will also be able to send emails using the AWS CLI. For this you need to have AWS CLI installed on your machine, which I believe you already have installed. If not, you can install the CLI tool from here.
Once you have the CLI installed, make sure that your AWS CLI Profile is configured. This ensures that you will be able to authenticate into AWS for consuming its services.
Open up the Terminal and run the following CLI command.
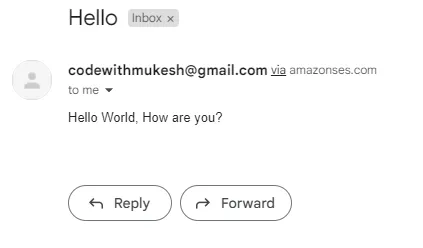
aws ses send-email --from [email protected] --to [email protected] --text "Hello World, How are you?" --subject "Hello"This will send a mail with the mentioned subject and body to the recipient and return back a message-id.

And here is the mail received.
You can read more about the CLI support parameter here: https://awscli.amazonaws.com/v2/documentation/api/latest/reference/ses/send-email.html
These are the 2 easy ways to send emails using Amazon SES. Next up, let’s learn about sending emails from ASP.NET Core Applications using Amazon SES.
What we’ll build?
We will be building a simple ASP.NET Core WebAPI that will be able to send emails using Amazon SES. We will have two approaches to this.
- Sending mail via SMTP Client
- Using the AWS SDK Package
Send Emails from ASP.NET Core using Amazon SES
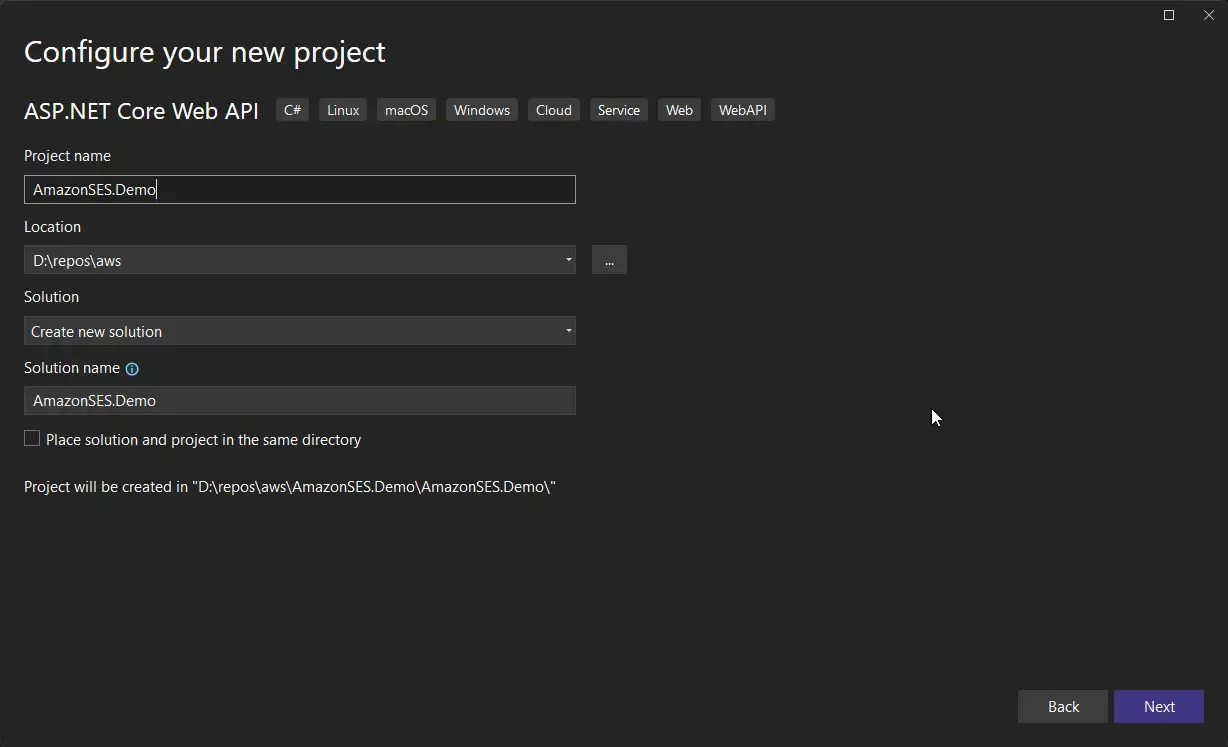
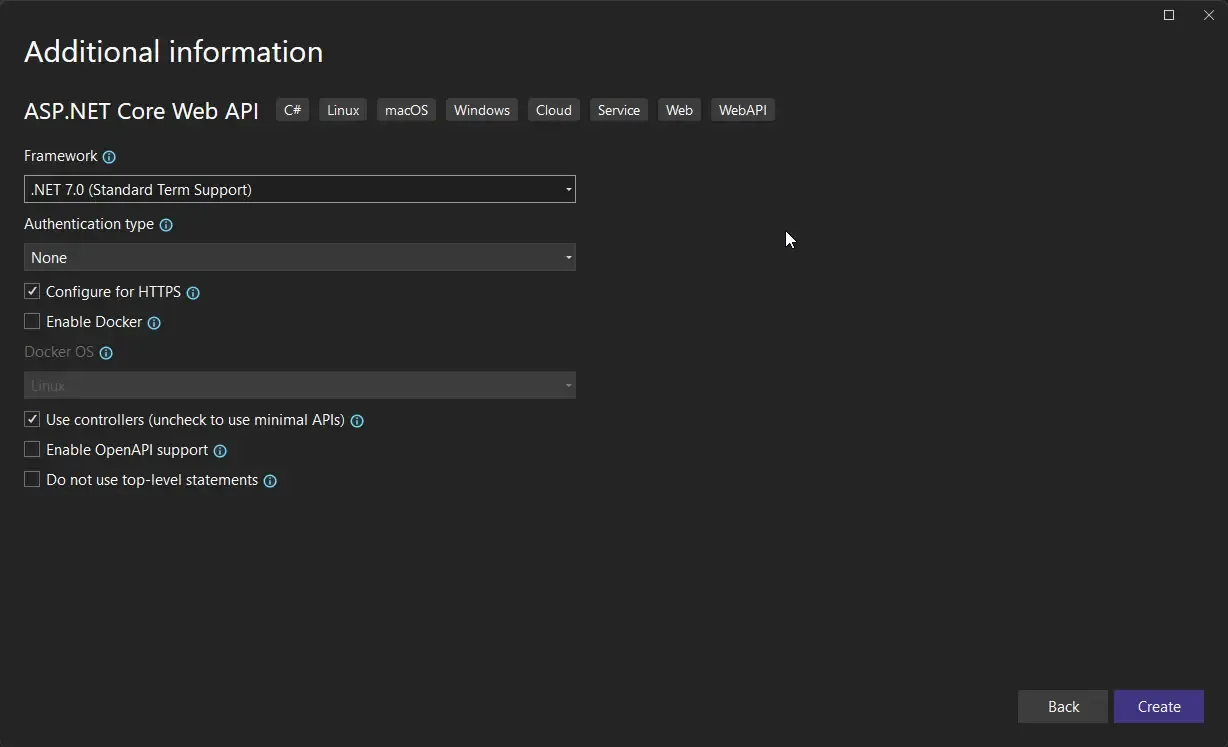
Let’s open up Visual Studio and create a new ASP.NET Core Web API project using .NET 7.
As mentioned earlier, programmatically there are 2 ways to send emails from ASP.NET Core using Amazon SES. They are as follows.
- via the SMTP interface
- via the AWS SDK for .NET
Sending Mail using Amazon SES via SMTP Interface in .NET
First up, we will build a traditional SMTP Mail Service that will accept a set of credentials like the SMTP username, password, port, and server address and attempt to send mails using the Mailkit package for .NET. I have already written a detailed guide regarding this. Feel free to check it out for more details.
Let’s first generate the required credentials and keep them ready. Open up AWS Management Console, and go to Amazon SES. Here, in the sidebar, go to SMTP Settings, and click on Create SMTP Credentials.
Note that you will be able to see the SMTP endpoint here. This is the host address that you will need later on.
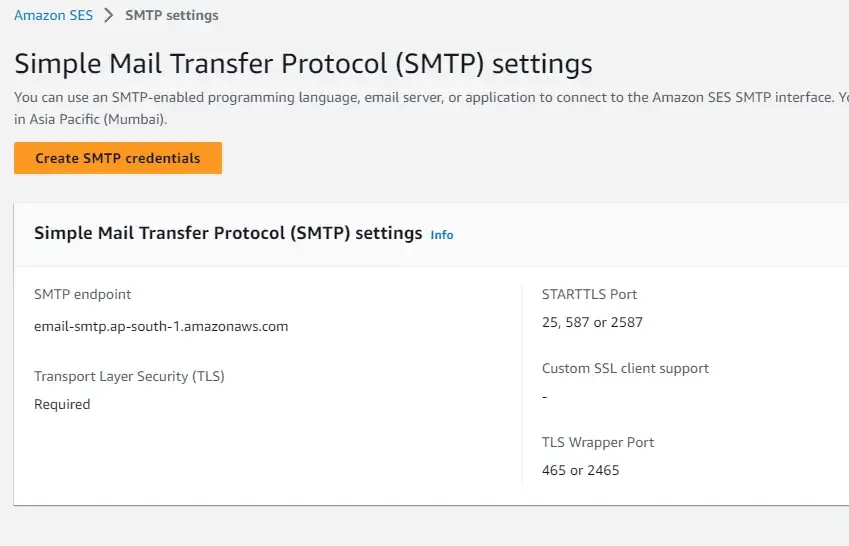
Once you click on Create smtp credentials, you will be redirected to AWS IAM, where a new user will be created for you. Create this user and continue.
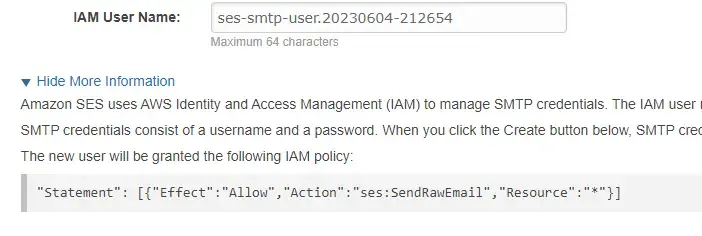
Once created, you will be given the SMTP username and password. Keep these details handy, along with the SMTP endpoint.
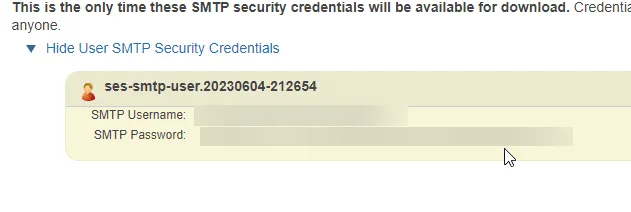
With that done, let’s switch back to our Visual Studio IDE. In your project, let’s install the required packages first.
Install-Package MailKitInstall-Package MimeKitLet’s create a new Request class where the client will send data like an email address to be mailed to, the subject, and the body content. Create a new class named MailRequest.
public class MailRequest{ public string? ToEmail { get; set; } public string? Subject { get; set; } public string? Body { get; set; }}Next, for configuring our email client, let’s add another class that will help in loading the configuration from appsettings.json. Create a new class named MailSettings.
public class MailSettings{ public string? Host { get; set; } public int Port { get; set; } public string? DisplayName { get; set; } public string? Mail { get; set; } public string? Username { get; set; } public string? Password { get; set; }}With that done, open up appsettings.json and add the following. Remember to replace the values with your data.
- Host - SMTP endpoint from Amazon SES SMTP Settings
- Port - 587
- Display Name - This will be what your recipient will be able to see.
- Mail - the mail id that we registered earlier in SES.
- Username & Password - the credentials that we generated via Amazon SES (IAM User).
"MailSettings": { "Host": "<smtp server>", "Port": 587, "DisplayName": "<your name>", "Mail": "<ses identity registered mail id>", "Username": "<iam smtp username>", "Password": "<iam smtp password>"}Finally, Create a new folder named Services, and add the following. We will create a new service for sending email using Mailkit package.
public interface IMailService{    Task SendEmailAsync(MailRequest mailRequest);}
public class MailService : IMailService{    private readonly MailSettings _mailSettings;    public MailService(IOptions<MailSettings> mailSettings)    {        _mailSettings = mailSettings.Value;    }    public async Task SendEmailAsync(MailRequest mailRequest)    {        var email = new MimeMessage();        email.From.Add(new MailboxAddress(_mailSettings.DisplayName, _mailSettings.Mail));        email.To.Add(MailboxAddress.Parse(mailRequest.ToEmail));        email.Subject = mailRequest.Subject;        var builder = new BodyBuilder();        builder.HtmlBody = mailRequest.Body;        email.Body = builder.ToMessageBody();        using var smtp = new SmtpClient();        smtp.Connect(_mailSettings.Host, _mailSettings.Port, SecureSocketOptions.StartTls);        smtp.Authenticate(_mailSettings.Username, _mailSettings.Password);        await smtp.SendAsync(email);        smtp.Disconnect(true);    }}
Let’s understand the code. In lines #8 to #12, we are injecting the configuration from appsettings into the constructor of the controller using the IOptions pattern (read this article for a detailed explanation about the IOptions pattern).
- Line 16, we are adding the From metadata to the Email variable.
- Line 22, we are creating a new Smtp client and trying to connect to it using the host, port, and authentication details from the appsettings.json
- Line 25, we are sending the email that we created using the data from the API request.
Next, open up Program.cs and add the following code to register the dependencies into the DI Container of the ASP.NET Core application.
builder.Services.Configure<MailSettings>(builder.Configuration.GetSection("MailSettings"));builder.Services.AddTransient<IMailService, MailService>();Finally, let’s create a new MailsController and wire it up with the service. Under the Controllers folder, create a new Controller named MailsController and add the following code.
[Route("api/[controller]")][ApiController]public class MailsController : ControllerBase{ private readonly IMailService _mailService; public MailsController(IMailService mailService) { this._mailService = mailService; } [HttpPost] public async Task<IActionResult> SendMail(MailRequest request) { await _mailService.SendEmailAsync(request); return Ok(); }}Here, we are creating a new endpoint (/api/mails [POST]) which calls the IMailService’s SendEmailAsync method. Note that the endpoint accepts MailRequest as the request and passes it on to the service call, which eventually sends the email using the SMTP client.
Let’s test it using Postman.

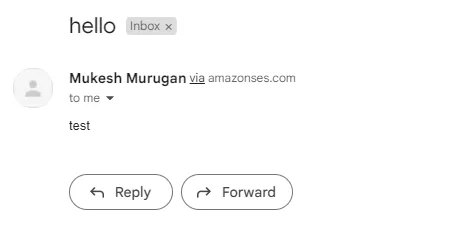
Sending Mail using Amazon SES via AWS SDK for .NET
Now that we have learned about how to send emails from ASP.NET Core using Amazon SES via SMTP, let’s now see how to do the same via AWS SDK Packages. We will use the same project for demonstrating this as well.
First up, install the following packages.
install-package AWSSDK.Extensions.NETCore.Setupinstall-package AWSSDK.SimpleEmailNext, open up appsettings.json and add the following. Remember to change the values that suit you.
"AWS": { "Profile": "default", "Region": "ap-south-1"}Next, we will add a new service that explicitly uses the AWS SDK package. Under the services folder, create a new class and name it SESService. This service will implement the IMailService interface as well.
Here is the code for your new SES Service.
public class SESService : IMailService{ private readonly MailSettings _mailSettings; private readonly IAmazonSimpleEmailService _mailService; public SESService(IOptions<MailSettings> mailSettings, IAmazonSimpleEmailService mailService) { _mailSettings = mailSettings.Value; _mailService = mailService; } public async Task SendEmailAsync(MailRequest mailRequest) { var mailBody = new Body(new Content(mailRequest.Body)); var message = new Message(new Content(mailRequest.Subject), mailBody); var destination = new Destination(new List<string> { mailRequest.ToEmail! }); var request = new SendEmailRequest(_mailSettings.Mail, destination, message); await _mailService.SendEmailAsync(request); }}- In lines #3 to #10, we are injecting the dependencies of IAmazonSimpleEmailService and the mail configuration into the constructor of this service.
- Then we create instances of Body, Subject, Message, and Destination using the data from the incoming API request. Finally, at #16, we create a new SendEmailRequest instance using these data and send out the email with the help of our IAmazonSimpleEmailService client.
With that done, let’s register the new services. Open up Program.cs and add the following changes. Note that you will have to add Lines 5-7 and probably comment out Line #3, which we added earlier in the SMTP section. This should now register the SESService as our Mailing Service instead of the previous SMTP service.
builder.Services.AddControllers();builder.Services.Configure<MailSettings>(builder.Configuration.GetSection("MailSettings"));//builder.Services.AddTransient<IMailService, MailService>();
builder.Services.AddDefaultAWSOptions(builder.Configuration.GetAWSOptions());builder.Services.AddAWSService<IAmazonSimpleEmailService>();builder.Services.AddTransient<IMailService, SESService>();
Let’s test the application. Open up Postman and send the same request again. This time, the mail will be delivered using the SES Service (the AWS SDK package for Simple Email Service). here is the mail that I received.
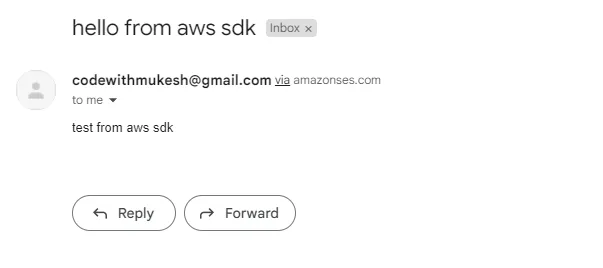
That’s a wrap for this article. Hope you liked it!
Summary
In this article, we learned everything about sending emails with ASP.NET Core using Amazon SES, aka the Simple Email Service.
You can find the source code of the entire implementation here.
Make sure to share this article with your colleagues if it helped you! Helps me get more eyes on my blog as well. Thanks!
Stay Tuned. You can follow this newsletter to get notifications when I publish new articles – https://newsletter.codewithmukesh.com. Do share this article with your colleagues and dev circles if you found this interesting. Thanks!


