Uploading large files in modern web applications isn’t just about handling a file stream and saving it to a server. That kind of setup might work for small-scale apps, but it quickly becomes a bottleneck as the file size or user base grows.
A more scalable and industry-standard approach is to offload the upload process to cloud storage services like AWS S3. Instead of routing the file through your backend, you allow the client to upload directly to S3 using a time-limited, secure presigned URL.
This method not only reduces the load on your server but also improves performance and scalability significantly.
In this article, we’ll walk through how to implement this flow using .NET Web API to generate presigned URLs, AWS S3 for storage, and Blazor Web App as the client-side framework. By the end, you’ll have a solid, production-ready setup for handling large file uploads the right way. This is the recommended way to handle file uploads in your system.
You can find the complete source code of this implementation at the bottom of this article.
High-Level Architecture Overview
Uploading large files—say hundreds of megabytes or more—comes with challenges like unreliable network conditions, timeouts, and memory usage. To handle this properly, we need to break files into smaller parts (chunks) and upload them sequentially or in parallel. This is exactly how S3 Multipart Upload works, and it’s the recommended approach for large files.
Here is the architectural diagram that I have prepared,
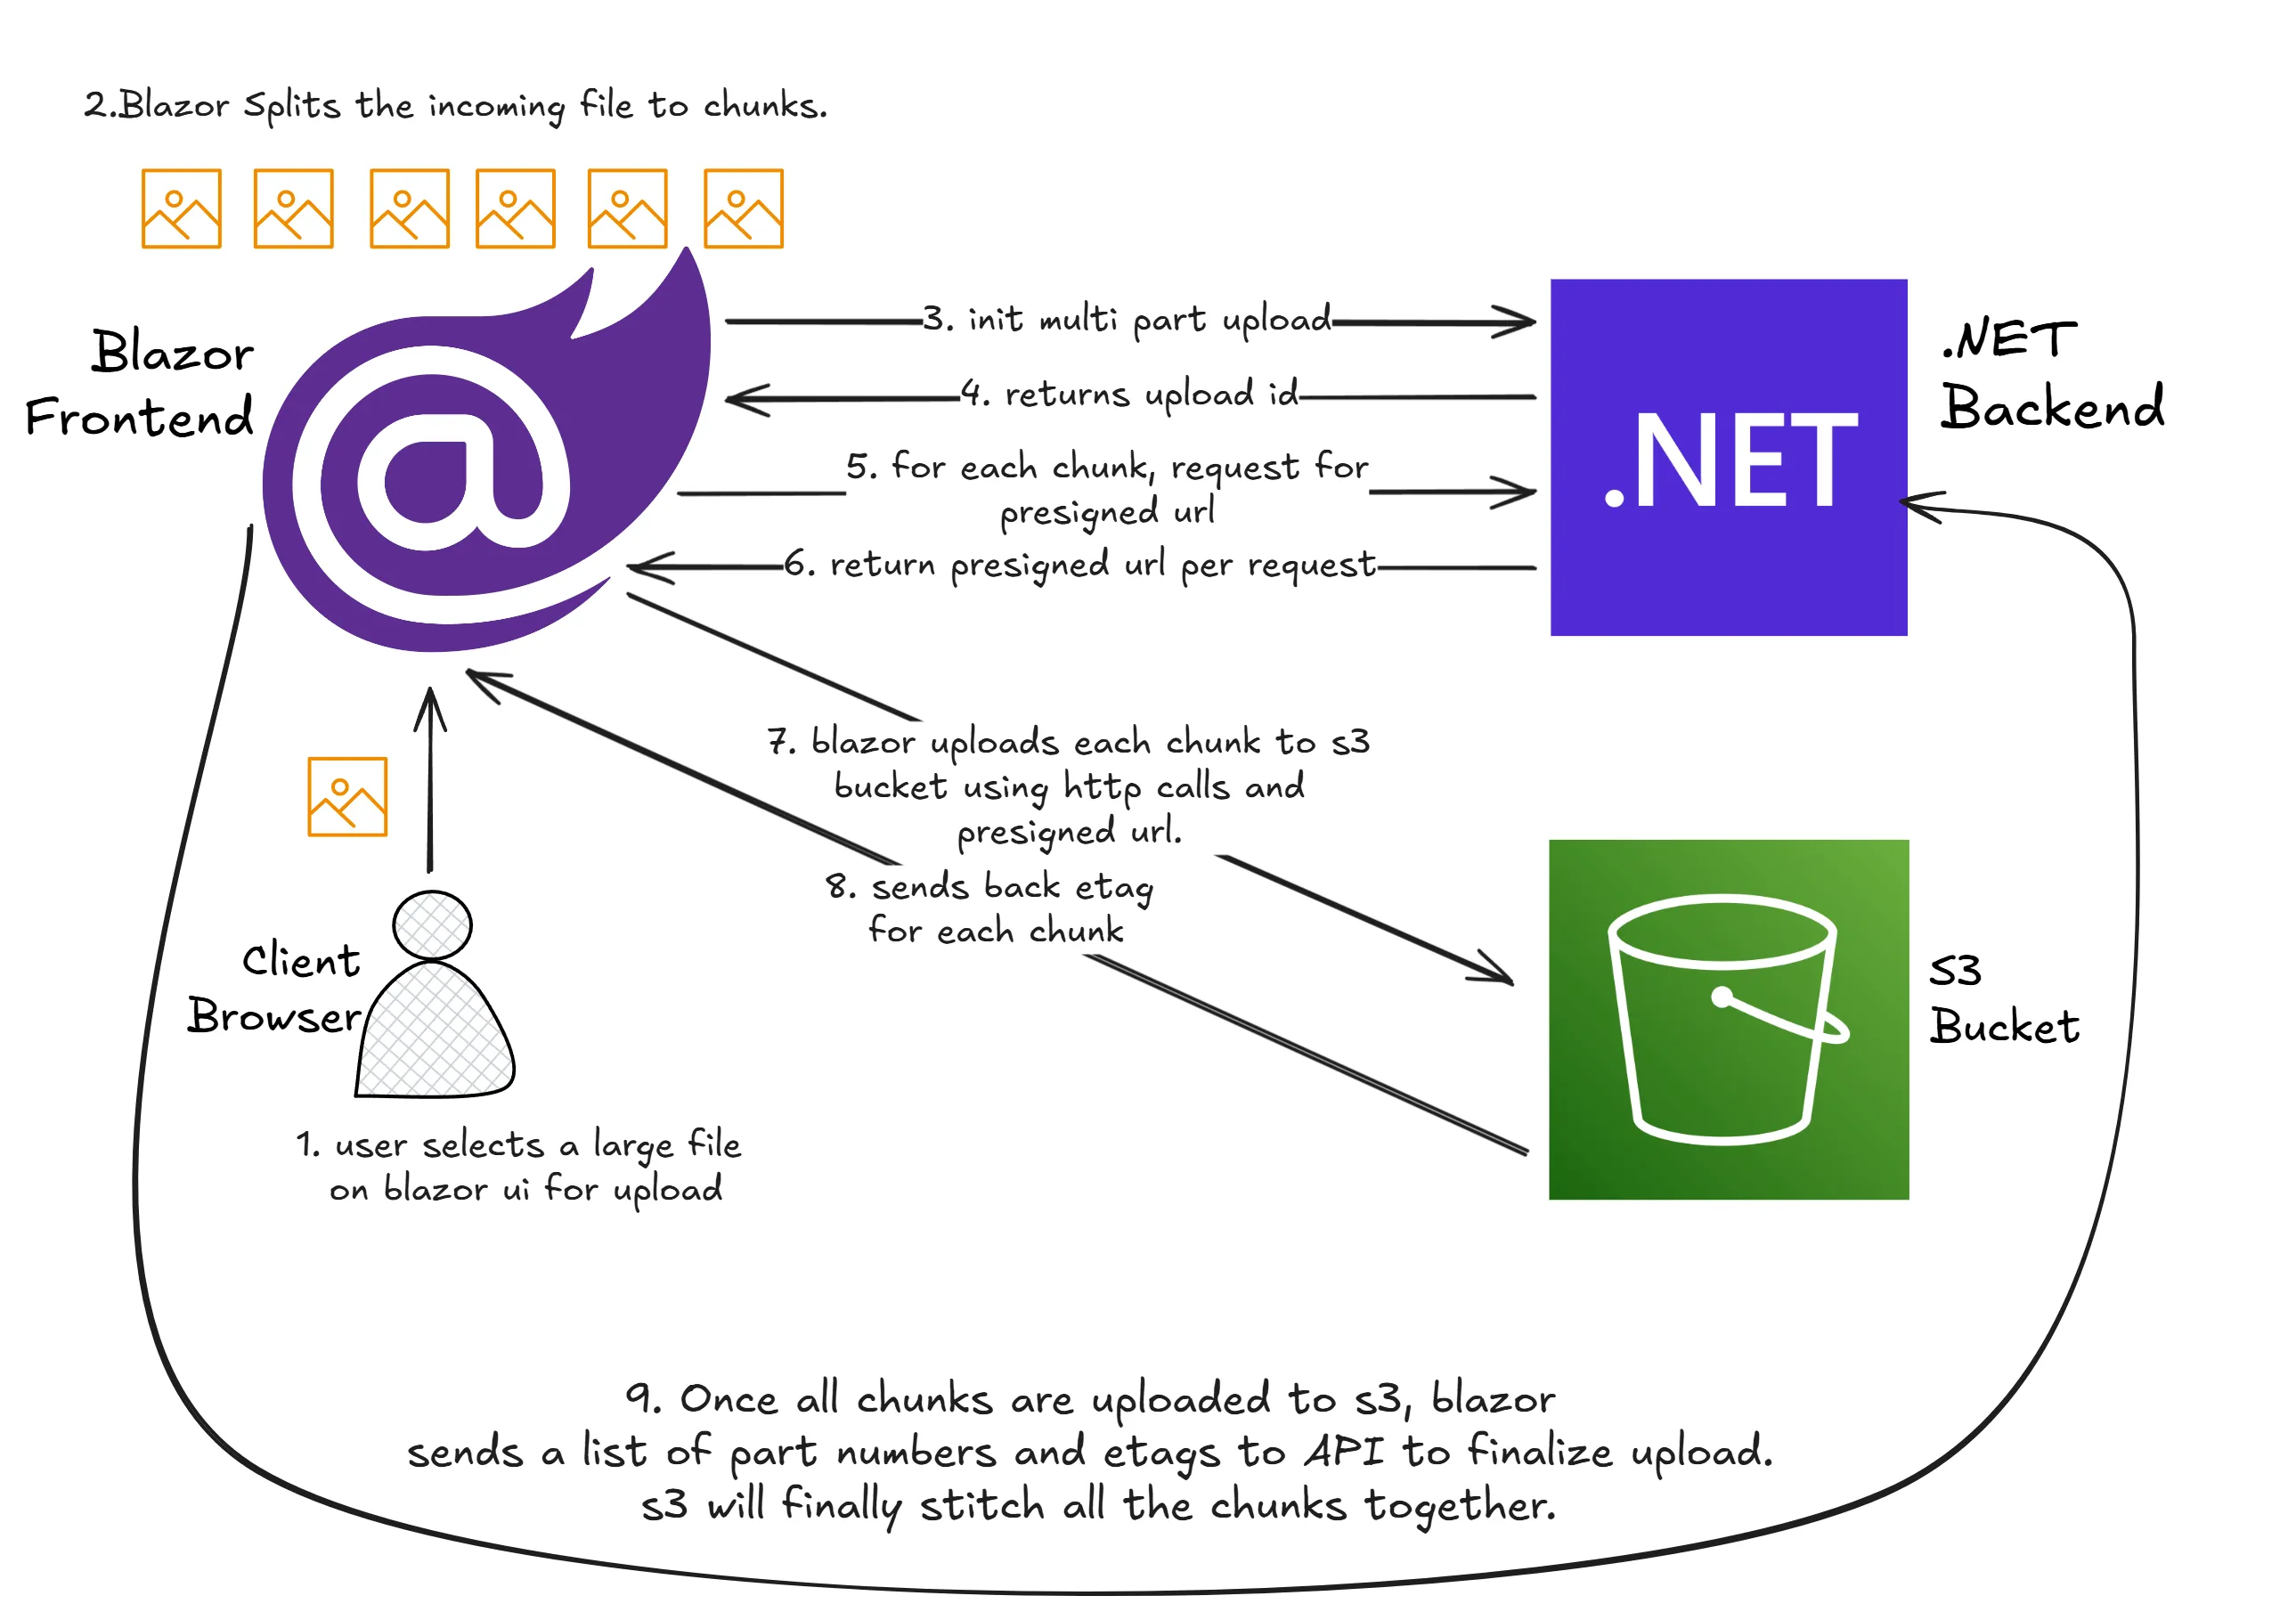
In this architecture, the Blazor Web App handles file selection and chunking on the client side. Once a file is selected, the client requests an initiate multipart upload call from the .NET Web API backend. The backend uses the AWS SDK to initiate the upload and returns an uploadId.
For each chunk, the Blazor client requests a presigned URL from the backend, specifying the part number and uploadId. The backend generates a presigned URL for that specific chunk and sends it back. The Blazor client then uses HttpClient to upload the chunk directly to S3 via the presigned URL.
This process continues until all chunks are uploaded. Once done, the client calls a complete multipart upload endpoint on the backend, passing the uploadId and the list of uploaded parts (with their ETags). The backend finalizes the upload with AWS, stitching all parts together into a single object.
This architecture has clear separation of concerns:
- The Blazor client handles chunking, retries, and direct uploads.
- The .NET Web API handles AWS interactions (init, presigned URLs, complete).
- AWS S3 handles actual storage and assembling the final file.
By offloading the heavy work to the client and S3, your backend stays lightweight and scalable, and the upload process remains reliable even for massive files.
Enough theory, let’s start building!
Shared Library
Firstly, since we have both the API and Blazor Client application, there is a need to have a shared library to define the request and responses.
Open up Visual Studio IDE and create a new C# Library Project. I named it as Shared.
Define the following records.
UploadRequest
public record UploadRequest(string FileName, double FileSize);Purpose:
Sent from the client to the API to start an upload process.
Fields:
FileName: Name of the file to be uploaded.FileSize: Size of the file, typically in bytes or megabytes.
InitiateResponse
public record InitiateResponse(string UploadId, string Key, List<PresignedPartUrl> Urls);Purpose:
Returned by the server after initiating a multi-part upload. Provides everything the client needs to start uploading.
Fields:
UploadId: A unique identifier for this upload session.Key: The destination path or object name in the storage system.Urls: A list of pre-signed URLs for each part of the file.
PresignedPartUrl
public record PresignedPartUrl(int PartNumber, string Url);Purpose:
Represents a single part of the upload along with its upload URL.
Fields:
PartNumber: Index of the part within the file.Url: A pre-signed URL allowing direct upload to storage.
CompleteUploadRequest
public record CompleteUploadRequest(string UploadId, string Key, List<CompletedPart> Parts);Purpose:
Sent by the client to finalize the upload and trigger the server to stitch the parts together.
Fields:
UploadId: The identifier of the upload session.Key: The intended object path for the uploaded file.Parts: List of all uploaded parts with their identifiers.
CompletedPart
public record CompletedPart(int PartNumber, string ETag);Purpose:
Identifies a successfully uploaded part, required to finalize the upload.
Fields:
PartNumber: The specific part index.ETag: Unique identifier or checksum of the uploaded part, usually returned by the storage service.
UploadCompletedResponse
public record UploadCompletedResponse(string Key);Purpose:
Sent by the server after successfully completing the upload.
Fields:
Key: Final path or name of the uploaded object in storage.
Setting up the .NET Backend
With that done, let’s create the .NET 9 Web API project.
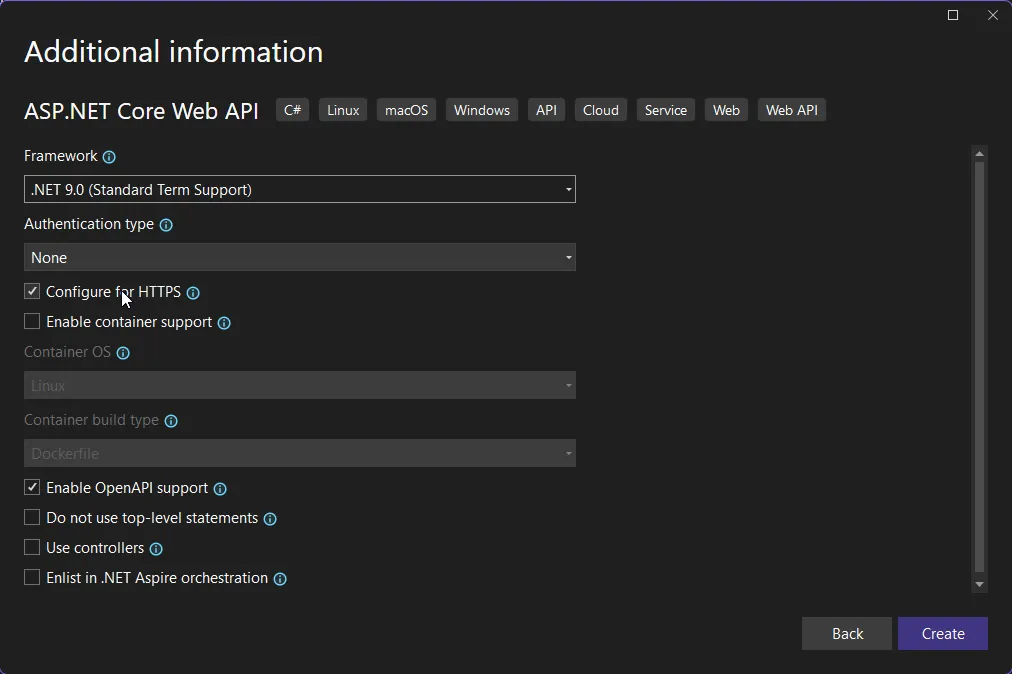
This Web API will be responsible for the following,
- Initiates the multipart upload, and retuns the upload id back to the client.
- Generates Pre-Signed URLs to upload each chunk of data that is split by the client.
- Completes the multi part upload as soon as the client signals the API.
Install the following packages.
Install-Package AWSSDK.Extensions.NETCore.SetupInstall-Package AWSSDK.S3Once that’s done, in the Program.cs let’s get the S3 service registered into our DI Container. Also, since our Blazor Client will be invoking this API, make sure that you configure the CORS options to ensure that the API allows requests from any origin.
You can be more specific about the localhost port that the Blazor Client would run on, however since this is just a demonstration, I have configured it allow requests from any origin, method or header.
builder.Services.AddAWSService<IAmazonS3>();builder.Services.AddCors(options =>{ options.AddDefaultPolicy(policy => { policy .AllowAnyOrigin() .AllowAnyHeader() .AllowAnyMethod(); });});...app.UseCors();Now, for the interesting part! Let’s add the crucial endpoints.
const string bucketName = "cwm-image-input";const int chunkSizeInMB = 10;
app.MapPost("/initiate-upload", async (UploadRequest request, IAmazonS3 s3Client) =>{    var key = $"uploads/{request.FileName}";
    var initRequest = new InitiateMultipartUploadRequest    {        BucketName = bucketName,        Key = key    };
    var initResponse = await s3Client.InitiateMultipartUploadAsync(initRequest);
    int totalParts = (int)Math.Ceiling(request.FileSize / (chunkSizeInMB * 1024 * 1024));    var presignedUrls = new List<PresignedPartUrl>();
    for (int i = 1; i <= totalParts; i++)    {        var urlRequest = new GetPreSignedUrlRequest        {            BucketName = bucketName,            Key = key,            Verb = HttpVerb.PUT,            PartNumber = i,            UploadId = initResponse.UploadId,            Expires = DateTime.UtcNow.AddMinutes(10),            ContentType = "application/octet-stream"        };
        string url = s3Client.GetPreSignedURL(urlRequest);        presignedUrls.Add(new PresignedPartUrl(i, url));    }    return Results.Ok(new InitiateResponse(initResponse.UploadId, key, presignedUrls));});
app.MapPost("/complete-upload", async (CompleteUploadRequest request, IAmazonS3 s3Client) =>{    var completeRequest = new CompleteMultipartUploadRequest    {        BucketName = bucketName,        Key = request.Key,        UploadId = request.UploadId,        PartETags = request.Parts.Select(p => new PartETag(p.PartNumber, p.ETag)).ToList()    };
    var response = await s3Client.CompleteMultipartUploadAsync(completeRequest);
    return Results.Ok(new UploadCompletedResponse(response.Key));});
Here’s a clear, professional explanation of each endpoint defined in your code for handling multi-part uploads using AWS S3 with .NET Minimal APIs:
Initiate MultiPart Upload Endpoint
This HTTP POST endpoint initiates a new multi-part upload session for a given file. When the client sends an UploadRequest containing the file name and size, the API performs the following steps:
- Constructs the S3 object key using the file name (
uploads/{FileName}). - Sends a request to S3 to initiate a multi-part upload using the
InitiateMultipartUploadRequest. This returns anUploadIdwhich uniquely identifies the upload session. - Calculates the total number of parts based on the provided file size and a fixed chunk size (10 MB in this case).
- Generates pre-signed URLs for each part using the
GetPreSignedUrlRequest. These URLs allow the client to upload each part directly to S3 without going through the API server, improving performance and reducing server load. - Returns an
InitiateResponsecontaining the upload ID, key, and a list ofPresignedPartUrlobjects. Each of these URLs corresponds to a specific part of the file and is valid for a limited time (10 minutes).
This endpoint sets up everything the client needs to begin uploading parts of the file directly to S3.
Complete MultiPart Upload Endpoint
This HTTP POST endpoint is called after all parts of a file have been successfully uploaded to S3 via the pre-signed URLs. It expects a CompleteUploadRequest containing the UploadId, the Key, and a list of uploaded parts with their corresponding ETag values.
The process involves:
- Creating a
CompleteMultipartUploadRequestthat includes the original upload ID, object key, and allPartETagvalues. - Sending the complete request to S3, which assembles all the parts into a single object. If any part is missing or incorrect, the request will fail.
- Returning an
UploadCompletedResponseto the client, confirming that the file was successfully assembled and stored under the specified key.
This endpoint finalizes the upload process, ensuring that the uploaded parts form a complete and valid file in the target S3 bucket.
Setting up Blazor Client
Now that we have the backend ready to go, let’s build our Blazor Frontend. For this demonstration I am going to use Blazor Standalone WASM App.
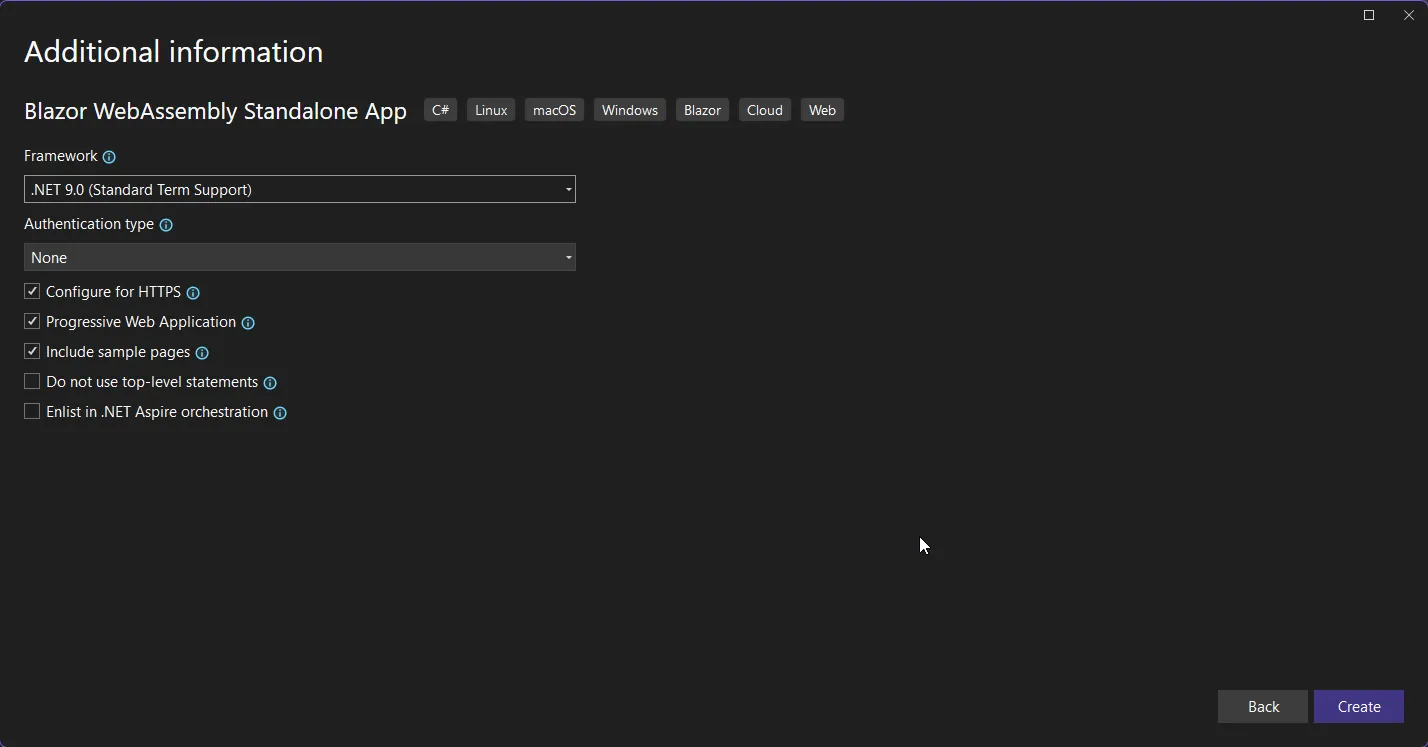
This setup runs entirely in the browser and communicates with Amazon S3 APIs and the backend .NET API for uploading files using the pre-signed URLs.
Firstly, install the following package,
Install-Package Microsoft.Extensions.HttpThis is specifically to register Http Client within the Blazor Pipeline.
File Upload Service
With that done, let’s create the uploader interface that will help us to interact with our .NET API.
Create a new folder called Services, and add a interface IFileUploadService.
public interface IFileUploadService{ Task<InitiateResponse> InitiateUploadAsync(string fileName, long fileSize); Task<UploadCompletedResponse> CompleteUploadAsync(CompleteUploadRequest request);}The IFileUploadService interface defines two asynchronous methods used for managing file uploads in a client-side Blazor application.
The InitiateUploadAsync method is responsible for starting a multi-part upload process. It takes the file name and file size, then returns an InitiateResponse that includes the upload ID, object key, and a list of pre-signed URLs. These URLs allow the client to upload file parts directly to S3 without routing through the server.
The CompleteUploadAsync method is used to finalize the upload once all parts have been successfully uploaded. It accepts a CompleteUploadRequest containing the upload ID, key, and the list of completed parts with their corresponding ETags. The method returns an UploadCompletedResponse that confirms the file has been assembled and stored.
Let’s implement this interface now. Add a new class named FileUploadService.
using FileUploader.Web.Services;using Shared;using System.Net.Http.Json;
public class FileUploadService : IFileUploadService{    private readonly HttpClient _http;
    public FileUploadService(HttpClient http)    {        _http = http;    }
    public async Task<InitiateResponse> InitiateUploadAsync(string fileName, long fileSize)    {        var request = new UploadRequest(fileName, fileSize);
        var response = await _http.PostAsJsonAsync("initiate-upload", request);        response.EnsureSuccessStatusCode();
        var result = await response.Content.ReadFromJsonAsync<InitiateResponse>();
        if (result == null)            throw new InvalidOperationException("InitiateUploadAsync: Response content was null or deserialization failed.");
        return result;    }
    public async Task<UploadCompletedResponse> CompleteUploadAsync(CompleteUploadRequest request)    {        var response = await _http.PostAsJsonAsync("complete-upload", request);        response.EnsureSuccessStatusCode();
        var result = await response.Content.ReadFromJsonAsync<UploadCompletedResponse>();
        if (result == null)            throw new InvalidOperationException("CompleteUploadAsync: Response content was null or deserialization failed.");
        return result;    }}
The FileUploadService class is the concrete implementation of the IFileUploadService interface. It acts as a bridge between the Blazor client and the backend API responsible for managing S3 file uploads.
The constructor receives an HttpClient instance via dependency injection, which is used to make HTTP calls to the backend. We will register the HTTPClient in the next section of this article.
The InitiateUploadAsync method constructs an UploadRequest with the file name and size, sends it as a JSON payload to the initiate-upload endpoint, and expects an InitiateResponse in return. If the response is unsuccessful or deserialization fails, it throws an exception to prevent the upload process from continuing with invalid data.
The CompleteUploadAsync method works similarly. It sends the completed parts along with the upload ID and key to the complete-upload endpoint. After the backend processes and finalizes the upload with S3, it returns an UploadCompletedResponse. Again, proper error handling ensures that the application doesn’t proceed if the response is invalid or missing.
Finally, in the Program.cs, let’s add our HTTP Client.
builder.Services.AddHttpClient<IFileUploadService, FileUploadService>(client =>{ client.BaseAddress = new Uri("https://localhost:7218/");});This code registers the FileUploadService with the Blazor dependency injection container, allowing it to be injected wherever IFileUploadService is required.
It uses AddHttpClient to configure an HttpClient specifically for FileUploadService. The BaseAddress is set to https://localhost:7218/, which is the base URL of the backend API. All relative endpoints (like initiate-upload and complete-upload) will be resolved against this base address.
Uploader Component
Let’s work on the UI now!
Under the Pages folder, create a new Razor component called Uploader.
@page "/uploader"@using FileUploader.Web.Services@using System.Diagnostics@using Shared@inject IFileUploadService UploadService
<h3>Upload Large File</h3>
<InputFile OnChange="OnFileSelected" />
@if (uploading){    <div style="margin-top:1rem;">        <div style="width: 100%; background: #eee; border-radius: 5px; overflow: hidden;">            <div style="height: 24px; width: @(progress)% ; background: #28a745; transition: width 0.2s;"></div>        </div>        <p>Progress: @progress %</p>        <p>Elapsed Time: @elapsedTime</p>    </div>}
@if (!string.IsNullOrEmpty(finalUrl)){    <div class="alert alert-success mt-2">        <strong>Upload complete!</strong><br />        <p>Uploaded to : @finalUrl</p>    </div>}
@code {    private int progress = 0;    private bool uploading = false;    private string finalUrl = "";    private string elapsedTime = "";    private Stopwatch stopwatch = new();
    private async Task OnFileSelected(InputFileChangeEventArgs e)    {        var file = e.File;        if (file is null) return;
        uploading = true;        progress = 0;        finalUrl = "";        elapsedTime = "";        StateHasChanged();
        stopwatch.Restart();
        var fileSize = file.Size;        var fileName = file.Name;        var chunkSize = 10 * 1024 * 1024; // 10MB        var uploadInit = await UploadService.InitiateUploadAsync(fileName, fileSize);
        var totalParts = (int)Math.Ceiling((double)fileSize / chunkSize);        var stream = file.OpenReadStream(long.MaxValue);        var parts = new List<CompletedPart>();        var bufferPool = new byte[totalParts][];
        for (int i = 0; i < totalParts; i++)        {            var buffer = new byte[chunkSize];            int bytesRead = await stream.ReadAsync(buffer, 0, buffer.Length);            bufferPool[i] = buffer[..bytesRead];        }
        var semaphore = new SemaphoreSlim(5); // Limit to 5 concurrent uploads        var uploadTasks = new List<Task>();
        for (int i = 0; i < bufferPool.Length; i++)        {            int partNumber = i + 1;            byte[] partBytes = bufferPool[i];            string uploadUrl = uploadInit.Urls.First(p => p.PartNumber == partNumber).Url;
            var task = Task.Run(async () =>            {                await semaphore.WaitAsync();                try                {                    using var content = new ByteArrayContent(partBytes);                    content.Headers.ContentType = new System.Net.Http.Headers.MediaTypeHeaderValue("application/octet-stream");
                    using var putResponse = await new HttpClient().PutAsync(uploadUrl, content);                    putResponse.EnsureSuccessStatusCode();
                    var etag = putResponse.Headers.ETag?.Tag ?? throw new Exception($"Missing ETag for part {partNumber}");                    lock (parts)                    {                        parts.Add(new CompletedPart(partNumber, etag));                    }
                    Interlocked.Add(ref progress, (int)((double)partBytes.Length / fileSize * 100));                    await InvokeAsync(StateHasChanged);                }                finally                {                    semaphore.Release();                }            });
            uploadTasks.Add(task);        }
        await Task.WhenAll(uploadTasks);
        var sortedParts = parts.OrderBy(p => p.PartNumber).ToList();        var completedResult = await UploadService.CompleteUploadAsync(new CompleteUploadRequest(uploadInit.UploadId, uploadInit.Key, sortedParts));
        stopwatch.Stop();        elapsedTime = stopwatch.Elapsed.ToString(@"hh\:mm\:ss");        finalUrl = $"{completedResult.Key}";        progress = 100;        uploading = false;
        StateHasChanged();    }}
This Blazor component implements a complete frontend experience for uploading large files using AWS S3’s multipart upload functionality with pre-signed URLs. The process begins with a file selection input (<InputFile>), which triggers the OnFileSelected method when a user selects a file. The method captures the file’s metadata, initializes UI state, and starts a stopwatch to track the total upload time.
Once the file is selected, the component calls InitiateUploadAsync via the injected IFileUploadService. This sends a request to the backend API, which returns an upload session including an UploadId, the target Key, and a list of pre-signed URLs—one for each chunk of the file. These URLs allow the client to upload directly to S3 without routing traffic through the backend server.
The file is then read in chunks of 10MB. For each chunk, the component reads bytes into memory and stores them in a buffer array. Uploads are processed concurrently using a SemaphoreSlim to limit active uploads to 5 at a time, which helps manage system resource usage and network saturation.
Each upload task uses an HttpClient to send a PUT request to its respective pre-signed URL. On successful upload, the S3 response includes an ETag, which is collected and stored in a thread-safe way. The upload progress is updated incrementally based on the chunk size, and the UI reflects this using a styled progress bar.
Once all parts are uploaded, the component sorts the completed parts by PartNumber and calls CompleteUploadAsync, which tells the backend to finalize the multipart upload using the collected ETags. When the operation completes successfully, the UI displays a success message along with the final file location, and the elapsed time is shown. The process is clean, efficient, and provides a smooth user experience for handling large file uploads in a Blazor WebAssembly application.
Finally, in the NavMenu component, add the following. This is just to show a nav menu item on the Blazor App’s sidebar.
<div class="nav-item px-3"> <NavLink class="nav-link" href="uploader"> <span class="bi bi-list-nested-nav-menu" aria-hidden="true"></span> Uploader </NavLink></div>That’s everything! Let’s test out our implementation now.
Testing
Build and run both the Web API and Blazor projects. Let’s do some testing now.
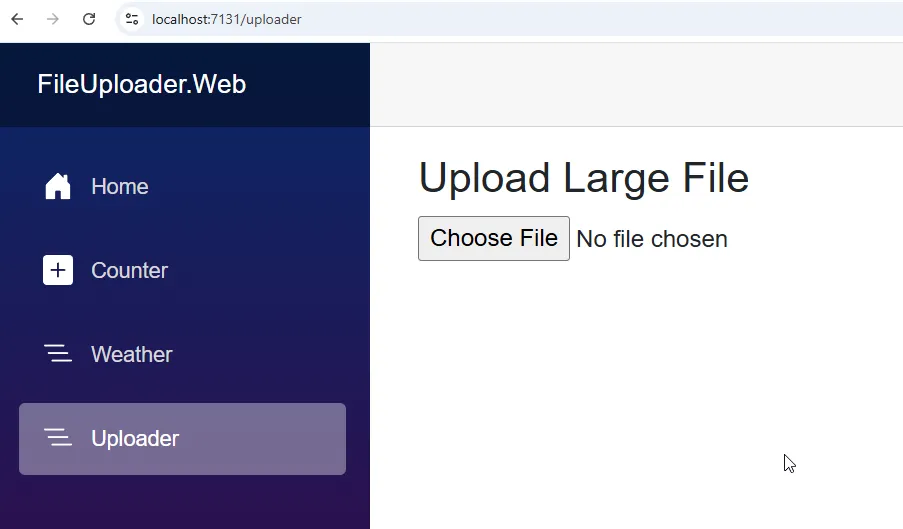
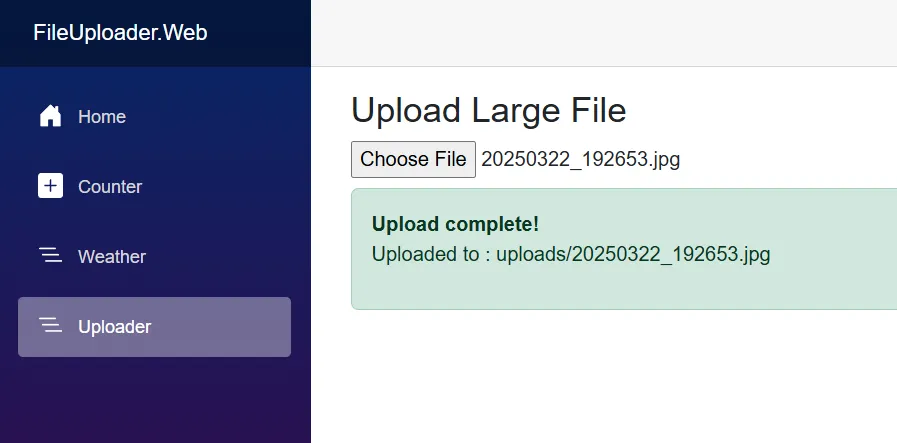
Let’s first upload a file that’s well under 10Mb.
As you can see, the upload is completed.
What’s more interesting is the network tab on your browser.
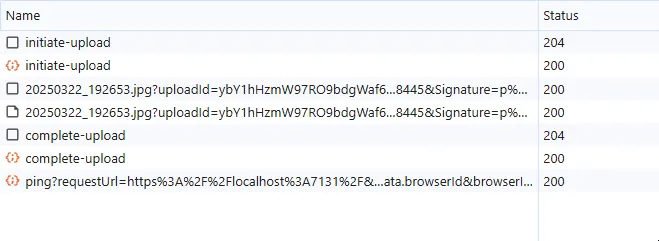
The Blazor client performs three key network requests during the file upload process:
- Initiate Upload Request:
The client first calls theinitiate-uploadendpoint on the .NET API. In response, the server returns theUploadId, the storageKey, and a list of pre-signed URLs—one for each file chunk. Since the file in this case is under 10MB, chunking is not needed, and only a single pre-signed URL is returned. - Direct Upload to S3:
The client then uses the pre-signed URL to upload the file directly to Amazon S3 via an HTTPPUTrequest. This bypasses the backend and leverages S3’s security and performance for handling large file transfers. - Complete Upload Request:
Once the upload is successful, the client makes a final call to thecomplete-uploadendpoint on the .NET API. This notifies the backend that the upload is finished. The backend, in turn, sends a request to S3 to finalize the upload session—stitching together all the uploaded parts into a single object.
Summary
That’s it for this tutorial. I hope you found it helpful and now have a clear understanding of how to implement large file uploads in ASP.NET Core using AWS S3 multipart upload with pre-signed URLs.
You’ve seen how to set up the backend API to generate and manage upload sessions, and how to build a Blazor WebAssembly client that handles chunking, parallel uploads, progress tracking, and completion. This approach keeps your server lightweight and scalable while offloading heavy file transfers directly to S3.
If you have any questions, feedback, or run into issues while implementing this, feel free to reach out. And if you found this useful, consider sharing it with your network or giving it a star on GitHub (if applicable).
Happy coding!


