In this article, we will learn about getting started with Blazor Hero - A Clean Architecture Template built for Blazor WebAssembly using MudBlazor Components. This project will make your Blazor Learning Process much easier than you anticipate. Blazor Hero is meant to be an Enterprise Level Boilerplate, which comes free of cost, completely open sourced. So, If you do like this Boilerplate, do consider supporting me with a coffee maybe? ;) Let’s get started.
Blazor Hero v2.2 is now available with lots of awesome features!
Here is a complete video overview of BlazorHero! Do Like and Subscribe to my Youtube Channel!
https://www.youtube.com/watch?v=j7BxKN7HYjk
Important Links
Here are a few of the quick links that will help you with the process of getting used to Blazor Hero.
- Youtube Overview Video about Blazor Hero
- Github Repository - Fork, Star and Contribute!
- NuGet Package Page
- Demo Video on my Facebook page (An Older Version)
Prerequisites
- Make sure you are running on the latest .NET 5 SDK (SDK 5.0 and above only). Get the latest one here.
- Visual Studio 2019 (v16.8+) ( You can check out my Installation Guide of Visual Studio 2019 Community which is completely Free to use.) Make sure that ASP.NET and web development workload is installed.
- Install the latest DOTNET & EF CLI Tools by using this command – dotnet tool install –-global dotnet-ef
- I recommend that you read Onion Architecture In ASP.NET Core With CQRS – Detailed article to understand this implementation much better. This project is just an Advanced Version of the mentioned article.
- Once you clear with Onion Architecture Implementation, you will also need to be aware of CQRS MediatR Pattern. I have written a step-by-step guide on how to implement CQRS using MediatR Library. Read it here.
Getting Started With Blazor Hero - Clean Architecture Template
Blazor Hero is available as a NuGet Package for you to install. Fire up Command Prompt and run the following command.
dotnet new --install BlazorHero.CleanArchitectureThis will install the entire Solution Template to your machine so that you can generate Awesome Blazor WebAssembly projects using this template and a line of CLI Command. Let’s see a walkthrough. Note that these steps are also demonstrated in the Video that I have mentioned in the Important Links Section on this Guide.
Important: If you were already using BlazorHero v1.x, run this command to upgrade to v2.2
dotnet new --install BlazorHero.CleanArchitecture::2.2.0Once the package is installed, it will be available globally on your machine. Let’s open up the command prompt again and change the directory to your actual working directory. Mine is D:\Repositories\
cd /d D:\Repositories\Now that we are at the Working Directory, let’s use a CLI command that would generate a Blazor Hero templated Solution with your own custom Namespace!
dotnet new BlazorHero.CleanArchitecture -n WarehouseManger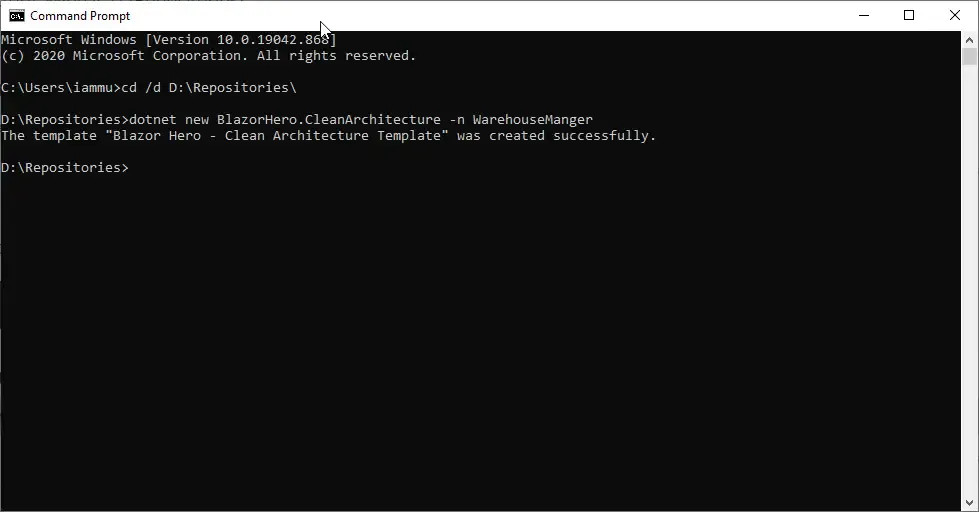
You can see the success message which states your templated project has been created. Let’s check out the Repositories\WarehouseManager Folder.
PS, you might see a slightly different folder structure from BlazorHero v2.2 and above.
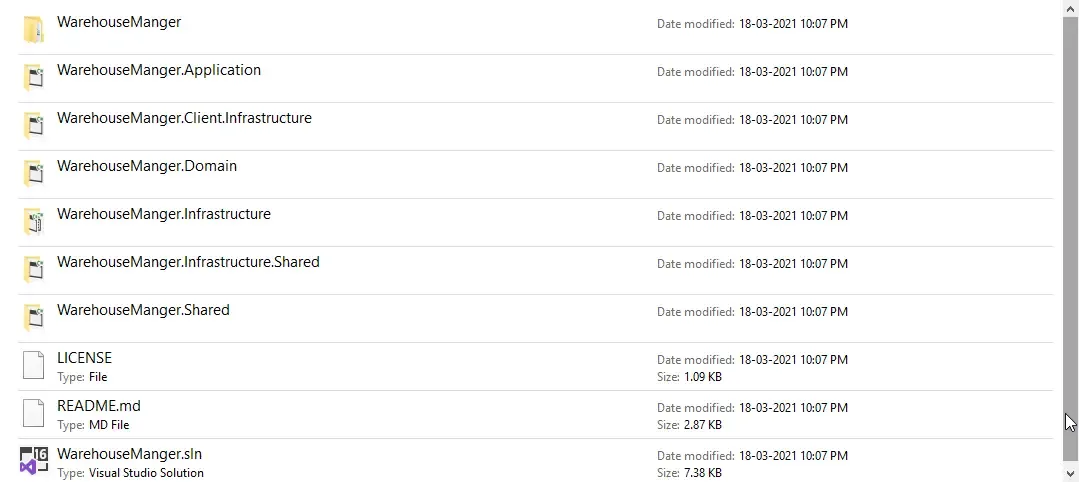
This Solution follows an Onion Architecture for better maintainability and scalability of the associated project. You can see that all the Layers of the Solutions are created with your custom namespace. Cool, yeah? Let’s open up the solution file. Wait for Visual Studio to finish installing all the required packages. You can see the Folder Structure of the Project below.
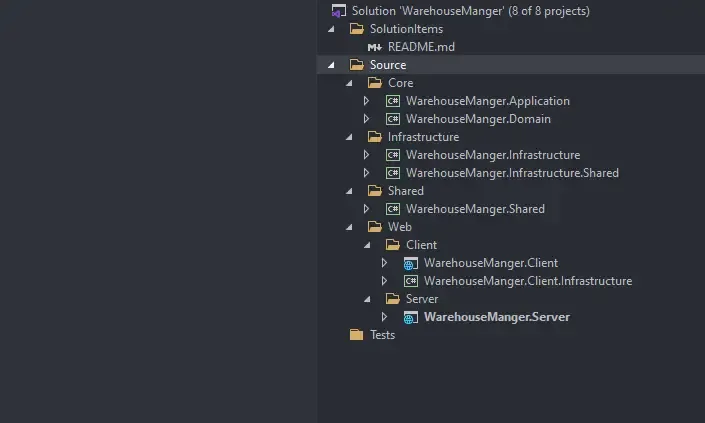
Make sure that you set the YourNamespace.Server project as the startup project.
By default, the localdb instance of your SQLServer is used as the Data Source with your namespace as the DB Name. Feel free to change the connection strings which are located at the appsettings.json and appsettings.Development.json in the Server Project.
"ConnectionStrings": { "DefaultConnection": "Data Source=(localdb)\\mssqllocaldb;Initial Catalog=WarehouseManger;Integrated Security=True;MultipleActiveResultSets=True"},Once you have fixed up your connection string, the next step is to create the database and update it. For this, open up the package manager console and set the default project as the YouNamespace.Insfrastructure project. Make sure that the YourNamespace.Server is set as the startup project as well. This is because all the packages and DBContexts related to building / migrating EFCore SQL Server databases are installed in the Infrastructure project.
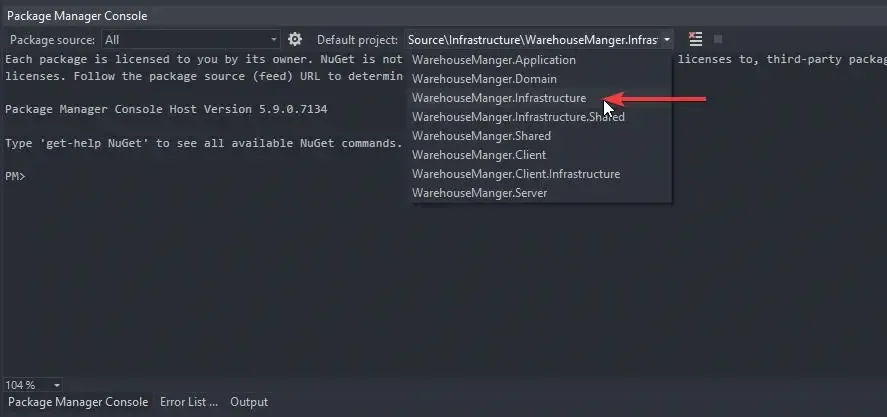
With that done, run the following command.
update-databaseNote that I have already added the latest migrations of the database. You need not run the add-migration command again.
Important: With the release of v2.0 and above, there are lots of schema changes to the application entity definition. Make sure that you are not using the database of Blazor Hero v1.x. Make sure you have a fresh database.
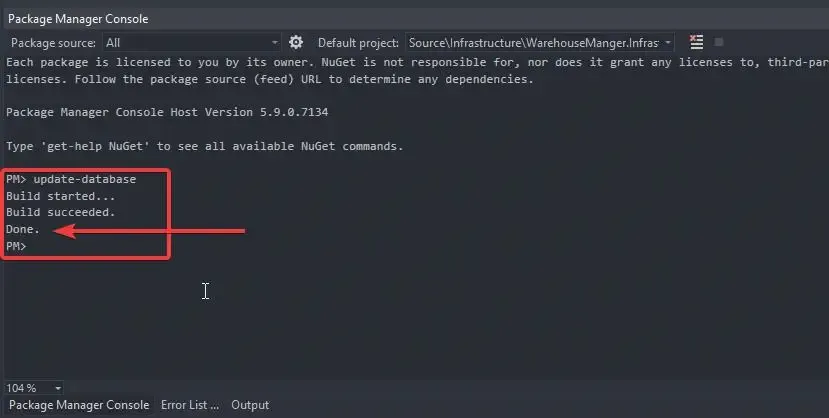
Once the database migration is done, you will be able to see the newly created database in the server explorer. Default Data like Roles and Users will be seeded into the database when you run the application for the first time.
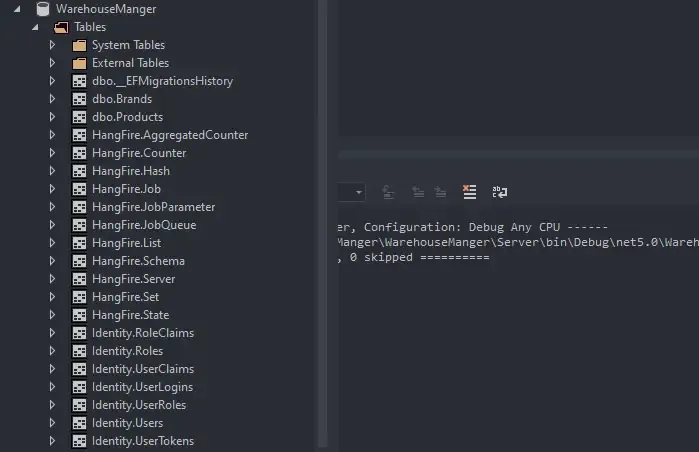
Note that this screenshot is just a demonstration. You will actually have much more tables than this.
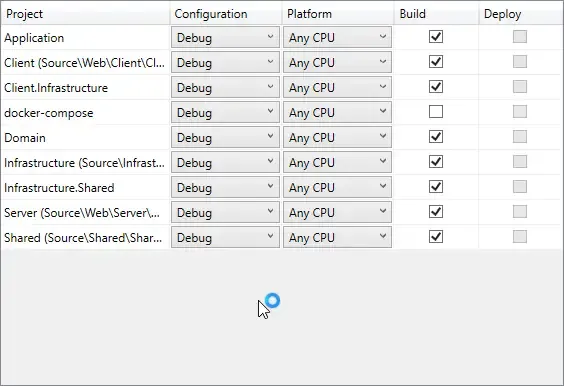
With the database migrations done, we are good to go. I personally recommend using the Kestrel Server instead of the IIS Server Variant. To switch to Kestrel, do the following.
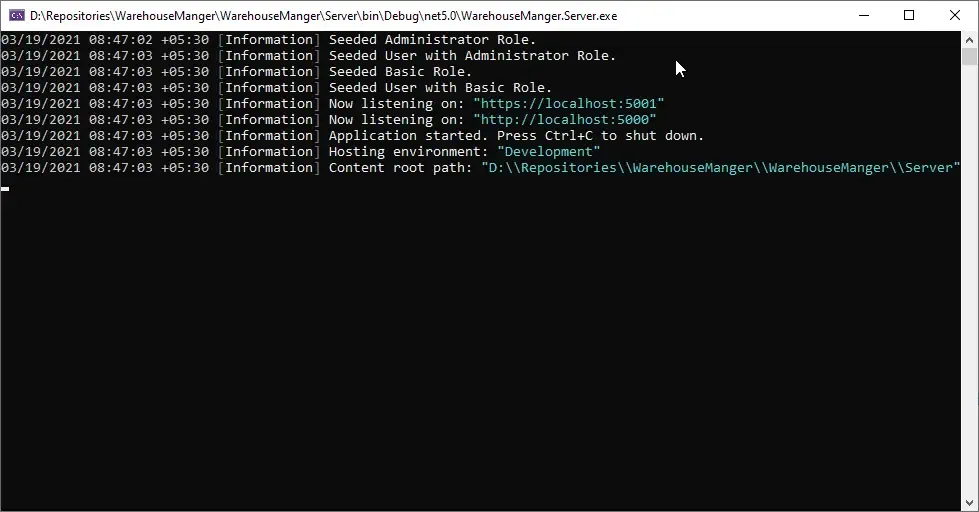
Once you run the application with Kestrel, you can see the below terminal popup. Here you can note that some default data is seeded while the application is run for the first time. This includes default roles, users, and permissions.
Let’s have a quick overview/guide of getting along with Blazor Hero.
Docker Support!
Not interested in Docker?
By default, Docker project build is disabled for BlazorHero. You can re-enable them by right-clicking the Solution in Visual Studio and enabling ‘docker-compose’ Build option in the Configuration Properties section!

Here are the steps:
- Install Docker on Windows via
https://docs.docker.com/docker-for-windows/install/ - Open up Powershell on Windows and run the following
cd c:\dotnet dev-certs https -ep $env:USERPROFILE\.aspnet\https\aspnetapp.pfx -p securePassword123dotnet dev-certs https --trust- Note - Make sure that you use the same password that has been configured in the
docker-compose.ymlfile. By default,securePassword123is configured.
- 5005 & 5006 are the ports set up to run blazorHero on Docker, so make sure that these ports are free. You could also change the ports in the docker-compose.yml and Server\Dockerfile files.
- Now navigate back to the root of the BlazorHero Project on your local machine and run the following via terminal - docker-compose -f ‘docker-compose.yml’ up —build
- This will start pulling MSSQL Server Image from Docker Hub if you don’t already have this image. It’s around 500+ Mbs of download.
- Once that is done, dotnet SDKs and runtimes are downloaded, if not present already. That’s almost 200+ more Mbs of download.
- PS If you find any issues while Docker installs the NuGet packages, it is most likely that your SSL certificates are not installed properly. Apart from that I also added the —disable-parallel in the Server\Dockerfileto ensure network issues don’t pop up. You can remove this option to speed up the build process.
- That’s almost everything. Once the containers are available, migrations are updated in the MSSQL DB, default data is seeded.
- Browse to https://localhost:5005/ to use your version of BlazorHero!
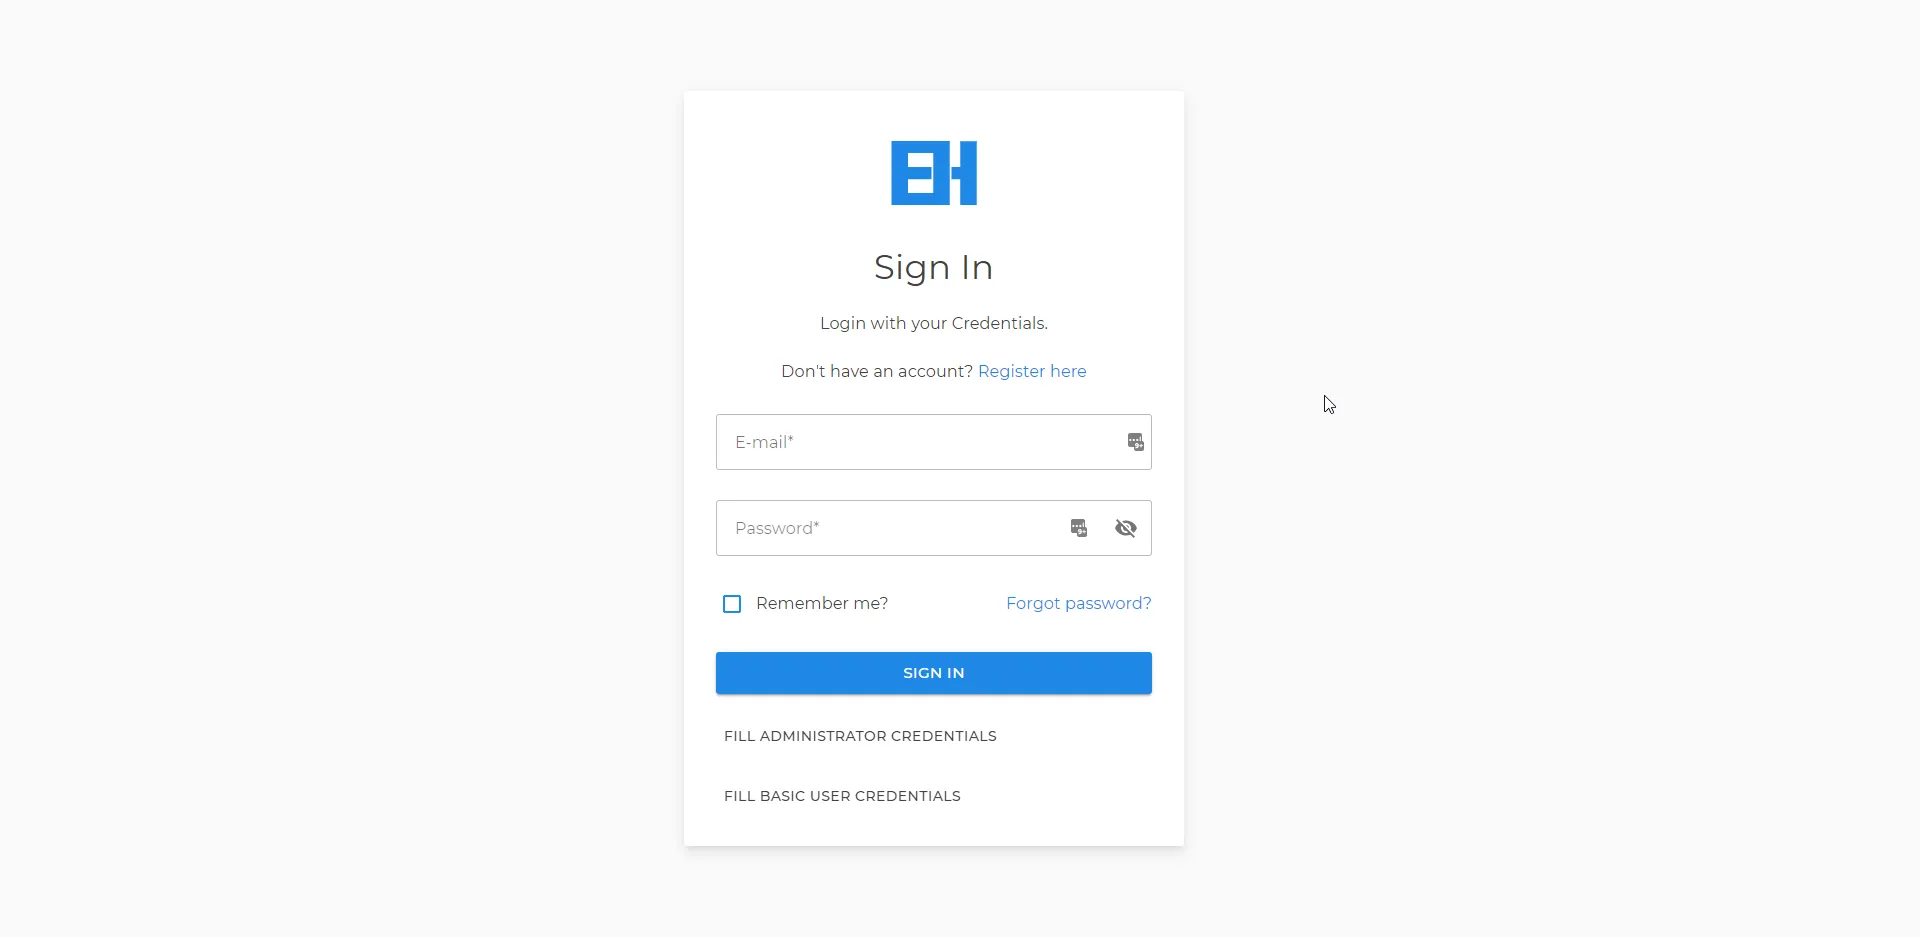
Login Page
Here is the login page that gave you the initial taste of Blazor Hero and MudBlazor Components! To get started quickly, I have added two buttons to fill in the credentials of the default Administrator and Basic Users.
Database Seeding
While the application starts for the first time, default data is seeded to the database.
Roles
- Administrator - Has All the permissions to access each and every resource.
- Basic
Users
Here are the default users registered to the system on startup. The below list follows the following format - email / password / role
- [email protected] / 123Pa$$word! / admin
- [email protected] / 123Pa$$word! / basic
Overall UI
Once you are logged in, you will get to see the below screen.
- Navigation Menu - Top
- App Drawer - Sidebar
- Body
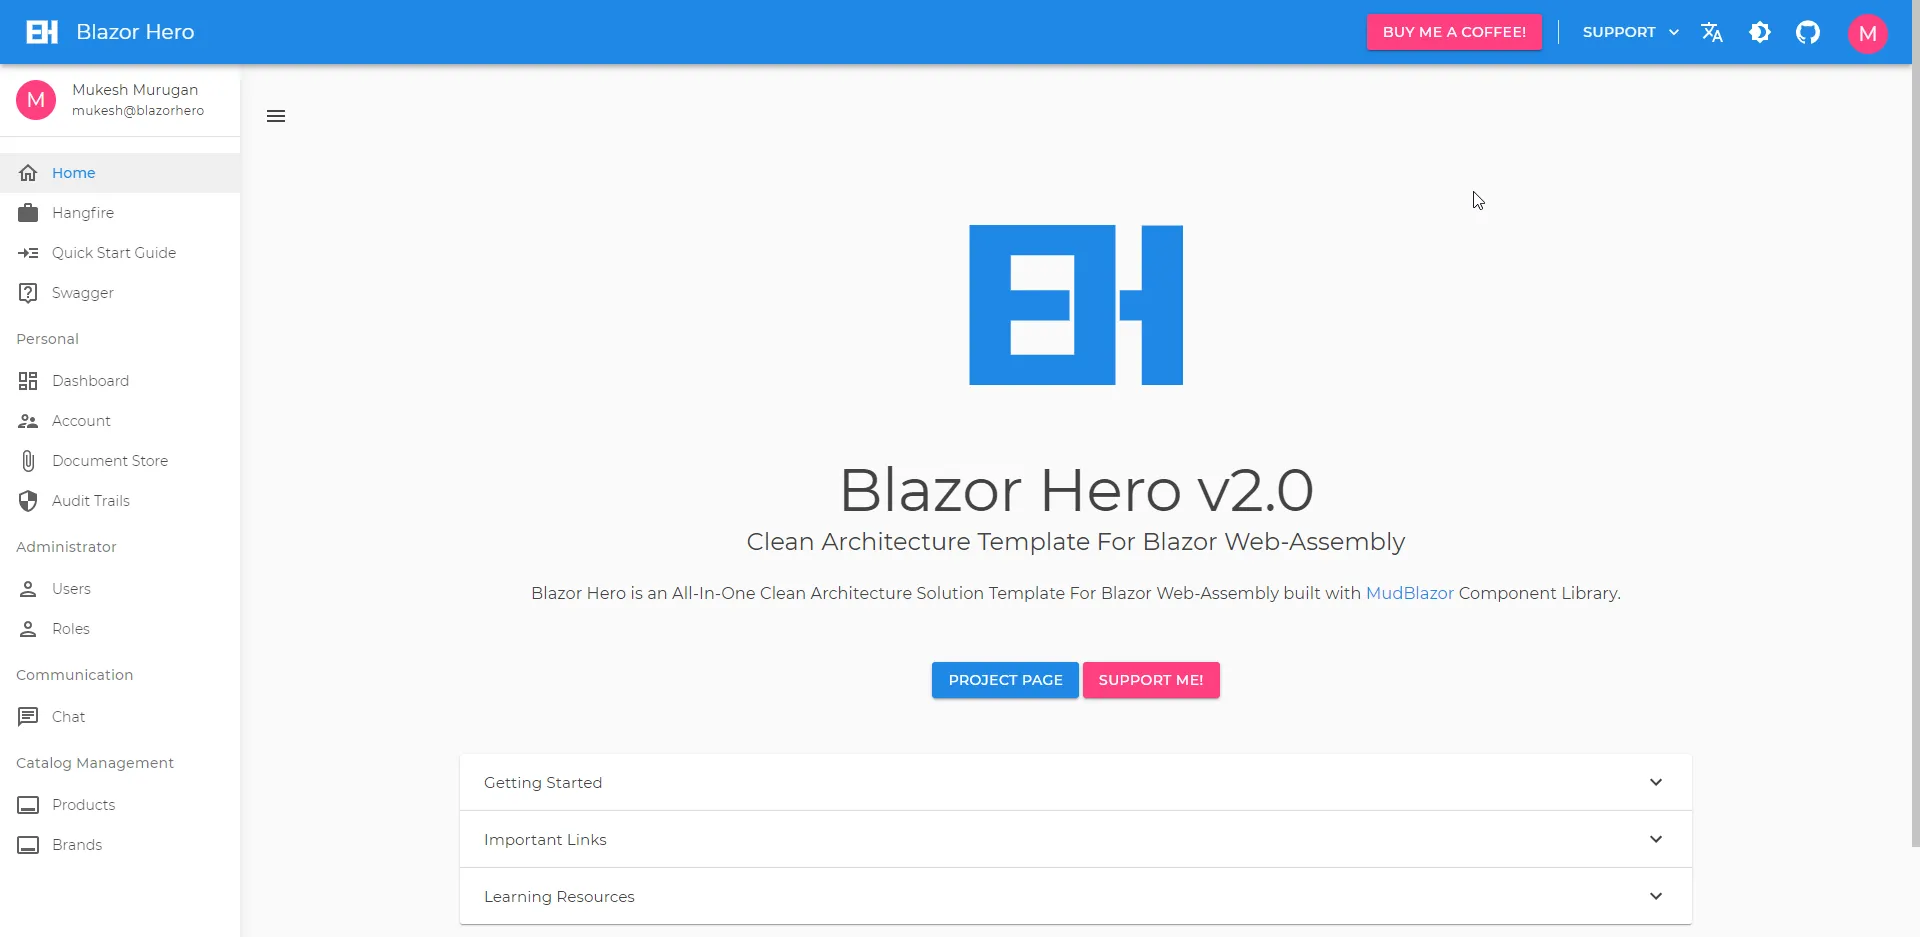
Blazor Hero is completely built with MudBlazor Component Library. A huge shoutout to the entire team! :D Mudblazor actually makes your apps look stunning by making no compromises on the features as well.
Mailing
Currently, the mailing service is enabled for sending User Registration, Reset Password Emails. I have implemented SMTP Services for sending out emails. Feel free to make separate implementations for other mail services like SendGrid. You would just have to add the implementation in the Infrastructure.Shared Project and something like a SendGridMailService under the services folder. Make sure to implement it from the IMailService interface.
By default, all the mails are configured to bounce to an Ethereal mailbox that is meant for test purposes only. You can find the ethereal configuration under the appsettings.json. This means that whoever be the recipient of the mail, it actually ends up in ethereal mailbox only. Pretty cool to have this while testing.
"MailConfiguration": { "From": "[email protected]", "Host": "smtp.ethereal.email", "Port": 587, "UserName": "[email protected]", "Password": "vAKmWQB8CyPUBg8rBQ", "DisplayName": "Mukesh Murugan"},Note that you can generate your own ethereal mailbox credentials by visiting here.
User Registration
If you are logged in as an Administrator, you get permissions to add new users to the system. Let’s add one!
Navigate to /identity/users by clicking on Users in the sidebar. Here you get to see all the registered users.

From here, click on the Register New User button.
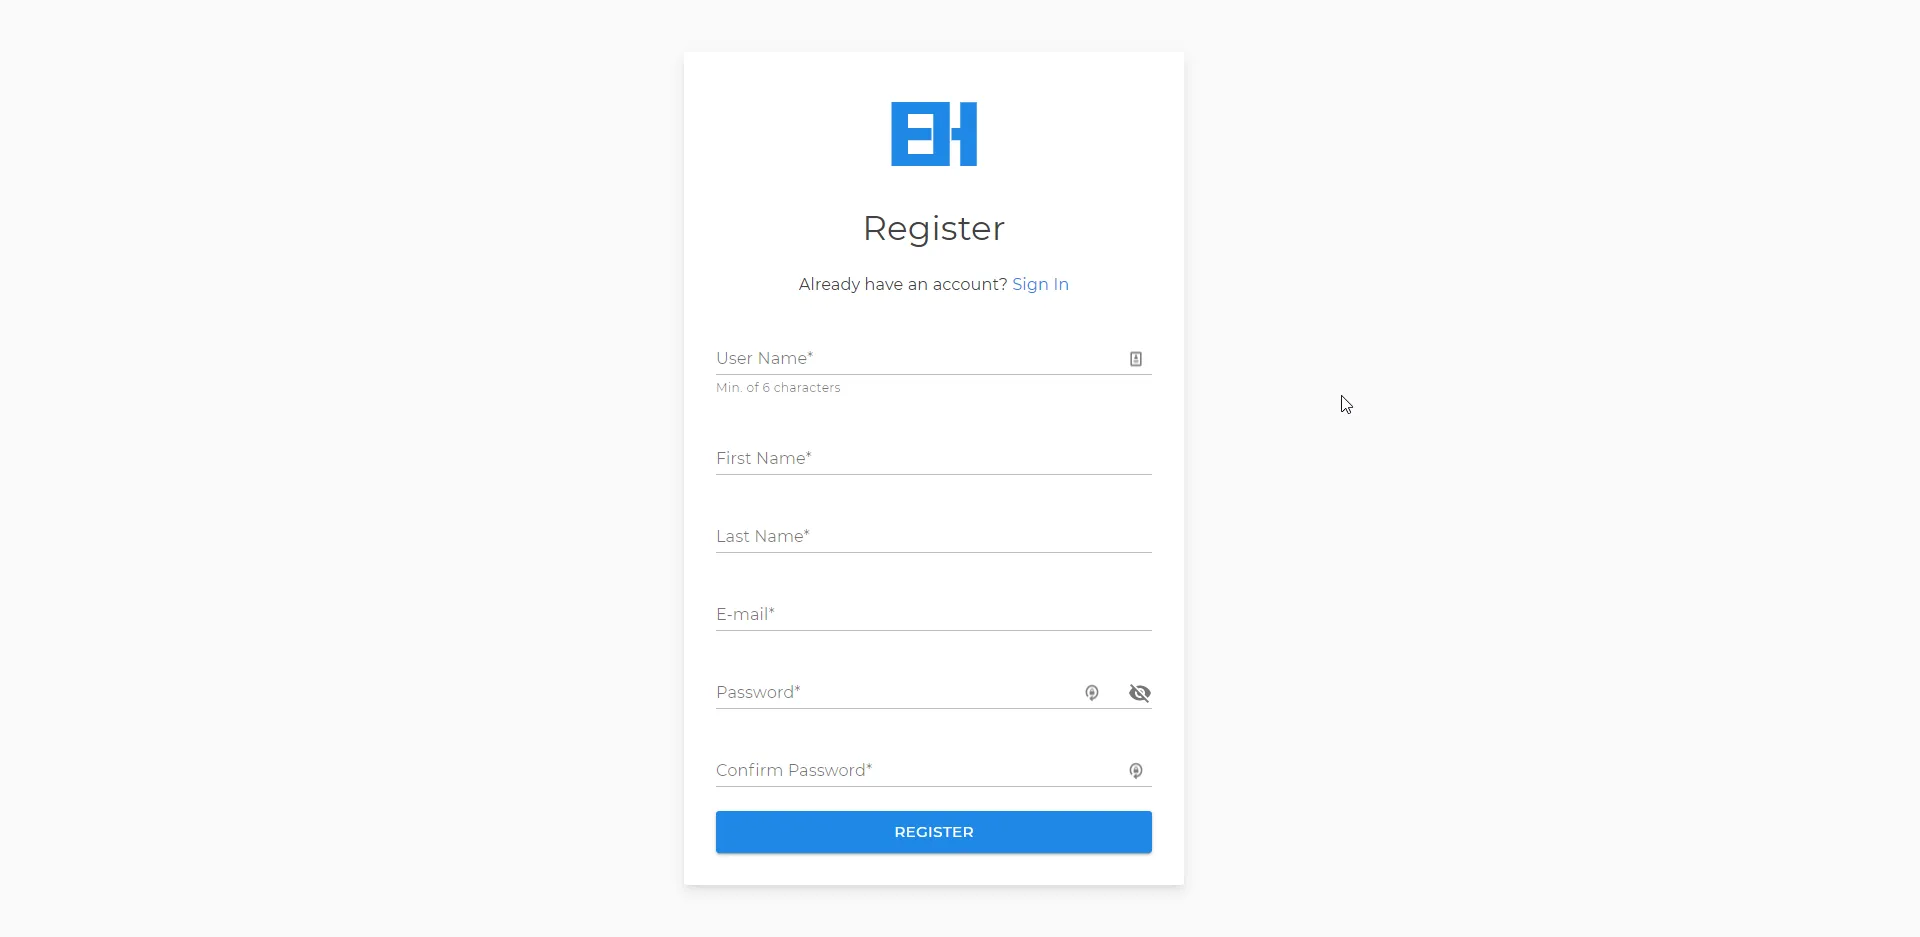
IMPORTANT - Make sure that the username you enter is 6 characters or longer.
Click Register after filling in the details. You can notice the two checkboxes.
- Activate User - This system has additional security that even after registration, the user should be approved by the administrator to access the resource. Unless the user is active, he/she will be locked out of the system. To skip this, check the Activate User box.
- Auto-Confirm Email - To register a new account with the system, the user has to confirm his/her email. BlazorHero sends an activation mail to the registered Email Id. In our case, by default, the registration mail goes to the ethereal mailbox. Again, to skip the part where the email has to confirmed, just check the Auto-Confirm Email checkbox.
Once the user is registered, an Email gets scheduled as a Background Job via Hangfire which then sends it to the Ethereal Mailbox.
Apart from this, users can also anonymously register into the application by navigating to the /register page. This is a feature added with version 2.0.

Email Confirmation
Here is the email confirmation that got delivered to Ethereal Mailbox.
On clicking the supplied link, the email id of the user gets confirmed with the system. As simple as that.
User Activation
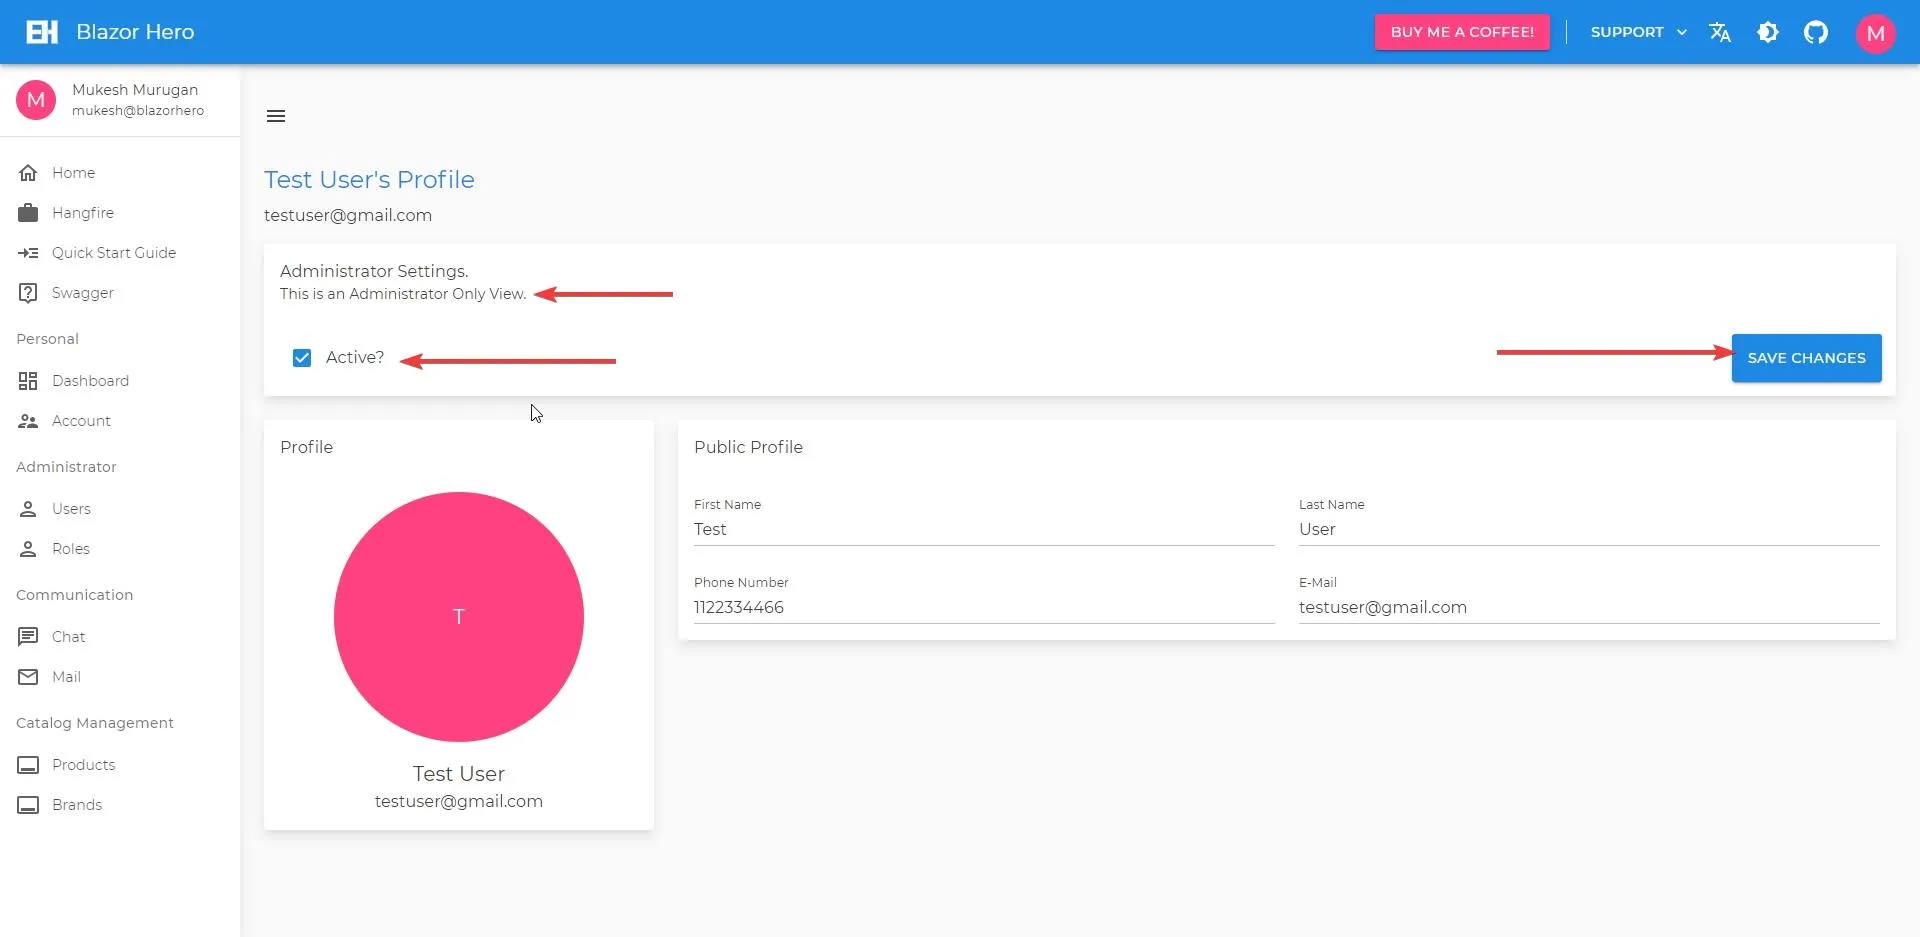
Now that the new user’s mail id is confirmed, it’s time to activate his account. Note that only administrators can do this. Click on View Profile under the User’s Dropdown.
Here, check the Active checkbox and click Save Changes. That’s it! This is how an Administrator can activate/deactivate users.
Serilog
Here is the default provided configuration for Serilog. As of now, the logs are written to text files locally to the application. To add in Database logging with Serilog in ASP.NET Core, refer to this article.
"Serilog": { "MinimumLevel": { "Default": "Information", "Override": { "Microsoft": "Error", "Microsoft.Hosting.Lifetime": "Information", "System": "Information", "Hangfire": "Warning" } }, "WriteTo": [ { "Name": "Console", "Args": { "outputTemplate": "{Timestamp} [{Level}] {Message}{NewLine:1}" } }, { "Name": "File", "Args": { "path": "Logs\\log.txt", "rollingInterval": "Day" } } ], "Enrich": [ "FromLogContext", "WithMachineName", "WithProcessId", "WithThreadId" ], "Properties": { "Application": "WarehouseManger.Server" }}Feel free to support the project by buying me a couple of coffees maybe? ;)
Swagger
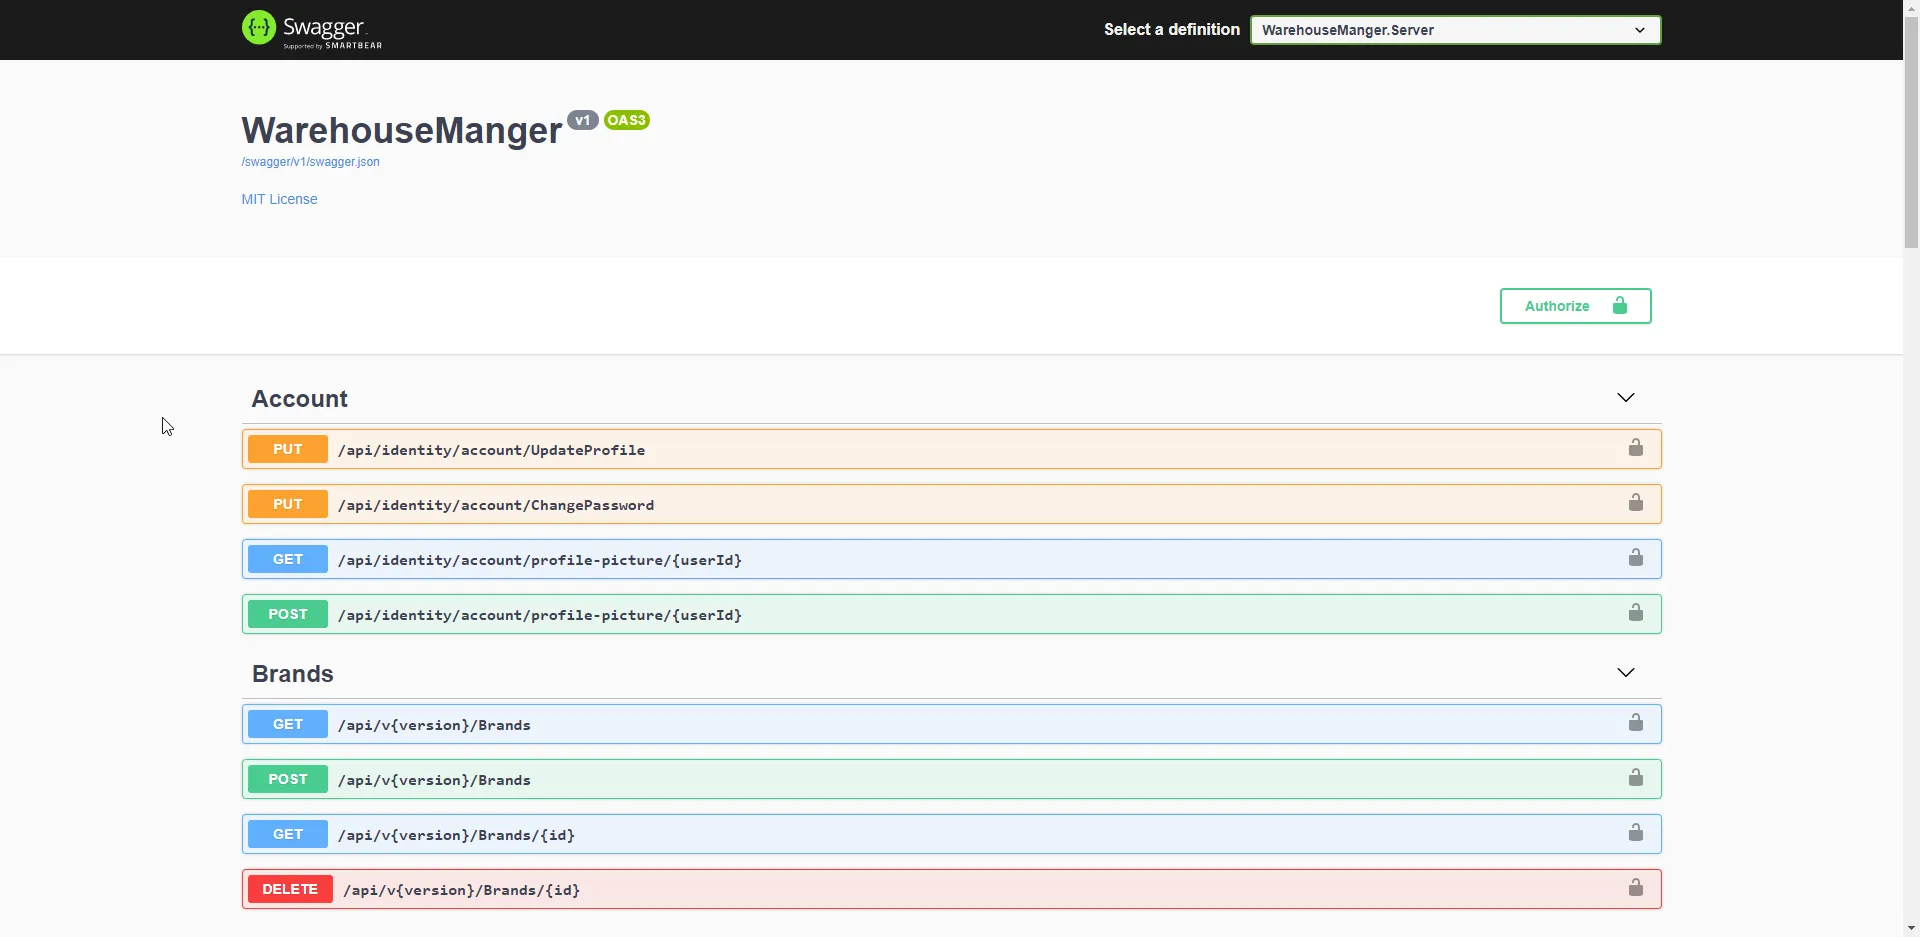
Every API Developer’s favourite tool, Swagger! Navigate to /swagger to access Swagger.
I have not yet added Swagger Documentation for the API. If anyone is willing to help me out in this part, do make the required contribution to the project’s repository.
CRUD Operations
Let’s see some CRUD now.
Open up the Brands Page. Here you get to see a Table for listing out all the Registered brands. Since it’s empty, let’s add a new one.
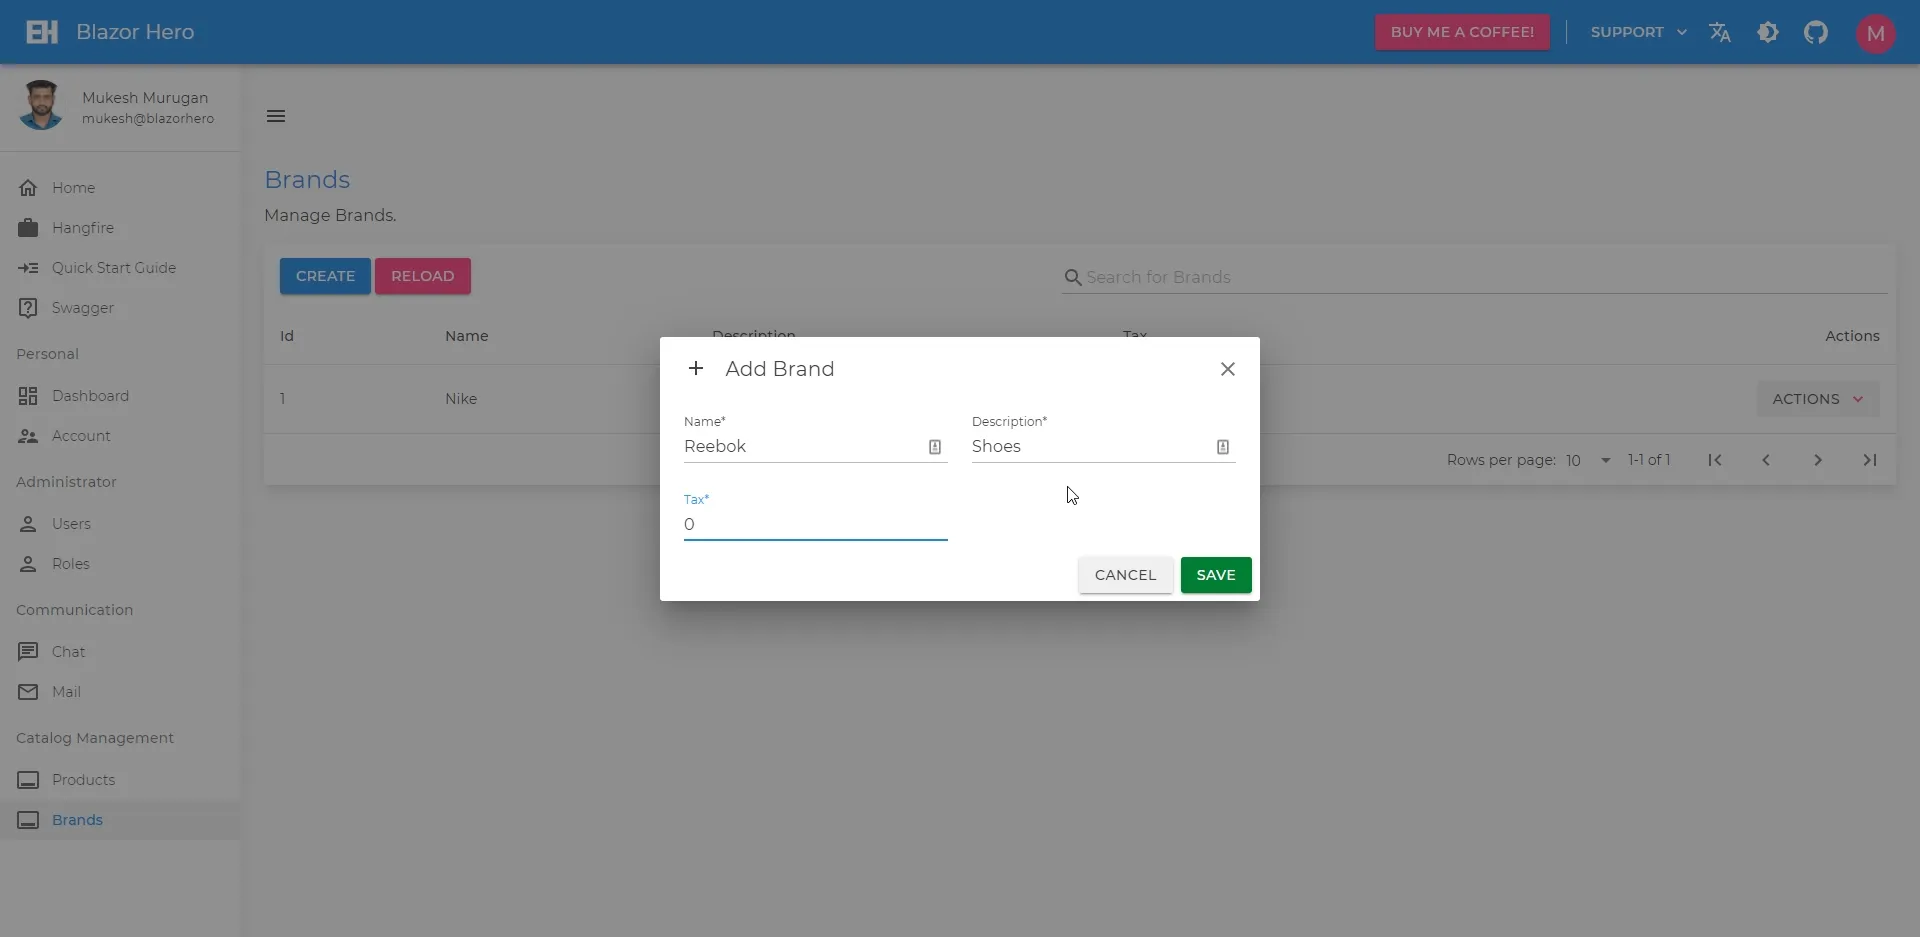
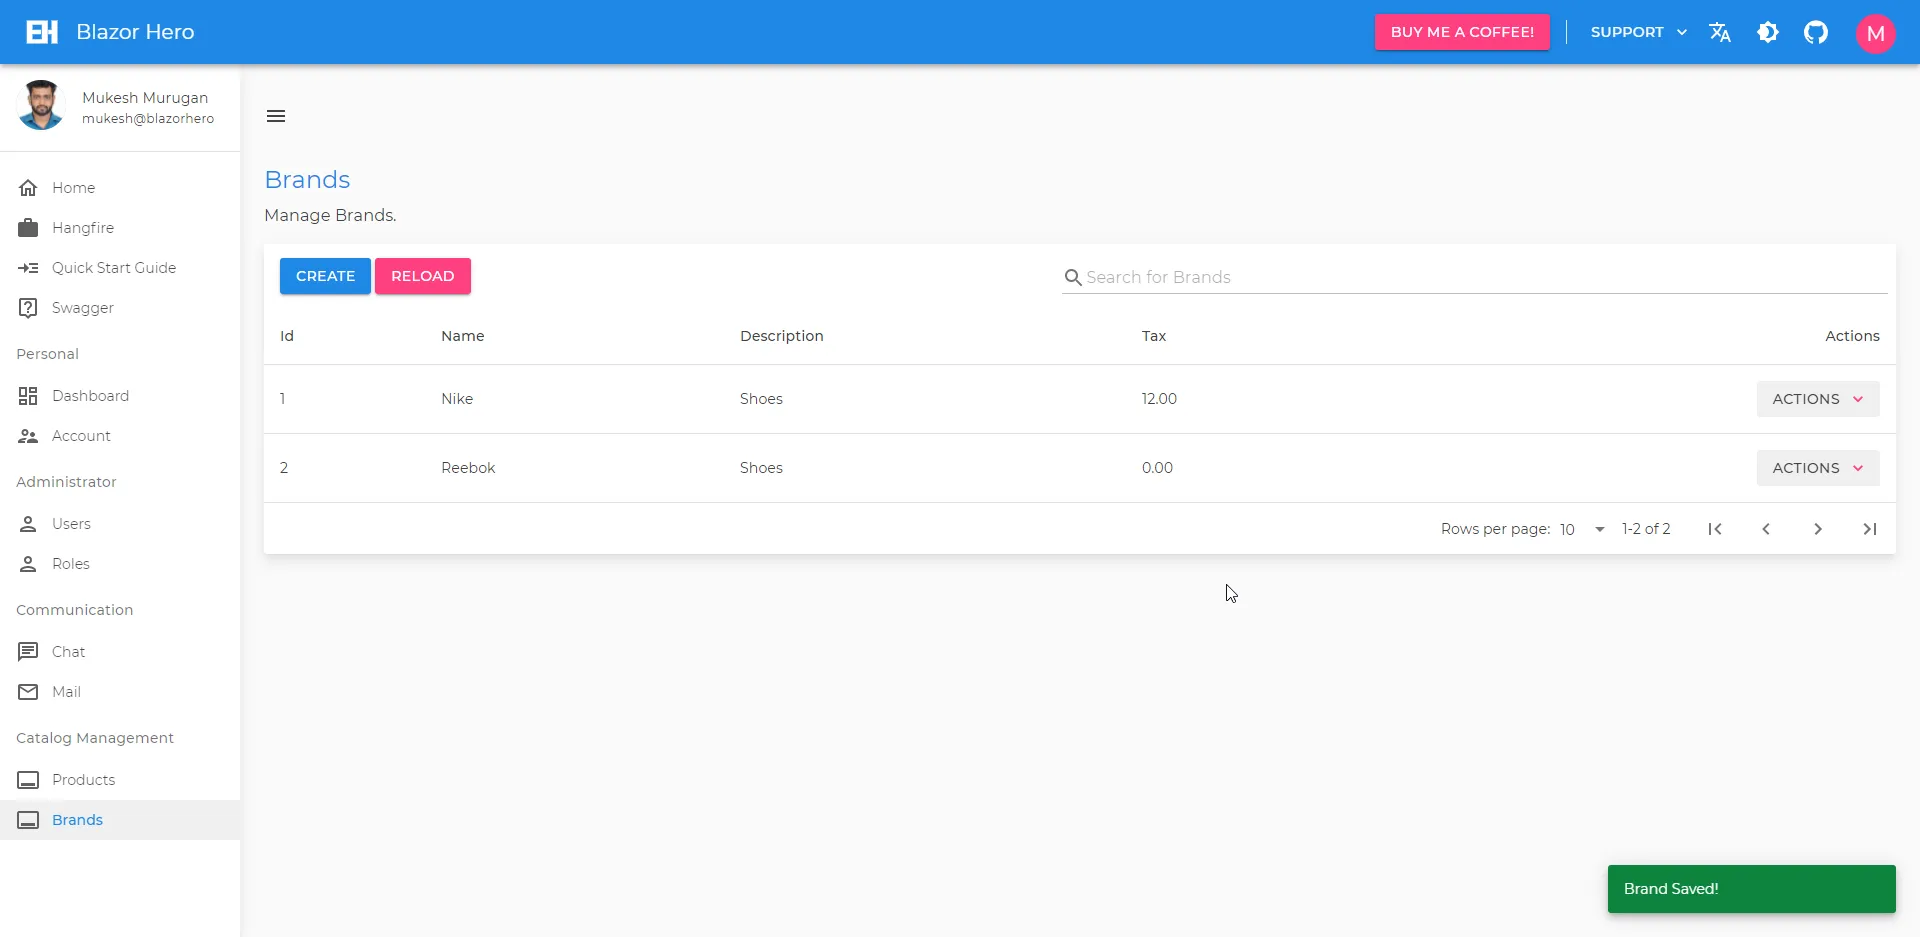
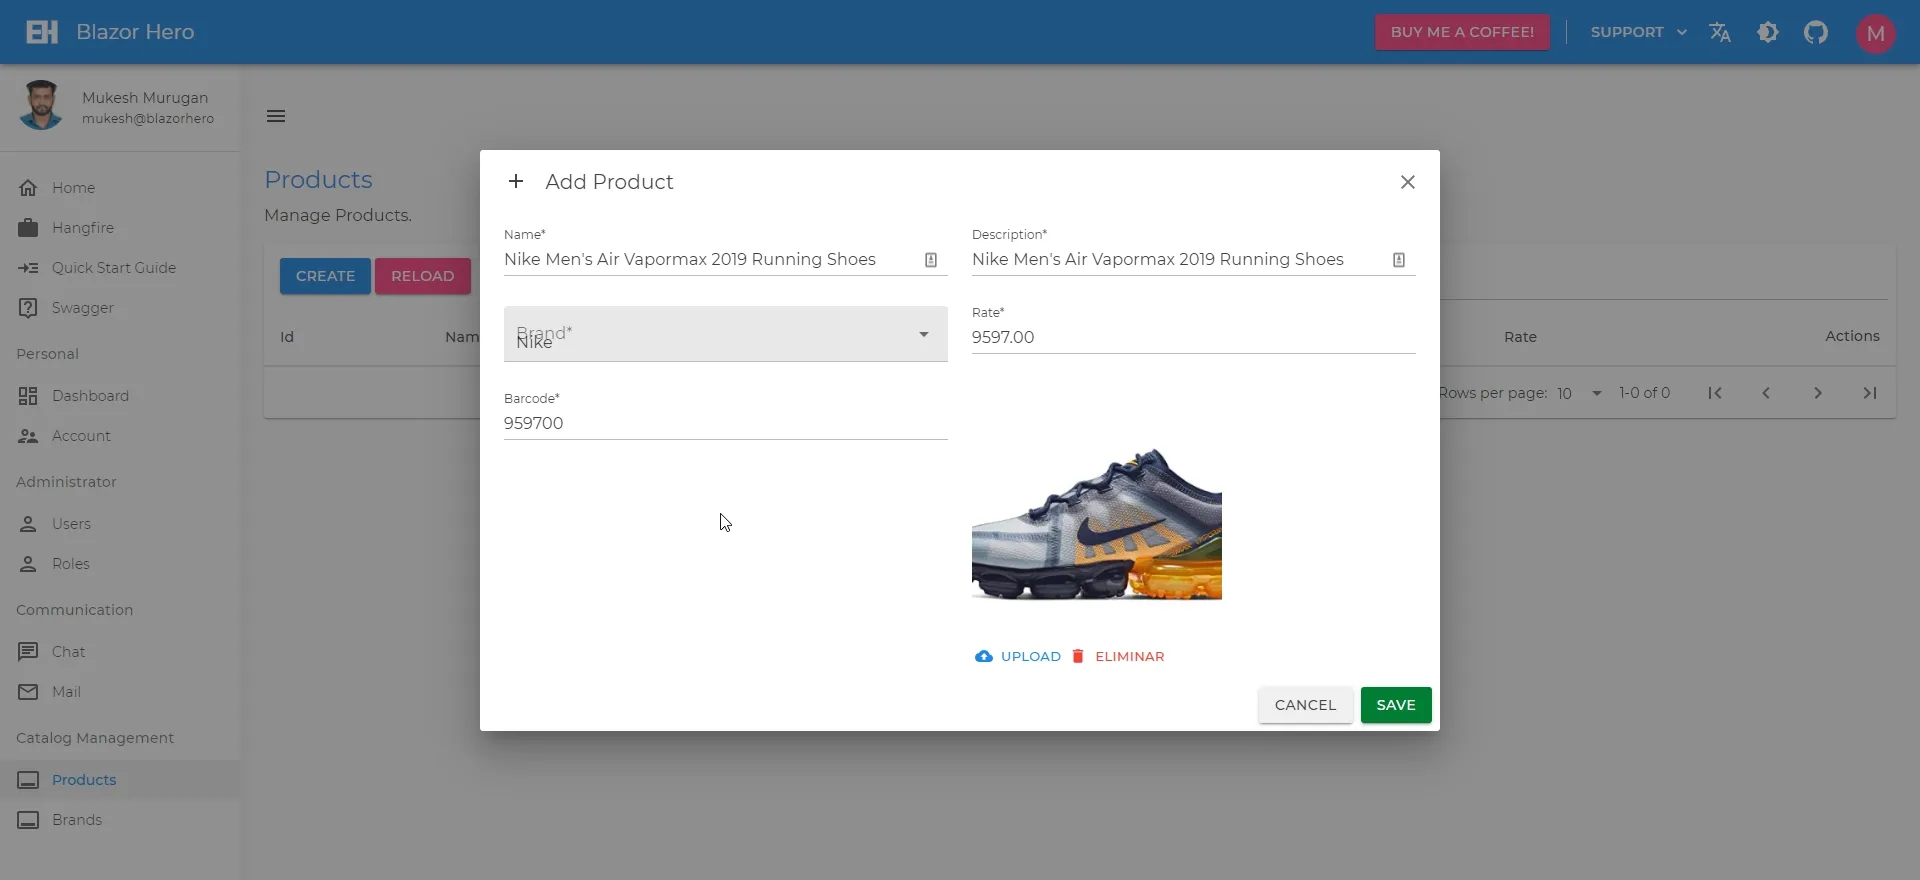
Once a couple of brands are entered. Let’s add in products. Navigate to the Product Page. Here is a more advanced ADD Modal with Select Componet and an Image component. Add in some dummy data and click Save.
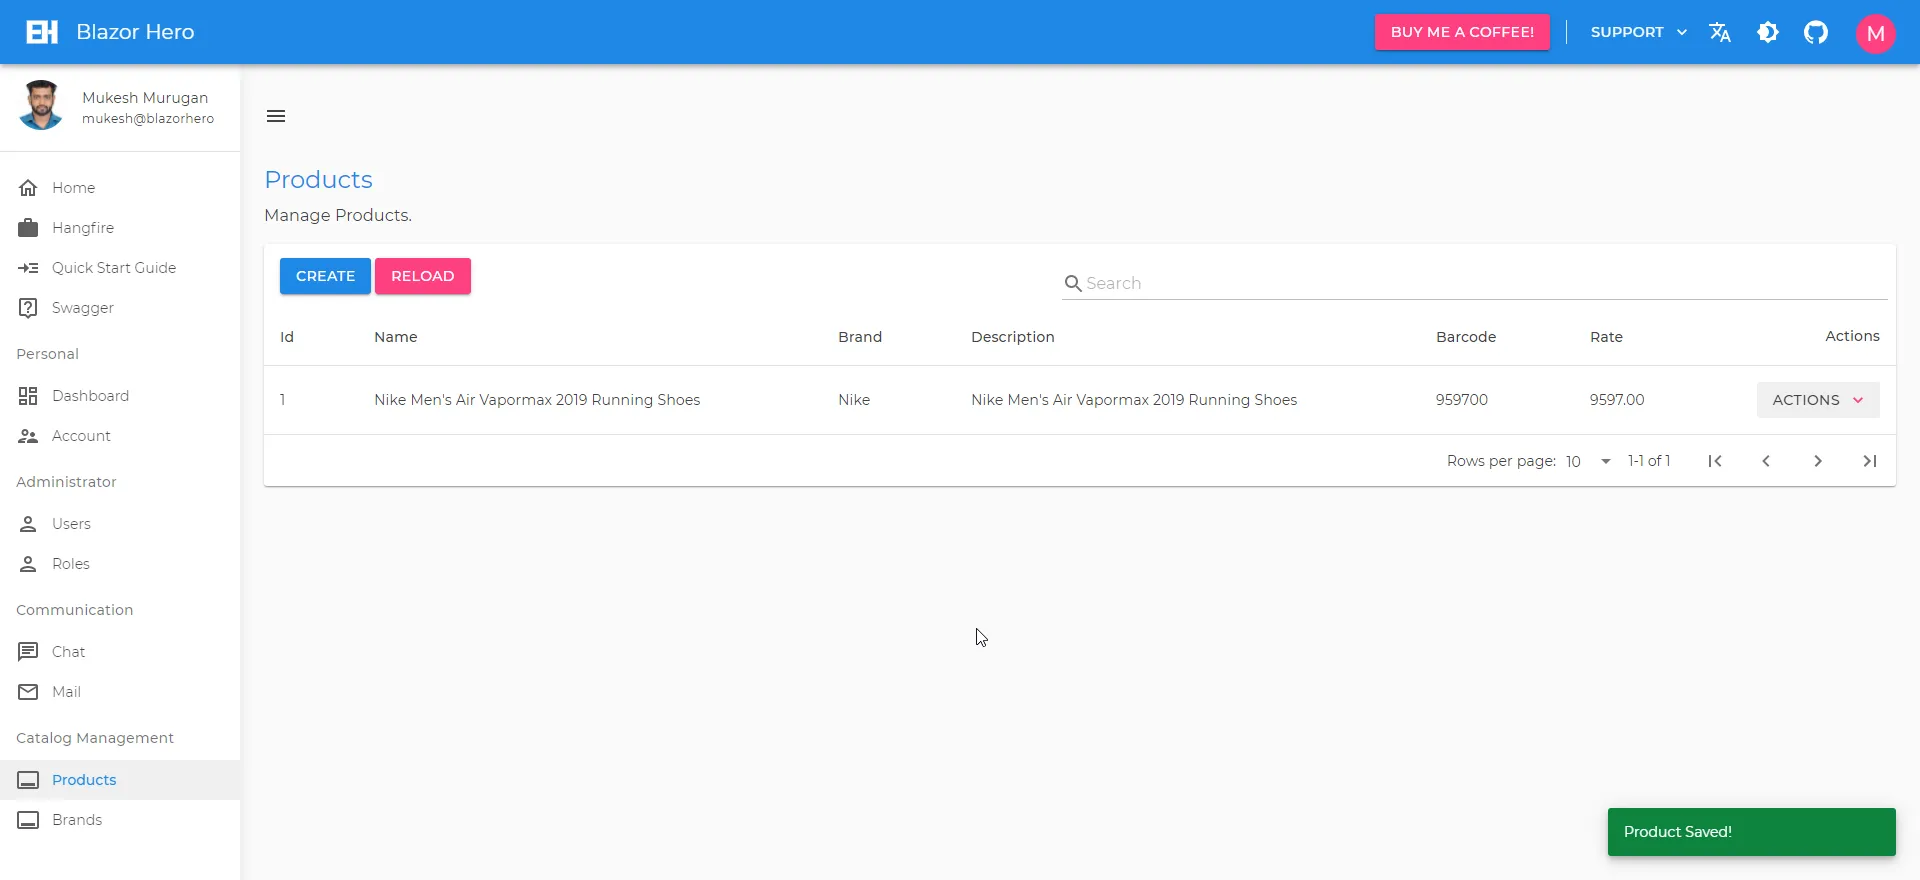
There you go! Similarly, you can Edit and Delete Products/Brands by clicking on the Actions dropdown against each of the entities. Pretty Self Explanatory, yeah?
Dashboard
Here is a cool-looking dashboard with an intention to give quick insights into what’s actually happening within the application. From here you get to see the total count of products, brands, registered users, and roles.
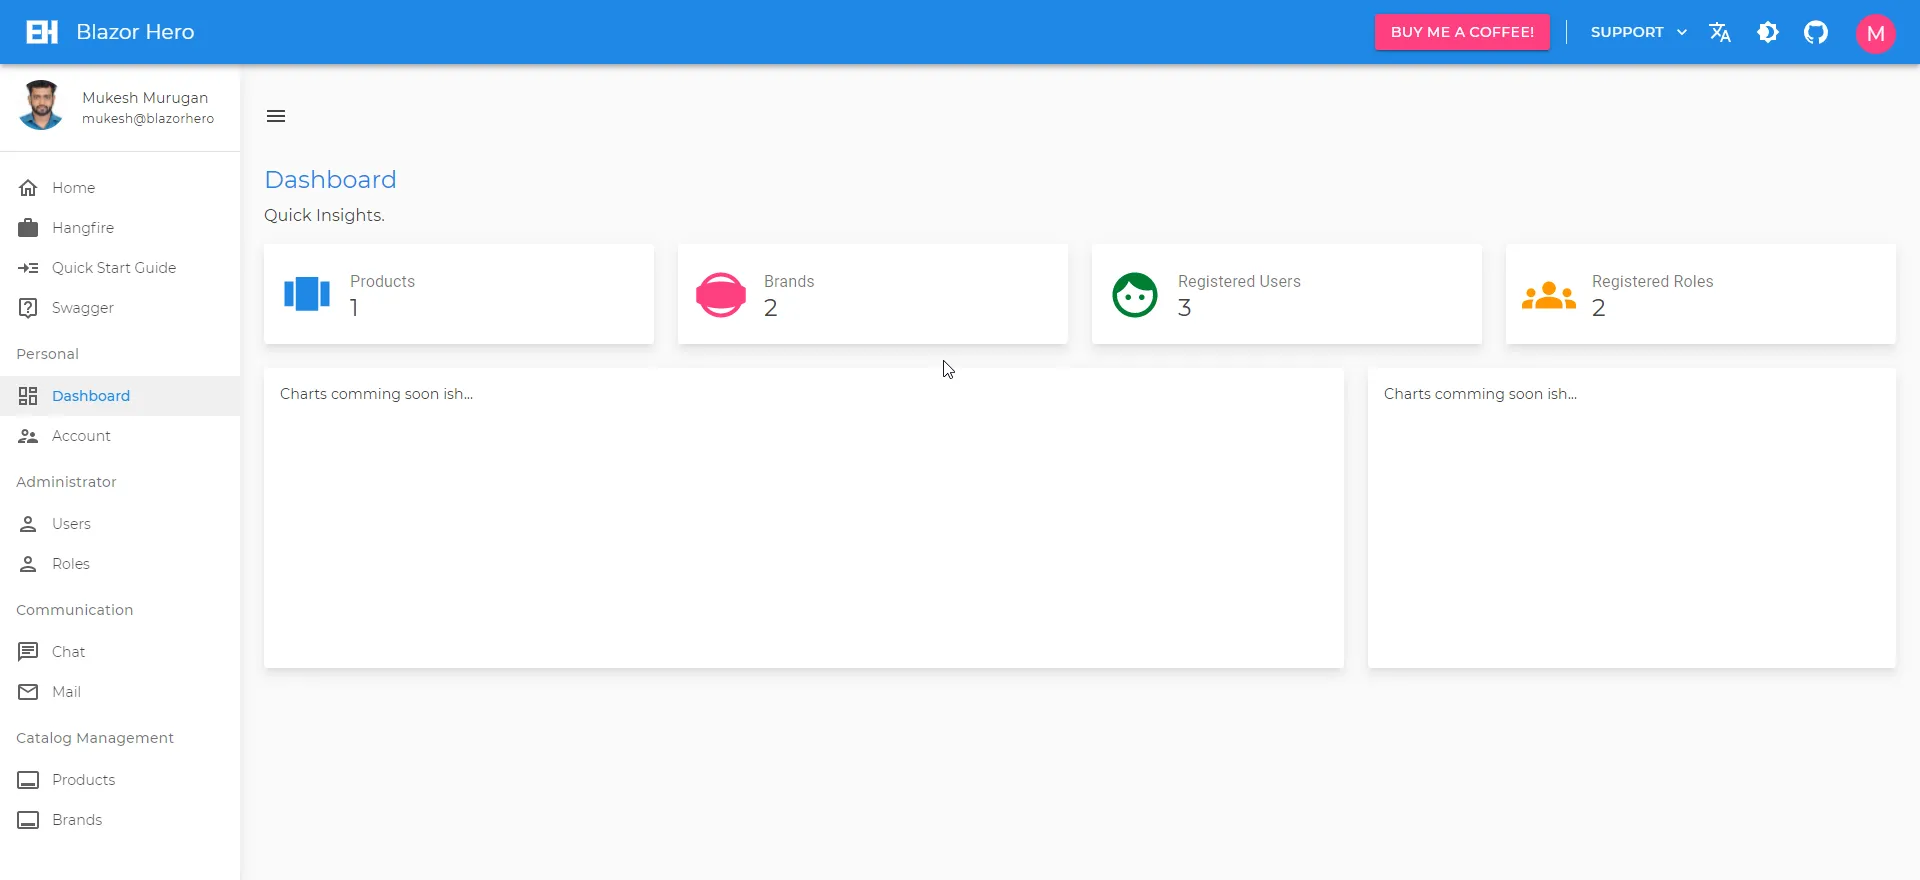
Down the roadmap, I will be implementing SignalR to the dashboard so that any new entries/deletions of entities will be notified in real-time. Probably in BlazorHero 2.0. Feel free to contribute this to code if you like.
Realtime Chat with SignalR and Identity
Documentation for this section will added soon. This is an already available feature.
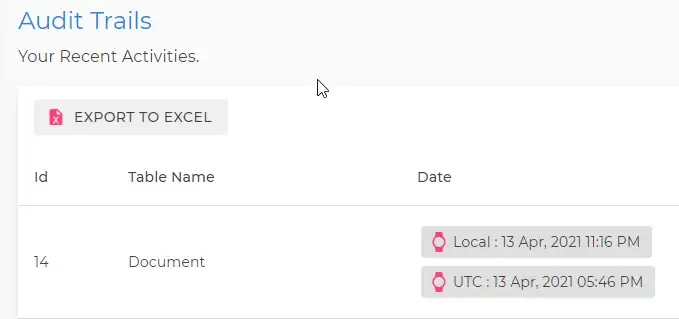
Audit Trails
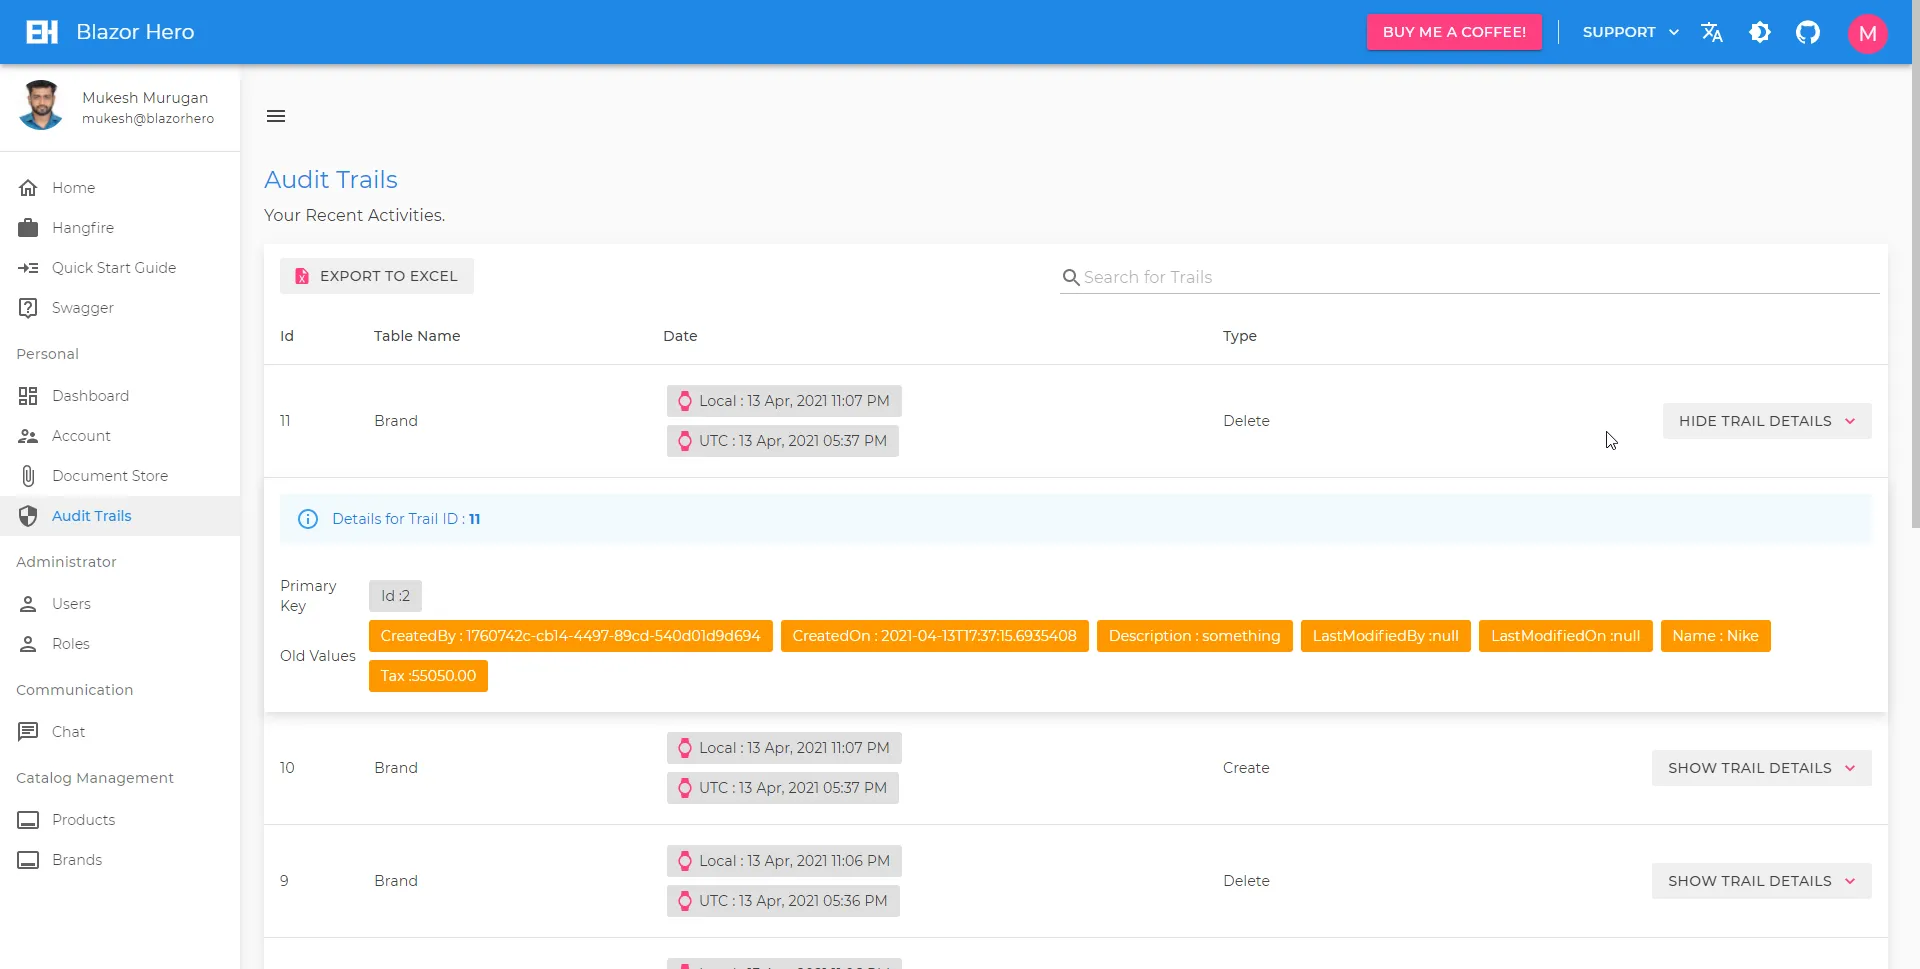
Documentation for this section will added soon. This is an already available feature.

Document Store
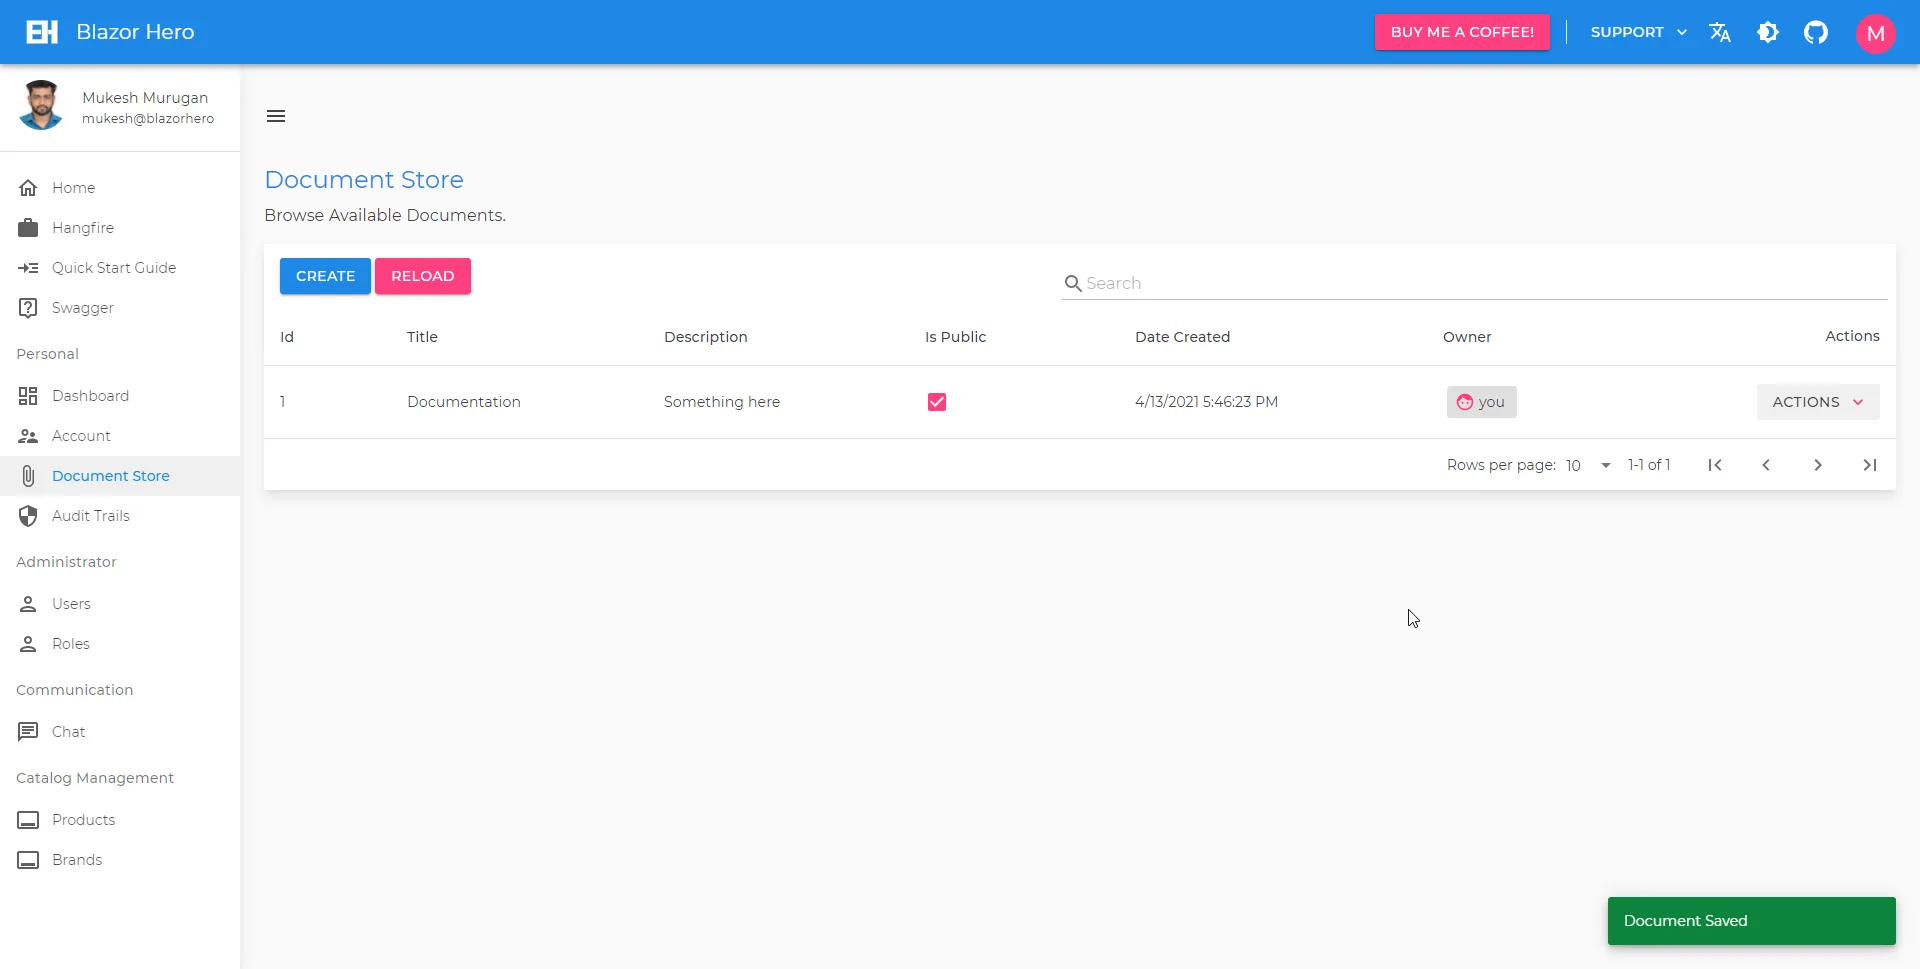
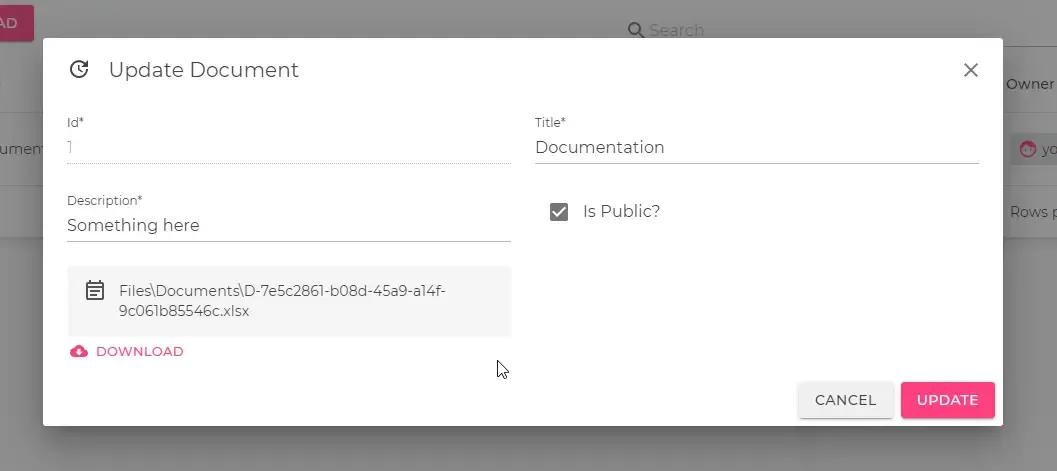
Documentation for this section will added soon. This is an already available feature.


Export to Excel
Documentation for this section will added soon. This is an already available feature.

Roles & Permissions
Roles & Permissions are the vital part of Application Security. In this project, let’s see how these features are implemented.
The Administrator by default gets to add, modify and delete Roles. Navigate to Roles.
Note that you will not be able to delete the Standard Roles (Administrator & Basic) from the system, even with Administrator privileges.
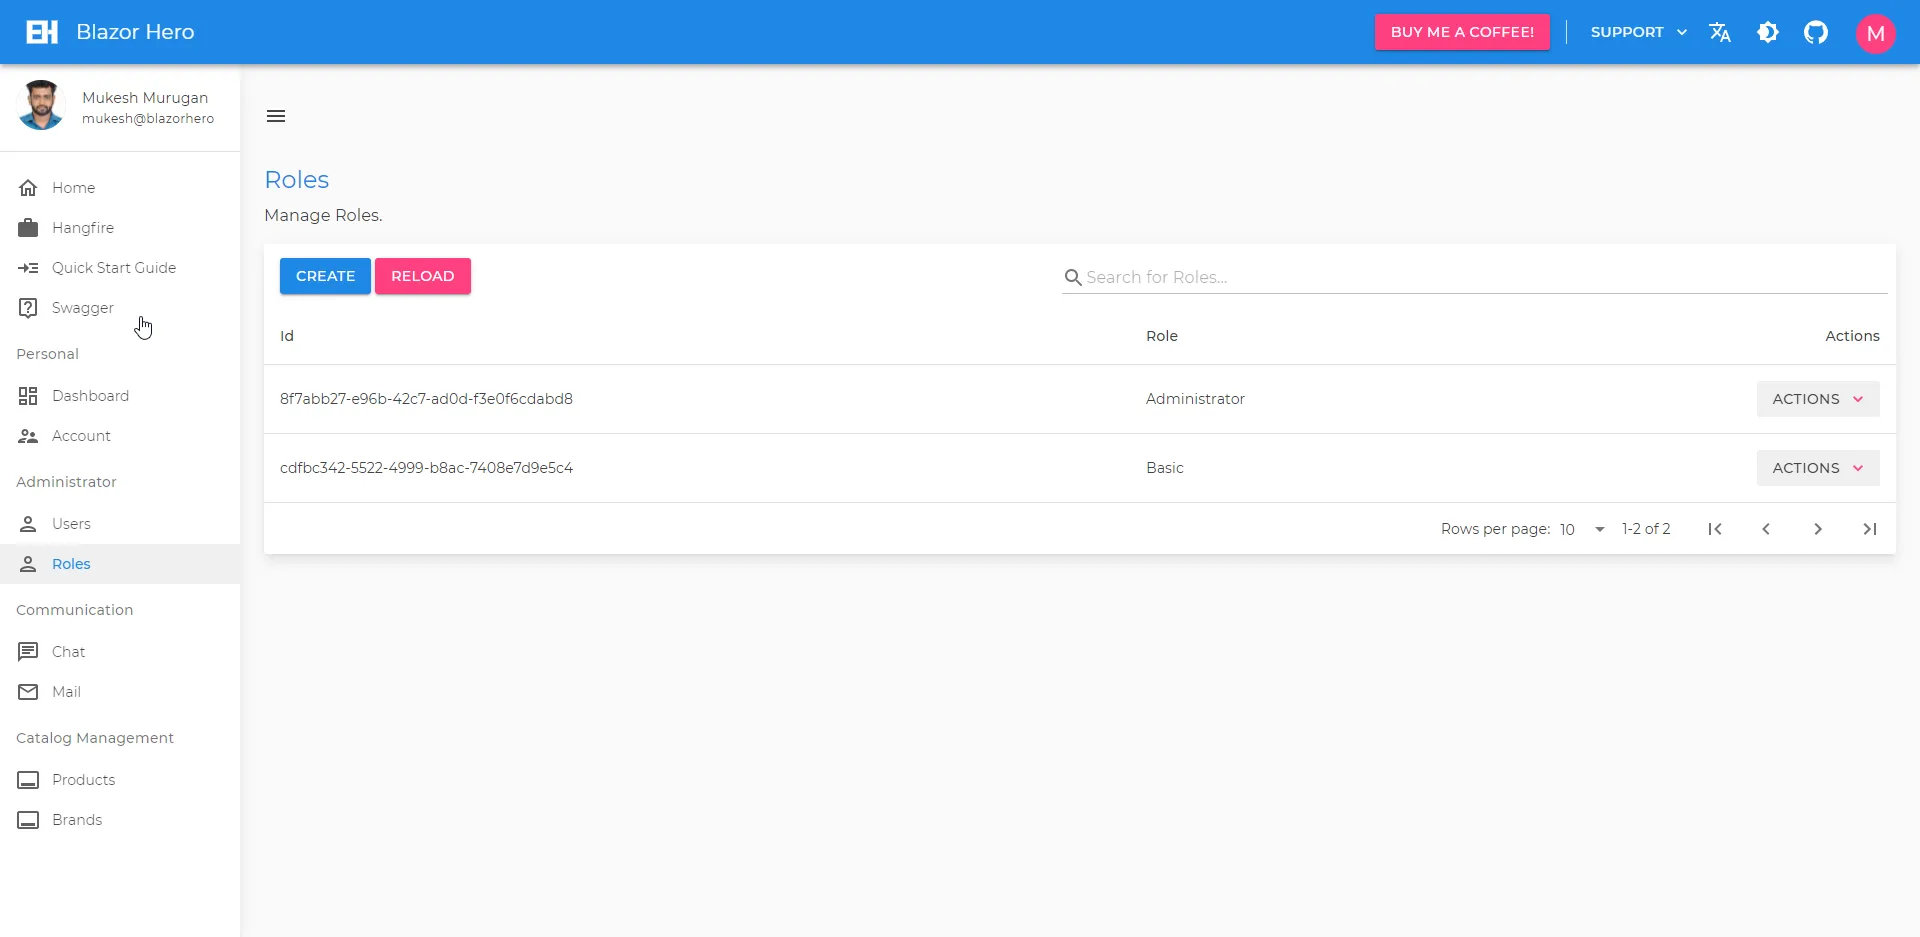
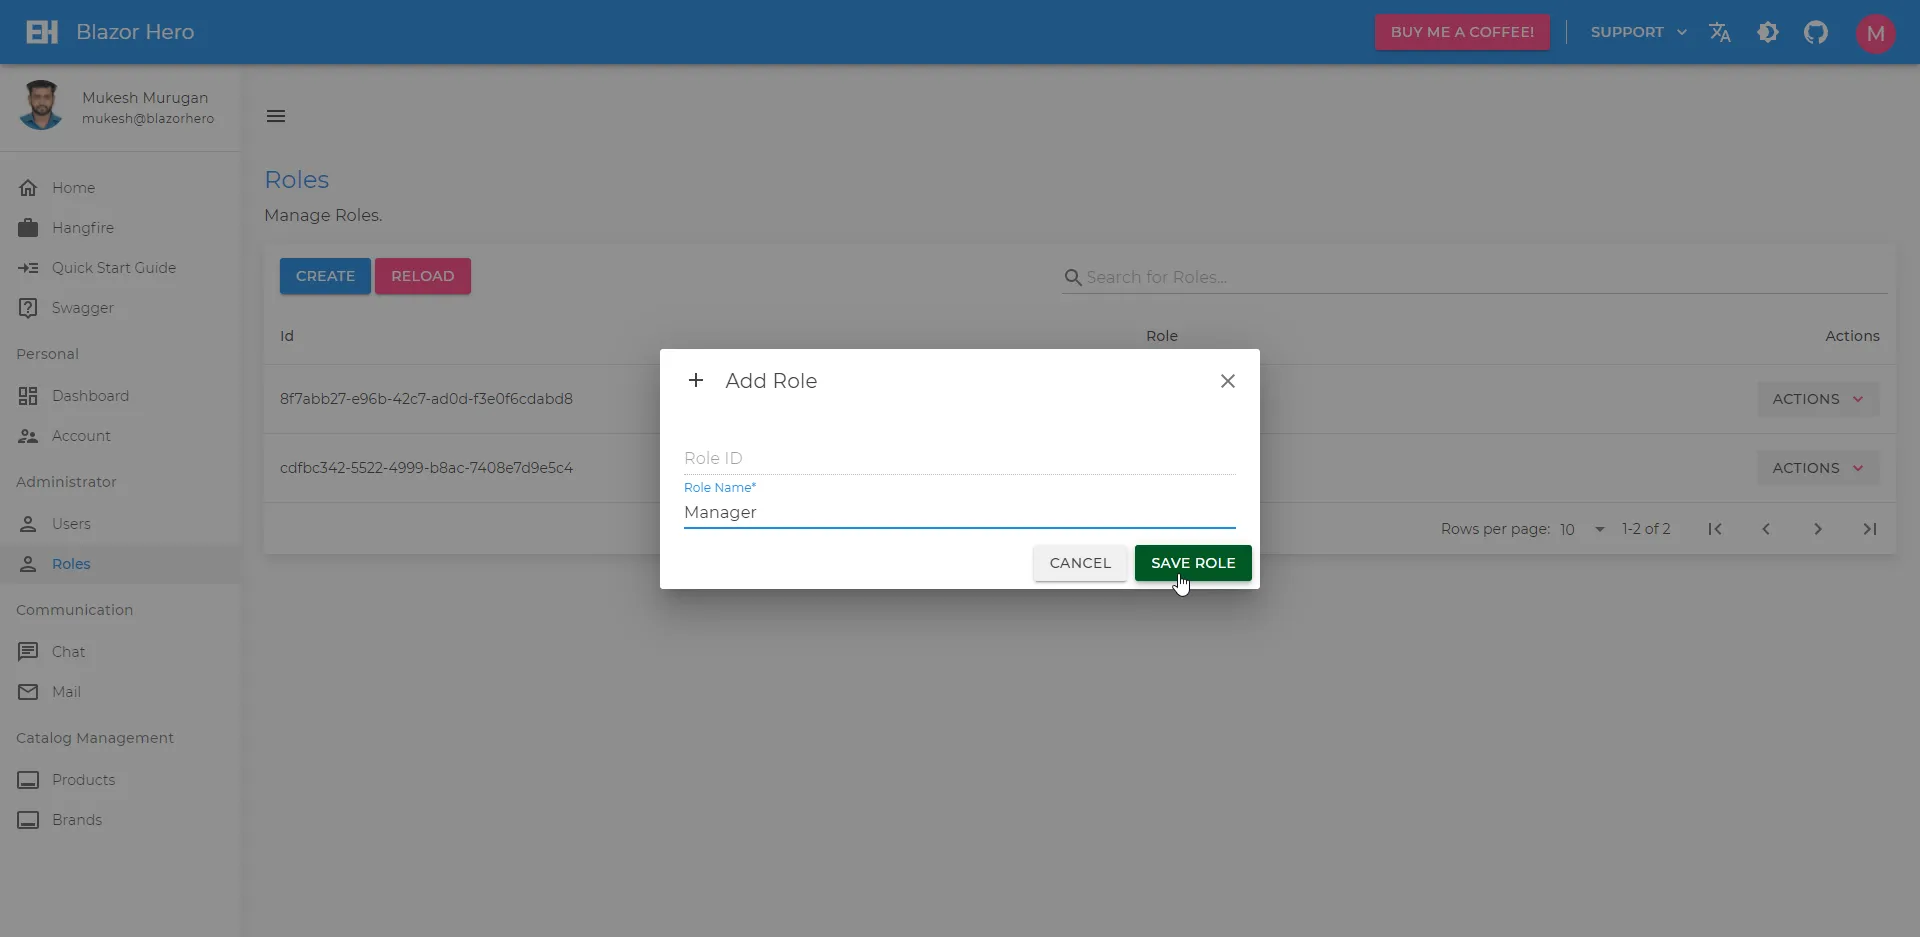
Let’s create a new Manager Role!
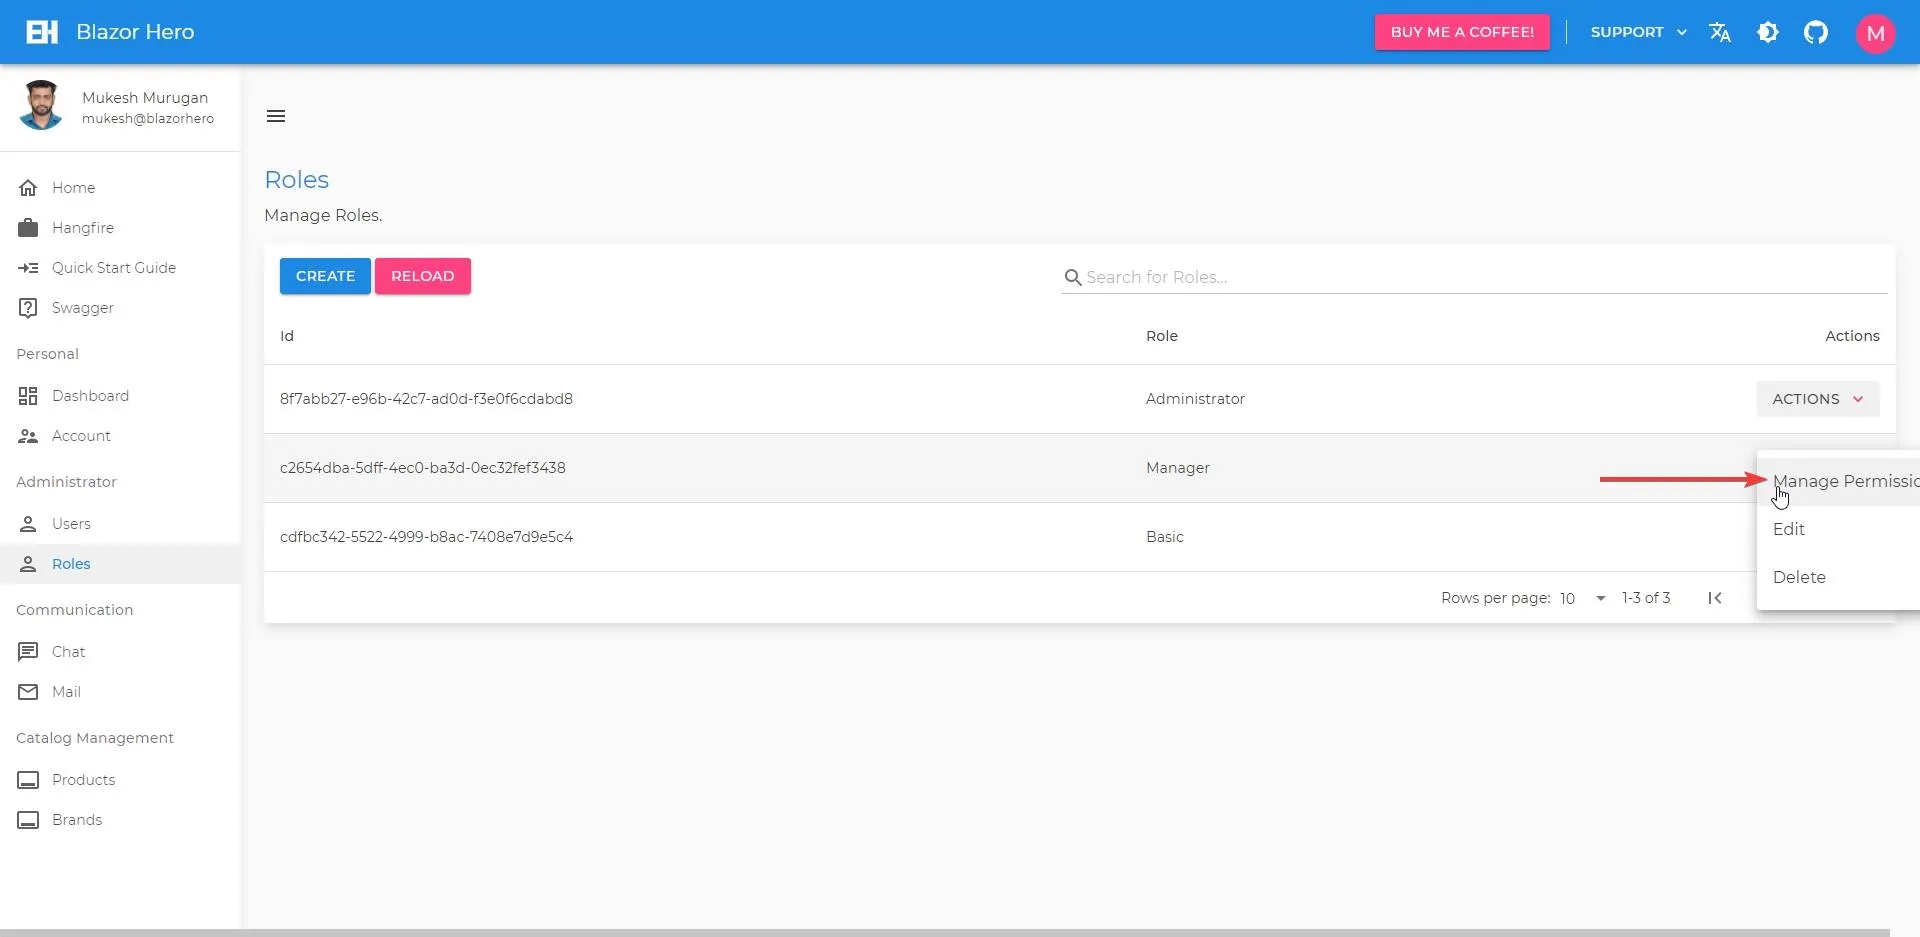
I have designed the system so that Permissions are attached to User Roles, rather than Users or anything static. This gives a lot of flexibility and less complex code as well. You can Manage the Permissions of Roles by clicking the associated Actions Dropdown and selecting the Manage Permissions option.
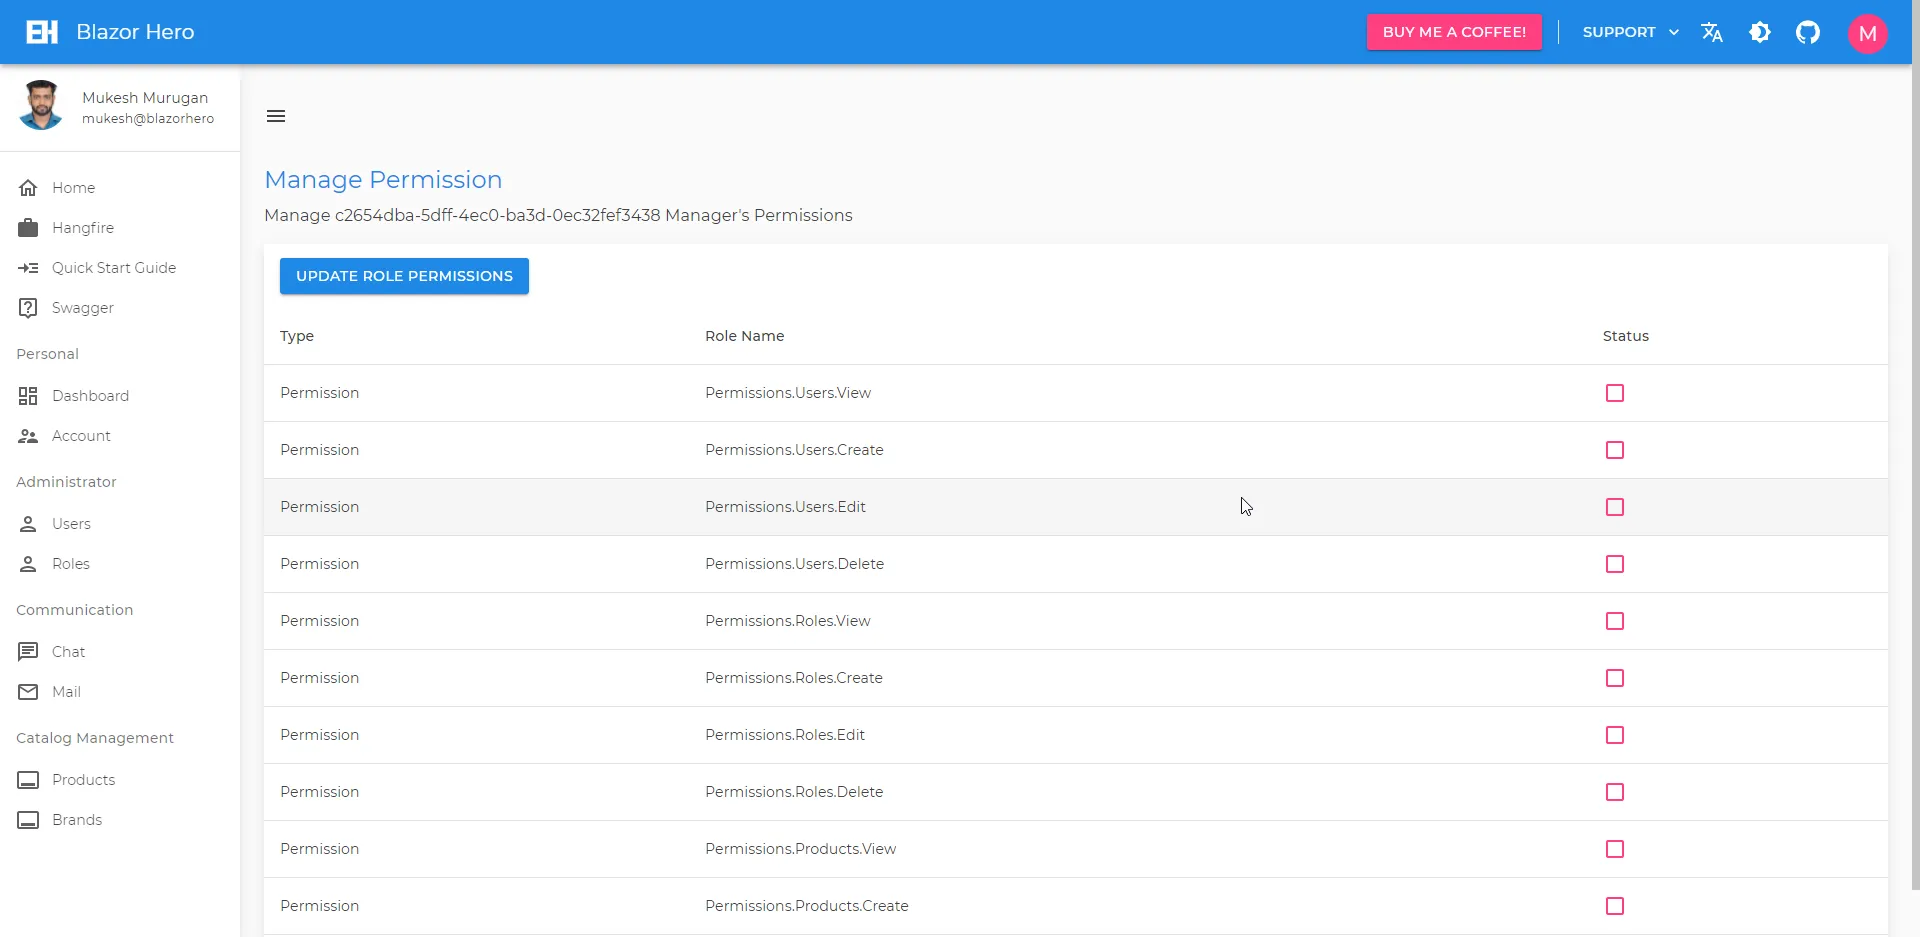
Here you get to check the required permissions for the selected User Role. As simple as that.
Forgot/Reset Password
(Documentation Coming Soon)
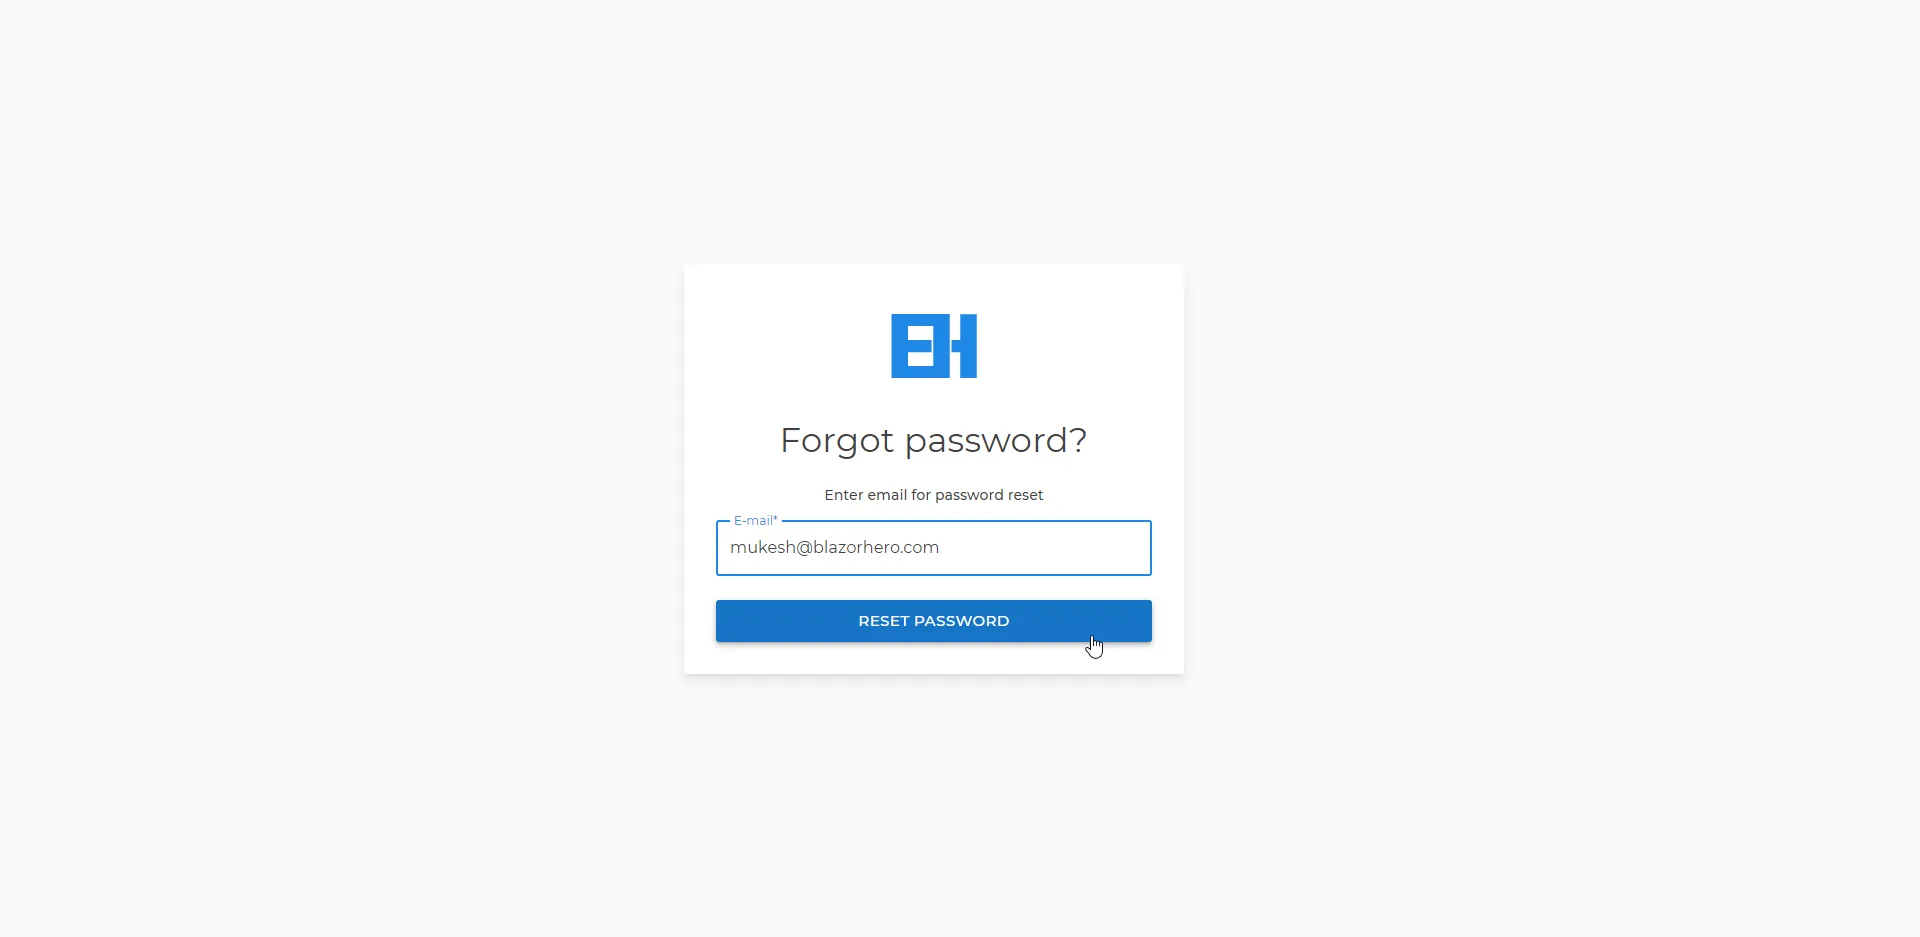
In the Login Page, you get an option to reset the password if you forgot it by any change. Here is the flow of the Password Reset Process.
User clicks the Forgot Password Button on the Login Page. Gets redirected to the below page, where the user has to enter in his/her email address.
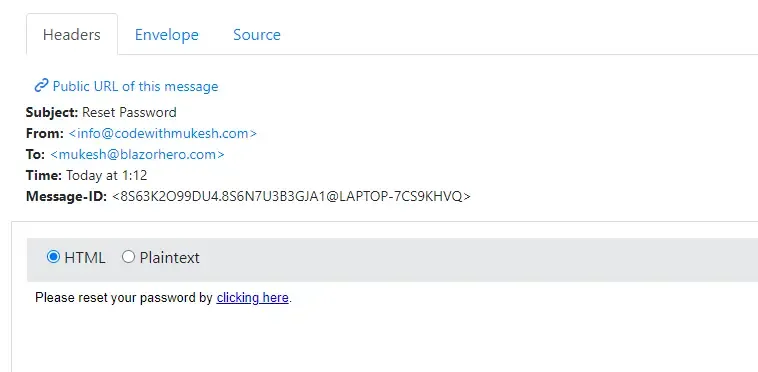
On Submission, an email with a link to reset the user password gets sent to the email id of the registered user. In our case, it will drop into the Ethereal Mailbox. Here is how the email would look like.
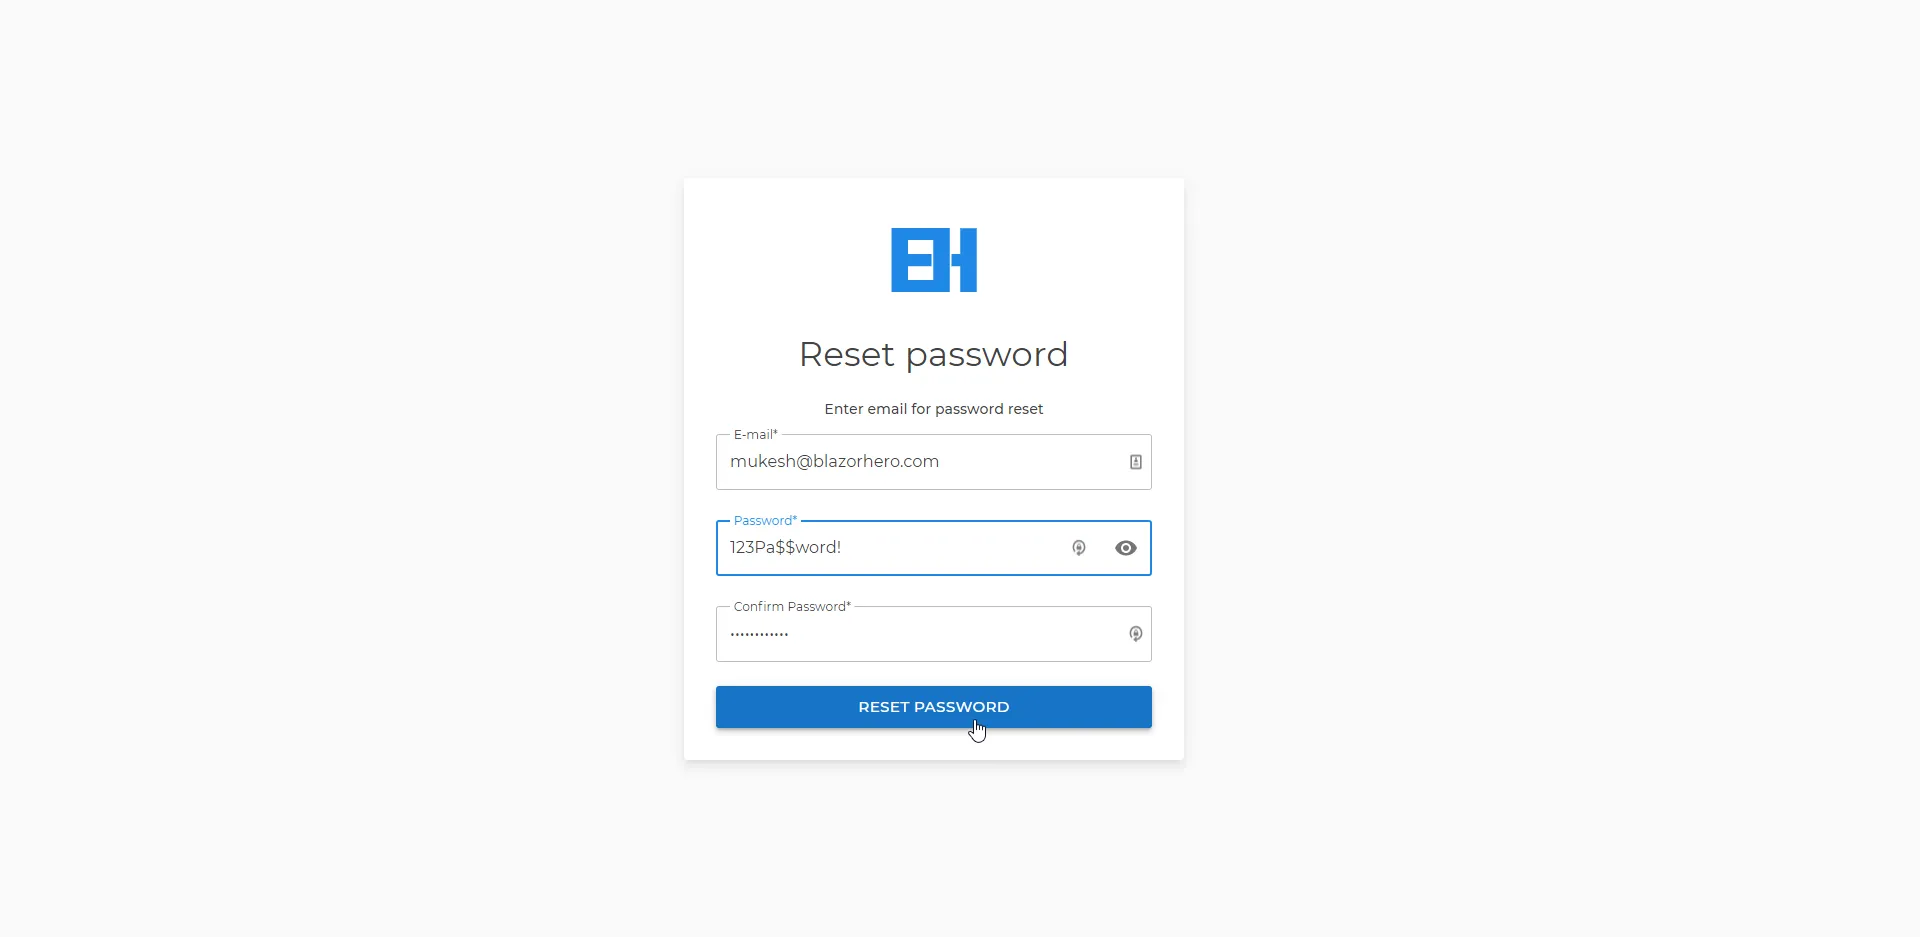
Upon Link Click, the user would have to re-enter the actual email id and set a new password for his/her account. This will immediately update the user’s password.
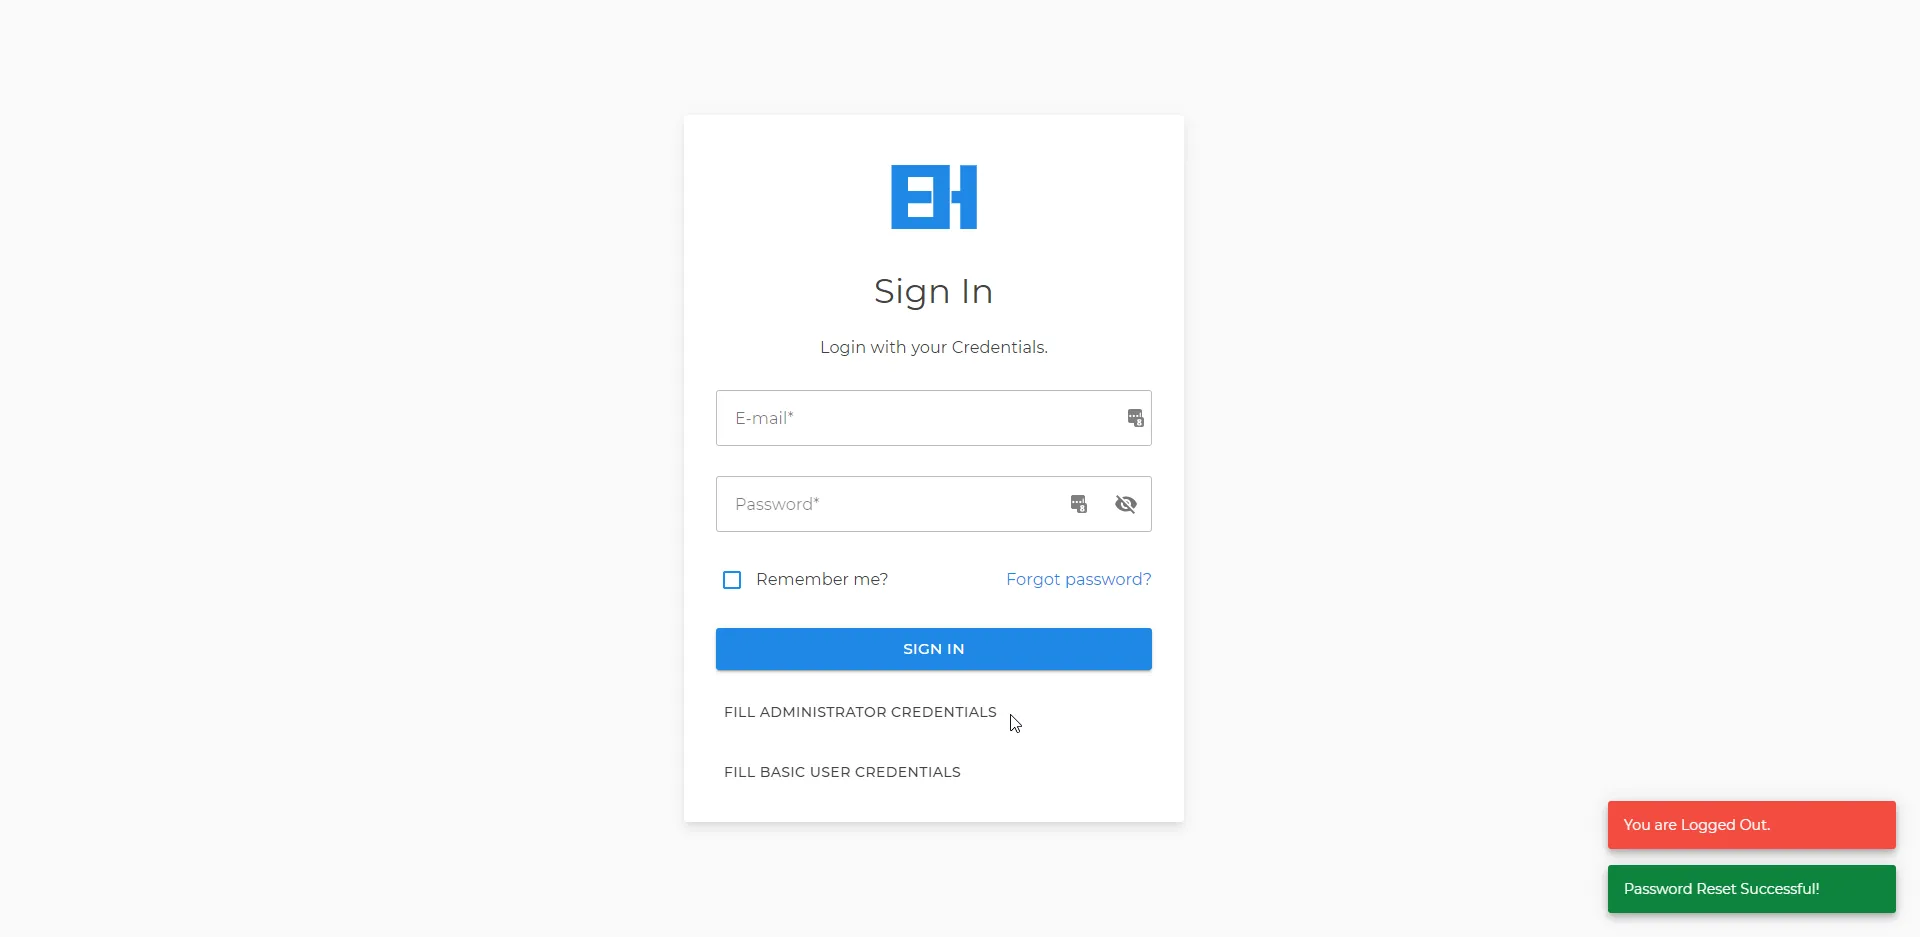
Password Reset Succeeded!
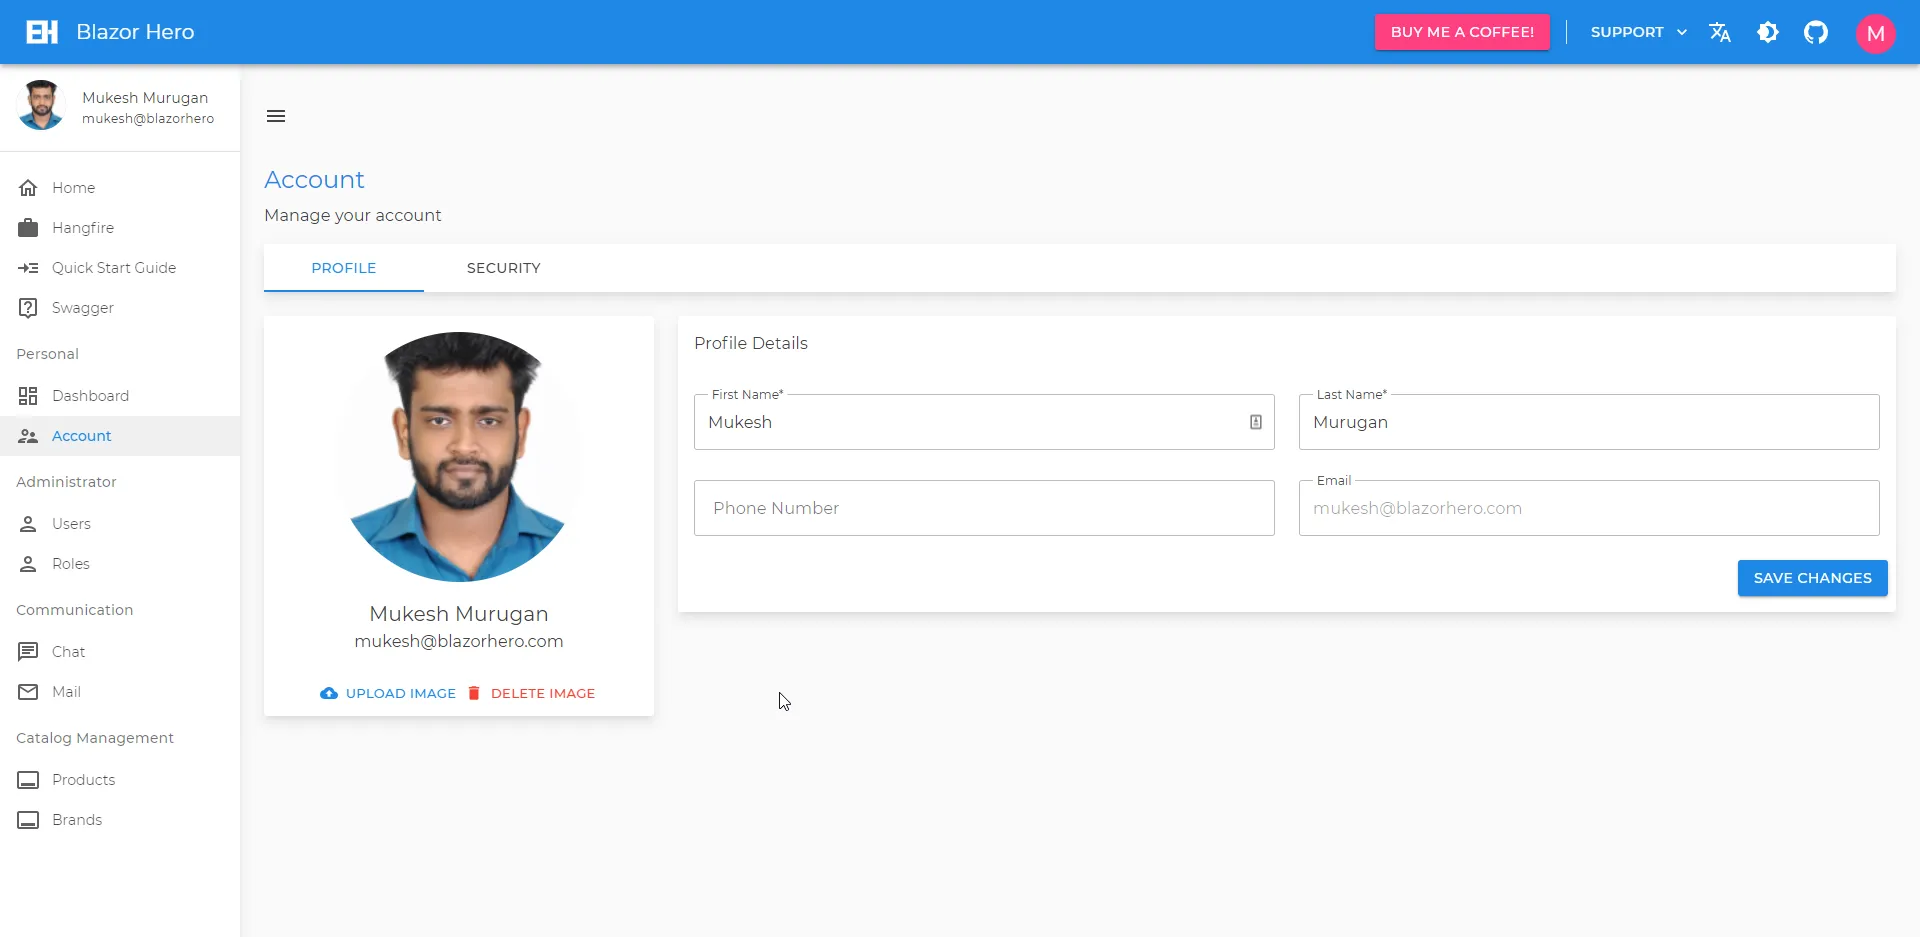
Profile Picture
A standard feature of the project - To upload User Profile Picture. The uploaded images will be stored as Data URLs in the database. I am planning to shift to a more file-system-based image upload mode. Any thoughts on this?
Furthermore, you can also update profile details as well as change the user password in the Security Tab of the Accounts Page.
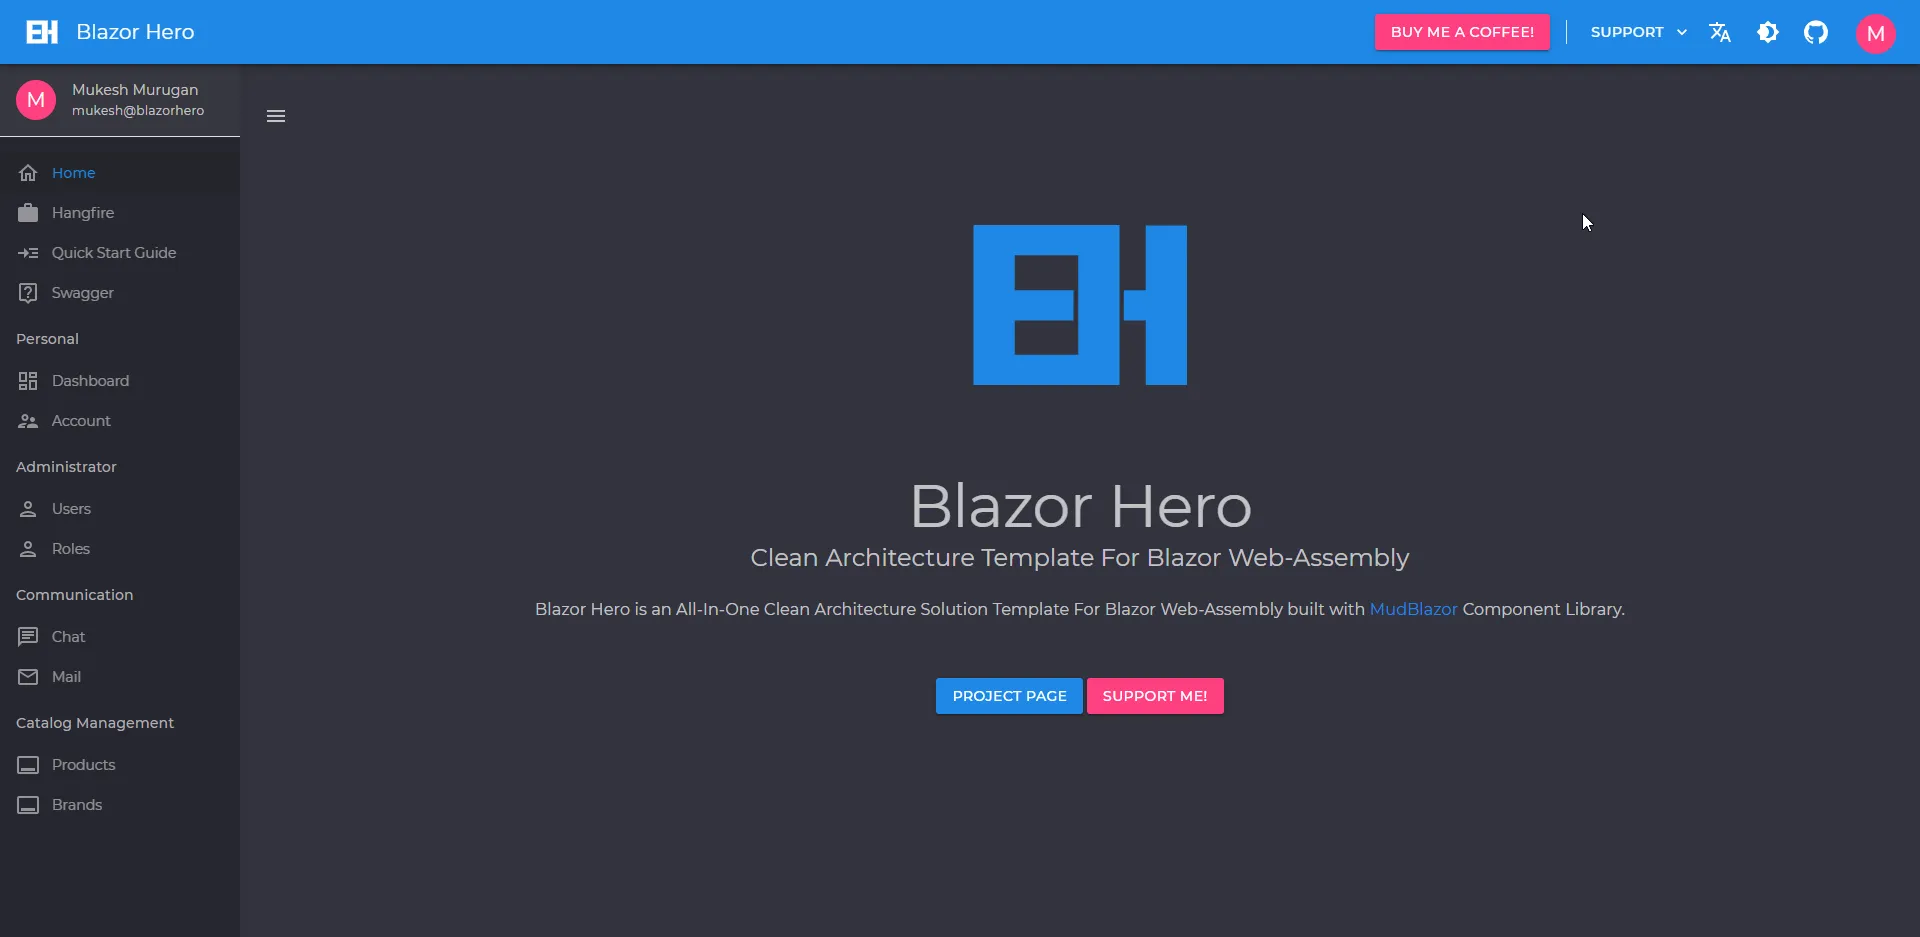
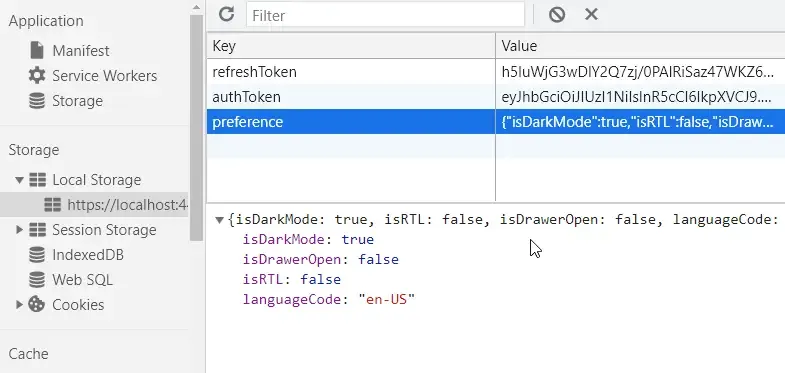
Dark Mode
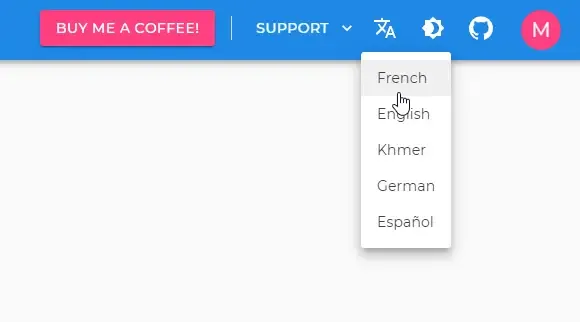
Localization
Blazor Hero, as of now supports French, English, Khmer, German and Spanish. Although few of the translations are missing, it’s growing on a regular basis, Thanks to the contributors! Feel free to add in some missing translations as well!
Hangfire
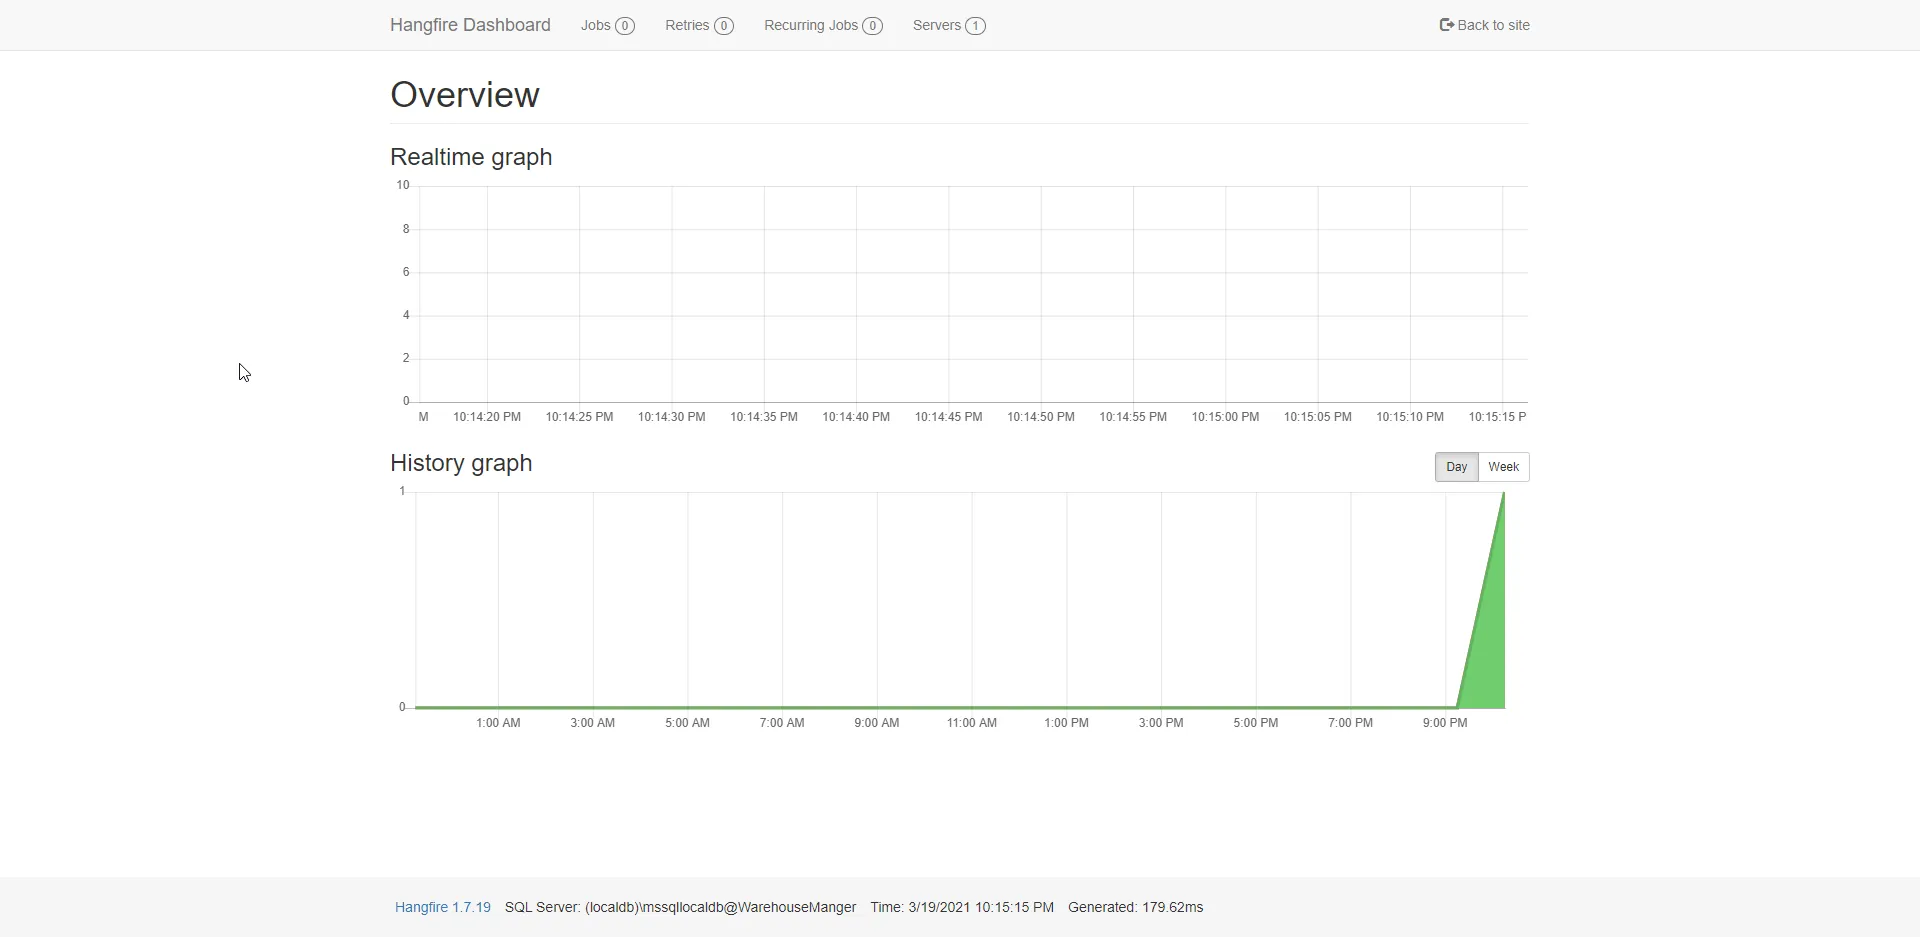
To access the Hangfire dashboard, navigate to /jobs. As of now, this dashboard does not need permissions. It will be added in the upcoming versions of the project.
Contribution Needed
- Need someone to add in the API Documentation for Swagger.
- Need someone to implement localization throughout every Razor Component of the solution under the WASM(Client) Project. You can take the Pages/Authentication/Login.razor as the point of reference. It is as simple as adding
@inject Microsoft.Extensions.Localization.IStringLocalizer<Login> localizerto every page, changing the texts to@localizer["Text Here"]and finally adding resx files to the Resources Folder as per the folder structure. - Need few contributors to add in various language translations as per the implemented Location. I got time to only add a few translations for French as of now.
- Need a UI contributor to look at the UX/UI of the entire project
- Need someone to buildup a cool Material Logo for BlazorHero (BH) :D Do contact me on LinkedIn (https://www.linkedin.com/in/iammukeshm/).
- And finally, Stars from everyone! :D
Version History
Version 2.2.0- NuGet | Github Release - 27 June 2021
- UI Improvements
- Docker Support
- Better Permissions Management
- Code Cleanups
- RTL Support
- Minor Bug Fixes
- Better Project Structure
Version 2.1.0 - NuGet | Github Release - 22 May 2021
- minor bug fixes
- UI improvements
- validation messages fixed
- fluent validation support
- mud table fixes
Version 2.0.0 - NuGet | Github Release - 13 April 2021
- Play Notification Tone when a new Chat Message is received.
- Auto-Scroll to the Last Message when a new Chat Message is received.
- Registration Page for Unauthorized User (Currently only Admins can register new users)
- Realtime Notifications - Dashboard Updates Realtime
- Logout Users / Regenerate Token from Multiple Client Browsers when Permission Changes
- FIX: Token Issue Fixed from v1.0.1
- User Images in Chat Component
- Chat - Integrated with Identity to support Private Chats (Will require re-migrating the DB schemas)
- Notifications System using SignalR
- Document Management
- Export to Excel
- Audit Trails
Version 1.0.1 - NuGet | Github Release - 19 March 2021
- Added Forgot / Reset Password
- HTTP Interceptor
- Code Cleanup
- Refresh Tokens
- Auto-Logout if Refresh Tokens Fail
Version 1.0.0 - NuGet | Github Release - 19 March 2021
- Initial Release
- Mudblazor Component Library
- .NET 5.0+
- Blazor Web-Assembly: ASP.NET Core Hosted
- Onion Architecture
- Persistent Dark Mode (Local Storage)
- Service-Based Approach
- MediatR at API Level
- AutoMapper
- API Versioning
- JWT Authentication
- Serilog - Server-Side Only*
- Complete User Management
- Profile Picture
- Clean Fluid UI
- CRUD Functionalities
- Custom Error Pages
- Localization
- Role Management
- User-Role Management
- Swagger
- Middlewares
- Favicon
- Default User & Role Seeding
- Dynamic Service Registration (WASM)
- Auto DB Migrations
- Paginated API Responses
- Polly - Retry Pattern for HttpClient
- Shared Email Service
- Hangfire Implementation
- Custom API Response for 500,401,403
- Specification Pattern
- Permission-Based UI Rendering


