In this article, we are going to learn about implementing CRUD with DynamoDB in ASP.NET Core Web API. This article is an integral part of the entire “Serverless Applications with AWS” which I have been writing on my blog. In a previous article, we covered AWS Lamba using .NET 6 Runtime and much more. Today, we will go through the basics of DynamoDB, creating tables and partition keys via the AWS Console, using the AWS DynamoDB Nuget package, and connecting to the tables from our .NET 6 application, performing basic CRUD operations, and so on.
You can find the complete source code of the implementation here.
About AWS DynamoDB
AWS Dynamo DB is a highly available, fully managed database service provided by Amazon Web Services. It’s a NoSQL Database, meaning it’s not a relational database. It’s also an important and flagship part of the entire Serverless Application Model of AWS. Since it’s auto-scalable, it can handle millions of requests per second and store TBs of data in its rows. Pretty interesting, right? The speed with which data retrieval happens is also quite impressive, the latency is pretty small. Other than that, it is integrated with AWS IAM for security (like every other AWS Service).
Being a NoSQL Compliant database, it’s a key/value database. Primary Keys are usually made up of 1 or 2 keys. Other properties (columns) of the DynamoDB table are internally known as attributes.
Another very important feature is that Amazon offers almost 25 GB of storage and up to 200 Million read/write requests per month with the Free Tier, which is more than enough if you want to get started with your AWS journey. Get your FREE tier account here if you haven’t already got one - https://aws.amazon.com/free/
Read more about Dynamo DB here - https://aws.amazon.com/dynamodb/
What we will build?
So, we will be building a simple .NET 6 WEB API that can connect to our AWS DynamoDB based on certain configurations that we set up via the local AWS CLI and perform some basic CRUD operations over an entity. In this demonstration, our entity will be Student, with properties like Id, Name, Class, Country, and just the basic ones. And, we will be writing code to Create, Get a single student, Get all Students, Delete, and update students.
With that clear, let’s get started!
Update: Checkout my YouTube video on Getting Started with AWS DynamoDB for .NET Developers – https://www.youtube.com/watch?v=BJYDWMN8taI
AWS Console - Dynamo DB
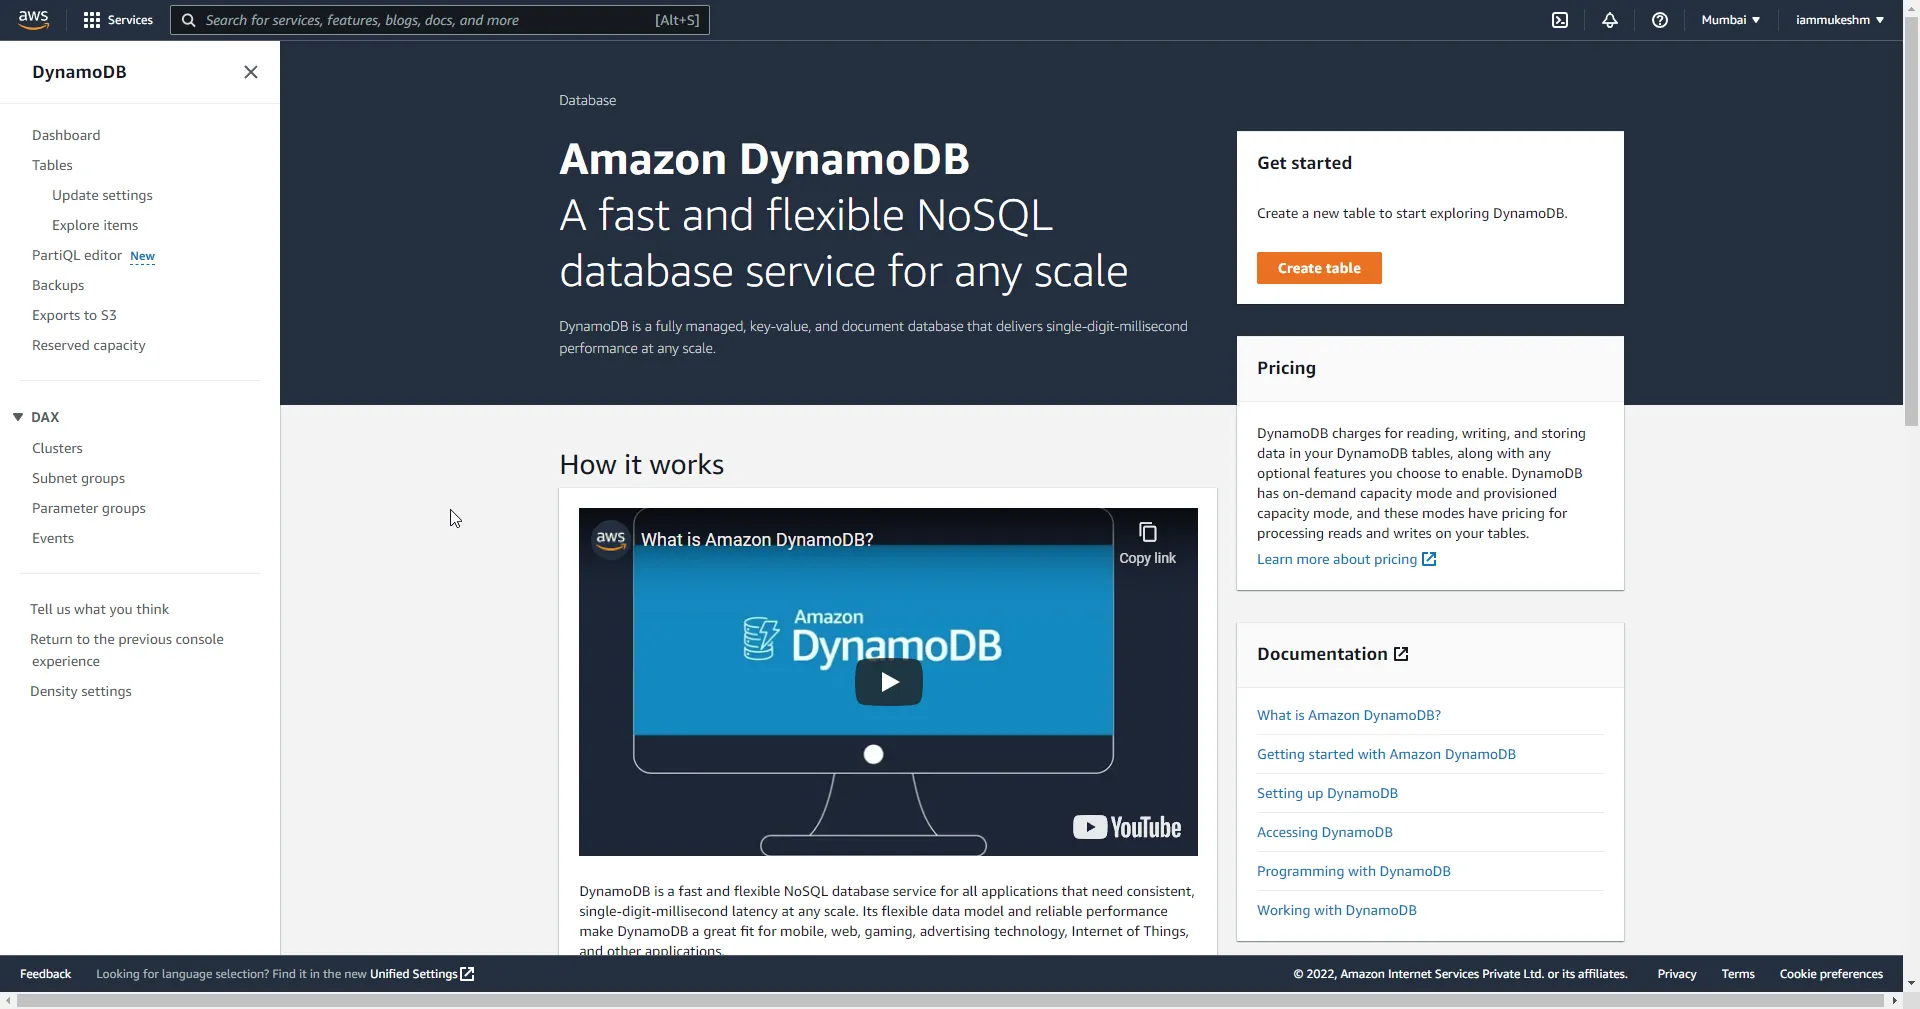
I assume that you already have an AWS account (preferably a FREE account which is more than enough for our learning). Let’s do some hands-on exercises with Amazon DynamoDB to know it better!
Login to your AWS Console, search for DynamoDB in the top Services search bar and open it up.
Next, click on the Tables or Create Table.
Creating a new Table in DynamoDB via Console
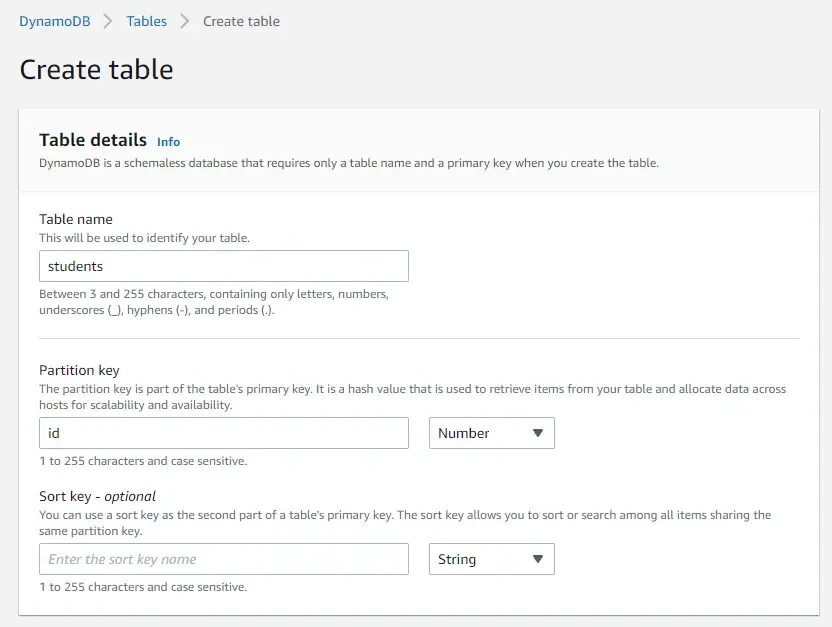
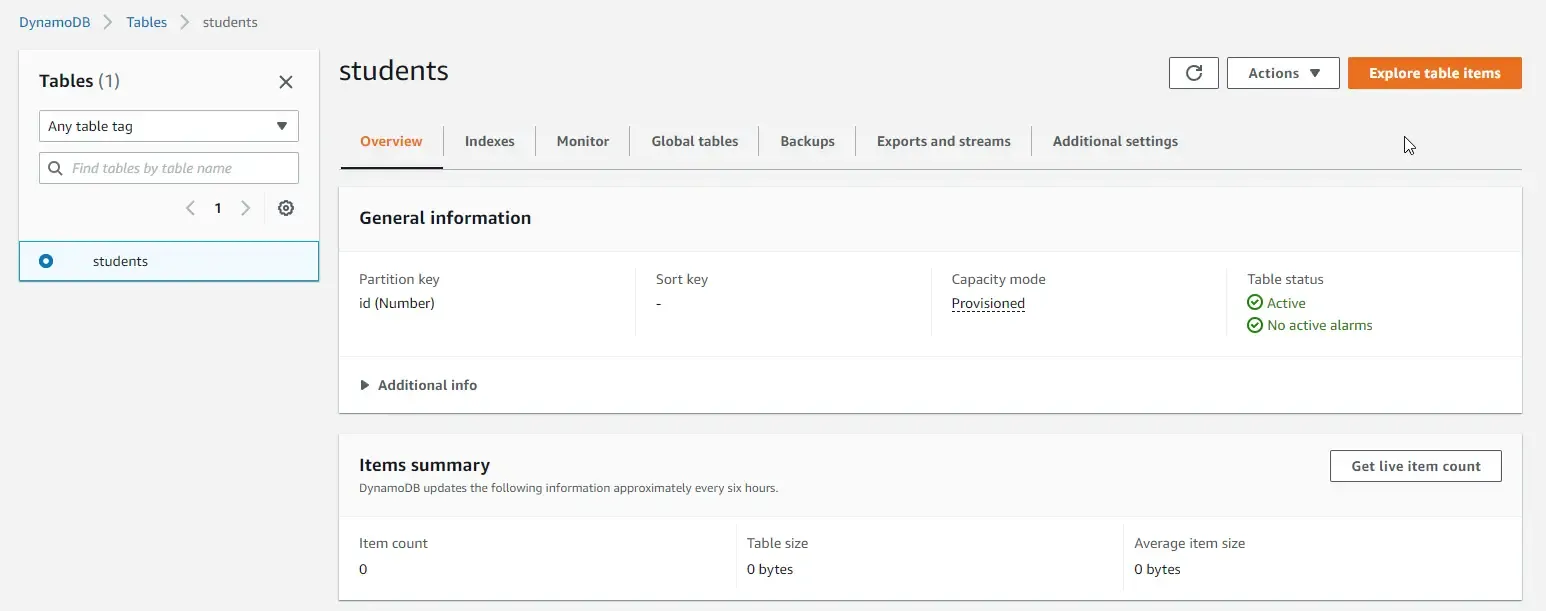
As discussed earlier, we will have to create a new table named students. Click on the “Create Table”.

Here, set the table name to “students” and the Partition Key as “id” (number). So, this will be the Primary key of the “students” table. Also note that, by using the Sort Key, we can further flex the primary key formation. This is more like a composite Primary which is formed by clubbing the Partition Key and the Sort Key.
For now, we are not setting any Sort Key. Leave the other fields as it is and Create the table.
That’s everything. It might take a couple of seconds to completely provision your table to DynamoDB. Once completed, the status of your table turns to Active.

Adding Data to AWS DynamoDB via Console
Once the table is provisioned, let’s add some data to it via the console. Click on the table and hit “Explore Table Items”.
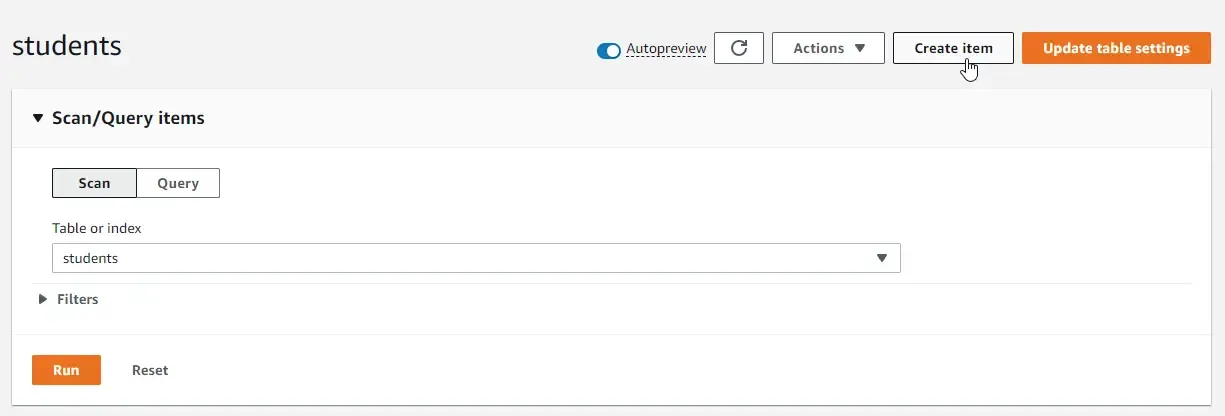
So, this is where you can query data from this table (if any data exists). The UI seems pretty intuitive for working with data. Click on “Create item”.
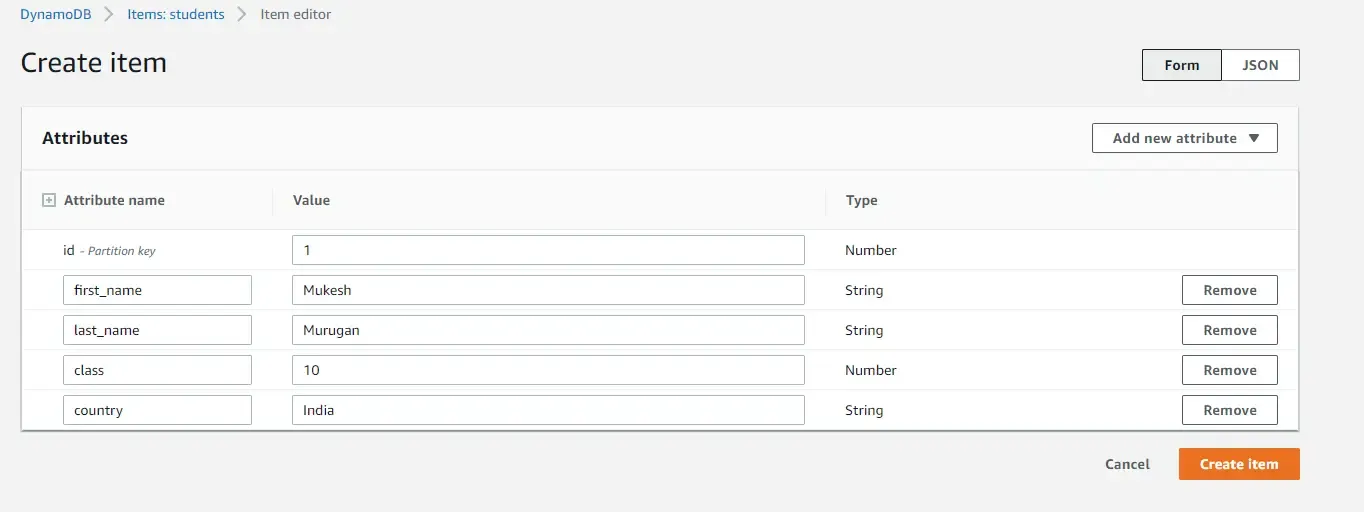
Now, here AWS DynamoDB allows you to define data in either JSON formats or add data as form fields. Click on the JSON tab to switch to the following view. Here, I add properties like Id, First Name, Last Name, Class, and Country.

You can switch back to the Form view for the below appearance. I prefer using the JSON view though.
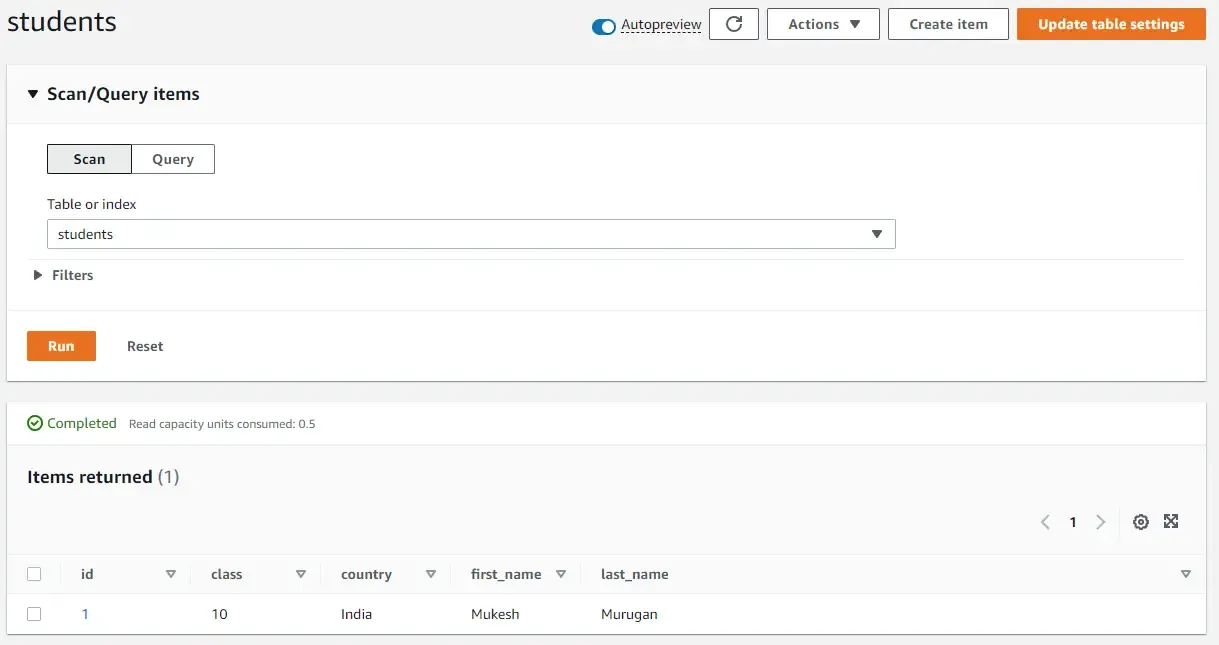
Once you enter the values and click create, AWS DynamoDB inserts the item into the students table as you can see below.
That’s how the DynamoDB interface works. Let’s write some code now.
Getting Started - CRUD with DynamoDB in ASP.NET Core
Now that we have a basic hands-on with AWS DynamoDB, let’s build a Web API that can consume this AWS service.
Open up your Visual Studio IDE (I am using Visual Studio 2022 Community with the latest iteration of .NET SDK installed, which is 6.0.2). Make sure that your development environment is set up.
Create a new ASP.NET Core Web API project and name it something like the one below.
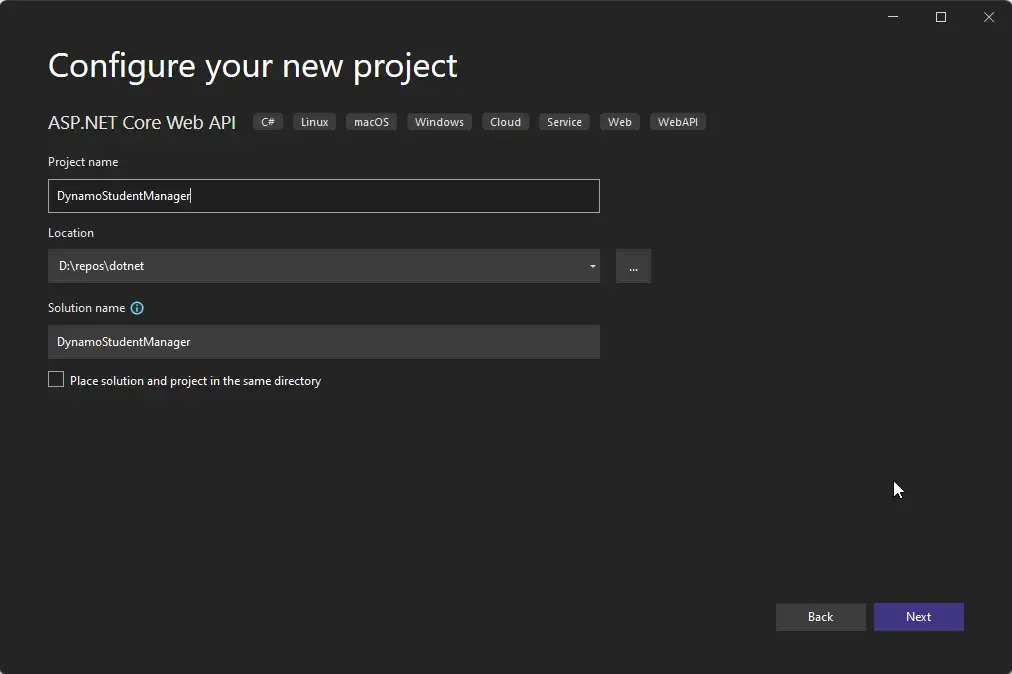
Make sure you select .NET 6 and check the “Use Controllers” checkbox. Also, ensure that you have enabled the OpenAPI support since we will be testing our application via Swagger.
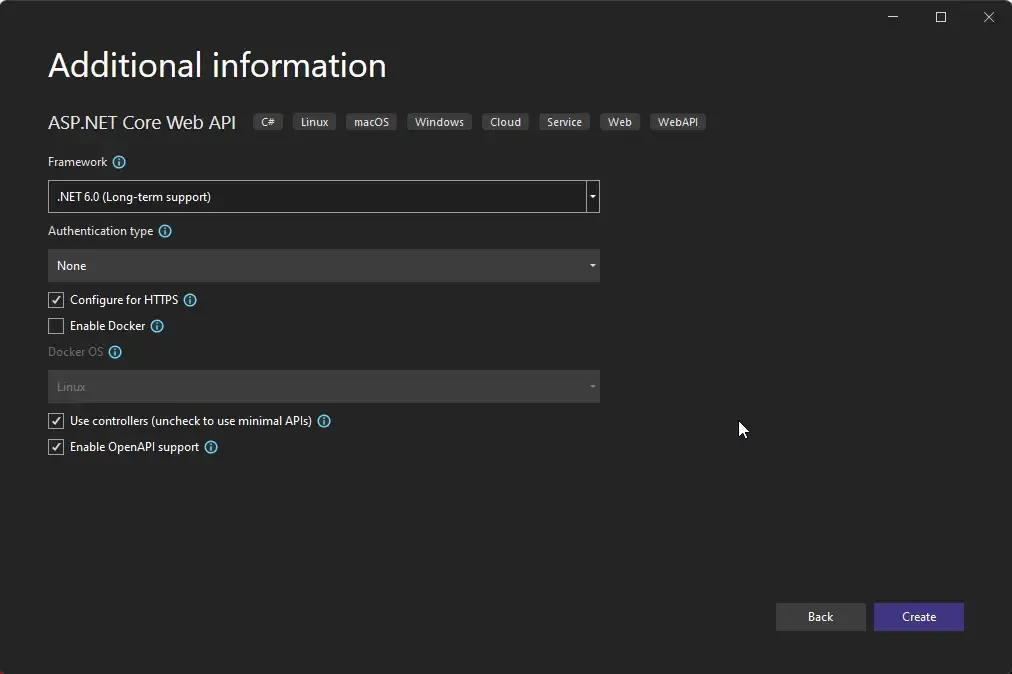
Now that you have the project up, let’s talk about configuring AWS credentials.
AWS CLI Configuration
So, for every AWS service that you work with locally, you need a set of credentials to access the AWS endpoints, right? If you have read my previous articles on AWS (S3 or Lambda), I have shown a way to store the AWS credentials securely onto your local machine and avoid including these details within your project.
Navigate to AWS IAM to create your user who has access to Dynamo DB. For creating a new user on AWS IAM, you can follow this section of my previous article. The only difference is that, instead of selecting AmazonS3FullAccess Policy, you would have to select a policy related to Dynamo DB. Make sure you have the read, write and delete permissions included in the selected policy. Here are the DynamoDB-related policies.
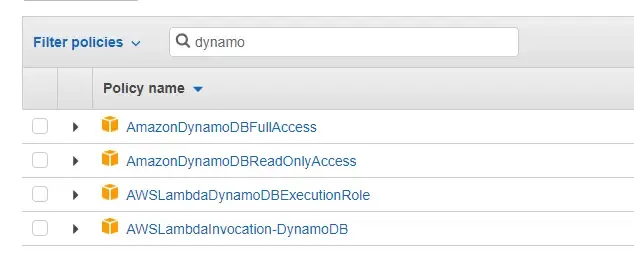
You can choose AmazonDynamoDBFullAccess for the time being. But always remember to select only what is actually needed by your application.
Once you have created your user, a set of credentials will be generated. Make sure that you download this generated CSV for safekeeping.
Next, to configure these credentials on your local machine, follow this section of my previous article.
I named my profile aws-admin. Here is how it looks to me.
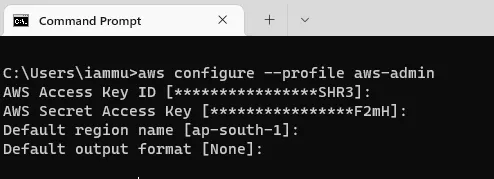
It’s important to note that you have to set the proper AWS region. For example, I have set my region to ap-south-1 which is Mumbai, India. The same region has to be selected while navigating the AWS Console. If there is a mismatch in the names of the regions, most probably you will not be able to see your provisioned table on DDB.
So, now that we have configured the AWS credentials, let’s open up our appsettings.json in the project and do the modifications as below.
Note that my profile name is aws-admin and the closest AWS region to me is ap-south-1. Make changes accordingly.
{ "Logging": { "LogLevel": { "Default": "Information", "Microsoft.AspNetCore": "Warning" } }, "AllowedHosts": "*", "AWS": { "Profile": "aws-admin", "Region": "ap-south-1" }}With that done, AWS SDK will be able to read the profile name from the appsettings.json and extract the credential details configured, and use it during the runtime of our application.
Install the Required Packages
Ensure that you install the following AWS SDK Packages by running the following command on your package manager console.
Install-Package AWSSDK.CoreInstall-Package AWSSDK.DynamoDBv2Install-Package AWSSDK.Extensions.NETCore.SetupCreating the Student Model
Remember us creating a table on AWS DynamoDB with certain properties? We need to build the same model class on our .NET project too.
Create a new folder named Models, and create a class under it named Student.cs
using Amazon.DynamoDBv2.DataModel;namespace DynamoStudentManager.Models{    [DynamoDBTable("students")]    public class Student    {        [DynamoDBHashKey("id")]        public int? Id { get; set; }
        [DynamoDBProperty("first_name")]        public string? FirstName { get; set; }
        [DynamoDBProperty("last_name")]        public string? LastName { get; set; }
        [DynamoDBProperty("class")]        public int Class { get; set; }
        [DynamoDBProperty("country")]        public string? Country { get; set; }    }}
Note that we have named our DynamoDB table “students”, but the name of our class is “Student” (it can even be something totally different). So, in order for the AWS SDK to understand that these are essentially the same models, we need to map them.
Line 4: Here we tell the SDK that the “students” DynamoDB Table has to map to the “Student” C# class.
Line 7: DynamoDBHashKey defines the primary key of the table. Here, we indicate that Id will be our primary key with the property name as “id” in the DDB table.
Lines 10,13,16,19: We define other properties of the table along with their respective DDB property names.
Service Registration
With the models set up, let’s register the AWS Services and configuration within the ASP.NET Core container. Open up the Program.cs and the following highlighted lines.
builder.Services.AddEndpointsApiExplorer();builder.Services.AddSwaggerGen();var awsOptions = builder.Configuration.GetAWSOptions();builder.Services.AddDefaultAWSOptions(awsOptions);builder.Services.AddAWSService<IAmazonDynamoDB>();builder.Services.AddScoped<IDynamoDBContext, DynamoDBContext>();var app = builder.Build();This essentially loads the AWS configuration from the appsettings.json file and registers the DynamoDB-related AWS Services into the application’s container.
Student Controller
Next, let’s write the API controller that will actually perform the CRUD-related operations with DynamoDB in ASP.NET Core. Create a new Blank API Controller under the Controllers folder and the name is StudentController.
namespace DynamoStudentManager.Controllers;
[Route("api/[controller]")][ApiController]public class StudentsController : ControllerBase{    private readonly IDynamoDBContext _context;    public StudentsController(IDynamoDBContext context)    {        _context = context;    }    [HttpGet("{studentId}")]    public async Task<IActionResult> GetById(int studentId)    {        var student = await _context.LoadAsync<Student>(studentId);        if (student == null) return NotFound();        return Ok(student);    }    [HttpGet]    public async Task<IActionResult> GetAllStudents()    {        var student = await _context.ScanAsync<Student>(default).GetRemainingAsync();        return Ok(student);    }    [HttpPost]    public async Task<IActionResult> CreateStudent(Student studentRequest)    {        var student = await _context.LoadAsync<Student>(studentRequest.Id);        if (student != null) return BadRequest($"Student with Id {studentRequest.Id} Already Exists");        await _context.SaveAsync(studentRequest);        return Ok(studentRequest);    }    [HttpDelete("{studentId}")]    public async Task<IActionResult> DeleteStudent(int studentId)    {        var student = await _context.LoadAsync<Student>(studentId);        if (student == null) return NotFound();        await _context.DeleteAsync(student);        return NoContent();    }    [HttpPut]    public async Task<IActionResult> UpdateStudent(Student studentRequest)    {        var student = await _context.LoadAsync<Student>(studentRequest.Id);        if (student == null) return NotFound();        await _context.SaveAsync(studentRequest);        return Ok(studentRequest);    }}
Line 7-11: Here, we inject the IDynamoDBContext into the constructor of the controller. Using this interface we will be able to access AWS DynamoDB.
Line 13-18: Gets items by Id (which is our primary key here). In Line 15, we load the Student table (which gets mapped to “students”) and pass the received StudentId as the HashKey to DynamoDB. This returns us the mapped Student record if it exists.
Line 20-24: Get all the student records from the DDB table.
Line 26-32: Here, we pass a Student record to the endpoint which then tries to create a new record in DDB with the passed details. It first checks if the passed ID already exists in the database. If found it returns a Bad Request Exception. Else, the student record is created as expected.
Line 34-40: We pass a student Id to this Delete endpoint. It first checks if such a record exists with the passed Id. If not found, the application throws a NotFound exception and breaks. Else it proceeds to delete the item from our DynamoDB table.
Line 42-48: Here, we try to update the student record, by passing the entire properties as such to the endpoint. We first check if the student Id exists, and then continue to update the item. As simple as that.
Testing
With the controllers wired up, let’s test our application. Since we have enabled OpenAPI support for our API, Swagger would be working out of the box without any additional configurations needed.
Run the application and navigate to localhost:xxxx/swagger on your web browser. This should open up the Swagger UI.

Remember, we created a new record earlier directly via the AWS Console DynamoDB. I had given it an Id of 1. Let’s query with this Id against the GET /api/students/1 endpoint.

There you go, just as we expected. Next, let’s create a new student using the POST endpoint. Here is what my JSON data would look like for the new student with ID 2.
{ "id": 2, "firstName": "John", "lastName": "Musk", "class": 10, "country": "USA"}You can see that there is a 200 Ok Response from our API, which means that the data is inserted into our DDB table. Let’s check our console.
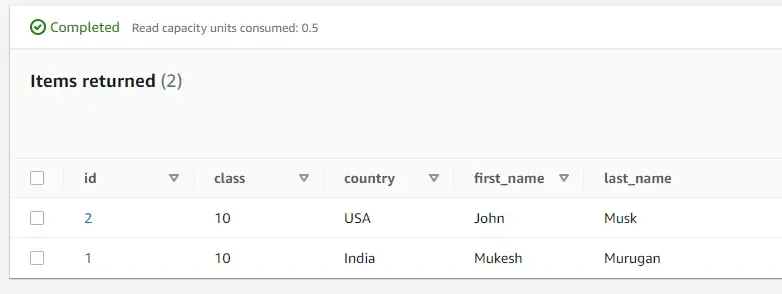
There you go, our new student is created. Similarly, I leave the remaining API endpoints for you to test out. You can find the entire source code of this implementation here. Feel free to follow my Github handle. Let’s wrap up this article for now.
In the next article of this series, we will learn about API gateways and creating Serverless Rest APIs (HTTP APIs) by attaching Lambdas to the gateway.
Summary
In this article, we learned about Performing CRUD with DynamoDB in ASP.NET Core, some hands-on with the AWS DynamoDB interface, Partition Keys, Installing the AWS CLI and configuring it, Building a Web API that can communicate with the DDB and working with data, and so on.
Do share this article with your colleagues and dev circles if you found this interesting. You can find the source code of the project here. Thanks!

