In this article, we will learn all about Dapper in ASP.NET Core and make a small implementation to understand how it works. Let’s not limit it just to Dapper. We will build an application that follows a very simple and clean architecture. In this implementation, we will try to under Repository Pattern and Unit Of Work as well. Everything put together, this article helps you to understand How Dapper can be used in an ASP.NET Core Application following Repository Pattern and Unit of Work. Here is the source code of the entire implementation. Let’s get started.
What is Dapper?
Dapper is a simple Object Mapping Framework or a Micro-ORM that helps us to Map the Data from the Result of an SQL Query to a .NET Class efficiently. It would be as simple as executing a SQL Select Statement using the SQL Client object and returning the result as a Mapped Domain C# Class. It’s more like an Automapper for the SQL World. This powerful ORM was built by the folks at StackOverflow and is definitely faster at querying data when compared to the performance of Entity Framework. This is possible because Dapper works directly with the RAW SQL and hence the time delay is quite less. This boosts the performance of Dapper.
Implementing Dapper in ASP.NET Core
We’ll build a simple ASP.NET Core 3.1 WebAPI following a Clean Architecture, Repository Pattern, and Unit of Work. At the Data Access Layer, we will be using Dapper. I will be using Visual Studio 2019 Community Edition as my IDE, and MS-SQL / SQL Management Studio as my RDBMS.
Creating the MS-SQL Database and Table
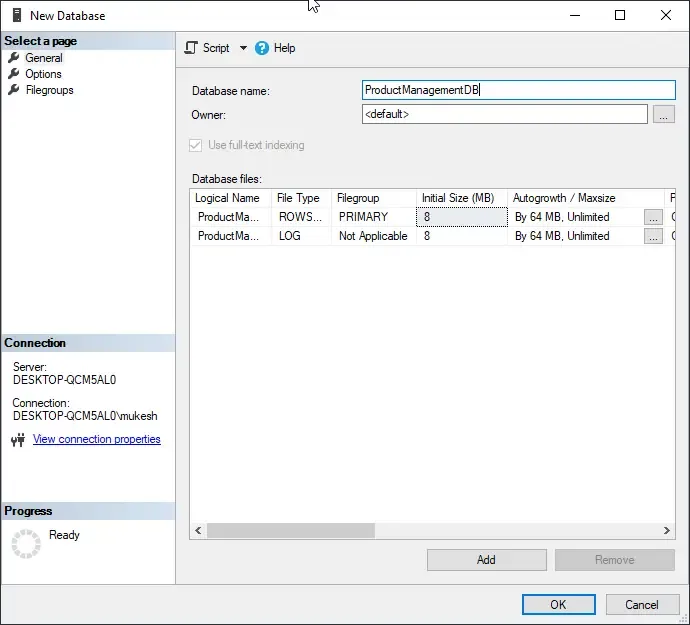
Let’s create our Database and Related Table First. Open up SQL Management Studio and connect to your local SQL Server. I will add a new database and the name is ‘ProductManagementDB’.
For this demonstration, I will create a simple Product Table with Columns like ID, Name, Description, and so on. Set Id as the Primary Key.

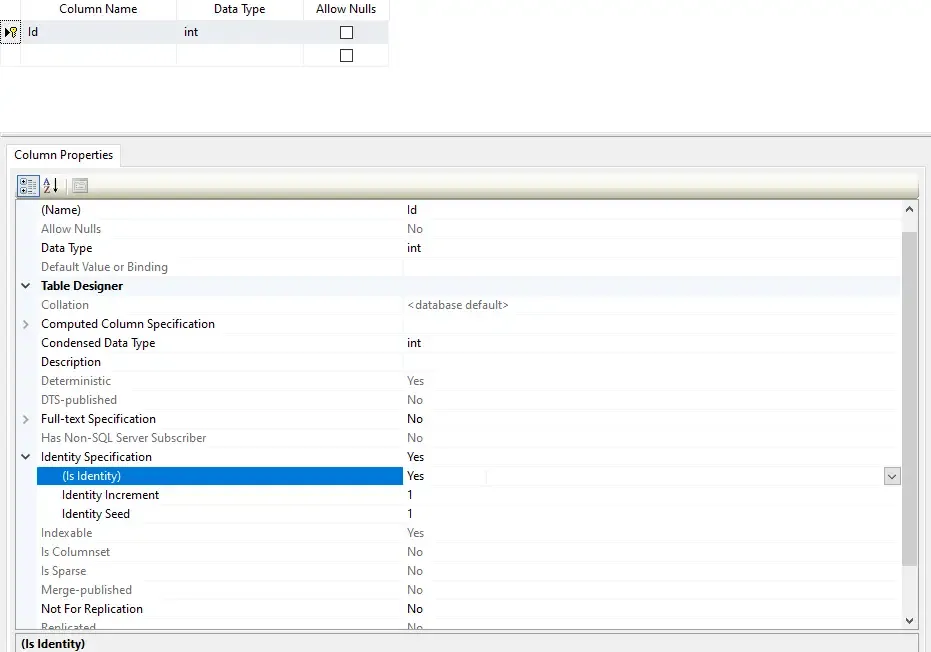
With Id as the selection, scroll down and Enable the ‘Is Identity’ Property. This makes your ID column auto-increment at every Insert Operation.
Here is the final schema for the Product Table.
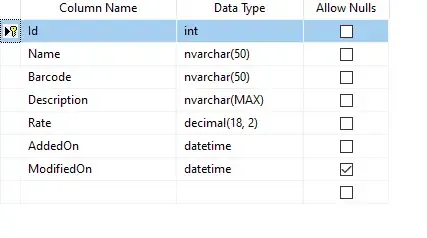
Alternatively, you can Execute this Script to Create the Required Table as well.
CREATE TABLE [dbo].[Products]( [Id] [int] IDENTITY(1,1) NOT NULL, [Name] [nvarchar](50) NOT NULL, [Barcode] [nvarchar](50) NOT NULL, [Description] [nvarchar](max) NOT NULL, [Rate] [decimal](18, 2) NOT NULL, [AddedOn] [datetime] NOT NULL, [ModifiedOn] [datetime] NULL, CONSTRAINT [PK_Products] PRIMARY KEY CLUSTERED( [Id] ASC)WITH (PAD_INDEX = OFF, STATISTICS_NORECOMPUTE = OFF, IGNORE_DUP_KEY = OFF, ALLOW_ROW_LOCKS = ON, ALLOW_PAGE_LOCKS = ON) ON [PRIMARY]) ON [PRIMARY] TEXTIMAGE_ON [PRIMARY]GOGetting Started with ASP.NET Core WebApi Project
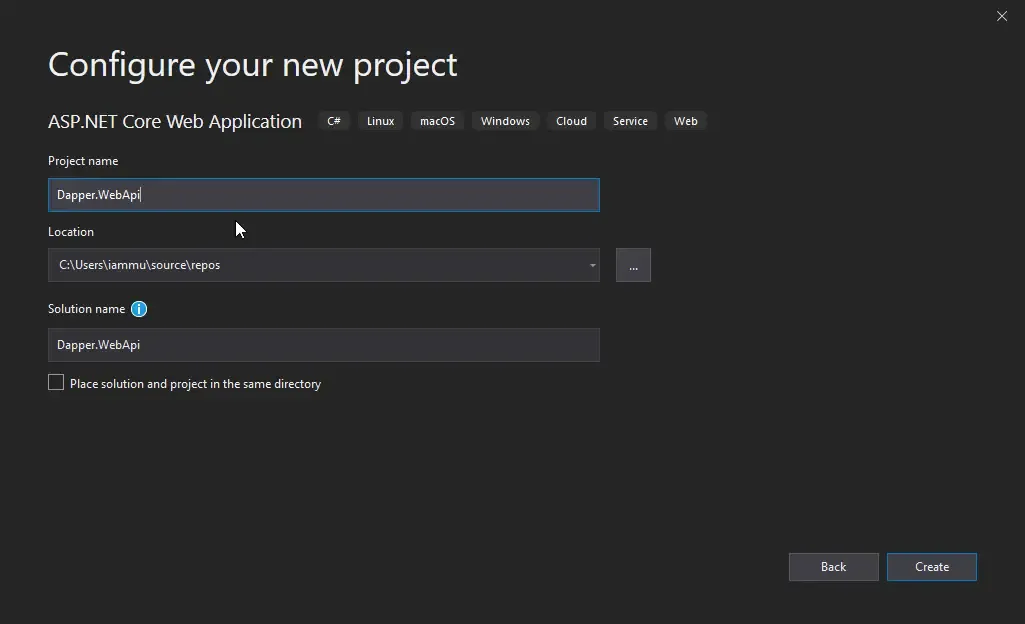
With the Database and Table done, let’s proceed with creating a new ASP.NET Core 3.1 WebAPI Project. I am naming the Solution and Project Dapper.WebApi.
Here is what we will build. It will be a real simple WebApi that Performs CRUD Operation using Dapper and Repository Pattern / Unit Of work. We will also follow some Clean Architecture so that we learn some good practices along with the implementation.
I will explain the Architecture that we will follow. So basically, we will have 3 Main Layers.
- Core and Application - All the Interfaces and Domain Models live here.
- Infrastructure - In this scenario, Dapper will be present here, along with implementations of Repository and other interfaces
- WebApi - API Controllers to access the Repositories.
If you need more in-depth knowledge about Clean Architecture in ASP.NET Core, I have written a highly detailed article on Onion Architecture in ASP.NET Core 3.1 using CQRS Pattern along with the complete source code.
Coming back to our implementation, Let’s now add a new .NET Core Library Project and Name it Dapper.Core.
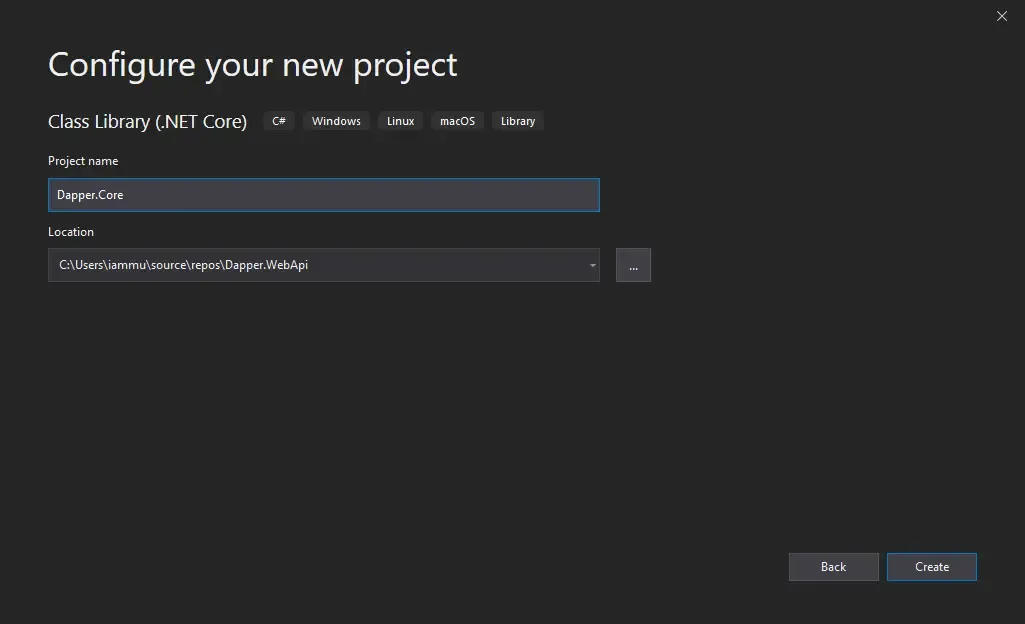
Here, Add a new Folder Entities, and Create a new Class in this folder. Since we are developing a simple CRUD Operation Application for Products, Let’s name this class Product.
public class Product{ public int Id { get; set; } public string Name{ get; set; } public string Description { get; set; } public string Barcode { get; set; } public decimal Rate { get; set; } public DateTime AddedOn { get; set; } public DateTime ModifiedOn { get; set; }}This is everything you need in this Dapper.Core Project. Please note that since our application is simple, the content of the Core Library is also minimal. But in this way, we are also learning a simple implementation of the Onion Architecture, yeah?
Remember, The Core layer is not going to depend on any other Project / Layer. This is very important while following Onion Architecture.
Next, Add another .NET Core Library Project and name it Dapper.Application. This is the Application Layer, that has the interfaces defined. So what will happen is, we define the interfaces for Repositories here, and implement these interfaces at another layer that is associated with Data access, in our case, Dapper.
Create a New Folder Interfaces, and add a new interface, IGenericRepository.
public interface IGenericRepository<T> where T : class{ Task<T> GetByIdAsync(int id); Task<IReadOnlyList<T>> GetAllAsync(); Task<int> AddAsync(T entity); Task<int> UpdateAsync(T entity); Task<int> DeleteAsync(int id);}As mentioned earlier, we will be using Repository Pattern along with the Unit Of work in our Implementation. In IGenericRepository, we are building a generic definition for the repository pattern. These include the most commonly used CRUD Operations like GetById, GetAll, Add, Update and Delete.
Add a Reference to the Core Project from the Application Project. The Application project always depends on the Core Project Only. Nothing else.
Now that we have a generic Interface, let’s build the product Specific Repository Interface. Add a new interface and name it IProductRepository. We will Inherit the IGenericRepository Interface with T as the Product.
public interface IProductRepository : IGenericRepository<Product>{}Finally, add the last Interface, IUnitOfWork.
public interface IUnitOfWork{ IProductRepository Products { get; }}That’s everything you need to add to the Dapper.Application Project.
Now, we need to define the connection string of our database, so that the application can connect to our Database for performing CRUD operations. Open up the appsettings.json file in the Dapper.WebApi Project and add the following
"ConnectionStrings": {"DefaultConnection": "Data Source=DESKTOP-QCM5AL0;Initial Catalog=ProductManagementDB;Integrated Security=True;MultipleActiveResultSets=True"}Make sure that you add in your actual connection string.
With that out of the way, create another .NET Core Class Library Project, Dapper.Infrastructure. Here, we will add the implementation of the Interfaces.
Once the Project is created, Let’s install the required Packages to the Dapper.Infrastructure Project.
Install-Package DapperInstall-Package Microsoft.Extensions.ConfigurationInstall-Package Microsoft.Extensions.DependencyInjection.AbstractionsInstall-Package System.Data.SqlClientNext, add a new folder, Repositories in the Dapper.Infrastructure Project.
Add a reference to the Application Project from the Infrastructure Project. You can slowly get the idea of this entire architecture, right?
Let’s first implement the IProductRepository Interface. Create a new class, ProductRepository.cs
public class ProductRepository : IProductRepository{ private readonly IConfiguration configuration; public ProductRepository(IConfiguration configuration) { this.configuration = configuration; } public async Task<int> AddAsync(Product entity) { entity.AddedOn = DateTime.Now; var sql = "Insert into Products (Name,Description,Barcode,Rate,AddedOn) VALUES (@Name,@Description,@Barcode,@Rate,@AddedOn)"; using (var connection = new SqlConnection(configuration.GetConnectionString("DefaultConnection"))) { connection.Open(); var result = await connection.ExecuteAsync(sql, entity); return result; } } public async Task<int> DeleteAsync(int id) { var sql = "DELETE FROM Products WHERE Id = @Id"; using (var connection = new SqlConnection(configuration.GetConnectionString("DefaultConnection"))) { connection.Open(); var result = await connection.ExecuteAsync(sql, new { Id = id }); return result; } } public async Task<IReadOnlyList<Product>> GetAllAsync() { var sql = "SELECT * FROM Products"; using (var connection = new SqlConnection(configuration.GetConnectionString("DefaultConnection"))) { connection.Open(); var result = await connection.QueryAsync<Product>(sql); return result.ToList(); } } public async Task<Product> GetByIdAsync(int id) { var sql = "SELECT * FROM Products WHERE Id = @Id"; using (var connection = new SqlConnection(configuration.GetConnectionString("DefaultConnection"))) { connection.Open(); var result = await connection.QuerySingleOrDefaultAsync<Product>(sql, new { Id = id }); return result; } } public async Task<int> UpdateAsync(Product entity) { entity.ModifiedOn = DateTime.Now; var sql = "UPDATE Products SET Name = @Name, Description = @Description, Barcode = @Barcode, Rate = @Rate, ModifiedOn = @ModifiedOn WHERE Id = @Id"; using (var connection = new SqlConnection(configuration.GetConnectionString("DefaultConnection"))) { connection.Open(); var result = await connection.ExecuteAsync(sql, entity); return result; } }}Line 3 - We added the connection string to the appsettings.json, Remember? We need to access that string in another project, Dapper.Infrastructure. Hence we use the IConfiguration interface to make the connection string available throughout the application.
Line 6 - Injecting the IConfiguration to the constructor of the ProductRepository.
Line 11 - A straightforward SQL Command to Insert data into the Products Table.
Line 12 - Using the connection string from the appsettings.json, we open a new SQL Connection.
Line 15 - We pass the product object and the SQL command to the Execute Function.
Similarly, we wrote the other CRUD operations.
Line 29 - Function to get all Products
Line 35 - Here we use Dapper to Map all the products from the database to a list of Product Classes. Here we use the QueryAsync Method. We use this for the GetById Function as well.
Next, Let’s implement the IUnitOfWork. Create a new class, UnitOfWork, and inherit from the interface IUnitOfWork.
public class UnitOfWork : IUnitOfWork{ public UnitOfWork(IProductRepository productRepository) { Products = productRepository; } public IProductRepository Products { get; }}Remember we have a few Interfaces and it’s implementation. Our next step is to register these interfaces with the implementations to the Service Container of ASP.NET Core. Add a new class in the Infrastructure Project and name it ServiceRegistration.
public static class ServiceRegistration{ public static void AddInfrastructure(this IServiceCollection services) { services.AddTransient<IProductRepository, ProductRepository>(); services.AddTransient<IUnitOfWork, UnitOfWork>(); }}This is more or less an extension method for the IServiceCollection. Here we add the interfaces with the Concrete Classes. Finally, go to the Startup.cs/ConfigureServices method in the WebApi Project, and let’s call the above-made extension method.
services.AddInfrastructure();Finally, let’s wire up the Repository to the Controller. Ideally, you may need a Service layer in between the Controller and the Repository Classes. But it would be an overkill for this implementation. Let’s keep things simple and proceed.
In the WebApi Project, Add a new Controller under the Controllers folder. Let’s name it Product Controller.
[Route("api/[controller]")][ApiController]public class ProductController : ControllerBase{ private readonly IUnitOfWork unitOfWork; public ProductController(IUnitOfWork unitOfWork) { this.unitOfWork = unitOfWork; } [HttpGet] public async Task<IActionResult> GetAll() { var data = await unitOfWork.Products.GetAllAsync(); return Ok (data); } [HttpGet("{id}")] public async Task<IActionResult> GetById(int id) { var data = await unitOfWork.Products.GetByIdAsync(id); if (data == null) return Ok(); return Ok(data); } [HttpPost] public async Task<IActionResult> Add(Product product) { var data = await unitOfWork.Products.AddAsync(product); return Ok(data); } [HttpDelete] public async Task<IActionResult> Delete(int id) { var data = await unitOfWork.Products.DeleteAsync(id); return Ok(data); } [HttpPut] public async Task<IActionResult> Update(Product product) { var data = await unitOfWork.Products.UpdateAsync(product); return Ok(data); }}Here we will just define the IUnitOfWork and inject it into the Controller’s constructor. After that, we create separate Action Methods for each CRUD operation and use the unit of work object. That’s it for the implementation. Let’s test it.
Testing with Swagger
Swagger is the favorite API testing tool for nearly every developer. It makes your life so easy. Let’s add swagger to our WebApi and test our implementation so far.
First, Install the required packages to the WebApi Project.
Install-Package Swashbuckle.AspNetCoreInstall-Package Swashbuckle.AspNetCore.SwaggerOpen Startup.cs/ConfigureServices method and add the following.
services.AddSwaggerGen(c =>{ c.IncludeXmlComments(string.Format(@"{0}Dapper.WebApi.xml", System.AppDomain.CurrentDomain.BaseDirectory)); c.SwaggerDoc("v1", new OpenApiInfo { Version = "v1", Title = "Dapper - WebApi", });});Next, in the Configure method, let’s add the Swager Middleware.
app.UseSwagger();app.UseSwaggerUI(c =>{ c.SwaggerEndpoint("/swagger/v1/swagger.json", "Dapper.WebApi");});Finally, Open up your WebApi Project Properties, enable the XML Documentation file and give the same file path.
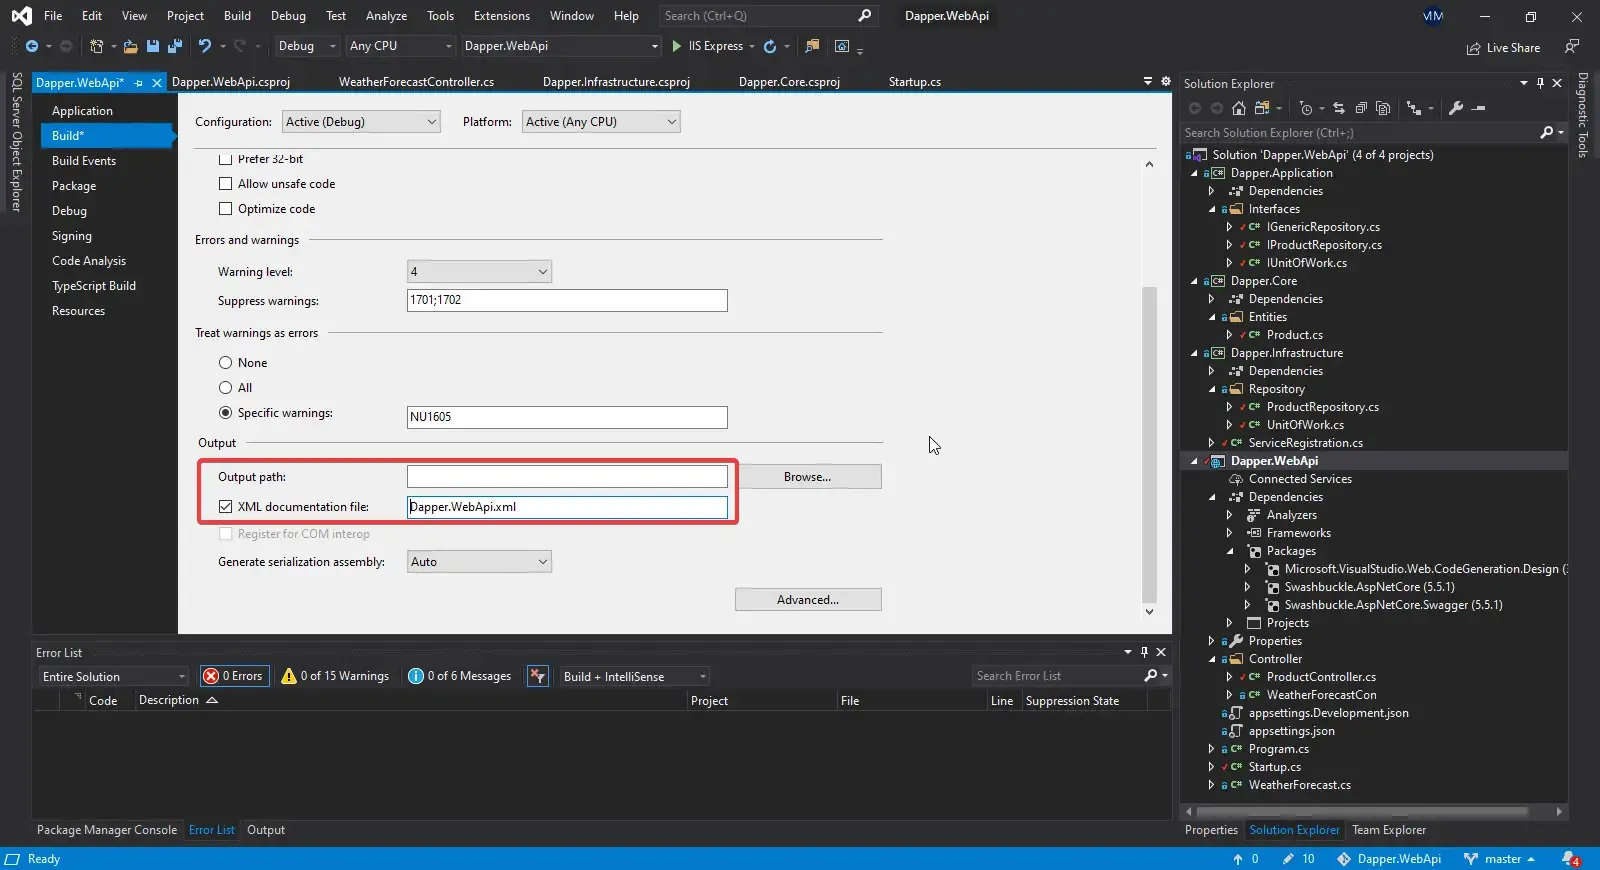
Now, build the application and run it. Navigate to localhost:xxxx/swagger. This is your Swagger UI. Here you get to see all the available endpoints of your API. Pretty neat, yeah?
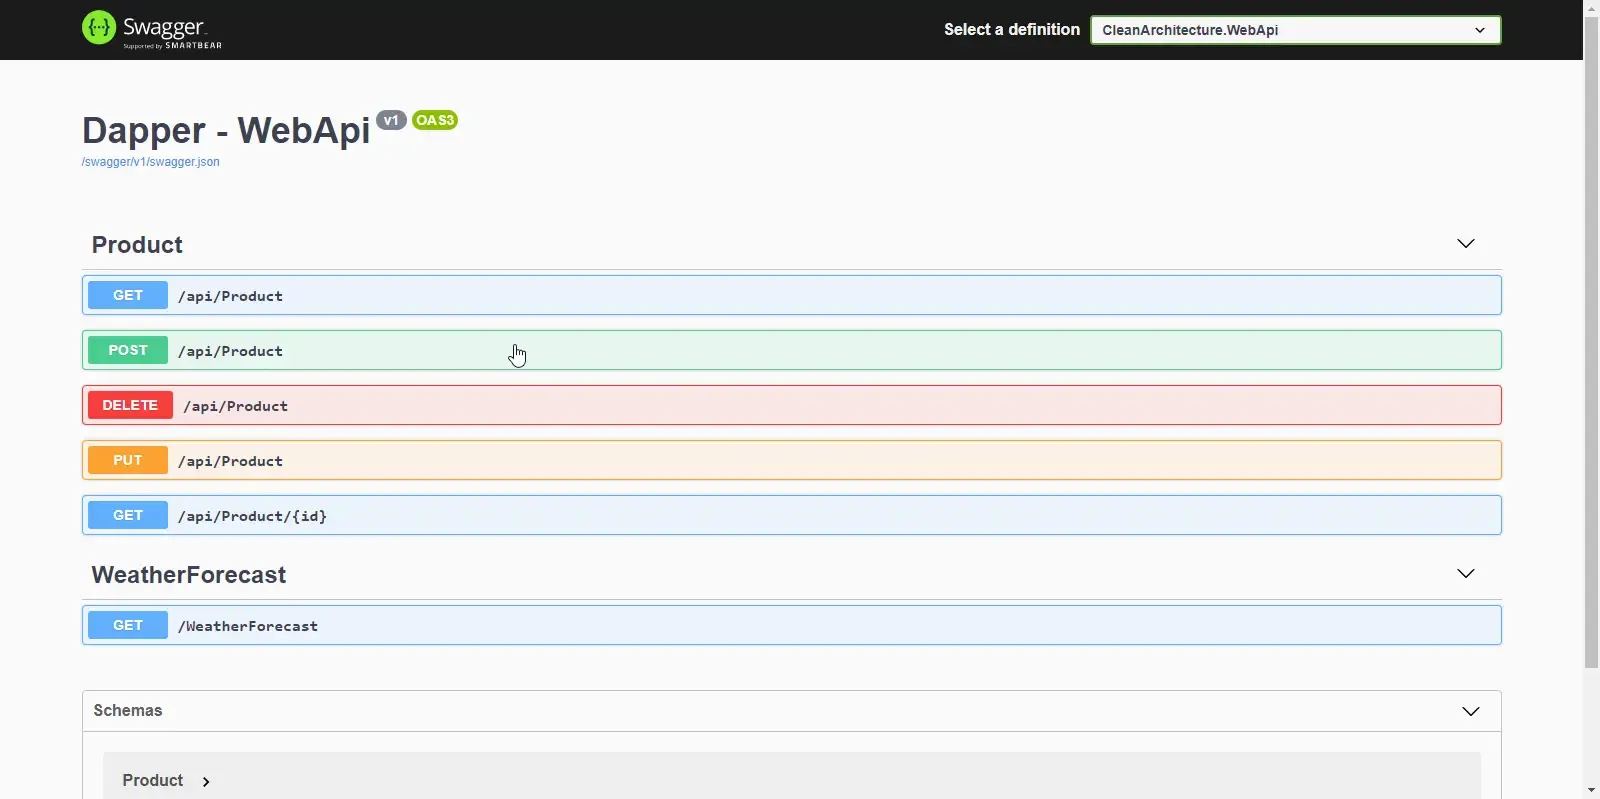
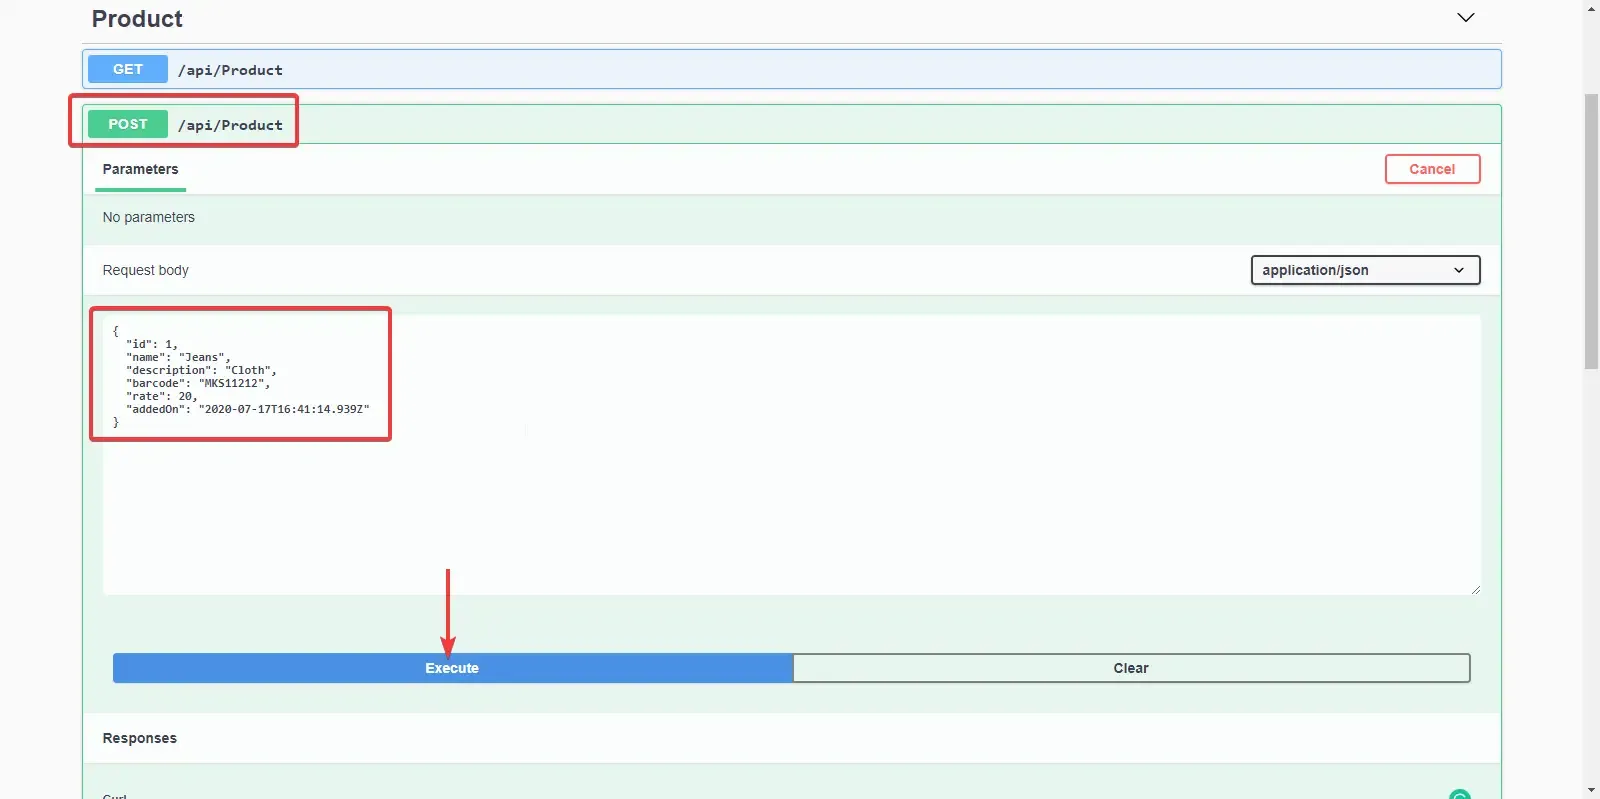
Let’s add a new Product. Click on the POST tab and enter your Product Object. Click Execute. It’s that easy to add a new record through Swagger. Makes the testing process blazing fast.
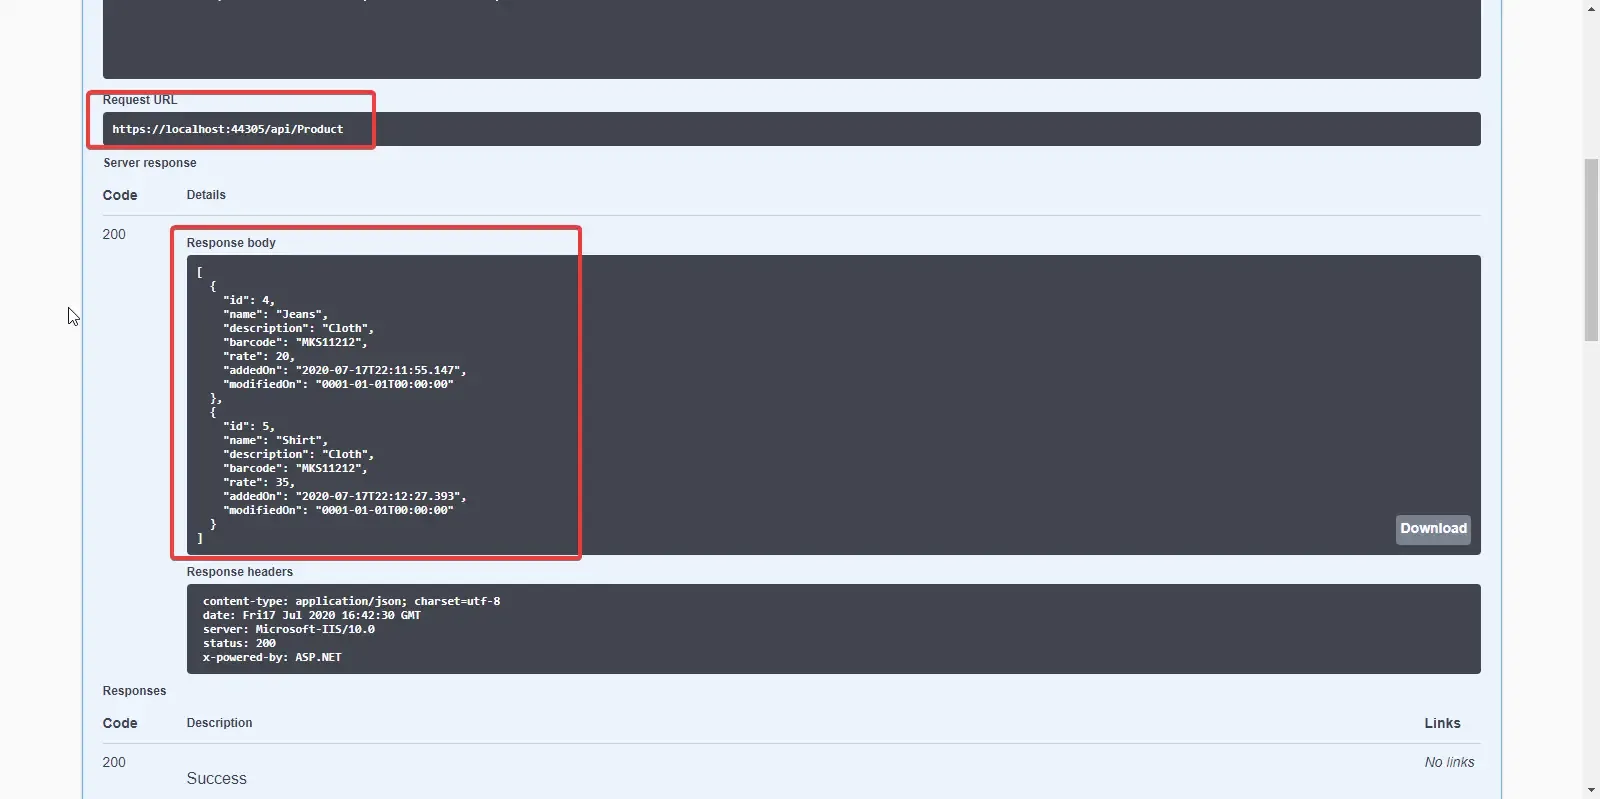
I added a couple of Products. Now let’s see all the added products. Go to the GET tab and Click Execute. Here are all the Added Products.
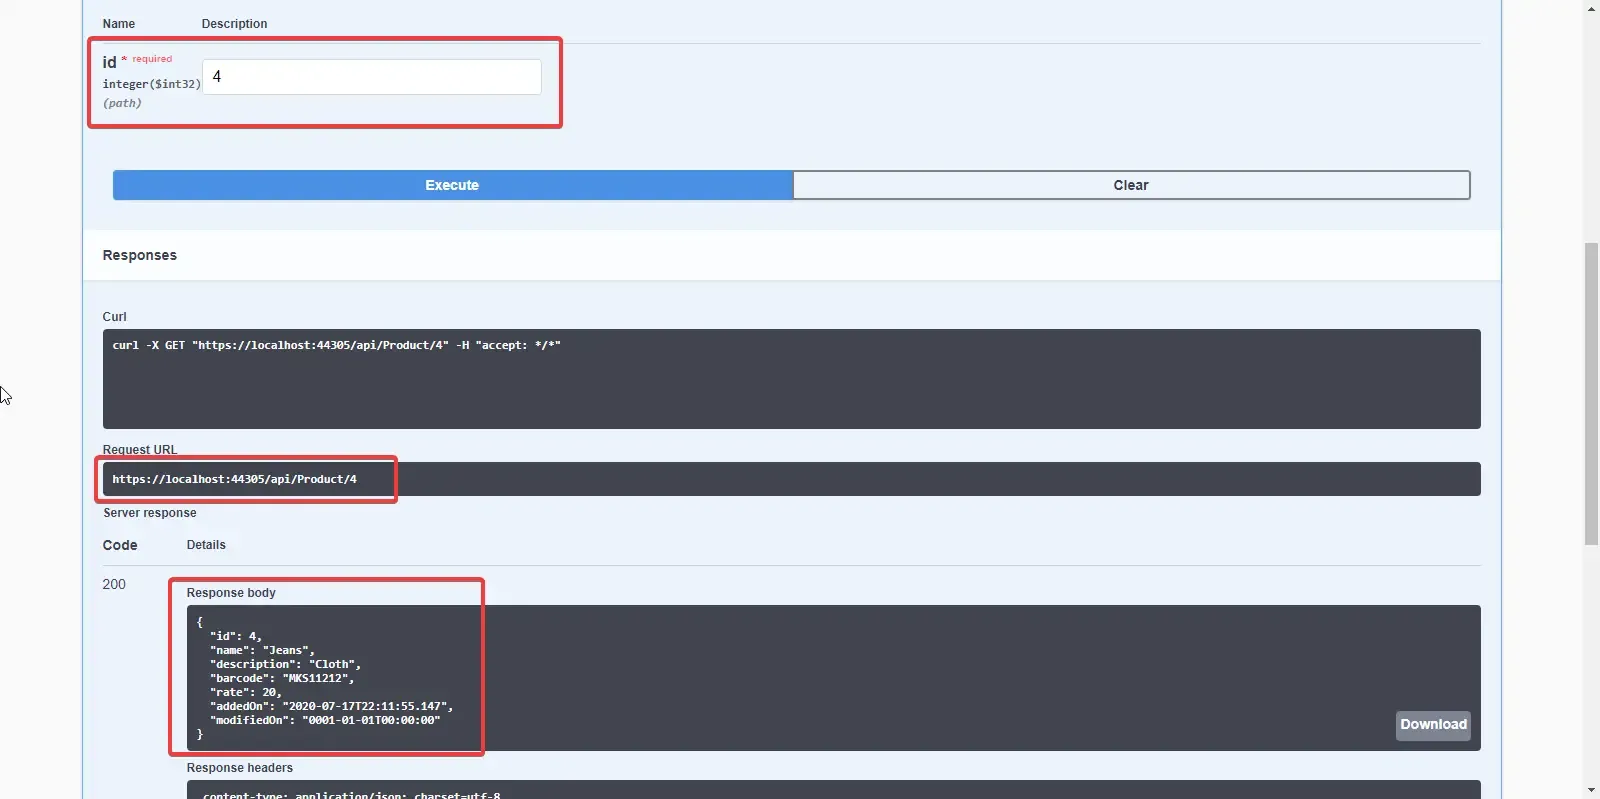
If you want to get a product by id, Click the Get Tab ({id}) and enter the required ID.
I will leave the remaining endpoints for you to test. With that let’s wind up this article.
Summary
In this detailed article, we have learned much more than just Dapper in ASP.NET Core. We were able to follow a clean architecture to organize the code, Implement a Repository pattern along with a Unit Of Work, Implement Swagger for efficient testing, and much more. You can find the completed source code here. I hope you learned something new and detailed in this article. If you have any comments or suggestions, please leave them behind in the comments section below. Do not forget to share this article within your developer community. Thanks and Happy Coding!

