Deploying a .NET AWS Lambda with Terraform is super simple and convenient. In this article, we will build a simple .NET 8 AWS Lambda, and get it deployed to AWS using Terraform. Whether you’re new to serverless or looking to integrate Terraform into your workflows, this guide has you covered. Let’s dive in!
This article is sponsored by AWS. Huge thanks for helping me produce more .NET on AWS content!
In a previous article (Automate AWS Infrastructure Provisioning with Terraform), we learnt the basics of Terraform, installing it on your machine, AWS providers, essential CLI commands, variables, outputs, and almost everything you need to know to get started with this awesome IaC tool. I would recommend you to go back to the above mentioned article to brush up your Terraform skills.
Serverless applications have become a key component of modern software solutions. In many of the .NET projects I’ve worked on, AWS Lambda plays a pivotal role in the overall system architecture. With Terraform being one of the most widely used Infrastructure as Code (IaC) tools, mastering how to efficiently deploy .NET Lambda functions to AWS is an essential skill for any developer.
PreRequisites
- .NET 8 SDK
- Visual Studio IDE
- AWS Account - Even a FREE Tier Account is enough
- Authenticated Development Machine to Use AWS Resources - Here is how I configured my machine via AWS CLI Profile to stay authenticated to my AWS Account.
- AWS Toolkit Installed
- Basic Terraform Knowledge - Read
- .NET Lambda Templates - Run
dotnet new install Amazon.Lambda.Templates
What We’ll Build?
We will use the .NET AWS Lambda Template to spin up a simple .NET 8 Minimal API that runs as a AWS Lambda. We will attach the required IAM Policies, CloudWatch Log Groups to this Lambda. We will then use Terraform to get the required AWS Resources provisioned. This will include having a simple build process (as part of Terraform workflow), that can restore, and publish our .NET API, and zip it up. This Zipped file would be used within terraform AWS Lambda definition, which would be then be uploaded to AWS. We will also enable the Function URL of the AWS Lambda, so that our Minimal API is reachable over HTTPs by the public.
So, the entire process will be as simple as “make the required code changes within the .net project, and once you are ready, just run the terraform apply command, and you would have your serverless app deployed in under 3 minutes!”. Let’s get started.
Setting up the .NET AWS Lambda Minimal API Project
Make sure that you have installed the .NET AWS Lambda Templates on your machine. You can do this by running the following command.
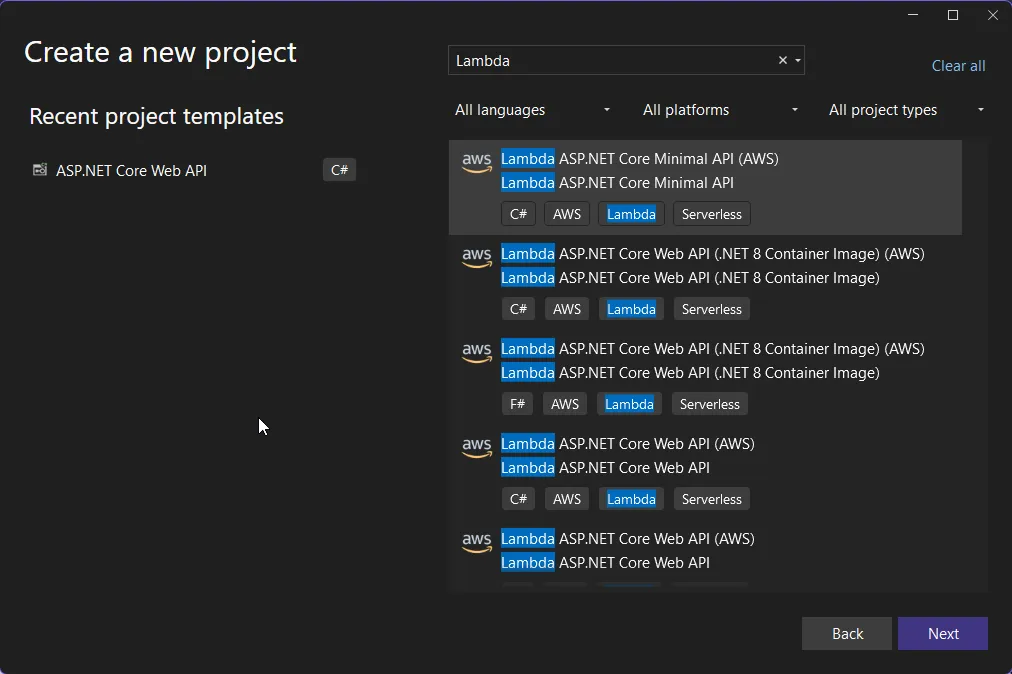
dotnet new install Amazon.Lambda.TemplatesOpen up Visual Studio, and create a new Project. Search for Lambda, and select the Lambda ASP.NET Core Minimal API. This will give you the required Boilerplate code to get started. This is basically a simple ASP.NET Core Minimal API, with just a single additional line of code (and package), that can make the entire API application compatible to run as a Serverless Function.
When the application is run on local, it has the default WebAPI behavior and runs on the Kestrel Web Server. But, when the application code is executed on AWS Lambda, the Kestrel is swapped out with Amazon.Lambda.AspNetCoreServer, which will start handling all the requests and responses.
The only code change you will have to do is to switch the default LambdaEventSource from RestApi to HttpApi. You can find the code in Program.cs file. Make sure that you have changed it as the below code.
builder.Services.AddAWSLambdaHosting(LambdaEventSource.HttpApi);This is essential for the App to work on AWS Lambda. Else you will start getting Internal Server Error everytime you hit the API endpoint.
I will keep everything else untouched. You can modify the default API Endpoints as needed. But for me, I will just have the default endpoints, as below.
- ”/” returns a Welcome message.
- “/calculate/” uses the CalculatorController for arithmetic operations.
That’s everything on the .NET side of things. Next, let’s start building our Terraform files.
Terraform
As mentioned in the previous articles, I prefer to use VSCode for anything apart from C# code. I created a terraform folder at the root of this project, where I would place my terraform files.
From this point on, it’s highly required that you are well versed with Terraform Basics.
Configuring the Backend
In the previous article, we had already talked about state management and how remote state management is achieved. We will use the same S3 bucket for this project as well, but use a different key for our state file.
Create a main.tf file.
terraform { backend "s3" { bucket = "cwm-tf-states" key = "deploy-dotnet-aws-lambda-with-terraform/terraform.tfstate" region = "us-east-1" dynamodb_table = "cwm-state-locks" encrypt = true }}Configuring the Providers
Next, create a providers.tf file, and add in the following.
terraform {  required_version = "1.10.2"  required_providers {    aws = {      source  = "hashicorp/aws"      version = "5.81.0"    }  }}
provider "aws" {  region = "us-east-1"  default_tags {    tags = {      Environment = "staging"      Owner       = "Mukesh Murugan"      Project     = "codewithmukesh"    }  }}
Here, we will be using the latest terraform version (it was 1.10.2 at the time of writing this article), and the latest AWS provider. Along with that, we will also add some default tags, which will be a part of the resources in AWS. This is completely optional.
Publish the .NET Artifacts
This is the core task of this entire setup, Publishing the .NET WebAPI and getting the Artifacts ready for deployment. For this, let’s create a build.tf file with the following code.
resource "null_resource" "build_dotnet_lambda" { provisioner "local-exec" { command = <<EOT dotnet restore ../HelloAPI/HelloAPI.csproj dotnet publish ../HelloAPI/HelloAPI.csproj -c Release -r linux-x64 --self-contained false -o ../HelloAPI/publish EOT interpreter = ["PowerShell", "-Command"] } triggers = { always_run = "${timestamp()}" }}This Terraform code defines a null resource named build_dotnet_lambda. It is used to run local commands that build and publish a .NET Lambda function. The null_resource is used here to perform local actions (build and publish) without managing actual cloud infrastructure.
The local-exec provisioner block runs the mentioned commands in local. Within the command block, we write the .NET Cli commands to restore and publish, by pointing to the correct directories.
And, the interpreter means the shell that we will use for executing the commands.
Under the trigger block, always_run = "${timestamp()}" ensures the null_resource always triggers because timestamp() generates a unique value each time Terraform runs, effectively making the resource execute on every plan/apply. This is crucial because this would ensure that it would run the dotnet publish command every time we try to apply terraform changes.
Overall, It ensures the .NET Lambda function is built and published in the required format before deployment.
Lambda
Here is the important part, provisioning the actual Lambda Function. Create a new lambda.tf file.
## Archiving the Artifactsdata "archive_file" "lambda" {  type        = "zip"  source_dir  = "../HelloAPI/publish/"  output_path = "./hello_api.zip"  depends_on  = [null_resource.build_dotnet_lambda]}
## IAM Permissions and Roles related to Lambdadata "aws_iam_policy_document" "assume_role" {  statement {    effect = "Allow"    principals {      type        = "Service"      identifiers = ["lambda.amazonaws.com"]    }    actions = ["sts:AssumeRole"]  }}
resource "aws_iam_role" "hello_api_role" {  name               = "hello_api_role"  assume_role_policy = data.aws_iam_policy_document.assume_role.json}
## AWS Lambda Resourcesresource "aws_lambda_function" "hello_api" {  filename         = "hello_api.zip"  function_name    = "hello_api"  role             = aws_iam_role.hello_api_role.arn  handler          = "HelloAPI"  source_code_hash = data.archive_file.lambda.output_base64sha256  runtime          = "dotnet8"  depends_on       = [data.archive_file.lambda]  environment {    variables = {      ASPNETCORE_ENVIRONMENT = "Development"    }  }}resource "aws_lambda_function_url" "hello_api_url" {  function_name      = aws_lambda_function.hello_api.function_name  authorization_type = "NONE"}
First up, we have the archive_file block which takes the Artifacts generated by the local-exec command, and zips it up. Note that this block will execute only after the null_resource.build_dotnet_lambda code is executed, meaning that the zipping will happen only after the artifacts are published, which is quite what we desire.
Next, we have the code for IAM Roles and Permissions. This Terraform configuration creates an IAM role for a Lambda function to use. The data block defines a policy document that allows AWS Lambda, identified by lambda.amazonaws.com, to assume the role using the sts:AssumeRole action. This policy is essential to let the Lambda service act on behalf of your account.
The aws_iam_role resource then creates a role named hello_api_role and attaches the assume role policy to it. This role will allow the Lambda function to securely execute its tasks with the necessary permissions.
Finally we have the aws_lambda_function and aws_lambda_function_url resources. This configuration deploys a .NET Lambda function and creates a public URL to invoke it.
The aws_lambda_function resource defines the Lambda function named hello_api. It uses the hello_api.zip file (containing the function’s compiled code) as its source. The role parameter attaches the IAM role created earlier, enabling the function to access AWS resources securely. The handler specifies the entry point of the Lambda function, while runtime sets it to use .NET 8. The source_code_hash ensures the function updates only when the code changes. The environment variables section includes ASPNETCORE_ENVIRONMENT set to “Development.” The function depends on the data.archive_file.lambda to ensure the archive is created before deployment.
The aws_lambda_function_url resource creates a public URL for the Lambda function. The URL does not require authorization (authorization_type = "NONE"), making it openly accessible. This setup is commonly used to expose serverless APIs or webhooks.
CloudWatch LogGroup
This is something optional for the scope of the demonstration. But you would always want it for better insights and monitoring. It’s quite simple to attach a Cloudwatch Log Group to your .NET Lambda Function. Create a cloudwatch.tf file and add in the below code.
resource "aws_cloudwatch_log_group" "hello_api_logs" {  name              = "/aws/lambda/hello_api"  retention_in_days = 7}
data "aws_iam_policy_document" "log_policy_document" {  statement {    effect = "Allow"    actions = [      "logs:CreateLogGroup",      "logs:CreateLogStream",      "logs:PutLogEvents",    ]    resources = ["arn:aws:logs:*:*:*"]  }}
resource "aws_iam_policy" "log_policy" {  name        = "log_policy"  path        = "/"  policy      = data.aws_iam_policy_document.log_policy_document.json}
resource "aws_iam_role_policy_attachment" "log_policy_attachment" {  role       = aws_iam_role.hello_api_role.name  policy_arn = aws_iam_policy.log_policy.arn}
This Terraform configuration sets up logging for the Lambda function hello_api using AWS CloudWatch Logs and grants the necessary permissions.
The aws_cloudwatch_log_group resource creates a log group named /aws/lambda/hello_api, where the Lambda function will store its logs. The retention_in_days is set to 7, ensuring logs older than 7 days are automatically deleted to control storage costs.
The data.aws_iam_policy_document block defines a policy document that allows actions like creating log groups, creating log streams, and putting log events in CloudWatch Logs. These permissions are essential for the Lambda function to send its logs to CloudWatch.
The aws_iam_policy resource creates a named policy (log_policy) using the policy document. This policy grants the necessary CloudWatch permissions for logging.
Finally, the aws_iam_role_policy_attachment attaches the log_policy to the Lambda’s IAM role (hello_api_role). This ensures that the Lambda function has the permissions to create and manage logs in the specified CloudWatch log group. Together, these resources enable logging for the Lambda function, making it easier to monitor and debug.
In case you are wondering, how the Lambda would know to log to this particular log group, here is how.
The Lambda function automatically writes its logs to the corresponding CloudWatch log group based on its name. AWS Lambda uses a default naming convention for log groups in CloudWatch, which is /aws/lambda/<function_name>. In your case, the function is named hello_api, so the log group /aws/lambda/hello_api will be used. If you want the Lambda to write to a different log group, you would have to handle it via the .NET Code, which is something you would most of the time not do.
Output Variables
Finally, I would also like my console to print out the AWS Lambda Function URL as soon as the deployment is completed. This is for convenience only and is completely optional.
output "hello_api_url" { value = aws_lambda_function_url.hello_api_url.function_url}That’s everything to you need! Let’s test our implementation.
Testing Deployment
Navigate to the Terraform folder, and run the terraform init command.
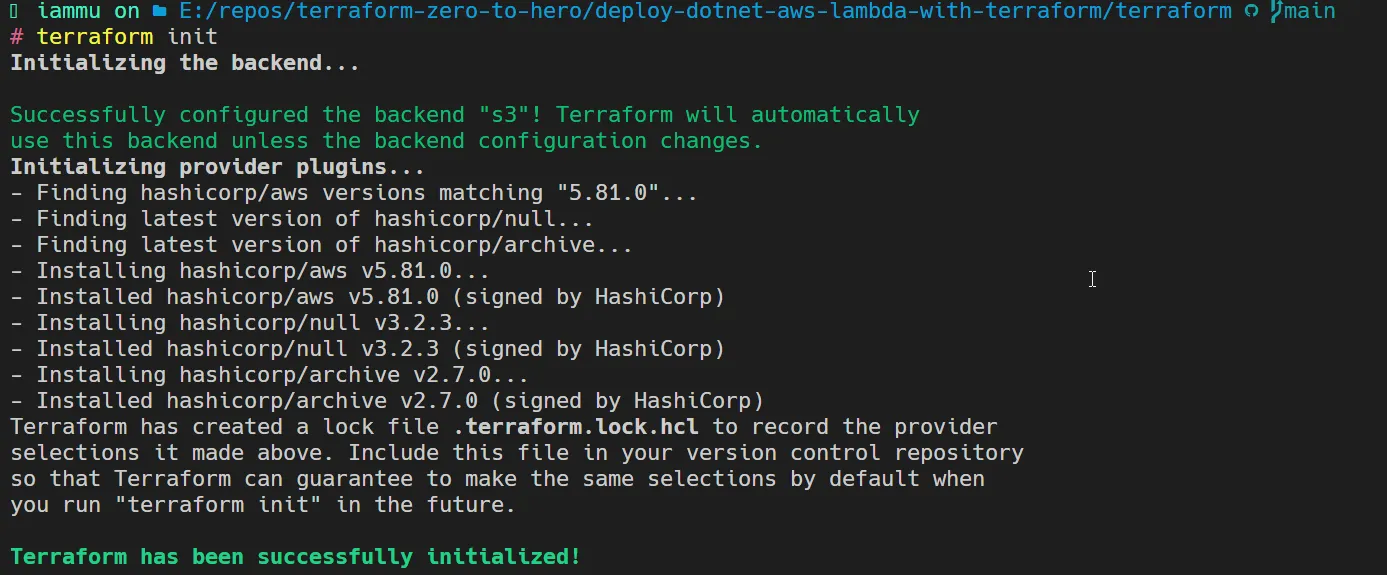
Once Terraform has successfully initialized in your working directory, let’s run a terraform plan command to check if there are no runtime errors.
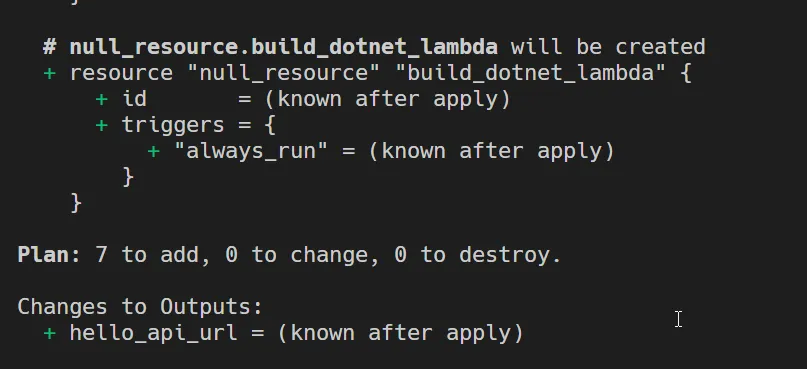
As you can see, we will be adding 7 new resources as part of this deployment. You can scroll to check each of the resources.
Next, let’s deploy! Run the terraform apply -auto-approve command. This would build, restore and publish your .NET Web API first, and start provisioning the AWS Resources.
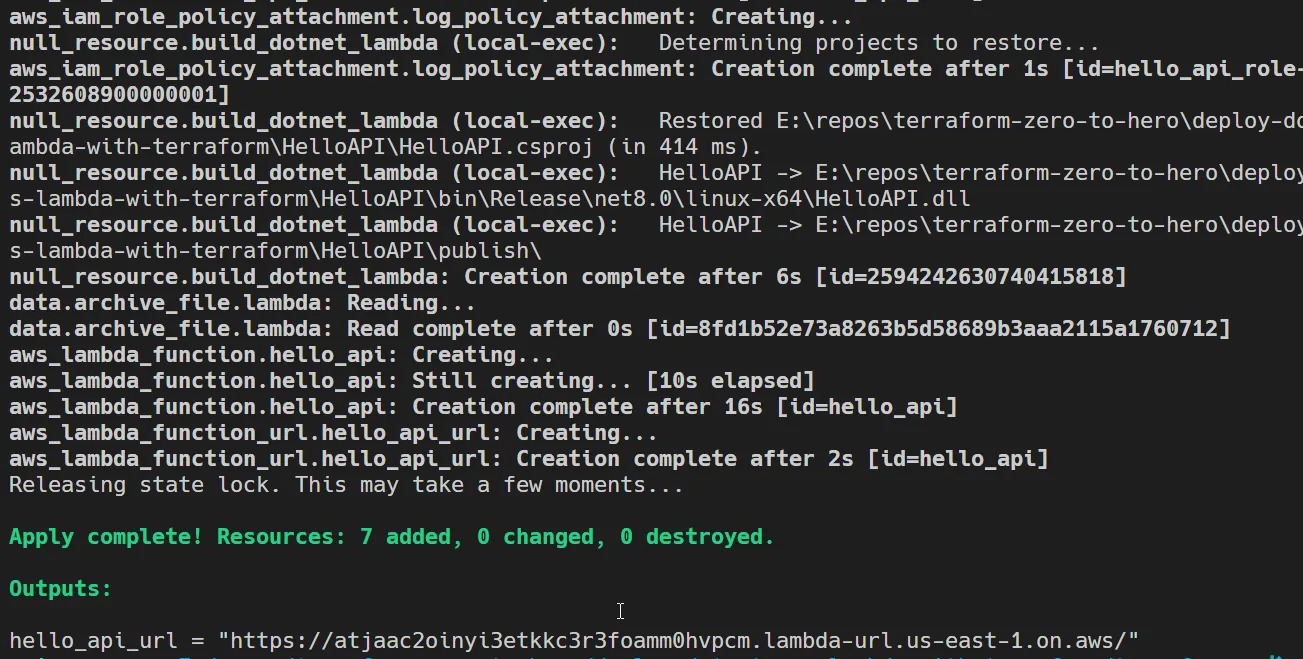
The Entire Deployment was completed in a matter of 1 minute! Also, you can see the Lambda Function URL that has been printed in the console. Let’s open it up and check if we get the Welcome message.

There you go! Now, i will change the welcome message to something else on the / endpoint and try to run the terraform apply command again. This time as well, it got deployed in under a minute.
And here is the newly deployed Lambda’s response!

You can also try to test the /calculator/ endpoints and verify the logs on the CloudWatch LogGroup. Here is what my log group looks like.
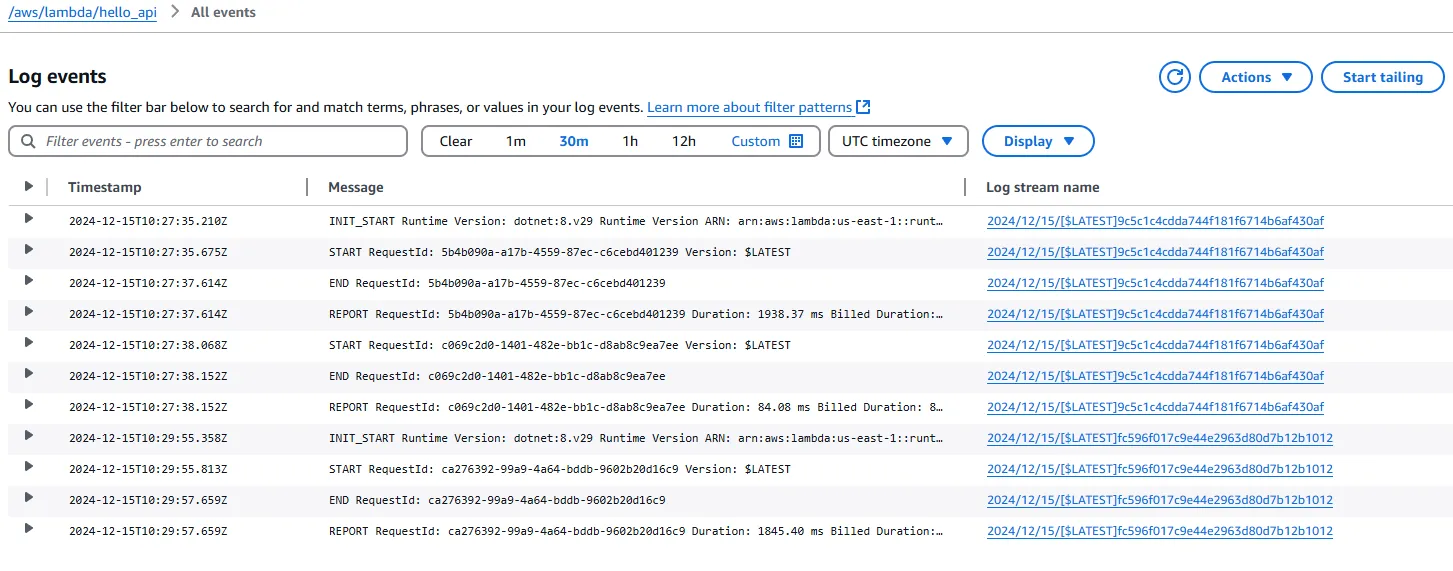
Once you are done testing, make sure to run the terraform destroy --auto-approve, which would, as the name suggests, destroy all the provisioned AWS resources. This helps keep your AWS bills under control.
Key Takeaways
This implementation demonstrates how simple and convenient it is to deploy a .NET 8 Minimal API as a serverless Lambda function, fully managed by Terraform. It showcases one of the most powerful and streamlined tech stacks available today. The real magic happens when you integrate a CI/CD pipeline into the process. With the pipeline automating the execution of Terraform commands, the entire deployment becomes completely automated—enabling faster, more efficient development cycles and seamless infrastructure management.
Do you currently use serverless architectures like AWS Lambda for your .NET Workloads? When do you see yourself using this stack in your own projects? If you found this article helpful, I’d love to hear your thoughts! Feel free to share it on your social media to spread the knowledge.

