In our previous article, Getting Started with Blazor, we discussed the core concepts of the application, different types and comparisons, and much more. In this second part, let’s go in more depth with the Blazor project structure and try to understand the fundamentals of this awesome Application.
Blazor Blog Series
- Getting Started with Blazor
- Exploring Blazor Project Structure - (You are Here)
- Blazor CRUD with Entity Framework Core
Blazor Server - Blazor Project Structure
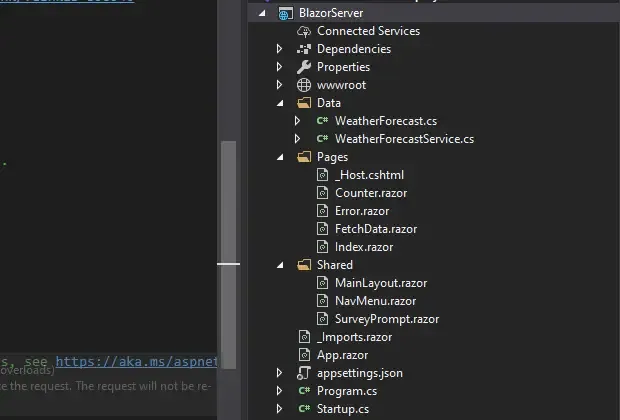
Both the applications have a Program.cs file. This file has the entry method for our applications, void main.
In Program.cs, the main method creates a host in the main function that builds and runs an asp.net core application.
You can notice that the startup file is present only in the Server project. It is very similar to the ASP.NET Core Project’s Startup class. If you are already working ASP.NET Core applications, you will be quite familiar with this class. It basically has 2 methods in it, the Configure and ConfigureServices. The ConfigureServices method is responsible for injecting services to the Dependency Container of the application, whereas the Configure method is responsible for initializing the middleware within the application.
In the ConfigureServices method, we inject the server side blazor service to the application.The building blocks of a Blazor Application is Razor Page. It is also called as a component, that is highly simple and reusable. (somewhat similar to partial views)
public void ConfigureServices(IServiceCollection services){ services.AddRazorPages(); services.AddServerSideBlazor(); services.AddSingleton<WeatherForecastService>();}In the Configure method, MapBlazorHub sets up SignalR endpoint on the server. This endpoint is responsible for keeping the client in sync with the data / views provided by the server. A SignalR connection is established between the server and client, which calculates the difference in the DOM, and refreshes only what is required. THis makes Blazor perfect for Single Page Web Applications.
app.UseEndpoints(endpoints =>{ endpoints.MapBlazorHub(); endpoints.MapFallbackToPage("/_Host");});Except the request to razor pages , every other requests will fall back to Pages/_Host.cshtml page. Every components (razor pages) are rendered from this Host Razor page.
<app> <component type="typeof(App)" render-mode="ServerPrerendered" /></app>The Main component gets loaded here during runtime. Notice that the component is of type ‘App’. This is where you would find the routing mechanism of Blazor. Open up App.razor.
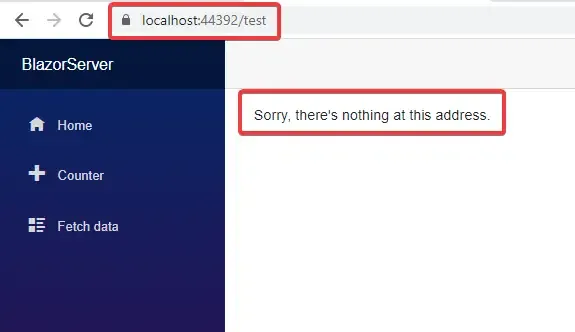
<Router AppAssembly="@typeof(Program).Assembly"> <Found Context="routeData"> <RouteView RouteData="@routeData" DefaultLayout="@typeof(MainLayout)" /> </Found> <NotFound> <LayoutView Layout="@typeof(MainLayout)"> <p>Sorry, there's nothing at this address.</p> </LayoutView> </NotFound></Router>It’s quite clear from here that if the application is able to find the route that we specified on the browser, it takes us there with a default page layout of type MainLayout (This is also quite similar to _Layout Pages in ASP.NET Core MVC). Else, shows a not found page. Now the obvious question is, how do you declare the routes of the components?
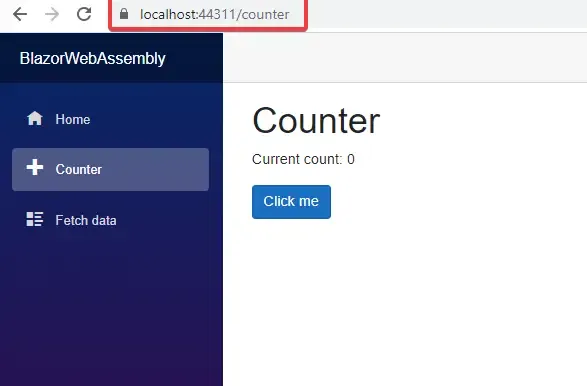
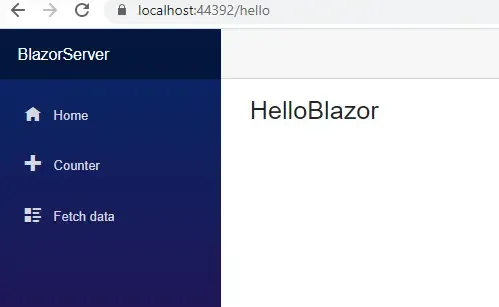
Quickly open up Counter.razor. This is a blazor component. All the Blazor components have a .razor extension to it. On the first line, we see @page "/counter". This is the defined route of the component. Switch to your browser and navigate to <localhost>/counter.
Let’s Navigate to a random route and check.
<script src="_framework/blazor.server.js"></script>This script (found in the _Host.cshtml ) is responsible for establishing a SingalR connection between server and client.
Under Shared Folder, we have a MainLayout.razor page.The base layout of the application is defined here.
@inherits LayoutComponentBase
<div class="sidebar">    <NavMenu /></div>
<div class="main">    <div class="top-row px-4">        <a href="https://docs.microsoft.com/aspnet/" target="_blank">About</a>    </div>
    <div class="content px-4">        @Body    </div></div>
As you see, we have a navigation menu sidebar, a main class that has a header and content. Under content div there is a @Body. Here is where the components get rendered where we navigate to the route of the component.
The Navigation Menu that we see on the left-hand side comes from the NavMenu.razor file, which is also present in the Shared Folder. This is a straight forward HTML declaration. Now that we have quite some good idea about the structure, let’s try to add a simple Blazor component and add a navigation menu entry too.
Right click on the Pages Folder and add a new item. Here, choose a RazorComponent and give it a name. Hit Add.
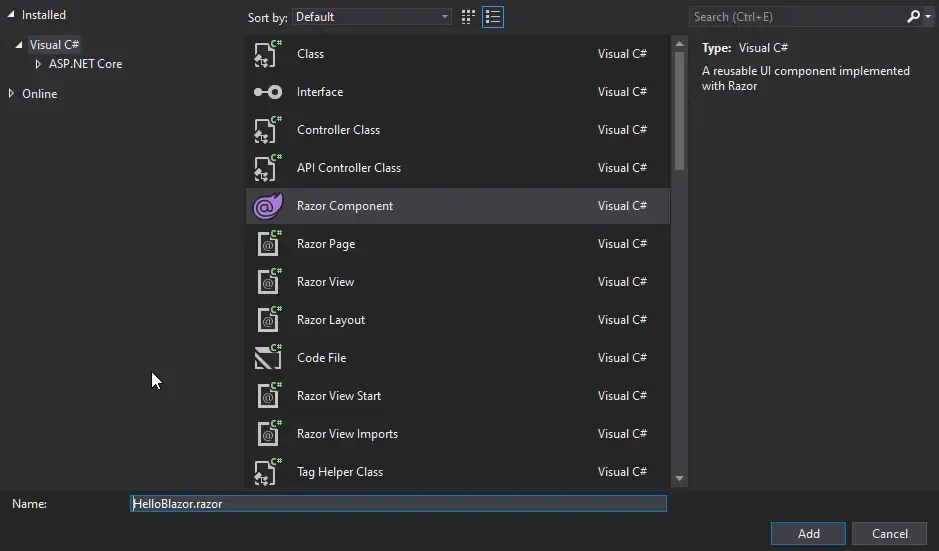
Your new component is created. Let’s define it’s route.
@page "/hello"
<h3>HelloBlazor</h3>
@code {
}
Now that the routing works, let’s try to add an entry in the navigation menu. For this, open NavMenu.razor and add another entry in the menu list.
<li class="nav-item px-3"> <NavLink class="nav-link" href="hello"> <span class="oi oi-list-rich" aria-hidden="true"></span> Hello Blazor </NavLink></li>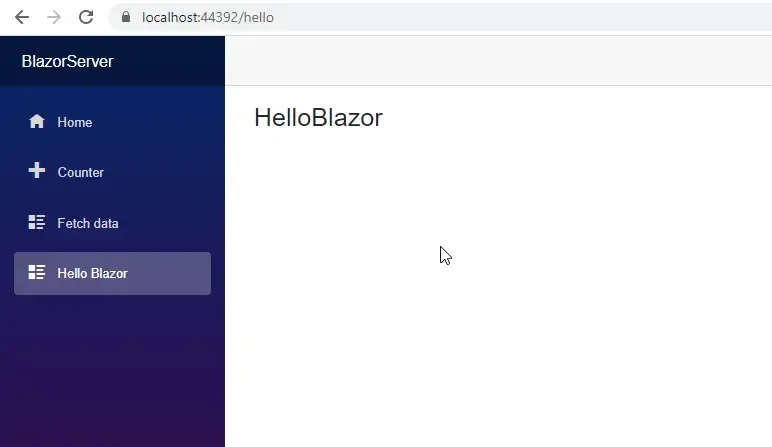
As simple as that, we are able to add new components with great ease.
@page "/hello"
<h3>HelloBlazor</h3>
@code {
}
See the @code {} ? This is what makes Blazor Super cool . It here where you write C# code that get’s executed on the client browser instead of Javascripts. That being said, it is also possible to run javascripts on Blazor, so that you get the best of both the worlds.
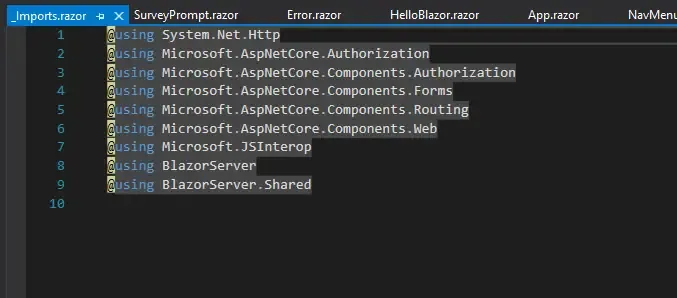
Moving forward, let’s check out other files and folders. The _Imports.razor basically contains all the namespaces needed for your components to run without mentioning it literally everywhere.
All the CSS files and resources are placed in the wwwroot directory. You also have a Data Folder, that basically contains thee Model class of WeatherForecast and service that return Weather data. This Folder acts like a service layer, which in practical scenarios will be responsible to fetch and post data from ASP.NET Core APIs.
Just like an ASP.NET Core application, we have a appsettings.json to store in the configuration settings.
Blazor WebAssembly - Blazor Project Structure
Both these projects are 90% similar in terms of project structures. Let me pinpoint the important differences.
Remember the _Host.cshtml in the Server project. We don’t have that here. Instead, in the wwwroot folder, we have an index.html with similar content. When the first request hits the application, it is this page that is being served. It also loads a blazor.webassembly.js that is responsible for downloading all the required DLLs and files on to the client browser.
The only difference comes in the way the Blazor application is hosted.
Otherwise, it is quite the same. Remember, both the Server and WebAssembly Applications have components. The way you build these components are not going to change no matter the type of application.
In other words, it will be quite simple to convert a Blazor Server App to a WebAssembly App and vice versa, if built clean.
Important Points about Blazor Project Structure.
- Components are the building blocks of Blazor Applications.
- Components have a .razor extension. They are Razor pages that have the routing data in them too.
- These Components can be built easily and reused across various projects.
- Razor Components are also called as Blazor components.
- Component names start with an uppercase character by convention.
Summary
We are now quite clear with the concept of Blazor, the problems it solves, the 2 different hosting models it offers, and all about the project structures of these models. For our next article, we will practically learn how to build a CRUD Application with a Blazor WebAssembly Project and connect it to a RESTful ASP.NET Core API using various best practices. Subscribe to be updated.
Read the next part of the Blazor Blog Series here - Blazor CRUD with Entity Framework Core – Detailed Tutorial
Have some suggestions . queries ? Leave them in the comments section.
If you found this article helpful, share it within your developer community so that we can all get started with this awesome Tech, BLAZOR Applications. Happy Coding. :D


