In this article, let’s learn about Deploying / Hosting ASP.NET Core with SmarterASP.NET, a Superior Hosting Service for ASP.NET Core 3.x. We will also go step-by-step on deploying an actual ASP.NET Core 3.1 Application directly from Visual Studio 2019 IDE to SmarterASP.NET Server via WebDeploy. Let’s get started.
About SmarterASP.NET
Before choosing the apt Hosting provider for your development/deployment needs, It’s quite important to learn about their services, right? Let’s see a few things about SmarterASP.NET. These guys offer World-Class ASP.NET Core Hosting at very affordable rates. To add to that, they also provide 60 Days FREE Trial to test out their services. That’s a good sign for any hosting provider, yeah?
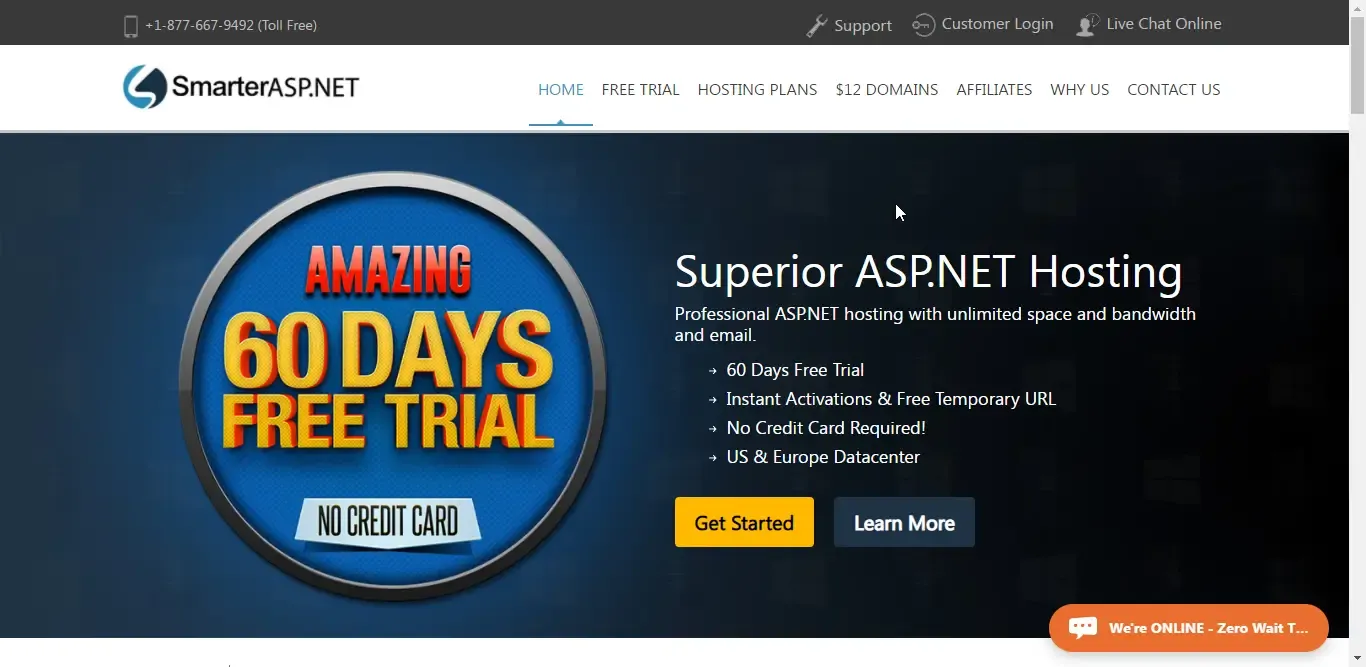
SmarterASP.NET Datacenters are available in both US and Europe. However, it would be better if they had more data centers, at least a couple of them in Asia. But the performance is still great for scaled-up systems as well.
Features of SmarterASP.NET
Here are the various Features of SmarterASP.NET
- Unlimited Storage *
- Unlimited Bandwidth *
- Complete support for ASP.NET 4.8 / 4.7 / 4.6 / 4.5.x / 3.5 and 2.0
- Complete support for ASP.NET Core 1.x / 2.x / 3.x - Even the big names in the hosting world do not provide support for ASP.NET Core 3.1 yet.
- MSSQL Database - SQLServer 2019 / 2017 / 2016 / 2014
- MVC 6 / 5 / 4 / 3 / 2 / 1
- SSD Storage and Database
- 1 Click Installers for several Popular ASP.NET Applications like NopCommerce, Blog.NET, and so on.
- FREE Temporary URL if you don’t have a domain yet.
- Depends on the plan you subscribe to.
Pricing Plans
SmarterASP.NET offers 4 Tiers of Hosting Packages. They are as follows.
- Shared Hosting
- Semi-Dedicated Hosting
- VPS
- Cloud Server
Shared Hosting - ASP.NET Plans
Ideal for Individuals who want to host their own application for Testing / POC purposes. This is a very basic plan that ranges from 0$ to 7.95$ a month. Now Shared Hosting is further split to several other sub-tiers
- 60 Days Trial - Although it is a FREE tier, it offers several cool features like 1GB Storage, 1 Website, 200 Parallel Connections / Requests, and 10GB Bandwidth. It’s the best option if you want to get a feel of SmarterASP.NET Service before going for a paid plan.
- .NET Basic - Now, for just 2.95$/ month, you get unlimited storage and Bandwidth for a single website / IIS Entry.
- .NET Advance (Recommended) - This is quite an ideal plan for everyone. You get 6 IIS Website Entries with Unlimited Storage, Concurrent Connections, and Bandwidth. All of this awesomeness for just 4.95$ a month. Get this deal now!
- .NET Premium - Need more than 6 Websites? This is the plan that may interest you then. At 7.95$ / month, you get everything unlimited.
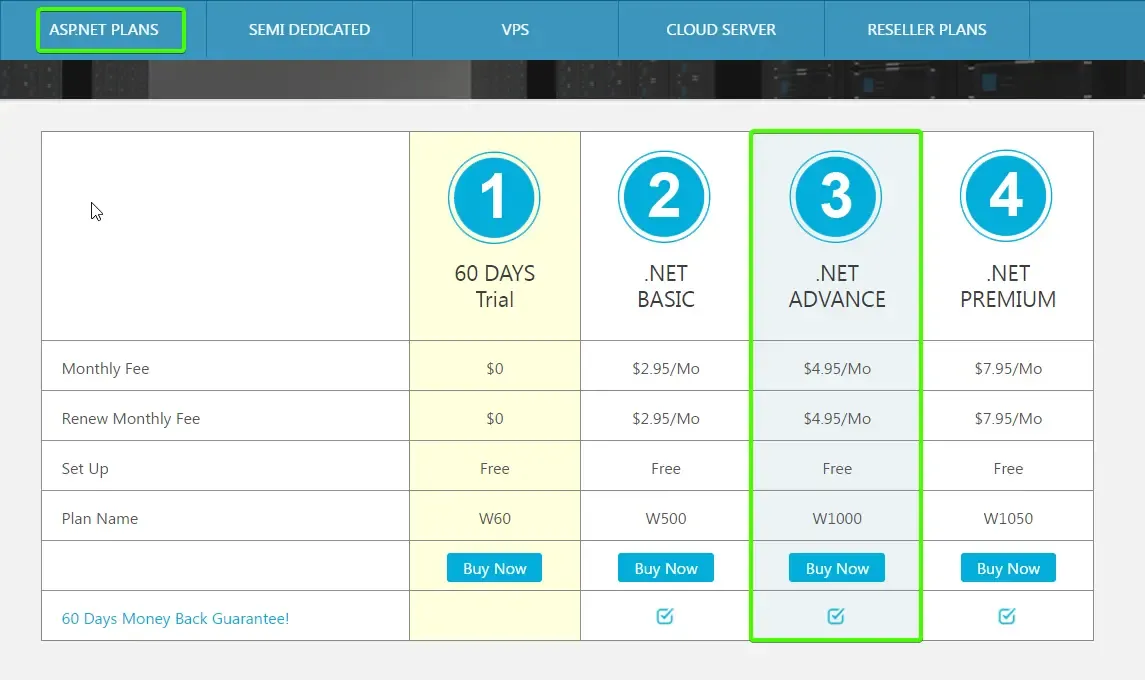
.NET Advance Plan is what you will need if you are getting started with Hosting ASP.NET Core. With just 4.95$/month, you get to host 6 ASP.NET Core Applications with everything from Bandwidth to Storage UNLIMITED. I would recommend you to try it with the 60 Days FREE Trial and then convert to a paid plan. We will see how to host a ASP.NET Core Application later in the article, step-by-step. Get you FREE Trial here.
Semi Dedicated Server
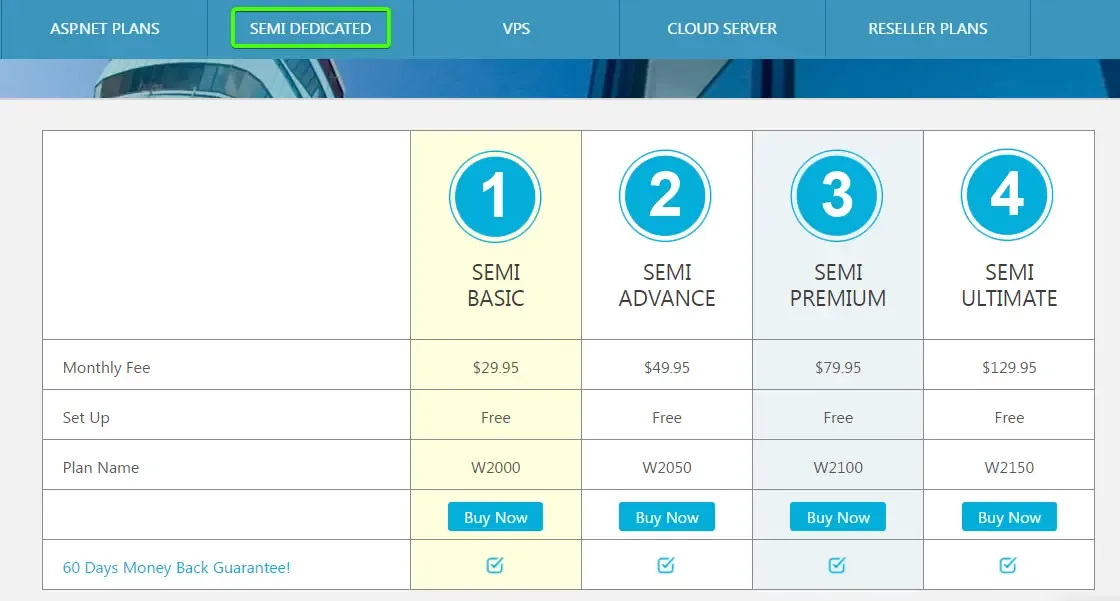
For those who want an additional powers to the Hosting Server. Starts from about 29.95$ a month. Here are the Features offered at this tier.
- Everything Included in the Shared Hosting Packages
- Unlimited Email Boxes - SMTP and more
- Meant for really high traffic ASP.NET Core Applications that require powerful CPUs as well.
The Awesome 60 Days FREE Trial!
This is what interested me to check out SmarterASP.NET. Who doesn’t like the words FREE and TRIALs? :P The best part is you don’t even have to provide your Credit Card Details to enjoy the Trial. What more can you ask for?
Let’s get the 60 Days FREE Trial.
Here is how to Host ASP.NET Core in SmarterASP.NET -
Step 1 - Click here to Navigate to SmarterASP.NET’s homepage.
Step 2 - Click on Get Started.
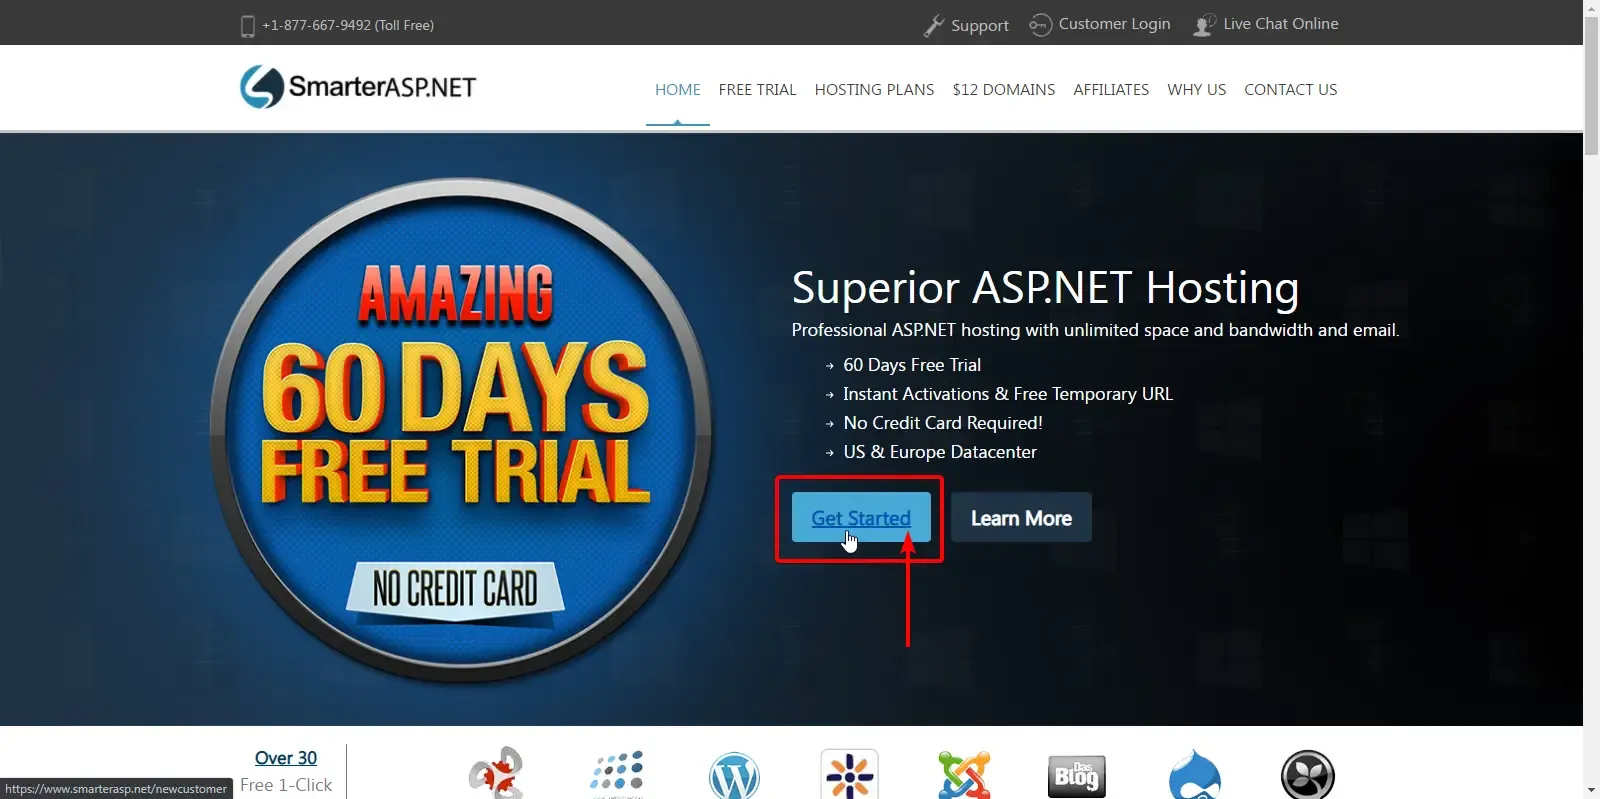
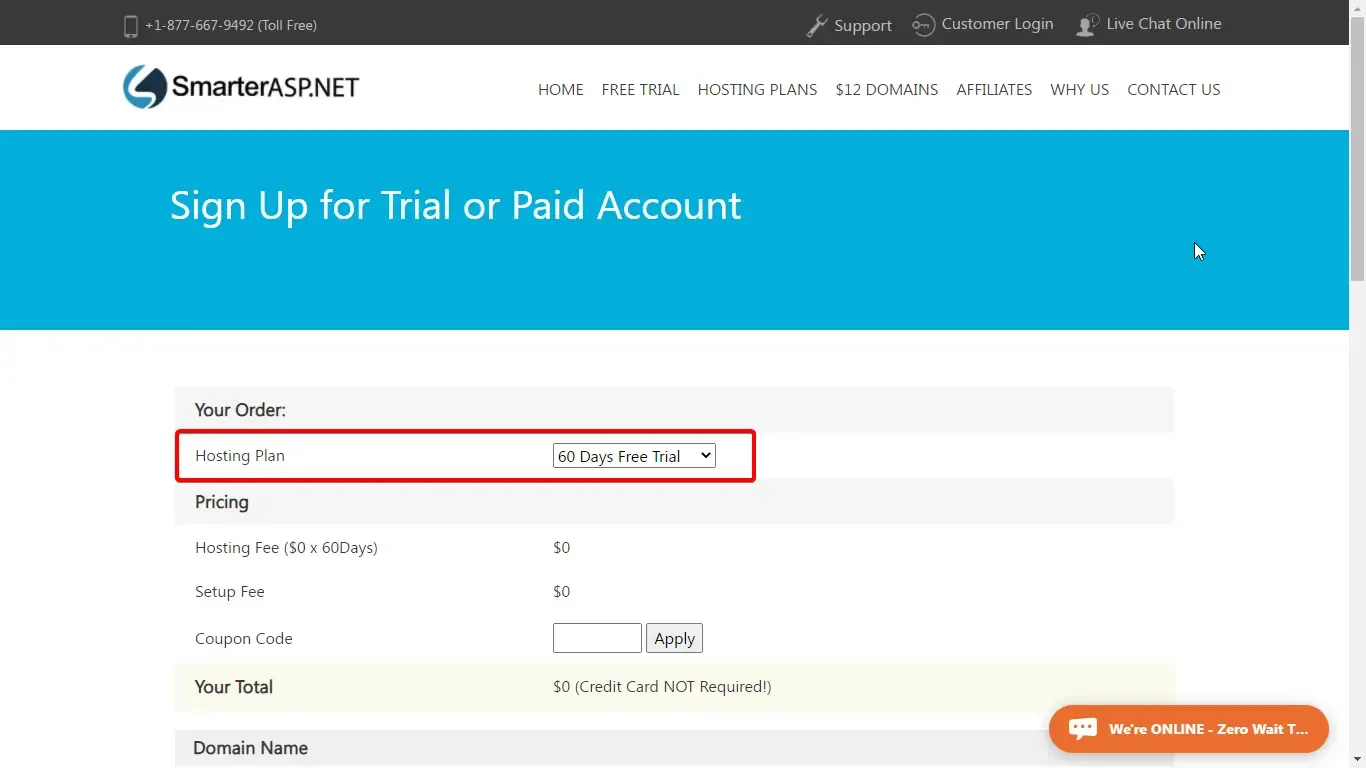
Step 3 - Make sure that you have selected the 60 Days FREE Trial.
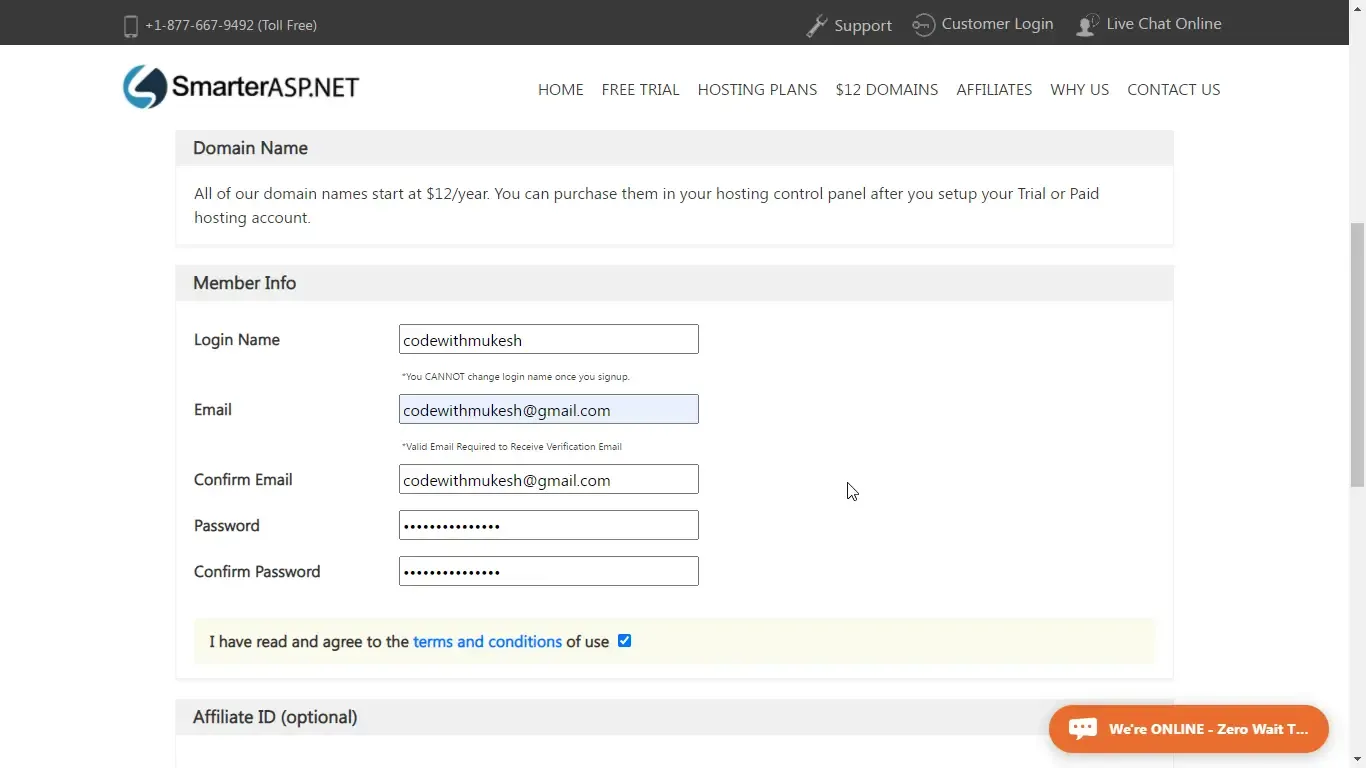
Step 4 - Enter in your username and email id. Give a password too. And Click on Signup. You will be prompted to confirm your email by clicking on the link that SmarterASP.NET has sent you via mail. This confirms your account.
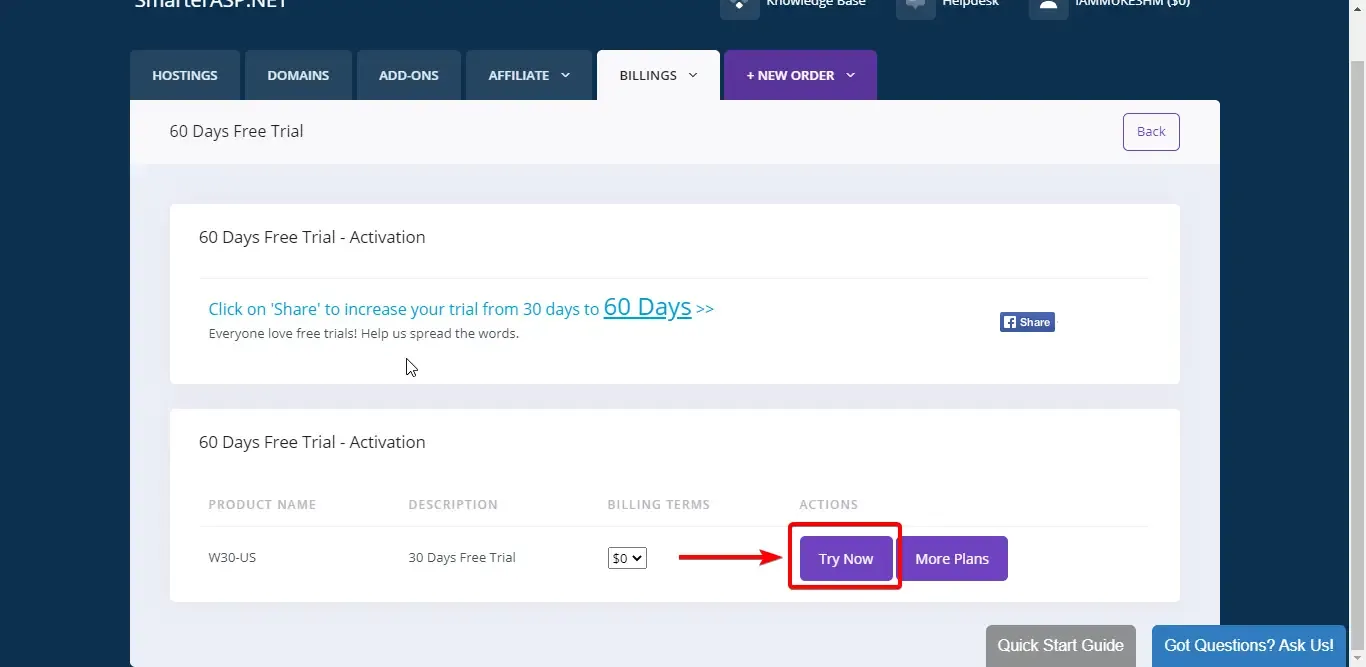
Step 5 - Once confirmed, Go back to SmarterASP.NET and login with your credentials. You will be presented with a similar View where you have to Click on Try Now. This means that you are already eligible for the 60 Days FREE Trial.
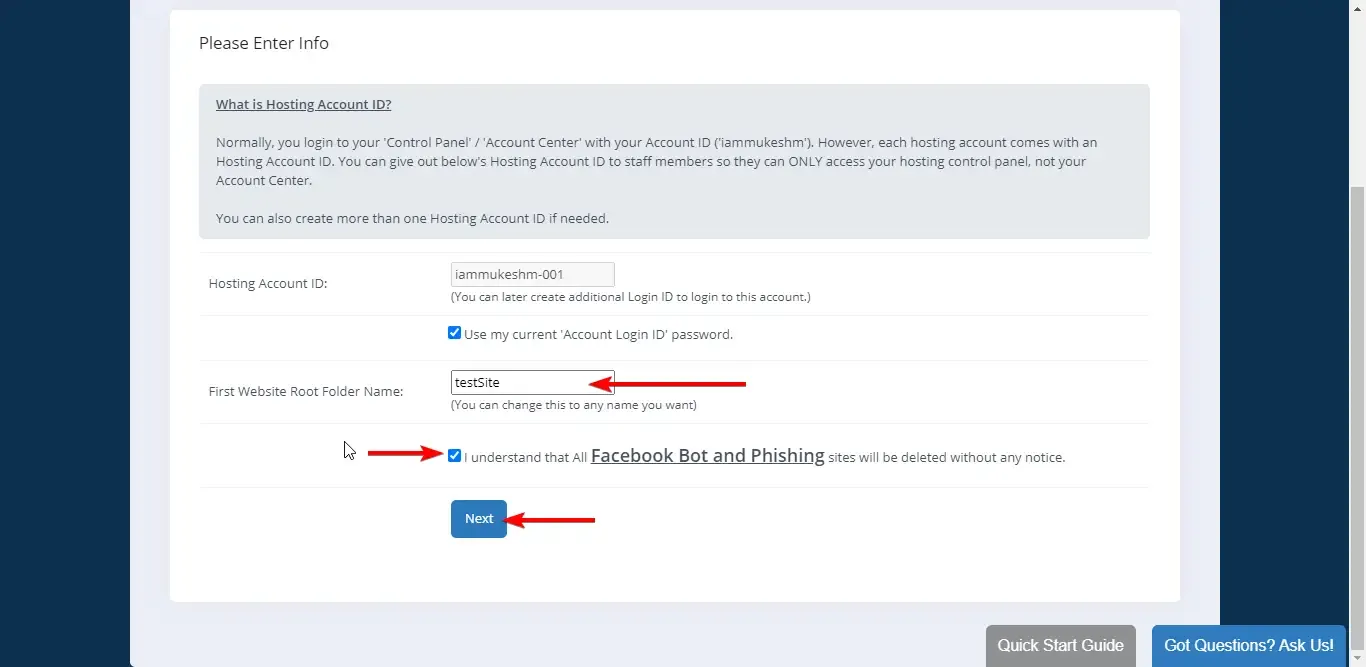
Step 6 - Enter in the root folder name. It can be anything. After that click on Next.
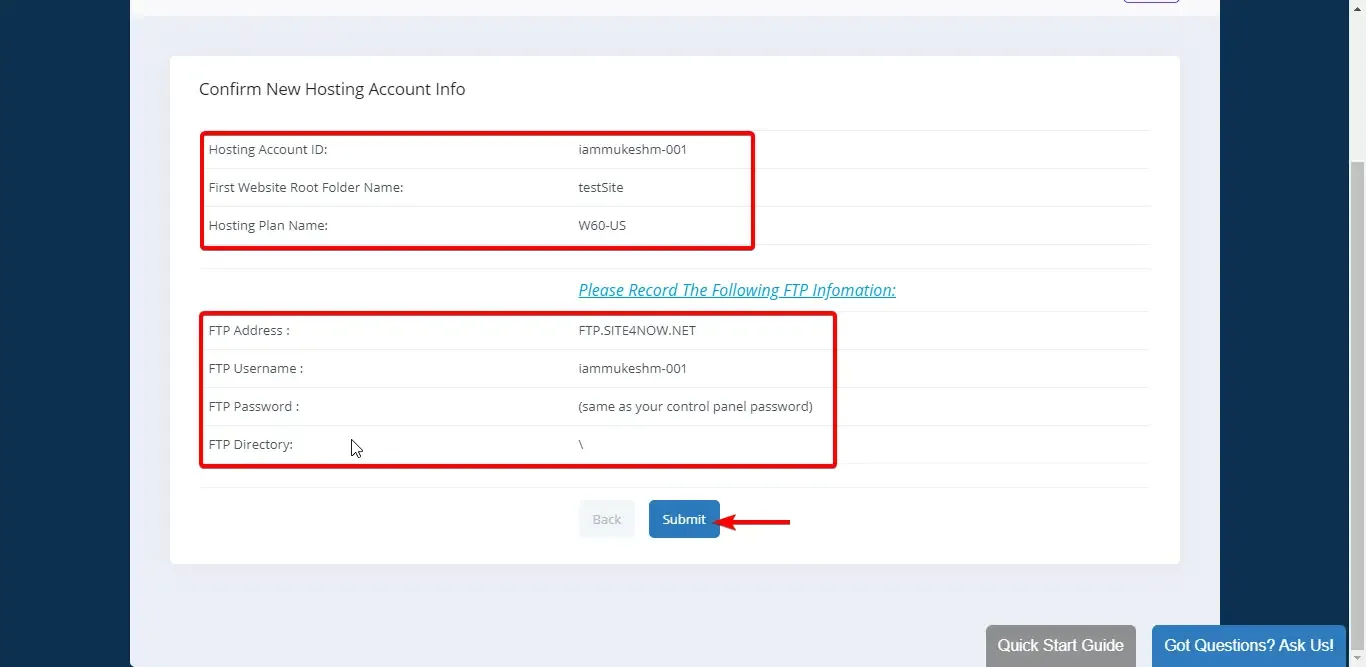
Step 7 - You will be getting some important information like FTP details and account details here. Make sure to note it down as well. Finally Click Submit. This would take about 2-5 minutes. In the background you are being allocated some space on their servers. It took about 3 odd minutes for me.
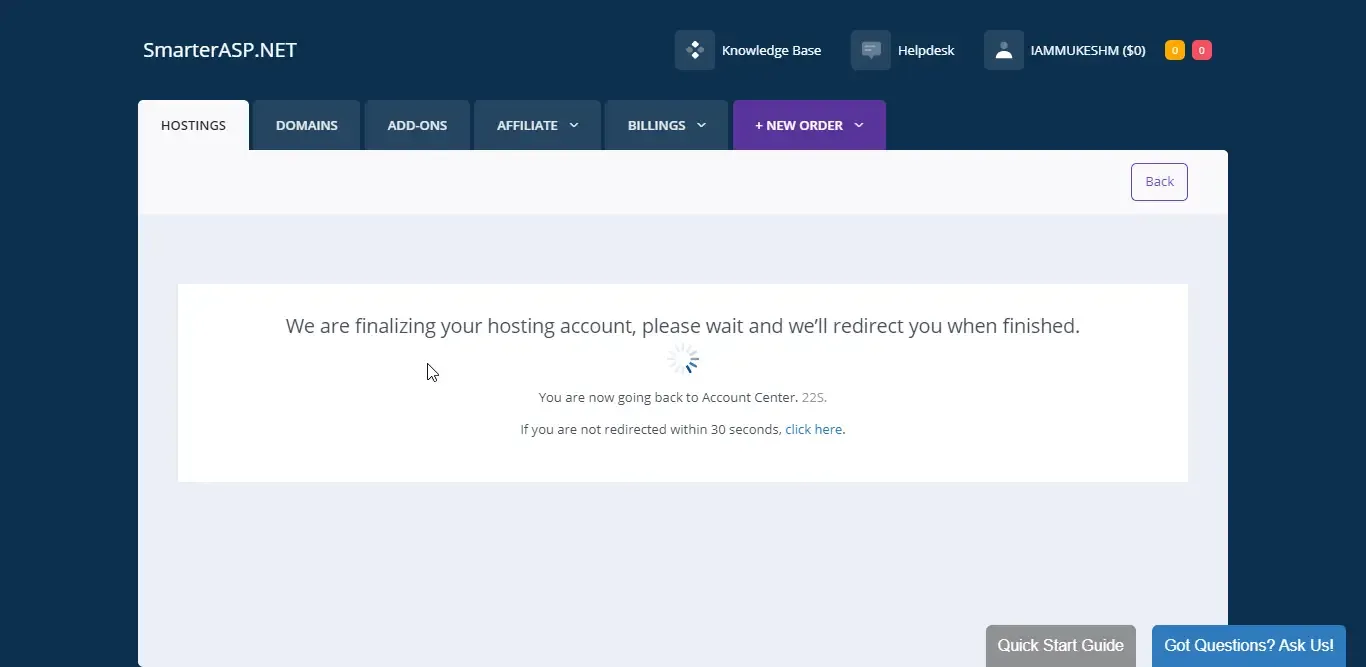
Step 8 - With your Hosting Account Finalized, go back to your SmarterASP.NET Dashboard and click on the Control Panel.

Here is how your Control Panel looks like. Quite a handful of details and settings right? Don’t worry, you dont have to do anything here as of now.
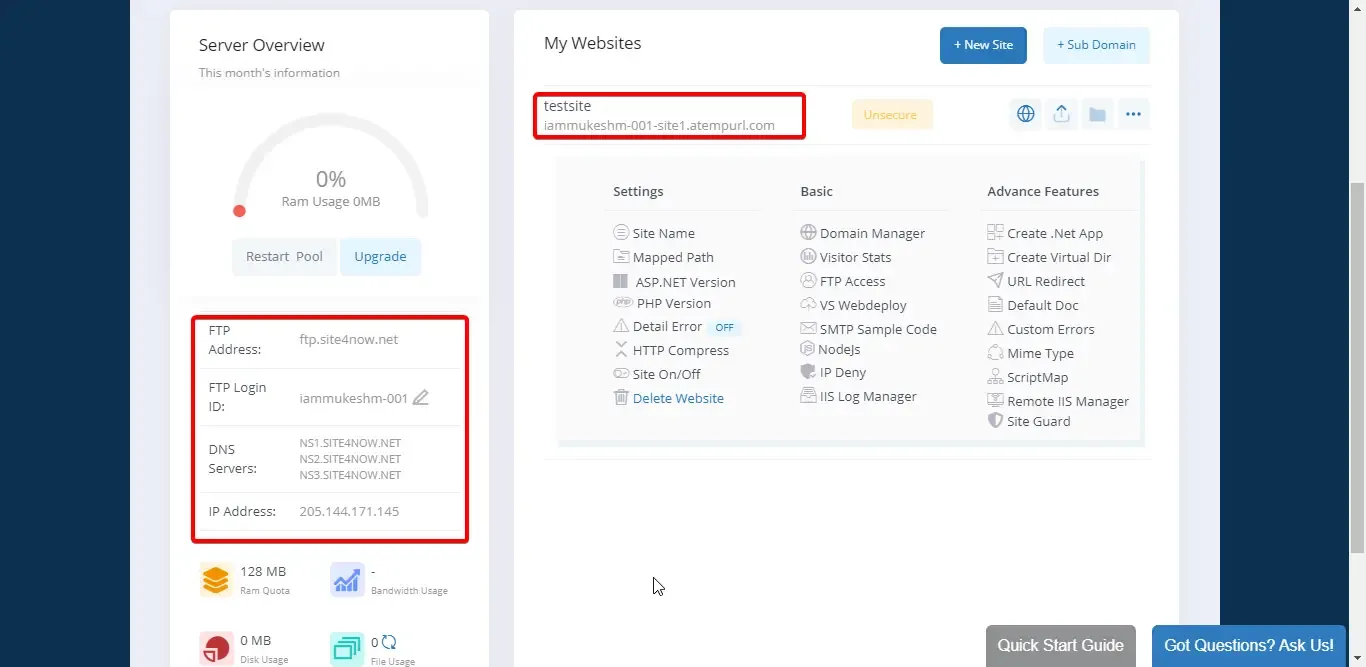
As we already have our Hosting account ready, the only task left is to actually upload an ASP.NET Core 3.1 Application to their storage. There are several ways to do it. We will do it in an effecient way where we can directly publish the ASP.NET Core application via the Visual Studio 2019 IDE to SmarterASP.NET Storage.
We will be using the Web-Deploy Mode is Visual Studio to publish our application to the cloud.
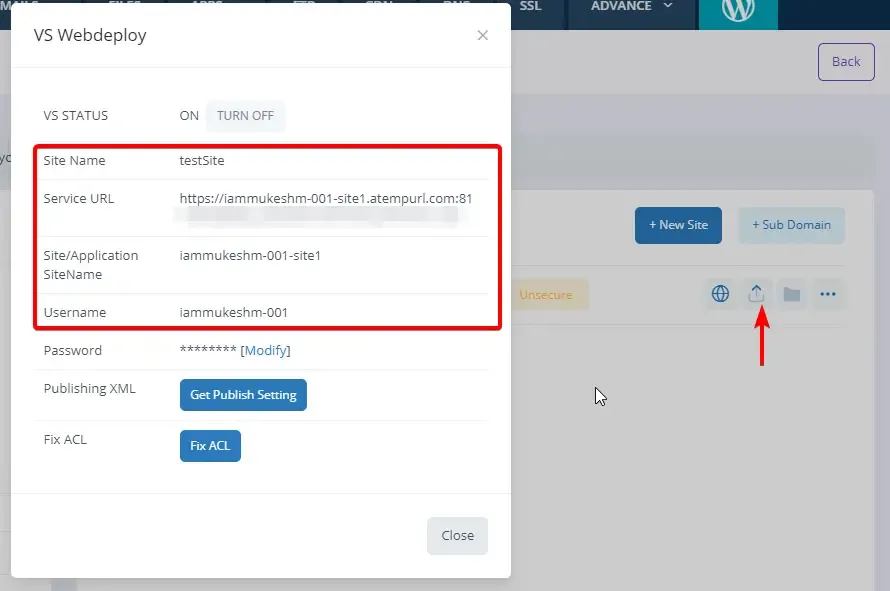
Click on the icon as shown below. This will give you some critical information you need while deploying later on. Note/Copy these down.
Hosting ASP.NET Core with SmarterASP.NET
For this demonstration, I will quickly publish the COVID-19 Dashboard Project that I had created earlier. This is a simple ASP.NET Core 3.1 Application / Razor that consumes an external API for Data Visualization of COVID Stats.
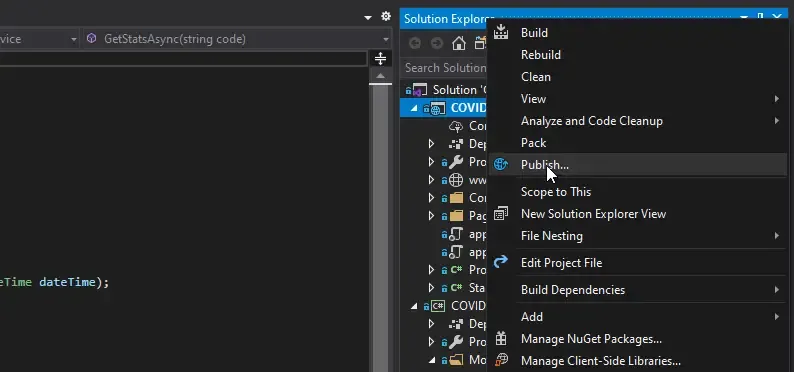
Open up the Project in Visual Studio IDE and click on Build -> Publish.
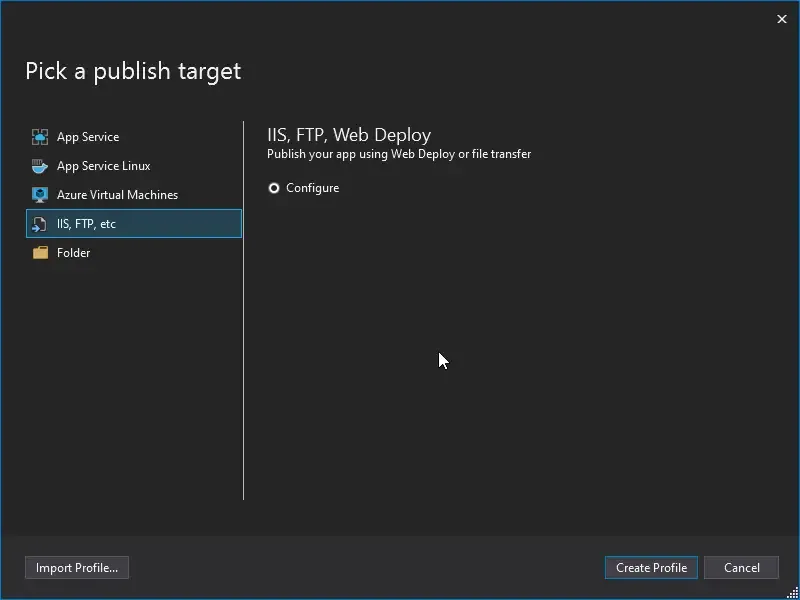
As mentioned earlier, we will be using WebDeploy. Click on IIS, FTP, etc and hit Create Profile.
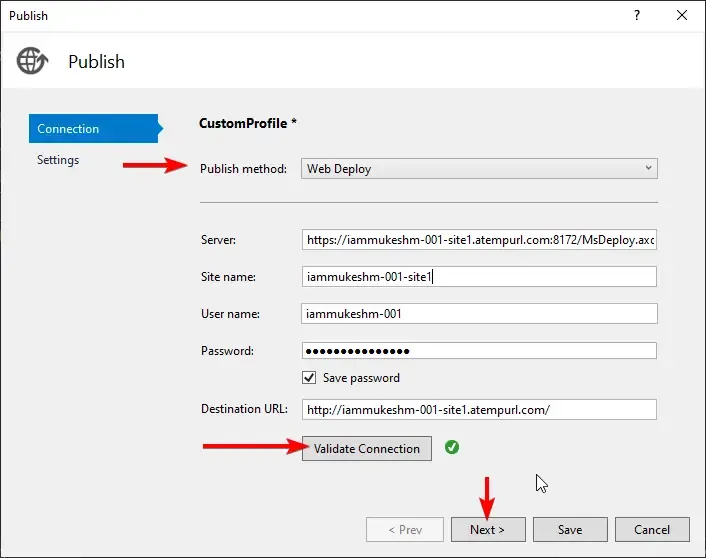
In the new dialog, set the publish method as WebDeploy. Fill in the form with the details we copied earlier. The password will be the same as your SmarterASP.NET Hosting password.
Once you have entered in all the details, click on Validate Connection to verify that you are able to connect to the remote server. After you are validated, click next.
Make Sure to copy/paste the details without any whitespaces. I had this issue where I pasted the server address with extra space and the connection was never established. So, remember to remove all the whitespaces.
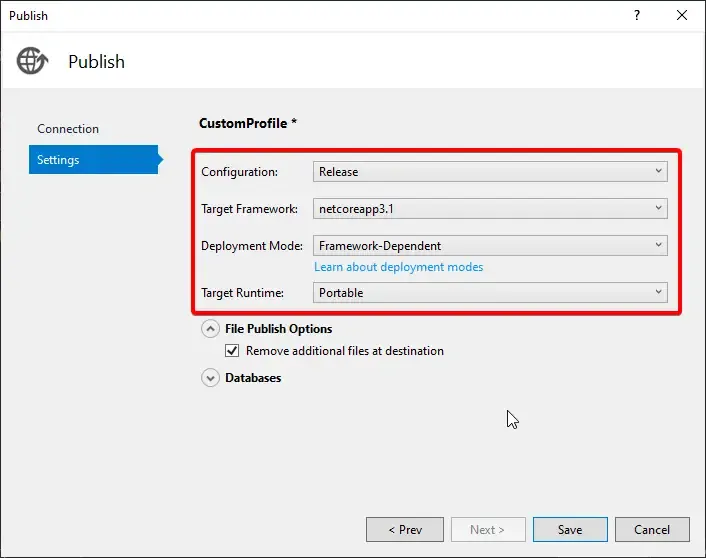
The following settings really depend on your application. For me, these were the ones that worked seamlessly. Click Save.
With that done, Click on Publish and wait for Visual Studio to complete deploying your awesome application to the web.
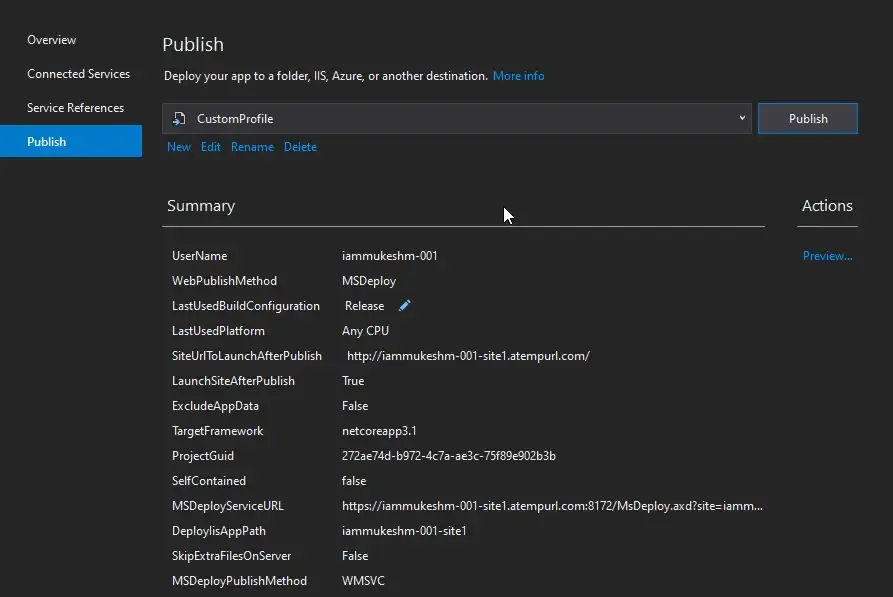
You will get a similar message after the application is published. Your newly published Application will be opened as well.

Here is my COVID-Dashboard deloyed - http://iammukeshm-001-site1.atempurl.com/
PS - The above link may not be live if you are reading this article much later.
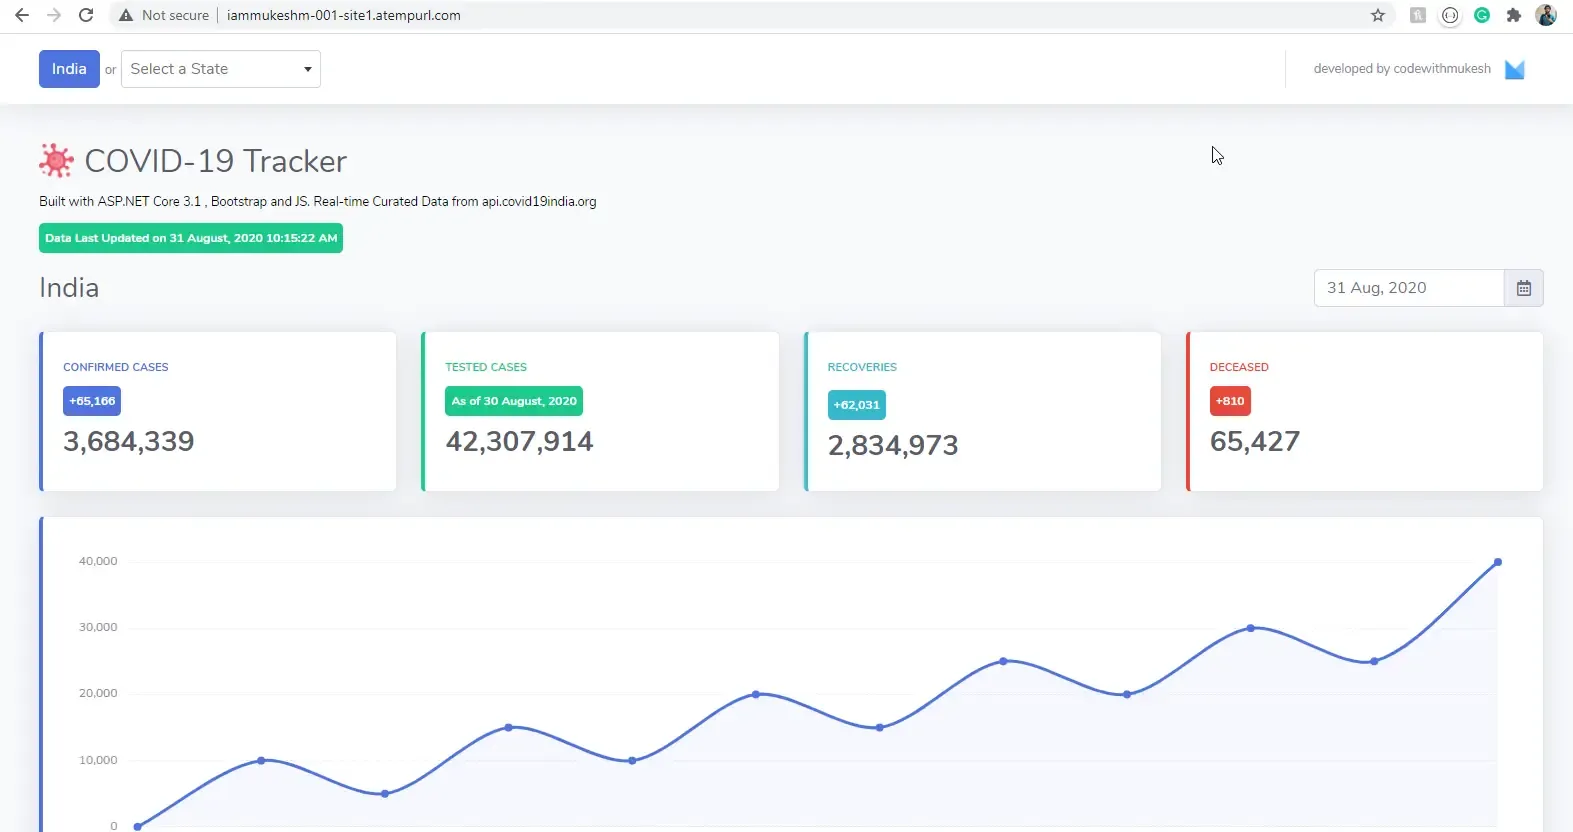
Got to say, even with a temporary URL, No SSL, FREE Plan, the Application loads quite fast compared to my Local IIS. I will continue testing SmarterASP.NET (Paid Plan) and keep on updating this article based on my findings. That’s a wrap for now.
If you are thinking about moving to the Paid Plan, there are a couple of Coupon Codes available that can save you 50% more on your bill (Lifetime Discount). Leave me a message for a valid coupon code. Cheers!
When you upgrade to a better plan (Shared Hosting -> NET Advance is what I would recommend), you get to configure FREE SSL, a dedicated URL for your application and much more.
Summary
In this article, we went through an awesome hosting - HOSTING ASP.NET Core with SmarterASP.NET and created a FREE 60 Days Trial Account. As you must have seen, we were also able to seamlessly deploy an ASP.NET Core 3.1 Application to the server directly via Visual Studio IDE.
Leave behind your valuable queries, suggestions in the comment section below. Also, if you think that you learned something new from this article, do not forget to share this within your developer community. Happy Coding!

