Caching is super crucial for applications. In the previous article we learned about Caching Basics, and how to make use of In-Memory Caching in ASP.NET Core Applications. In this article, we will discuss Distributed Caching benefits, and how you can achieve distributed caching in ASP.NET Core Applications with Redis.
Grab the complete source code of the .NET Zero to Hero Series from here. Let’s get started.
What is Distributed Caching in ASP.NET Core?
ASP.NET Core supports both in-memory application-based caching and distributed caching. Unlike in-memory caching, which resides within the application, distributed caching is external to the application. It does not live within the application itself and does not need to be present on the same server.
A distributed cache can be shared by one or more applications, instances, or servers, making it ideal for scenarios where you have multiple instances of your application running. It helps ensure that all instances have consistent data. However, it’s highly recommended placing your distributed cache instance as close to your application as possible to minimize network latency.
Like an in-memory cache, a distributed cache can significantly improve your application’s response time. However, the implementation of a distributed cache is specific to the application, meaning there are multiple cache providers that support distributed caching.
The most popular distributed cache provider is Redis. Redis offer robust features and scalability options, making it suitable for various applications and deployment scenarios.
In this article, we will focus on building an ASP.NET Core application that caches data to a Redis instance, which runs locally on a Docker Container.
Pros & Cons of Distributed Caching
Pros:
- Data Consistency: Ensures data is consistent across multiple servers.
- Shared Resource: Multiple applications or servers can use a single instance of a distributed cache like Redis, reducing long-term maintenance costs.
- Persistence: The cache remains intact across server restarts and application deployments as it resides externally.
- Resource Optimization: Does not consume local server resources, preserving them for other application processes.
- Scalability: Distributed caches can easily scale to handle large amounts of data and high traffic volumes.
- Fault Tolerance: Many distributed caching solutions offer built-in fault tolerance and replication features, enhancing system reliability.
- Advanced Features: Distributed caches often come with advanced features like data eviction policies, expiration, and clustering.
Cons:
- Latency: Response times can be slightly slower compared to in-memory caching due to network latency, depending on the connection strength to the distributed cache server.
- Complexity: Setting up and managing a distributed cache can add complexity to the system architecture.
- Cost: There can be additional costs associated with running and maintaining a distributed cache, especially for managed services or larger setups.
- Network Dependency: Performance is dependent on network reliability and speed. Network issues can impact cache performance.
- Security Concerns: Ensuring secure communication between your application and the distributed cache requires additional configurations and considerations.
- Data Synchronization: In highly dynamic environments, ensuring data synchronization between the application and the cache can be challenging.
This comprehensive list provides a balanced view of the advantages and potential drawbacks of using distributed caching in your applications. As you know, System Design is a game of trade-offs. There is no single BEST Approach. Everything depends on the purpose and scale of your application.
IDistributedCache Interface
The IDistributedCache interface in .NET provides the necessary methods to interact with distributed cache objects. This interface includes the following methods to perform various actions on the specified cache:
- GetAsync: Retrieves the value from the cache server based on the provided key.
- SetAsync: Accepts a key and value, and stores the value in the cache server under the specified key.
- RefreshAsync: Resets the sliding expiration timer for the cached item, if any (more details on sliding expiration will be covered later in the article).
- RemoveAsync: Deletes the cached data corresponding to the specified key.
These methods enable efficient and straightforward operations on the distributed cache, ensuring your application’s data remains synchronized and accessible.
However, one method that seems missing in this interface is the CreateOrGetAsync. Later in this article, we will write an extension to add this too!
What is Redis?
Redis is an open-source, in-memory data store that serves multiple purposes, including acting as a database, cache, and message broker. It supports various data structures such as strings, hashes, lists, sets, and more. Redis is known for its blazing-fast performance as a key-value store, written in C, and classified as a NoSQL database.
Redis is widely adopted by tech giants like Stack Overflow, Flickr, GitHub, and many others, thanks to its versatility and speed. Its ability to handle high-throughput operations makes it an excellent choice for caching and real-time applications, ultimately helping organizations save costs in the long run.
In the context of distributed caching, Redis is an ideal option for implementing a highly available cache. It significantly reduces data access latency and improves application response time, thereby offloading a substantial amount of load from the primary database. This leads to more efficient and responsive applications.
Run Redis in a Docker Container
For this, ensure that you have Docker / Docker Desktop installed on your machine.
Here are steps to spin up Redis in a Docker Container. You will also get some very basic idea of how Docker works in general, and a few important docker commands.
1. Pull the official Redis Image from Docker Hub.
Open your terminal and pull the latest Redis image by running:
docker pull redis2. Run the Redis Container
Once the image is downloaded, start a Redis Container.
docker run --name redis -d -p 6379:6379 redisdocker run: This is the base command used to create and start a new container from a specified Docker image.--name redis: This option assigns a name to the container. In this case, the container is namedredis. Naming a container makes it easier to reference and manage later on.-d: This flag stands for “detached mode.” When you run a container in detached mode, it runs in the background, allowing you to continue using the terminal. Without this flag, the container would run in the foreground, and you’d see the container’s logs directly in your terminal.-p 6379:6379: The default port of Redis in the container is6379. This part of the command maps port 6379 on the host to port 6379 on the container, allowing you to access the Redis server on port 6379 from your host machine.redis: This is the name of the Docker image from which the container is created. By default, this command pulls the latest Redis image from Docker Hub (if it’s not already available locally) and uses it to create the container.
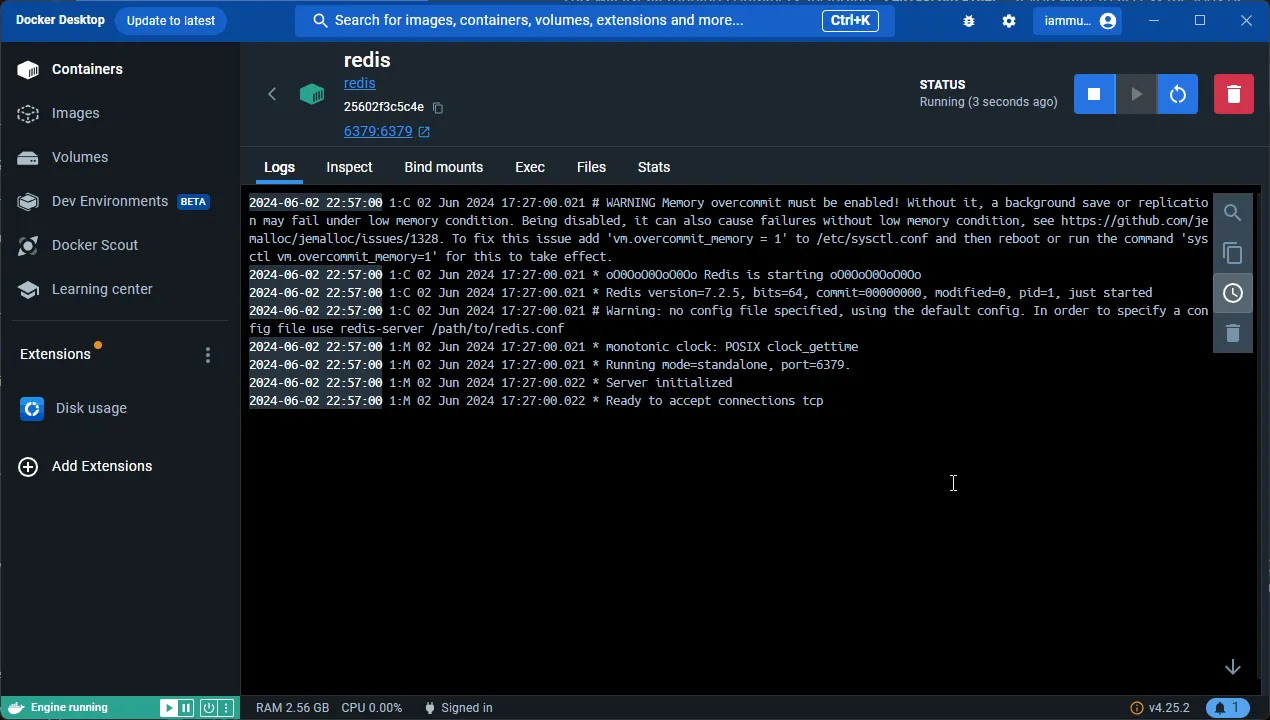
You can verify the status of the Container via Docker Desktop.

3. Accessing Redis via CLI
Now we have our Redis container up and running. To access the Redis instance running in the container, you can use the redis-cli tool. First, enter the container’s shell:
docker exec -it redis shThen, use the Redis CLI to interact with your Redis server:
redis-cli4. Basic Redis Commands
Here are some important Redis CLI commands that you would want to know.
Setting a Cache Entry
-> Set name "Mukesh"OKGetting the cache entry by key
-> Get name"Mukesh"Deleting a Cache Entry
-> Get name"Mukesh"-> Del name(integer)1-> Get name(nil)Setting a key with expiration time (in seconds)
-> SETEX name 10 "Mukesh"OkGet the Time left to expire(in seconds)
->TTL name(integer)55. Redis Insight (Recommended)
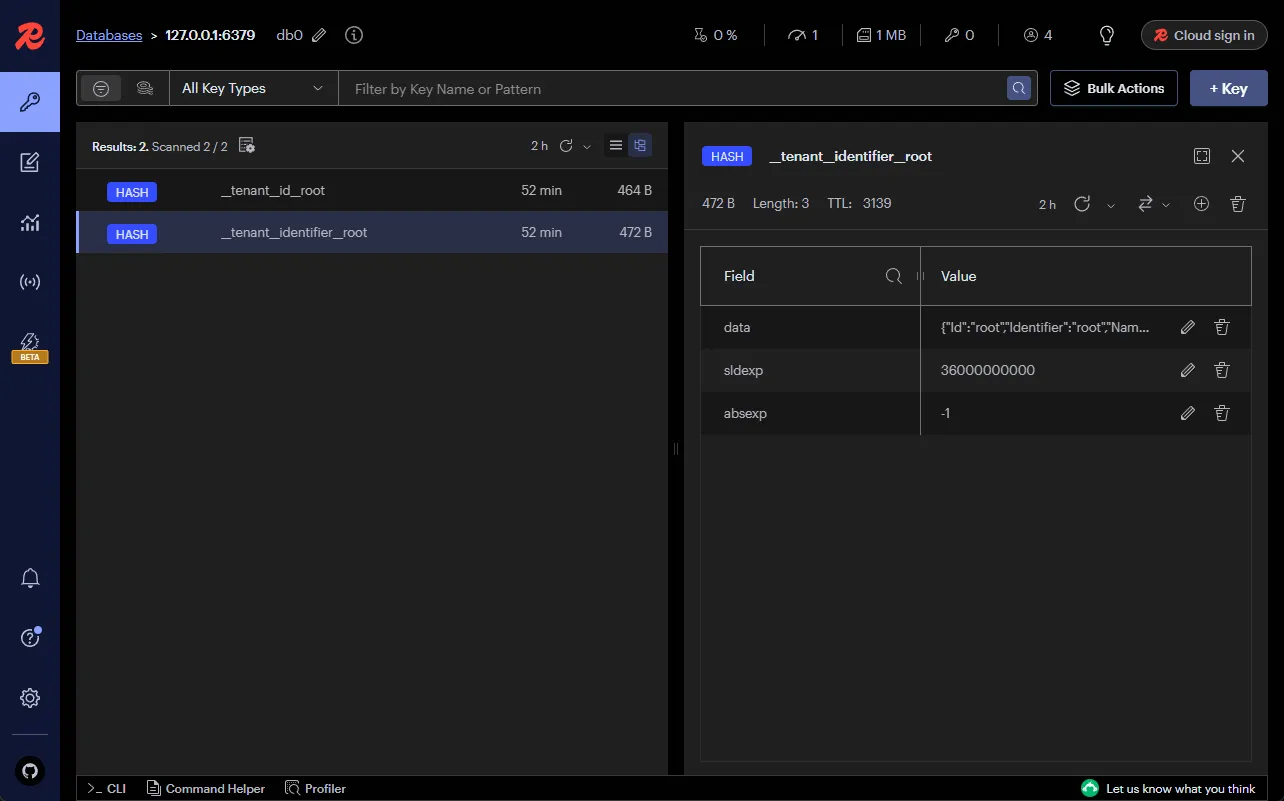
In addition to using Redis as a key-value store or cache, I recommend leveraging Redis Insight for monitoring and managing your Redis instances.
Redis Insight is a powerful graphical user interface (GUI) tool that provides a detailed view of your Redis data and performance metrics in real-time. With Redis Insight, you can easily monitor key metrics, such as memory usage, commands per second, and client connections, allowing you to optimize your Redis deployment for better performance.
Additionally, Redis Insight provides a convenient way to interact with your Redis databases, enabling you to view and manage keys, execute commands, and troubleshoot issues efficiently.
Overall, Redis Insight is a valuable tool for developers and administrators looking to gain deeper insights into their Redis instances and optimize their Redis deployments for maximum efficiency.
More importantly, this is a completely FREE tool. Install it from here.

Caching in ASP.NET Core with Redis
Let’s get started with implementing Distributed Caching in ASP.NET Core with Redis.
For this demonstration, I will be using the API that we had built in the previous article (In-Memory Caching).
This API is connected to a PostgreSQL Database via Entity Framework Core, and has some CRUD Operations over the Product Model. Also, the database already has about 1000+ products records, which we had inserted in the previous article. For your reference I have also attached the SQL Script file to this repository. Feel free to use it to seed 1000 product data to your PostgreSQL Database.
First, let’s install a package that helps you communicate with the Redis server.
Install-Package Microsoft.Extensions.Caching.StackExchangeRedisMAKE Sure that your Redis Container is up and running.
After that, we have to configure our .NET application to support the Redis cache. To do this, navigate to Program.cs file and add the following.
builder.Services.AddStackExchangeRedisCache(options =>{ options.Configuration = "localhost"; options.ConfigurationOptions = new StackExchange.Redis.ConfigurationOptions() { AbortOnConnectFail = true, EndPoints = { options.Configuration } };});This above code configures a Redis cache in an ASP.NET Core application using the AddStackExchangeRedisCache method. It sets the Redis server’s connection string to “localhost”, indicating that the Redis server is running on the local machine.
The AbortOnConnectFail option is set to true, meaning the application will fail immediately if it cannot connect to Redis. The EndPoints property is configured to use the same connection string specified in options.Configuration, ensuring that the endpoint for the Redis server is correctly set.
The IDistributedCache.SetAsync method requires that we pass in 3 parameters.
- Cache Key
- Data, but as byte array.
DistributedCacheEntryOptions, similar toIMemoryCache
It might be a bad idea to start Serializing every object and generating a byte array out of it.
To combat this, let’s add some extension method make the cache operations even more seamless.
public static class DistributedCacheExtensions{    private static JsonSerializerOptions serializerOptions = new JsonSerializerOptions    {        PropertyNamingPolicy = null,        WriteIndented = true,        AllowTrailingCommas = true,        DefaultIgnoreCondition = JsonIgnoreCondition.WhenWritingNull    };    public static Task SetAsync<T>(this IDistributedCache cache, string key, T value)    {        return SetAsync(cache, key, value, new DistributedCacheEntryOptions()            .SetSlidingExpiration(TimeSpan.FromMinutes(30))            .SetAbsoluteExpiration(TimeSpan.FromHours(1)));    }
    public static Task SetAsync<T>(this IDistributedCache cache, string key, T value, DistributedCacheEntryOptions options)    {        var bytes = Encoding.UTF8.GetBytes(JsonSerializer.Serialize(value, serializerOptions));        return cache.SetAsync(key, bytes, options);    }
    public static bool TryGetValue<T>(this IDistributedCache cache, string key, out T? value)    {        var val = cache.Get(key);        value = default;        if (val == null) return false;        value = JsonSerializer.Deserialize<T>(val, serializerOptions);        return true;    }
    public static async Task<T?> GetOrSetAsync<T>(this IDistributedCache cache, string key, Func<Task<T>> task, DistributedCacheEntryOptions? options = null)    {        if (options == null)        {            options = new DistributedCacheEntryOptions()            .SetSlidingExpiration(TimeSpan.FromMinutes(30))            .SetAbsoluteExpiration(TimeSpan.FromHours(1));        }        if (cache.TryGetValue(key, out T? value) && value is not null)        {            return value;        }        value = await task();        if (value is not null)        {            await cache.SetAsync<T>(key, value, options);        }        return value;    }}
Here, there are 2 Core Methods, which are the SetAsync and the TryGetValue. The remaining 2 methods wrap around these core methods. Anyhow, let’s go through them.
Note that all of these extensions methods are on top of the IDistributedCache interface.
SetAsync
As the name suggests, this helps you serialize the incoming value of type T, and then forming the byte array. This data, along with the cache key is passed on to the original SetAsync method. We are also passing JsonSerializerOptions instance while serializing the data.
By default, any cache key would have an absolute expiration of 1 hour, and sliding expiration period of 30 minutes.
TryGetValue
This method fetches the data from cache based on the passed cache key. If found, it deserializes the data into type T and sets the value, and passes back a true. If the key is not found in the Redis cache memory, it returns false.
GetOrSetAsync
This is a wrapper around both of the above extensions. Basically, in this single method, it handles both the Get and Set operations flawlessly. If the Cache Key is found in Redis, it returns the data. And if it’s not found, it executes the passed task (lambda function), and sets the returned value to the cache memory.
Product Service
Here is the ProductService class that will consume the extension methods we designed in the previous step.
public class ProductService(AppDbContext context, IDistributedCache cache, ILogger<ProductService> logger) : IProductService{    public async Task Add(ProductCreationDto request)    {        var product = new Product(request.Name, request.Description, request.Price);        await context.Products.AddAsync(product);        await context.SaveChangesAsync();        // invalidate cache for products, as new product is added        var cacheKey = "products";        logger.LogInformation("invalidating cache for key: {CacheKey} from cache.", cacheKey);        cache.Remove(cacheKey);    }
    public async Task<Product> Get(Guid id)    {        var cacheKey = $"product:{id}";        logger.LogInformation("fetching data for key: {CacheKey} from cache.", cacheKey);        var product = await cache.GetOrSetAsync(cacheKey,            async () =>            {                logger.LogInformation("cache miss. fetching data for key: {CacheKey} from database.", cacheKey);                return await context.Products.FindAsync(id)!;            })!;        return product!;    }
    public async Task<List<Product>> GetAll()    {        var cacheKey = "products";        logger.LogInformation("fetching data for key: {CacheKey} from cache.", cacheKey);        var cacheOptions = new DistributedCacheEntryOptions()                .SetAbsoluteExpiration(TimeSpan.FromMinutes(20))                .SetSlidingExpiration(TimeSpan.FromMinutes(2));        var products = await cache.GetOrSetAsync(            cacheKey,            async () =>            {                logger.LogInformation("cache miss. fetching data for key: {CacheKey} from database.", cacheKey);                return await context.Products.ToListAsync();            },            cacheOptions)!;        return products!;    }}
Note that the IDistributedCache and AppDbContext instances are injected into the primary constructor of this class.
In the Get Method, we are forming the cache key as earlier, and using the GetOrSetAsync extension. To this we pass the cache key, and if the value is not found in the cache (a cache miss), it executes the provided delegate (an asynchronous lambda function) to fetch the value from the database. The product data is then returned.
The GetAll method is also similar except that we are explicitly setting the DistributedCacheEntryOptions properties for SlidingExpiration and the AbsoluteExpiration to 2 and 20 minutes respectively.
Let’s build the application and run it. I used Postman to test the endpoints.
I invoked the /products GET endpoint, which would return me a list of 1000+ products right from the database. And here is how time the response took.

After this, we expect this list of products to be stored in the Redis cache. Let’s hit the endpoint once again, and this time we expect the data to be fetched from the cache memory instead. Here is the response time in the subsequent calls.

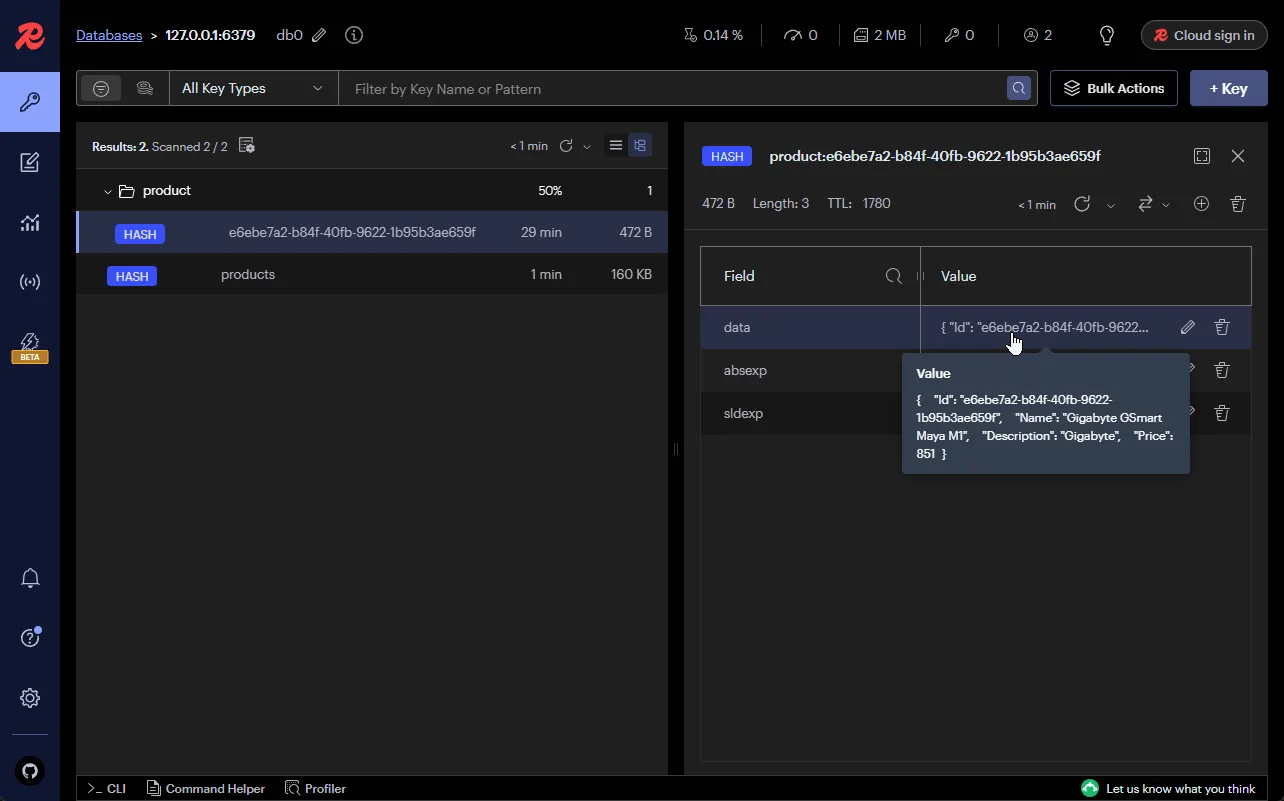
I have also tried to hit the /products/:id endpoint.
As recommended earlier, you can also use this awesome Redis Visualizer tool to analyze and monitor you Redis instance. Here are the cached data that we can browse through.

That’s a wrap for this article. How do you cache your ASP.NET Core applications to boost performance?
In the next article we go through one of the following.
IHybridCachein .NET 9- Response Caching with MediatR
- Docker for .NET Developers
Which one would you prefer next? Let me know in the comment section.
Summary
In this detailed article, we have learned about Distributed Caching, Redis, Setting up Redis on a Docker Container, IDistributedCache interface, Redis Insight client, and finally a sample to Integrate Distributed Caching in ASP.NET Core with Redis. I hope you learned something new and detailed in this article.
If you have any comments or suggestions, please leave them behind in the comment section below. Do not forget to share this article within your developer community. Thanks and Happy Coding!

