In this article, we are going to learn about how to Trigger AWS Lambda with S3 Events. In previous articles, we have already gone through the basics of the involved AWS Services like Amazon S3 and AWS Lambda. Now, let’s see how they can be integrated to form a practical system that has an event-driven approach. We will learn this using a real-life scenario, and help build a more efficient system.
This article is sponsored by AWS. Huge thanks for helping me produce more .NET on AWS content!
The Scenario
Imagine this scenario: your .NET web application is thriving, and users are uploading images like never before. In the backend, you are generating thumbnails for each of the uploaded images. But with increasing user activity comes the challenge of handling image processing efficiently, which may end up as a bottleneck in your entire application’s design. This is where AWS Lambda steps in as a game-changer. Your application code should allow the users to upload their images to S3 as usual, and not worry about the thumbnail conversion part.
You will asynchronously delegate this task to a Serverless Lambda that scales automatically. By triggering Lambda functions with S3 events, you can effortlessly create image thumbnails, providing a smooth user experience and optimizing storage costs. You get the problem we are trying to solve right? This is the case for almost every application once there is a spike in traffic. Thumbnail Creation seems to be the ideal candidate scenario to explain the S3 and Lambda integration! Let’s get started.
What we will build?
The scenario needs us to have a provision to upload an image file to an Amazon S3 Bucket location. We will use a simple minimal API for this purpose with just one endpoint that allows the client to upload an image to a predefined S3 Location. Post that we will write a .NET Lambda (.NET 6) that will handle the incoming S3 event notification, fetch the newly uploaded image, process it, and upload it to another location, which is meant for Thumbnails. Thus, we will need a Lambda and some Configurations in S3 Bucket to get the notifications part working. We will be using the popular ImageSharp package for converting the image into a thumbnail in our Lambda.
Prerequisites
As usual, here are the prerequisites.
-
.NET 6 SDK or higher. I will build the WebAPI using .NET 8, and the Lambda using .NET 6
-
AWS Account. A free tier would be enough.
-
Basic understanding of AWS Lambda. I have already written articles about this. Please refer to the article here.
-
Basic understanding of Amazon S3. Refer to the article here.
-
AWS CLI & Profile Configured. This will help you access your AWS resources programmatically. Read more about it here.
-
AWS Toolkit extension for Visual Studio.
-
Visual Studio IDE: I am using Visual Studio 2022 Preview to be able to use the .NET 8 SDK.
Creating the Amazon S3 Bucket
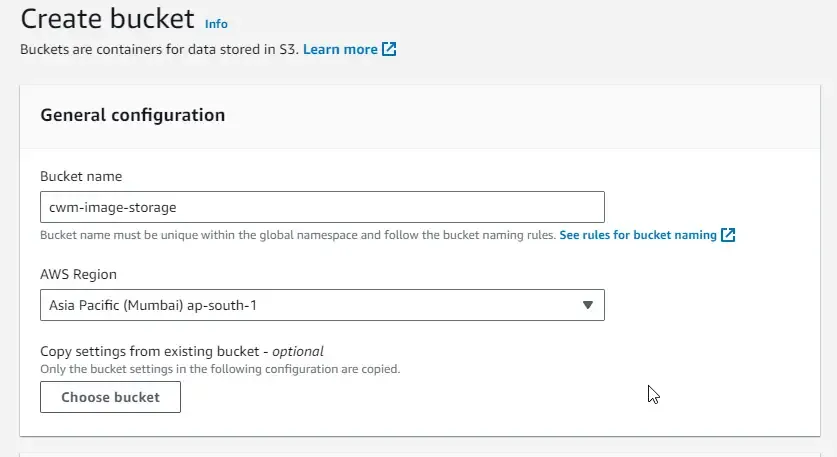
First up, let’s log in to our AWS Management Console and create a new S3 bucket for this demonstration purpose.
I named this new bucket “cwm-image-storage”. I have left all the other settings to the default values.
Note that we will be uploading RAW images (unprocessed) to this bucket under the images folder using our .NET 8 Web API. The Lambda would pick up the unprocessed files from here, convert them, and upload them to a folder named thumbnails.
Building the Image Upload API
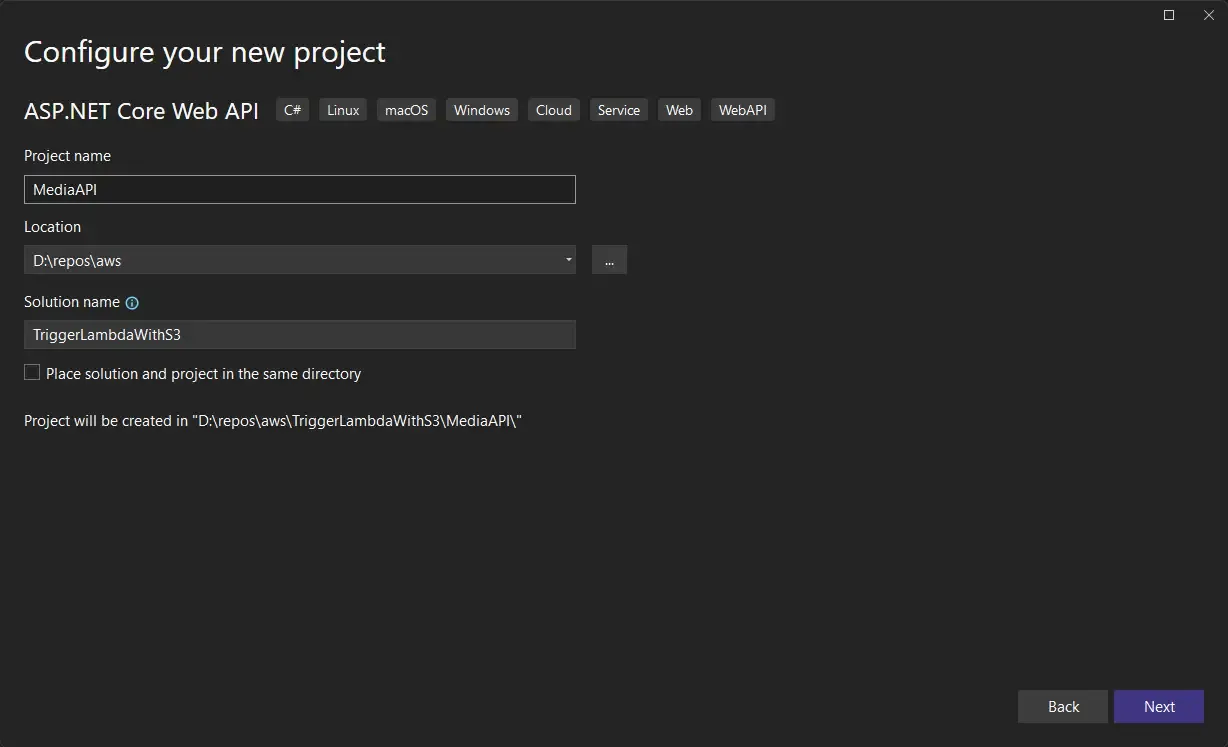
Open up Visual Studio, and create a new Solution. I named my solution as TriggerLambdaWithS3, and a new Web API project named MediaAPI. I will be adding the Lambda project also under this solution at a later point in this article.
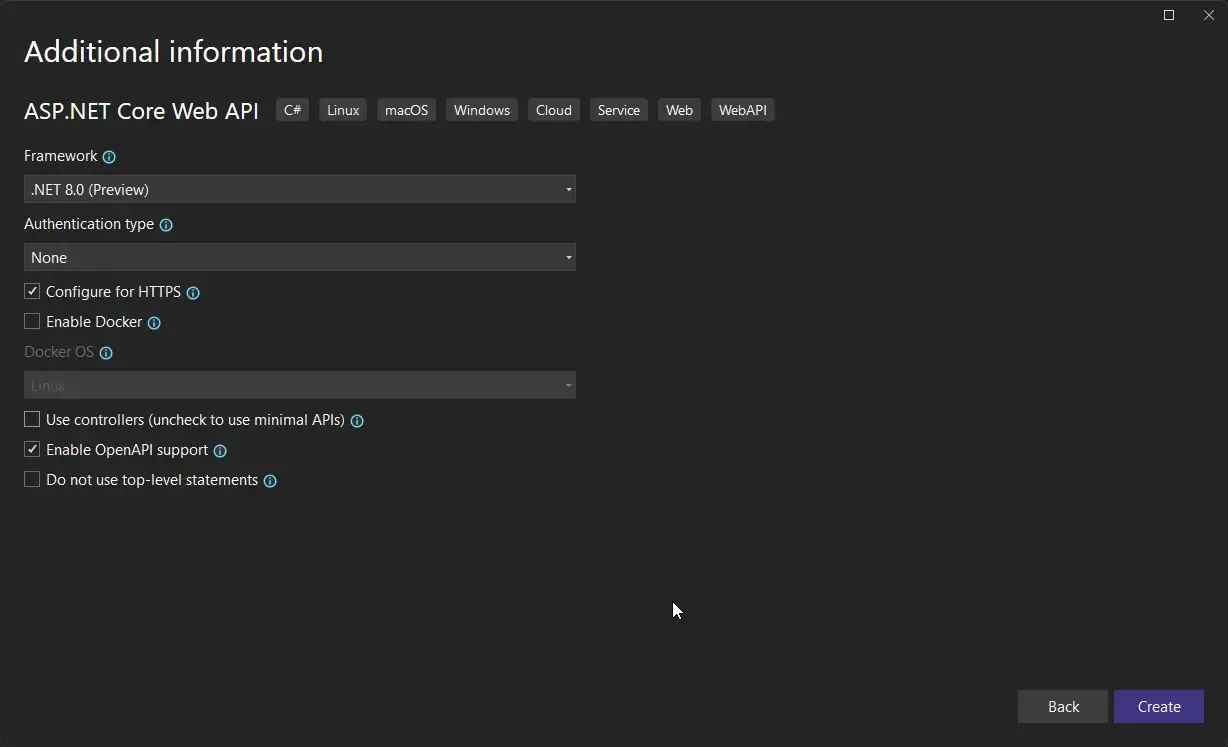
Make sure to select .NET 8 Preview (as of June 2023) and use Minimal API. Our ASP.NET Core WebAPI code is going to be just under a single file!
First up, we will have to install the following packages. Open up the package manager console and run the following lines of commands. This will install the packages necessary to interact with Amazon S3 Buckets.
Install-Package AWSSDK.S3Install-Package AWSSDK.Extensions.NETCore.SetupOnce the packages are installed, open up Program.cs and replace it with the following piece of code.
using Amazon.S3;using Amazon.S3.Model;var builder = WebApplication.CreateBuilder(args);builder.Services.AddEndpointsApiExplorer();builder.Services.AddSwaggerGen();builder.Services.AddDefaultAWSOptions(builder.Configuration.GetAWSOptions());builder.Services.AddAWSService<IAmazonS3>();var app = builder.Build();app.UseSwagger();app.UseSwaggerUI();app.MapPost("upload", async (IFormFile file, IAmazonS3 _s3Client) =>{ if (!file.ContentType.StartsWith("image/")) return Results.BadRequest("Invalid File Format. We support only Images."); var request = new PutObjectRequest() { BucketName = "cwm-image-storage", Key = "images/" + file.FileName, InputStream = file.OpenReadStream() }; request.Metadata.Add("Content-Type", file.ContentType); await _s3Client.PutObjectAsync(request); return Results.Accepted($"Image {file.FileName} uploaded to S3 successfully!");});app.UseHttpsRedirection();app.Run();Let’s go line by line.
-
In lines 6 to 7, we are registering the required services into our application’s DI container.
-
In lines 11 to 23, we are defining our upload endpoint and its handler.
Note that our endpoint is located at /upload route and it accepts IFormFile from the client. We are also injecting the instance of IAmazonS3 to this endpoint. First, we check if the uploaded file is an image. We throw a BadRequest exception if the file is not an image.
Next, we form a request to upload to our Amazon S3 bucket by passing the name of the bucket (which we already know), the key will be the combination of “images/” and the name of the incoming file, and the stream of data. With that done, we will call the PutObjectSync method of the S3 client and upload our file.
This is how you would do a basic upload operation onto your S3 Bucket. Are you interested to learn about the other operations you can do from your ASP.NET Core application over Amazon S3 Objects or buckets? I have written a dedicated article that demonstrated various operations that you can perform with Amazon S3 and .NET like upload, list, delete, update, and so on. Read more about it here. Or you can also watch my youtube video about it from here.
That’s all you have to do. Run the application, we will test if the image upload works!
Testing Image Upload
You will be seeing the Swagger UI. Under the /upload endpoint, choose a file, open up an image, and hit execute. You can see the following message.

To test the BadRequest scenario, simply choose a non-image file and try executing the request.

Building the Thumbnail Conversion Lambda with S3 Blueprint
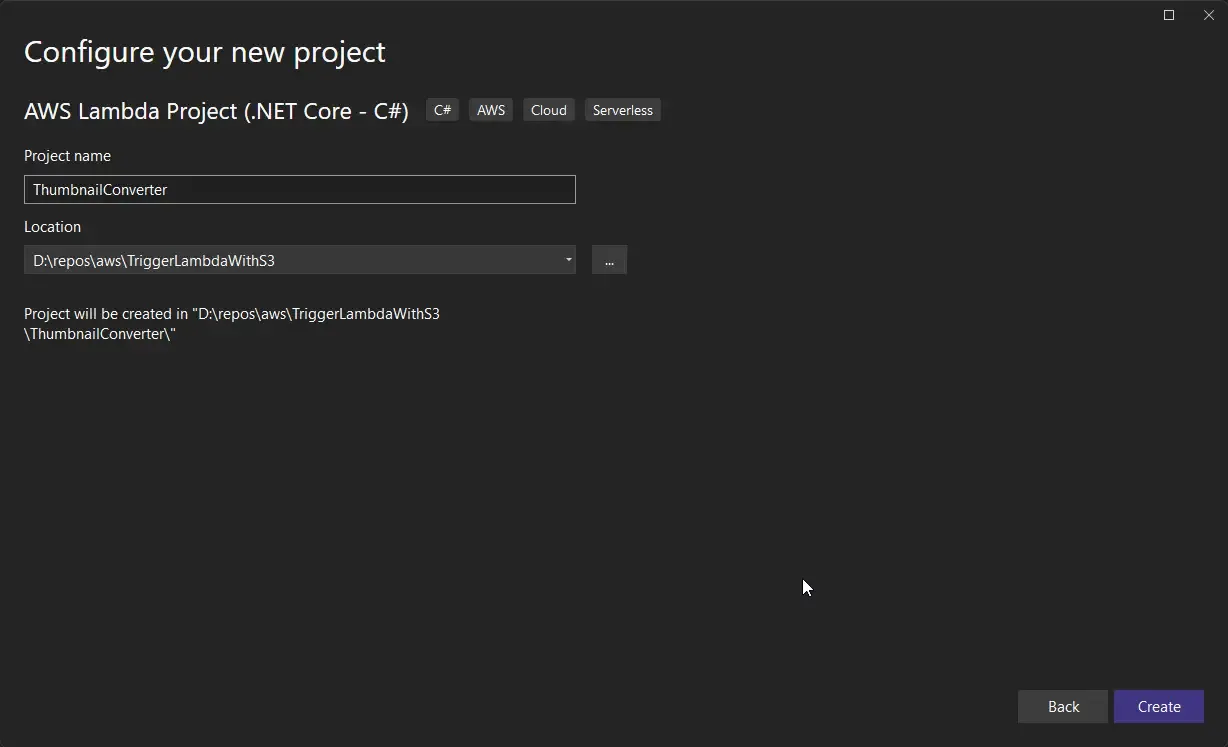
Now that we have an API to upload the image to the desired S3 Bucket location, let’s build the core of our requirement, the thumbnail conversion service. Under the same solution, create a new project and select AWS Lambda Project C#. You would have to install the AWS Toolkit and Templates extensions to see this option on your Visual Studio Project Template selection screen.
I named my AWS Lambda project as Thumbnail Converter.
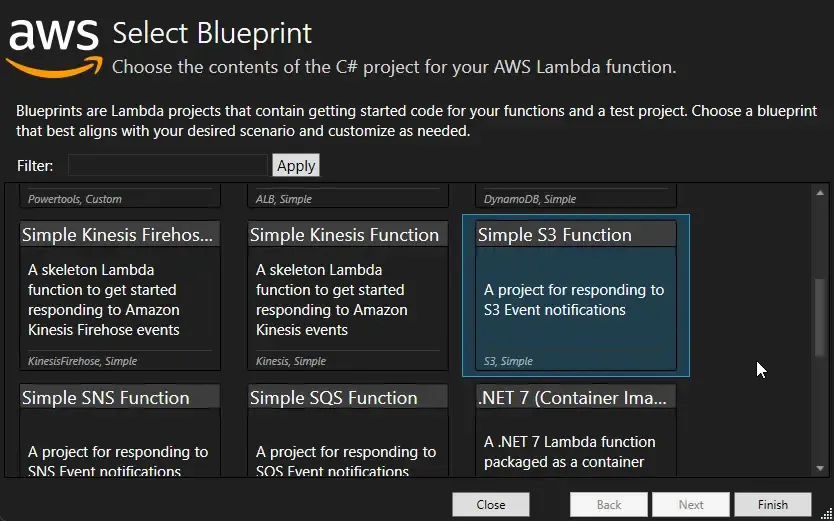
In the next screen, you will have to select the Blueprint of your Lambda Function. We will be selecting the Simple S3 Function, which is a minimal template for the Lambda to listen to Events emitted by Amazon S3.
Below is the Lambda code that uses the ImageSharp package to convert our original image to thumbnails, and upload it to another S3 location under the same bucket.
Make sure to install the SixLabors.ImageSharp package on this Lambda project.
public class Function{ IAmazonS3 S3Client { get; set; } public Function() { S3Client = new AmazonS3Client(); } public Function(IAmazonS3 s3Client) { this.S3Client = s3Client; } public async Task FunctionHandler(S3Event @event, ILambdaContext context) { var eventRecords = @event.Records ?? new List<S3Event.S3EventNotificationRecord>(); var thumbnailFolder = "thumbnails/"; foreach (var record in eventRecords) { var s3Event = record.S3; if (s3Event == null) { continue; } try { var bucketName = s3Event.Bucket.Name; var key = s3Event.Object.Key; var response = await this.S3Client.GetObjectAsync(bucketName, key); context.Logger.LogLine($"Original Size of {key}: {response.ContentLength}"); using (var image = Image.Load(response.ResponseStream)) { int maxWidth = 500; int maxHeight = 500; image.Mutate(x => x.Resize(new ResizeOptions { Mode = ResizeMode.Max, Size = new Size(maxWidth, maxHeight) })); using (MemoryStream stream = new MemoryStream()) { image.Save(stream, new SixLabors.ImageSharp.Formats.Jpeg.JpegEncoder()); context.Logger.LogLine($"Thumbnail Size of {key}: {stream.Length}"); var thumbnailKey = thumbnailFolder + key.Replace("images/", ""); var uploadRequest = new PutObjectRequest { BucketName = bucketName, Key = thumbnailKey, InputStream = stream }; await this.S3Client.PutObjectAsync(uploadRequest); context.Logger.LogLine($"Uploaded Thumbnail to {thumbnailKey}"); } //delete original image await this.S3Client.DeleteObjectAsync(bucketName, s3Event.Object.Key); context.Logger.LogLine($"Deleted Original Image from {s3Event.Object.Key}"); } } catch (Exception e) { context.Logger.LogError(e.Message); context.Logger.LogError(e.StackTrace); throw; } } }}In lines 3 to 11, we are injecting the S3 client service into the constructor of our Lambda.
We first check if there are any records that we received as part of our S3 Notification. Note that we haven’t configured our Lambda Trigger yet. We will be doing it in the next section.
Line 27, we get the original image from the S3 bucket using our S3 Client. We then use ImageSharp Library to resize the image to a maximum width and height of 500 while maintaining the aspect ratio, so that you don’t get a weird-looking image.
At line 40, we are saving the image converted by ImageSharp into the MemoryStream, which is then passed as part of the Amazon S3 Put request along with the bucket name and the thumbnail key which will be a combination of “thumbnails/” and the original file name. Line 49 is responsible for uploading the thumbnail back to the S3 bucket, under the thumbnails folder.
Once the upload is completed, you can optionally delete the original image as well, to reduce the S3 bucket’s storage. This will be a simple Delete Call where we would pass the bucket name and the name of the original file under the images folder.
This is everything you will have to do with regard to the Lambda code. Let’s upload the Lambda to AWS now. Simply right-click the Lambda project and click on “Publish to AWS Lambda”.
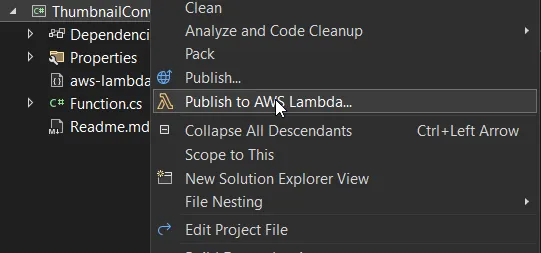
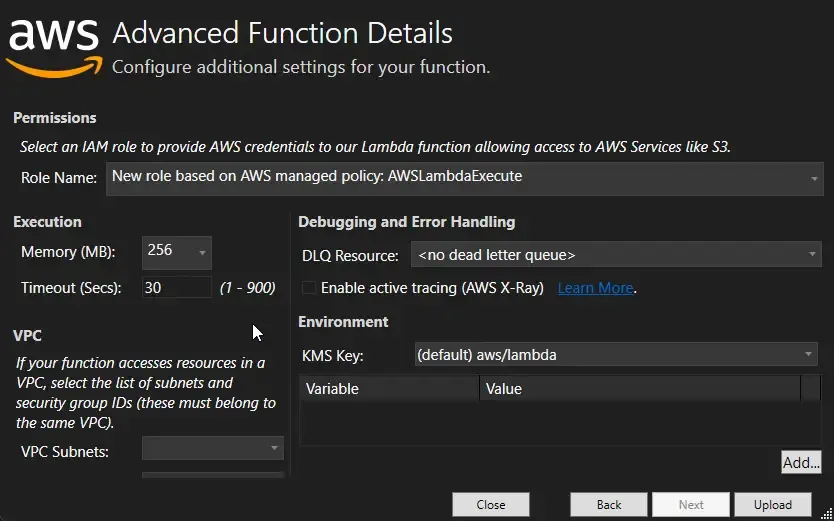
In the popup that comes, enter in the function name and hit next.
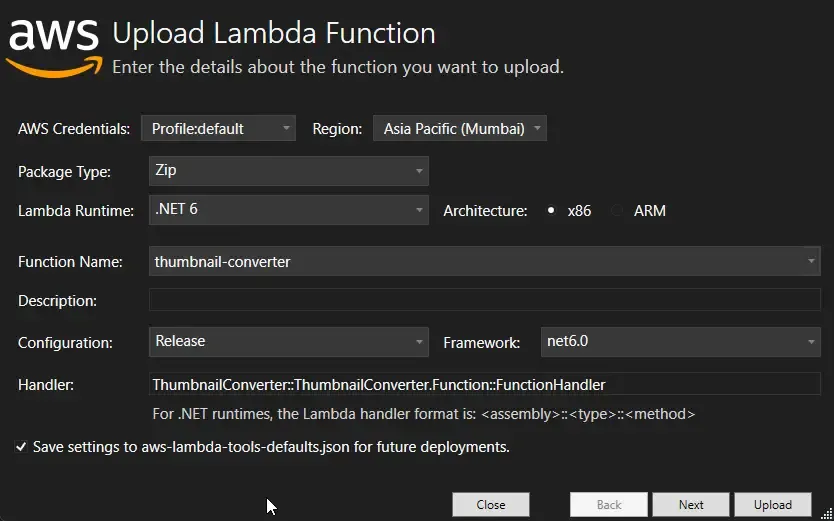
Here, select the Role as AWSLambdaExecute. This gives you basic permissions to write to Cloudwatch. Note that we additionally need the permissions to access S3. We will be doing this part in the next section. For now, hit on upload. This should upload your function code to AWS Lambda.
Updating the Lambda permissions to Access S3 Objects
Let’s fix the Lambda permissions first. Navigate to AWS Management Console and open up Lambda. Here, select your new Lambda, and go to Configurations -> Permissions. Click on the IAM Role of your Lambda. In my case, it is named lambda_exec_{lambdaName}.
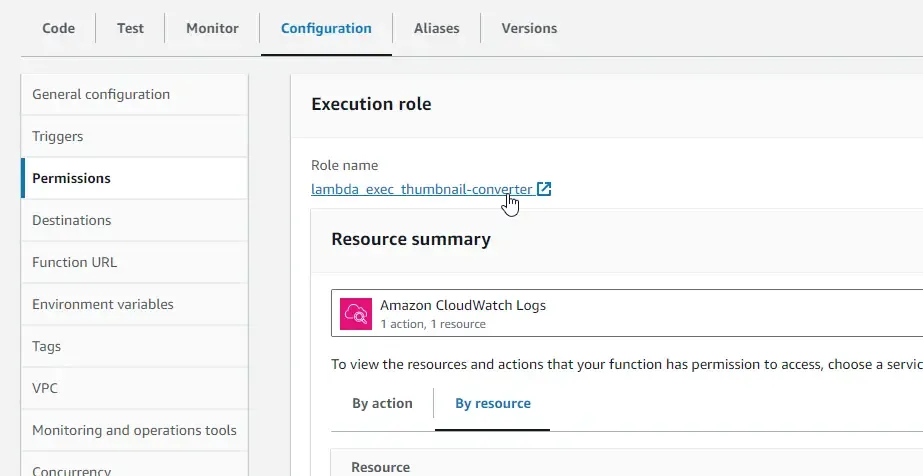
Under permissions, click on Add Permissions and Attach Policies.

Here, search for S3 and select AmazonS3FullAccess. Note that we are choosing this permission for demonstration purposes only and is not recommended in production scenarios. Ideally, you need to be much more specific than this. Let’s proceed.
Once added, save it.

This should grant the required permissions to your AWS Lambda function to access S3 buckets and upload files to it.
Trigger AWS Lambda with S3 Events
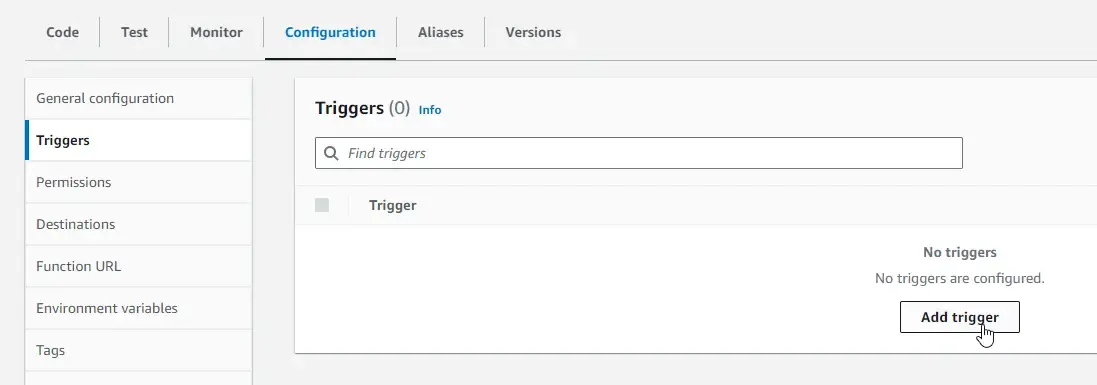
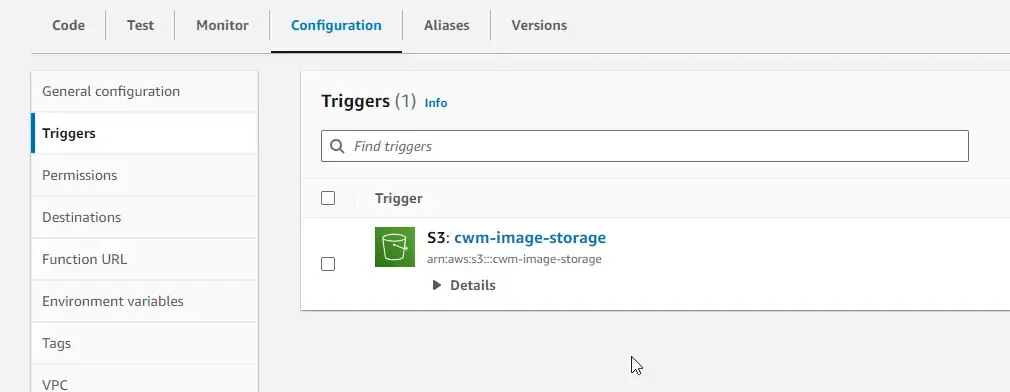
Now that everything is in place, let’s finish the final piece of the puzzle, and trigger the Lambda code whenever there is a new object uploaded to our Amazon S3 bucket, specifically under the images folder. Open up the AWS Lambda once again and open the thumbnail-creator Lambda. Navigate to Configurations -> Triggers and click on Add Trigger.
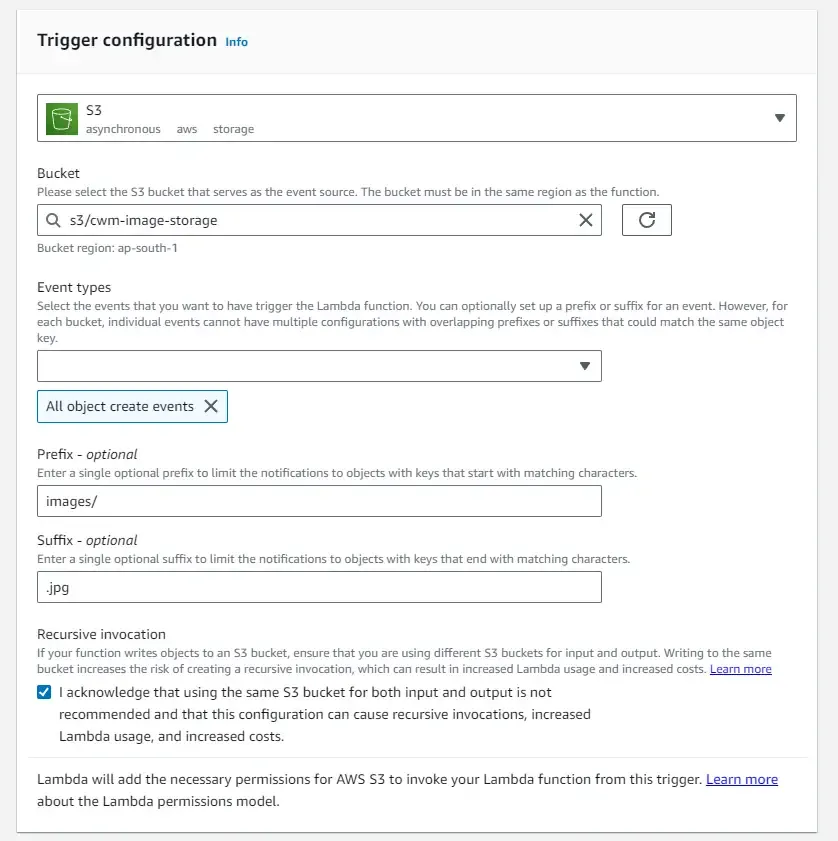
Select the trigger source as S3. This means that the lambda will be subscribed to events emitted by S3. Next, select the Bucket that we created earlier, which is cwm-image-storage. For event types, we need only the events that are associated with Object Creations. Select the All object create events option.
Next, in the prefix, type in “/images” as this is the path that our Web API would upload the user image to. For the suffix, let’s set it as .jpg, as we will assume that only jpg is supported in our use case.
Select the Acknowledgment checkbox and Add the trigger.
That’s it. You should be able to see the below trigger on your Lambda as well! This essentially means that, whenever you upload a file with an extension as .jpg into the bucket/images path of our bucket, S3 would trigger the Lambda (thumbnail-converter) and pass the S3Event metadata to the context of the Lambda, which will process the new image file, resize it and upload it to the thumbnails folder of the bucket!
This is a really clean way to decouple your file-processing logic out of the main application and thus improving the overall system performance. Let’s see the implementation in action now.
Simply run the WebAPI and upload an Image file. I am going to upload a 4K image of size almost at 2Mb via my WebAPI.
Here is the upload success message back from my WebAPI.

Navigate to S3 and open up the Image bucket. A new folder named thumbnails should be available now. You can see the converted file here. ImageSharp was able to convert the 2Mb file to a 61KB file as you can see from the screenshot below.

And here is the image.

Similarly, if you open up the Cloudwatch logs, under the log stream of your Lambda, you will be able to see the following logs.

Pretty good resize from ImageSharp. And you can also note that the original file is deleted. This complete process took under 320 milliseconds. This can be further optimized if needed.
Exception Handling
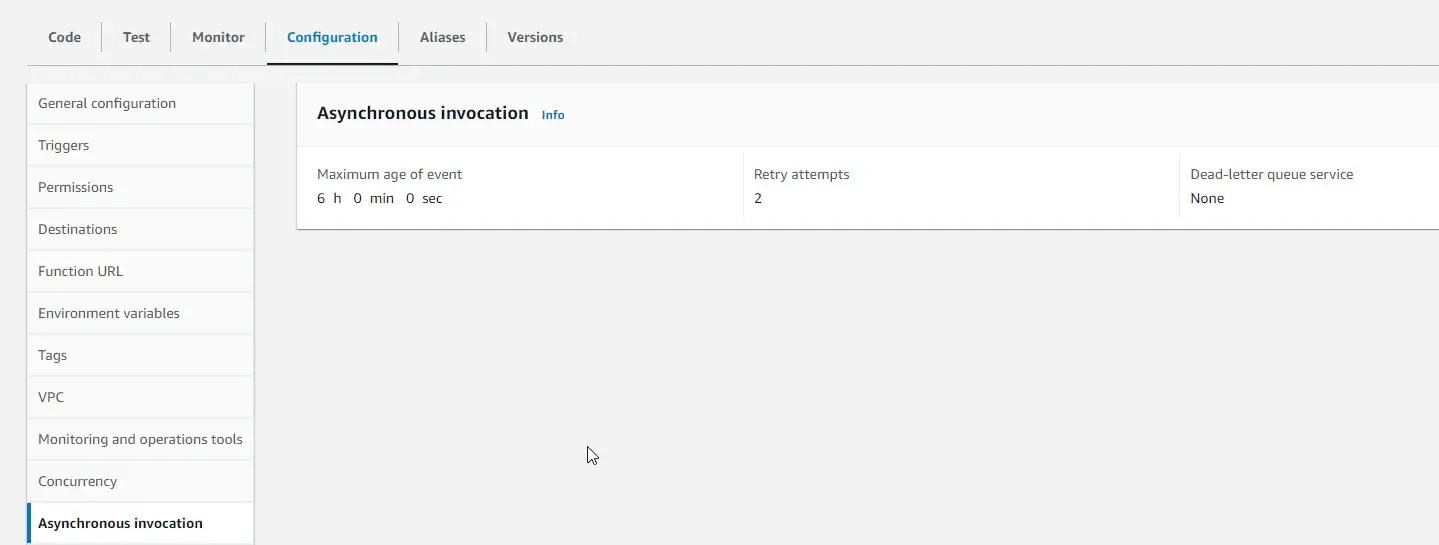
Till now, we have only seen the success scenarios. But what about the failures? By default, AWS Lambda retries any failure 2 times with a maximum age of the event as 6 hours. This can be configured under Lambda Configurations -> Asynchronous Invocation.
This means that an event will be lost after 2 retry attempts if the event age is way older than the configured maximum event age. To prevent this data loss, you can configure a Dead Letter Queue. Any failed events, after retry, will be moved to the specified DLQ. This can be later retrieved from the DLQ and processed based on the requirement or use case.
Summary
In this article, we learned about how to Trigger AWS Lambda with S3 Events for .NET Developers. In the process, we built an application that solves a real-life problem, where image conversion can bottleneck the application performance. We built an Event Driven Solution, where a notification is sent to a Lambda whenever there is a new file uploaded to Amazon S3. This C# Lambda using the ImageSharp package resizes the original image to a thumbnail and deletes the original image in milliseconds.
You can find the source code of the entire implementation here.
Make sure to share this article with your colleagues if it helped you! Helps me get more eyes on my blog as well. Thanks!
Stay Tuned. You can follow this newsletter to get notifications when I publish new articles – https://newsletter.codewithmukesh.com. Do share this article with your colleagues and dev circles if you found this interesting. Thanks!

