


In this article, I will go through the 12 NuGet packages that I would recommend for an ASP.NET Core project on .NET 10. There is one package for each job, and the 12 are Serilog, FluentValidation, Mapperly, EF Core with Dapper, Scalar, HybridCache, Quartz.NET, Mediator, OpenTelemetry, xUnit v3, Testcontainers and Aspire. For every package, you will get the install command with the exact version, the code that you need to get it working, and the license that it comes with.
If you are a .NET developer, you have probably followed a list of must-have NuGet packages at some point and installed most of what was on it. The problem with the older lists is that a few of the packages on them are no longer free to use at work. In the last couple of years, AutoMapper, MediatR, MassTransit and FluentAssertions have all moved to a commercial license, and a lot of teams only found out about it when a version update came in. So I checked the license of every package in this article on nuget.org on October 3, 2026, and all 12 of them can be used in a commercial project without paying anything.
I have also built a small .NET 10 Web API that uses all 12 packages together, so every code snippet in this article is taken from a project that builds and runs. After the list, I will cover the popular packages that I left out, and I will show you how to check the license of any package yourself. Let’s get started.
The 12 Packages at a Glance
Here is the complete list, in case you only need the names and the install commands. The rest of the article explains each one in detail.
| # | Job | Package | Version | License |
|---|---|---|---|---|
| 1 | Logging | Serilog.AspNetCore | 10.0.0 | Apache-2.0 |
| 2 | Validation | FluentValidation | 12.1.1 | Apache-2.0 |
| 3 | Object mapping | Riok.Mapperly | 4.3.1 | Apache-2.0 |
| 4 | Data access | Npgsql.EntityFrameworkCore.PostgreSQL (EF Core 10) and Dapper | 10.0.3 and 2.1.89 | PostgreSQL / MIT and Apache-2.0 |
| 5 | API documentation | Scalar.AspNetCore | 2.17.13 | MIT |
| 6 | Caching | Microsoft.Extensions.Caching.Hybrid | 10.10.0 | MIT |
| 7 | Scheduled jobs | Quartz.Extensions.Hosting | 4.3.0 | Apache-2.0 |
| 8 | Command and query handlers | Mediator.Abstractions and Mediator.SourceGenerator | 3.0.2 | MIT |
| 9 | Traces and metrics | OpenTelemetry.Extensions.Hosting | 1.19.1 | Apache-2.0 |
| 10 | Unit tests | xunit.v3 with NSubstitute | 4.0.1 and 6.2.0 | Apache-2.0 and BSD-3-Clause |
| 11 | Integration tests | Testcontainers.PostgreSql | 4.15.0 | MIT |
| 12 | Running everything locally | Aspire.AppHost.Sdk | 13.6.0 | MIT |
How I Picked These Packages
Before the list, let me quickly explain how I picked these packages, because you can use the same three checks in your own projects.
- Does .NET already do the job? Things like JSON serialization, dependency injection, rate limiting and health checks are built into the framework now, so you do not need a package for them anymore.
- Is the license free for commercial use? I only picked packages with a permissive open source license, like MIT or Apache 2.0. This means you can use them in a commercial product without paying, and without having to open source your own code.
- Is the package actively maintained? It should also have been around long enough that I am comfortable depending on it for the next few years.
Every package in this article passes all three checks.
What .NET 10 Already Gives You
The first check removes more packages than you might expect. If your project still has a package for any of the jobs below, you can most likely remove it, because the framework covers it.
| Job | What is built into .NET 10 | Package you no longer need |
|---|---|---|
| JSON | System.Text.Json | Newtonsoft.Json, unless you depend on a feature that only it has |
| OpenAPI document | Microsoft.AspNetCore.OpenApi | Swashbuckle.AspNetCore, which was removed from the templates in .NET 9 |
| Rate limiting | The rate limiting middleware | AspNetCoreRateLimit |
| Health checks | The health checks middleware | None for the basics. You only add a package for a specific database or broker probe |
| Dependency injection | The built-in container, with three service lifetimes | Autofac, for most applications |
| Error responses | IExceptionHandler and ProblemDetails, which I covered in the global exception handling article | A custom exception middleware package |
| Simple validation | builder.Services.AddValidation() for Minimal APIs, using Data Annotations | None for a couple of simple fields |
| Real-time | SignalR | None |
| HTTP retries and timeouts | Microsoft.Extensions.Http.Resilience, a Microsoft package that uses Polly internally | Hand-written Polly policies for HttpClient. Please read the note about Polly in the section on the packages I left out |
The Sample Project
To follow along, you need the .NET 10 SDK and Docker Desktop. Docker is used by Testcontainers in package 11 and by Aspire in package 12. If you have not built a Web API on .NET 10 yet, I would start with the ASP.NET Core Web API CRUD with EF Core tutorial and come back to this article after that.
The sample is a small shop API with products and orders, and it has three projects. You can get the complete source code from my GitHub repository here.
All the install commands for the API are run from the src/Api folder, and the ones for the tests are run from the tests/Api.Tests folder.
1. Serilog for Logging
The first package is Serilog, and I use it for logging. .NET already gives you the ILogger interface, and you should keep using it in your classes. What Serilog adds is structured logging. This means every log entry is saved along with its properties, like the request ID or the user ID, so that you can search and filter your logs by those values later. It also has sinks for almost every place you would want to send your logs to, like the console, a file, Seq or Elasticsearch.
dotnet add package Serilog.AspNetCore --version 10.0.0Navigate to the Program.cs file, and add the following.
builder.Host.UseSerilog((context, config) => config    .ReadFrom.Configuration(context.Configuration)    .Enrich.FromLogContext()    .WriteTo.Console());
app.UseSerilogRequestLogging();
The first block reads the logging settings from your appsettings.json file, so you can change the log level without touching the code. The last line adds request logging, which gives you one clean log entry for every HTTP request, with the status code and the time it took. Here is the section that goes into appsettings.json.
"Serilog": { "MinimumLevel": { "Default": "Information", "Override": { "Microsoft.AspNetCore": "Warning", "Microsoft.EntityFrameworkCore": "Warning", "Quartz": "Warning" } }}The overrides reduce the number of log entries that come from the framework, so that the console mostly shows your own log entries. This is what the sample API prints for a few requests.
[18:35:11 INF] HTTP POST /products responded 201 in 44.1513 ms[18:35:11 INF] HTTP POST /products responded 400 in 15.1080 ms[18:35:11 INF] HTTP POST /orders responded 201 in 42.8326 msOne thing worth knowing is that UseSerilog replaces the default logging providers. If you later send your logs to an OpenTelemetry backend, they will not arrive through the Microsoft logging provider, and you will need the Serilog OpenTelemetry sink for that. I have covered that sink, along with enrichers and Seq, in the full guide below. Serilog comes under the Apache 2.0 license, so it is free for commercial use.
Serilog in ASP.NET Core .NET 10 - Structured Logging Done Right
The full setup with configuration, enrichers, request logging, Seq and the OpenTelemetry sink.
2. FluentValidation for Validation
Data annotations like [Required] and [MaxLength] work fine when you have a couple of simple fields, and .NET 10 can now run them for Minimal APIs on its own. But once you need a rule that depends on another property, or a rule that has to check the database, the attributes become hard to read and hard to test. With FluentValidation, you write the rules of a request in a separate class.
dotnet add package FluentValidation --version 12.1.1dotnet add package FluentValidation.DependencyInjectionExtensions --version 12.1.1public class CreateProductValidator : AbstractValidator<CreateProductRequest>{ public CreateProductValidator() { RuleFor(x => x.Name).NotEmpty().MaximumLength(200); RuleFor(x => x.Price).GreaterThan(0); RuleFor(x => x.Sku).Matches("^[A-Z]{3}-[0-9]{4}$"); }}You register all your validators with one line in Program.cs.
builder.Services.AddValidatorsFromAssemblyContaining<Program>();After that, you can inject the validator into your endpoint and call it before you do any work.
group.MapPost("/", async (    CreateProductRequest request,    IValidator<CreateProductRequest> validator,    AppDbContext db,    ProductMapper mapper,    CancellationToken ct) =>{    var validation = await validator.ValidateAsync(request, ct);    if (!validation.IsValid)    {        return Results.ValidationProblem(validation.ToDictionary());    }
    // create and save the product});
When the request is invalid, Results.ValidationProblem returns a 400 response in the standard ProblemDetails format, with one entry for each failed rule.
{ "title": "One or more validation errors occurred.", "status": 400, "errors": { "Name": ["'Name' must not be empty."], "Price": ["'Price' must be greater than '0'."], "Sku": ["'Sku' is not in the correct format."] }}There are two things I want you to remember here. The first is that FluentValidation and FluentAssertions are two different packages from two different teams. FluentAssertions is the one that became commercial, and FluentValidation is still free under Apache 2.0. I see these two getting mixed up very often because the names are so similar.
The second thing is that you only need the two packages above. Many older tutorials install FluentValidation.AspNetCore, and the FluentValidation documentation now says that this package is no longer supported, so I would leave it out of new projects.
FluentValidation in ASP.NET Core .NET 10 - Beyond Data Annotations
Async rules, rules that depend on other properties, and returning ProblemDetails when validation fails.
3. Mapperly for Object Mapping
For years, AutoMapper was the default choice for mapping an entity to a DTO. AutoMapper now needs a paid license for many companies, so for new projects I recommend Mapperly instead.
dotnet add package Riok.Mapperly --version 4.3.1[Mapper]public partial class ProductMapper{ [MapperIgnoreSource(nameof(Product.CreatedAt))] public partial ProductDto ToDto(Product product);}This is all the code you write. Mapperly is a source generator, which means it writes the actual mapping code for you when the project builds. Since there is no reflection at runtime, it is fast, and you can open the generated file and read exactly how each property is mapped. The generated mapper has no state, so I register it once as a singleton with builder.Services.AddSingleton<ProductMapper>() and inject it wherever it is needed.
One thing worth knowing is that Mapperly tells you at build time about every property that it could not map. In the sample, the Product entity has a CreatedAt property that the DTO does not have. Without the MapperIgnoreSource attribute, the build shows this warning.
warning RMG020: The member CreatedAt on the mapping source type Api.Products.Productis not mapped to any member on the mapping target type Api.Products.ProductDtoI like this behavior, because the build also reports it when you add a property to the DTO and forget to map it (RMG012), and it is much better to see that during the build than in production.
I would also say that if your mapping is only four or five properties, a small method that you write by hand is perfectly fine. I bring in Mapperly when the mapping code starts to repeat across many classes. Mapperly is free under Apache 2.0. I have compared the options with benchmarks in the AutoMapper vs Mapster vs manual mapping article.
4. EF Core and Dapper for Data Access
For data access, I have two packages that work together, which are EF Core and Dapper.
EF Core is the default choice for data access in .NET, and it is what I use for most of my APIs. It comes from Microsoft under the MIT license. You work with your tables as C# classes, you write your queries in LINQ, and it manages the database schema for you through migrations. The sample uses PostgreSQL, and there are providers for SQL Server and most other databases as well.
dotnet add package Npgsql.EntityFrameworkCore.PostgreSQL --version 10.0.3dotnet add package Microsoft.EntityFrameworkCore.Relational --version 10.0.12dotnet add package Microsoft.EntityFrameworkCore.Design --version 10.0.12dotnet add package Dapper --version 2.1.89The Design package is needed only for the dotnet ef migration commands. I have added the Relational package explicitly so that every project in the solution uses the same EF Core version, and the Troubleshooting section explains what happens when you leave it out.
builder.Services.AddDbContext<AppDbContext>((services, options) => options.UseNpgsql(services.GetRequiredService<IConfiguration>().GetConnectionString("shopdb")));This registers the DbContext with PostgreSQL and reads the connection string named shopdb from the configuration. Saving a new product then takes two lines.
db.Products.Add(product);await db.SaveChangesAsync(ct);EF Core keeps track of the changes that you make and generates the SQL when you call SaveChangesAsync. To create the tables, you add a migration with dotnet ef migrations add InitialCreate, and the sample applies it at startup with db.Database.MigrateAsync() when it runs in the Development environment.
For most of your endpoints, EF Core is all you need. But in most projects, there are a few read-heavy endpoints, like reports and dashboards, where you already know the exact SQL that you want to run. For those, I use Dapper.
group.MapGet("/summary", async (string status, AppDbContext db, CancellationToken ct) =>{    var connection = db.Database.GetDbConnection();
    var rows = await connection.QueryAsync<OrderSummary>(new CommandDefinition(        """SELECT "Id", "Total", "Status" FROM "Orders" WHERE "Status" = @status""",        new { status },        cancellationToken: ct));
    return Results.Ok(rows);});
You write the SQL yourself, and Dapper maps each row of the result to your class. The status value is passed as a parameter, so the query is safe from SQL injection. I am also taking the connection from the DbContext here, which means that Dapper and EF Core share the same connection and you do not have to register a second one.
One thing worth knowing if you use PostgreSQL is that EF Core creates the tables and columns with the exact casing of your C# names, like "Orders" and "Total". PostgreSQL converts any name that is not inside double quotes to lower case, so the names in your Dapper SQL have to be quoted as shown above.
I would not build a whole application only on Dapper, because you would end up writing migrations and change tracking by hand. EF Core for the writes and most of the reads, and Dapper for the few queries that need raw SQL, is a combination that works well. EF Core is free under MIT, and Dapper is free under Apache 2.0.
10 EF Core Performance Mistakes (and How to Fix Them) in .NET 10
Check these before you decide that EF Core is too slow for an endpoint and move it to raw SQL.
5. Scalar for API Documentation
If you create a new Web API project today, you will notice that Swagger UI is no longer included in the template. .NET now generates the OpenAPI document on its own, and you only need a UI to display it. Scalar is the UI that I use for this.
dotnet add package Microsoft.AspNetCore.OpenApi --version 10.0.12dotnet add package Scalar.AspNetCore --version 2.17.13builder.Services.AddOpenApi();
if (app.Environment.IsDevelopment()){ app.MapOpenApi(); app.MapScalarApiReference();}The AddOpenApi and MapOpenApi lines come from the framework and produce the OpenAPI document. The MapScalarApiReference line is from Scalar. Once you run the API, open /scalar in the browser, and you get a clean page where you can browse your endpoints, send test requests, and copy ready-made client code in several languages.
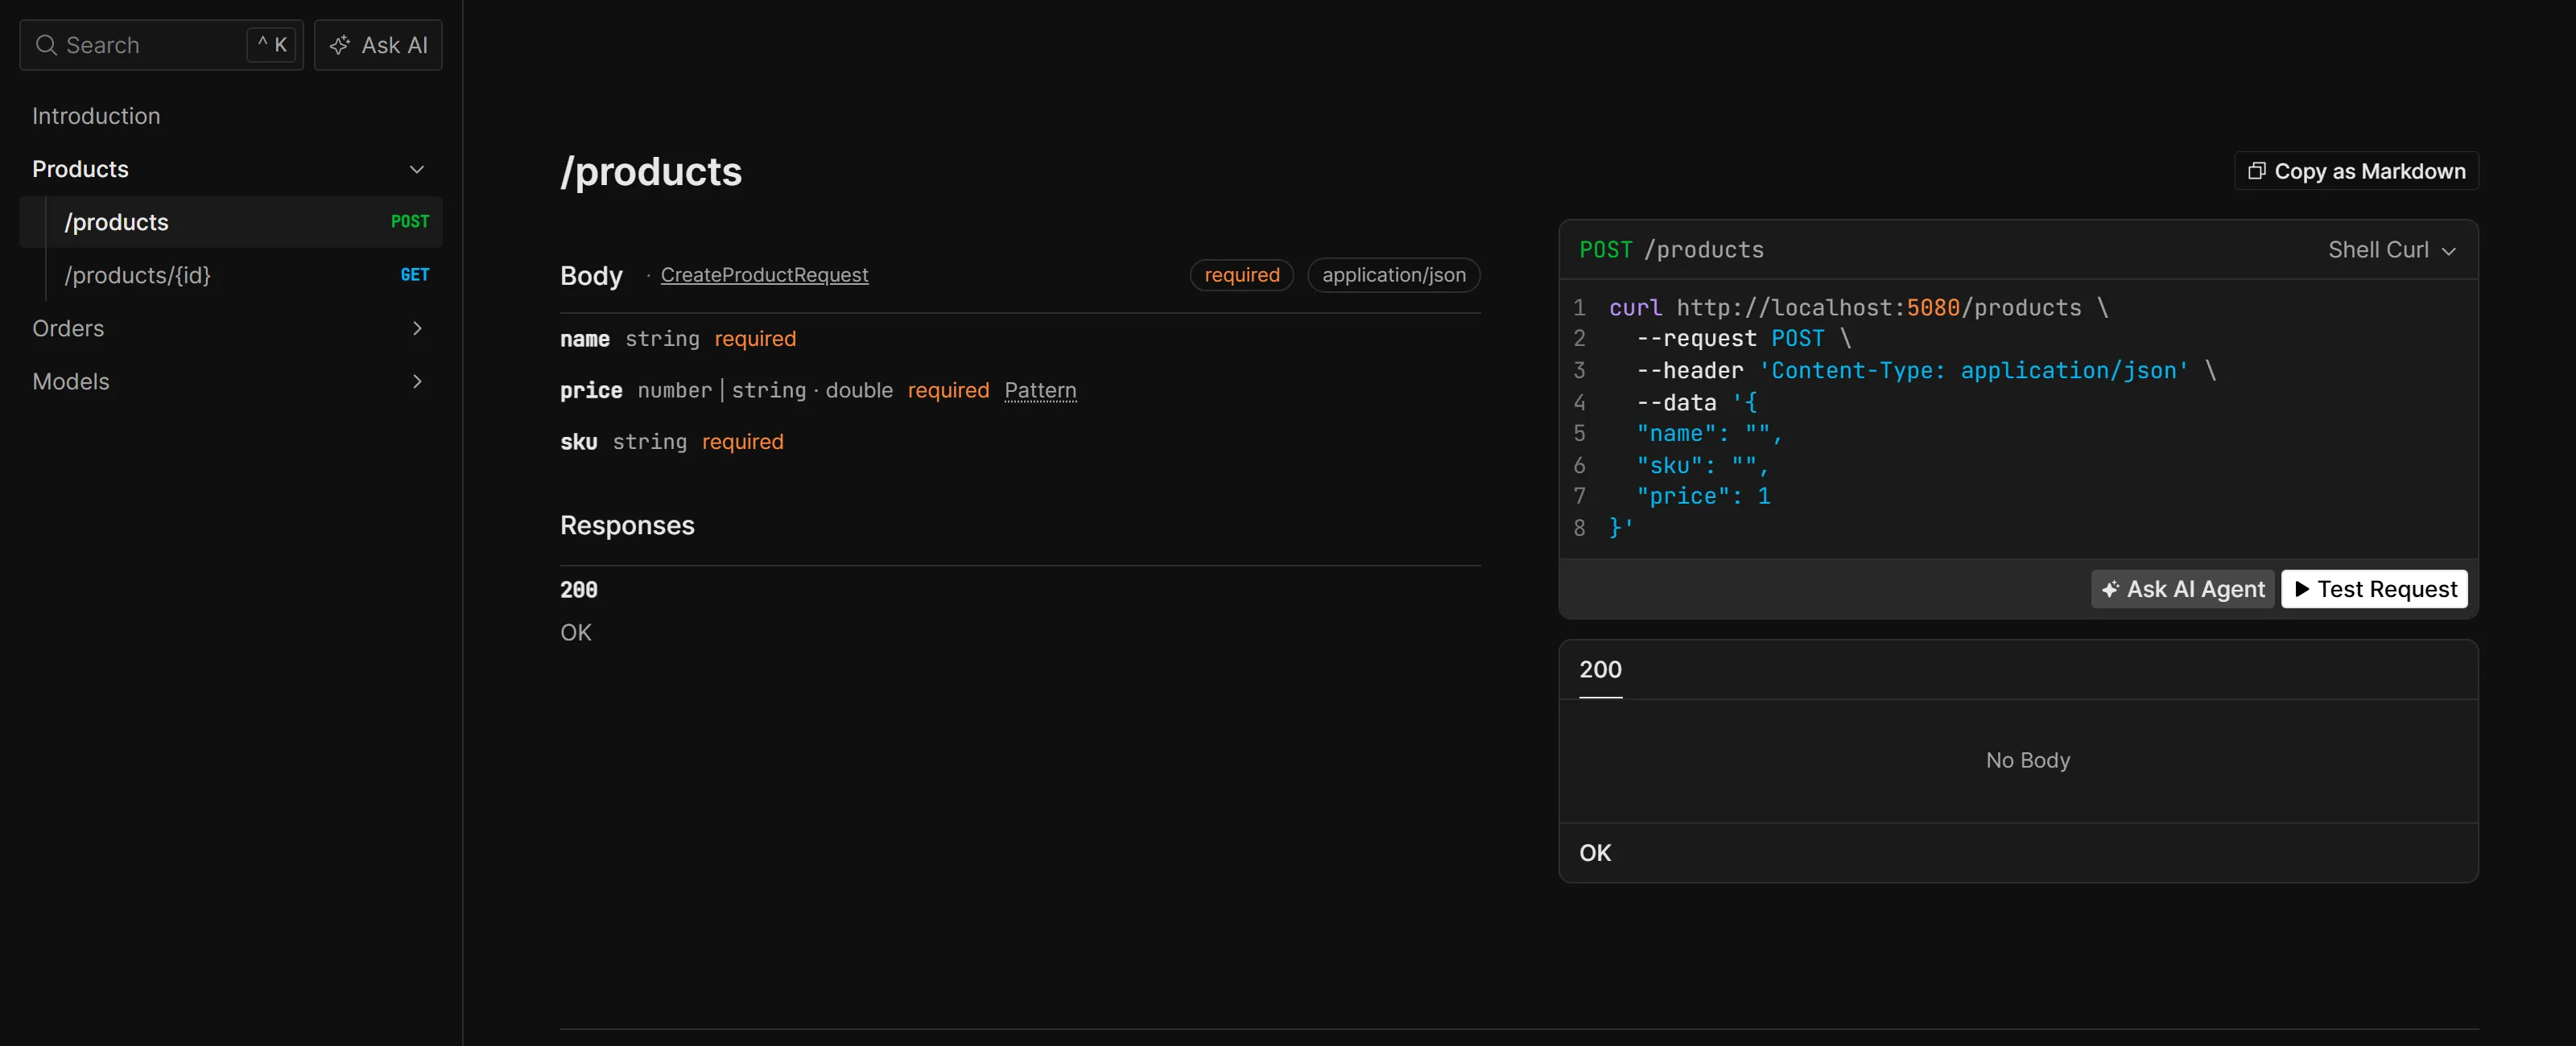
I have kept both endpoints inside the Development check, so that the documentation of your API is not open to everyone in production. Scalar is free under the MIT license.
ASP.NET Core Dropped Swagger - Here's What Replaced It in .NET 10
Why Swashbuckle was removed from the templates, how the built-in OpenAPI document works, and how to set up Scalar.
6. HybridCache for Caching
HybridCache is Microsoft’s own caching library. Earlier, you had to choose between the in-memory cache and a distributed cache like Redis, and write the cache-aside logic by hand for each one. HybridCache gives you both behind one simple API.
dotnet add package Microsoft.Extensions.Caching.Hybrid --version 10.10.0builder.Services.AddHybridCache();var product = await cache.GetOrCreateAsync( $"product:{id}", async token => { var entity = await db.Products .AsNoTracking() .FirstOrDefaultAsync(p => p.Id == id, token);
return entity is null ? null : mapper.ToDto(entity); }, cancellationToken: ct);GetOrCreateAsync first checks the cache for this key. If the value is there, it returns it, and if it is missing, it runs your database query, stores the result and then returns it. This is the request log of the sample API when I read the same product twice. The first request also includes the warm-up of the first database query, so please look at the second line, where the request no longer goes to the database.
[18:35:11 INF] HTTP GET /products/01a101de-57c0-7aae-abaa-9bd98a0da122 responded 200 in 283.1586 ms[18:35:11 INF] HTTP GET /products/01a101de-57c0-7aae-abaa-9bd98a0da122 responded 200 in 0.4118 msThere is one more benefit that is easy to miss. If 100 requests ask for the same product at the same moment and the cache is empty, HybridCache runs the database query only once, and all 100 requests wait for that one result. The HybridCache documentation describes this as stampede protection. With the older approach, each of those requests would have gone to the database.
When you add Redis later, the same code keeps working, and Redis becomes the second level of the cache. You only install one more package and register it.
dotnet add package Microsoft.Extensions.Caching.StackExchangeRedis --version 10.0.12var redis = builder.Configuration.GetConnectionString("cache");if (!string.IsNullOrWhiteSpace(redis)){ builder.Services.AddStackExchangeRedisCache(options => options.Configuration = redis);}One thing worth knowing is that HybridCache also stores the result when your query returns null. In the sample, I requested a product ID that does not exist, and Redis had a key for that ID as well. This is useful, because repeated requests for a missing record do not reach the database. But it also means that you should call cache.RemoveAsync($"product:{id}") whenever you create, update or delete that record. HybridCache is free under MIT.
HybridCache in ASP.NET Core .NET 10 - Complete Guide
Expiration options, tags, invalidation and the Redis setup in detail.
7. Quartz.NET for Scheduled Jobs
Quartz.NET is for background jobs that run on a schedule. Think of a report that has to be generated every night, or a cleanup task that runs every hour.
dotnet add package Quartz.Extensions.Hosting --version 4.3.0You write the job as a class.
public class NightlyReportJob(AppDbContext db, ILogger<NightlyReportJob> logger) : IJob{    public async ValueTask Execute(IJobExecutionContext context, CancellationToken ct)    {        var since = DateTime.UtcNow.AddDays(-1);
        var orders = await db.Orders.CountAsync(o => o.CreatedAt >= since, ct);        var revenue = await db.Orders            .Where(o => o.CreatedAt >= since)            .SumAsync(o => o.Total, ct);
        logger.LogInformation(            "Nightly report: {OrderCount} orders worth {Revenue} in the last 24 hours",            orders,            revenue);    }}
And then you register it along with a schedule.
builder.Services.AddQuartz(q =>{ var jobKey = new JobKey("nightly-report"); q.AddJob<NightlyReportJob>(o => o.WithIdentity(jobKey)); q.AddTrigger(t => t .ForJob(jobKey) .WithCronSchedule(builder.Configuration["Jobs:NightlyReportCron"] ?? "0 0 2 * * ?"));});builder.Services.AddQuartzHostedService(o => o.WaitForJobsToComplete = true);The cron expression 0 0 2 * * ? means 2 AM every day. I read it from the configuration, so that I can change the schedule for each environment without a new build. The job takes the AppDbContext in its constructor, and Quartz creates the job from dependency injection for every run, so this works without any extra code. Quartz can also store its jobs in a database, so that the schedule survives a restart, and only one instance runs the job when you have several servers.
One thing worth knowing is that the Execute method in Quartz 4 returns a ValueTask and takes a CancellationToken. Most tutorials still show the older Task Execute(IJobExecutionContext context) signature, and that does not compile on version 4.
You might be wondering why Hangfire is missing from this spot. I will explain that in the section on the packages I left out. If your background work does not need a schedule at all, the built-in BackgroundService is enough, and I have covered it in the IHostedService vs BackgroundService article. Quartz.NET is free under Apache 2.0.
8. Mediator for Command and Query Handlers
For years, MediatR was the package that most of us used to send commands and queries to their handlers, and it was part of almost every Clean Architecture template. MediatR now needs a paid license for many companies, so I recommend the Mediator library in its place. Please note that this is a different package from a different author, even though the names are very close.
dotnet add package Mediator.Abstractions --version 3.0.2dotnet add package Mediator.SourceGenerator --version 3.0.2public record CreateOrder(Guid ProductId, int Quantity) : IRequest<OrderCreated>;
public record OrderCreated(Guid OrderId, decimal Total);
public class CreateOrderHandler(AppDbContext db, OrderCalculator calculator) : IRequestHandler<CreateOrder, OrderCreated>{ public async ValueTask<OrderCreated> Handle(CreateOrder request, CancellationToken ct) { var total = await calculator.TotalAsync(request.ProductId, request.Quantity, ct);
var order = new Order { Id = Guid.CreateVersion7(), ProductId = request.ProductId, Quantity = request.Quantity, Total = total, Status = "Pending", CreatedAt = DateTime.UtcNow };
db.Orders.Add(order); await db.SaveChangesAsync(ct);
return new OrderCreated(order.Id, order.Total); }}If you have used MediatR before, this will look very familiar. You have a request, and a handler that implements IRequestHandler for that request. The one difference you will notice is that the handler returns a ValueTask.
builder.Services.AddMediator(options => options.ServiceLifetime = ServiceLifetime.Scoped);var created = await mediator.Send(command, ct);You register it with one line, and you send the command from your endpoint the same way as before.
What I like about this library is that it uses a source generator. The code that connects each request to its handler is generated when your project builds, so there is no reflection at runtime, and you can open the generated code and read it. It also means that if a request has no handler, you find out at build time through the MSG0005 warning.
One thing worth knowing is that the default lifetime in Mediator is Singleton, because that gives the best performance. A handler that uses a DbContext cannot be a singleton, since the DbContext is a scoped service, and that is the reason for the ServiceLifetime.Scoped option above.
There is also a second option here, which is to write the handlers yourself without any library. For a lot of APIs, a plain handler class that you register in dependency injection and call from your endpoint is all you need. Mediator is free under the MIT license.
Build Your Own CQRS Dispatcher in .NET 10 (No MediatR)
Commands, queries and pipeline behaviors with plain classes, built from scratch without any library.
9. OpenTelemetry for Traces and Metrics
Logs tell you what happened inside one service. But when a request is slow, you usually want to know where the time went. Was it the database, or the call to another API? Traces and metrics answer that question, and OpenTelemetry is the standard way to collect them.
dotnet add package OpenTelemetry.Extensions.Hosting --version 1.19.1dotnet add package OpenTelemetry.Exporter.OpenTelemetryProtocol --version 1.19.1dotnet add package OpenTelemetry.Instrumentation.AspNetCore --version 1.19.0dotnet add package OpenTelemetry.Instrumentation.Http --version 1.19.0builder.Services.AddOpenTelemetry() .WithTracing(t => t .AddAspNetCoreInstrumentation() .AddHttpClientInstrumentation() .AddSource("Npgsql")) .WithMetrics(m => m.AddAspNetCoreInstrumentation()) .UseOtlpExporter();With this code, every incoming request and every outgoing HTTP call is traced automatically. The AddSource("Npgsql") line adds the PostgreSQL queries to the same trace, because the Npgsql driver already publishes its own trace data under that name. The data is then exported using a protocol called OTLP, to the address in the OTEL_EXPORTER_OTLP_ENDPOINT environment variable. Aspire sets this variable for you in package 12, and that is where you will see the traces.
The reason I like this one for the long term is that OpenTelemetry is an open standard that almost every monitoring tool supports, like Grafana, Jaeger, Datadog and the Aspire dashboard. So if your company changes its monitoring tool in the future, this code stays the same and you only change where the data is sent. The OpenTelemetry packages are free under Apache 2.0.
10. xUnit v3 for Unit Tests
The next two packages are for testing, and the first one is xUnit, which is the test framework itself. If you are starting a new test project, use the v3 package. I pair it with NSubstitute for mocking.
dotnet add package xunit.v3 --version 4.0.1dotnet add package NSubstitute --version 6.2.0public class OrderCalculatorTests{ [Fact] public async Task Total_multiplies_price_by_quantity() { var ct = TestContext.Current.CancellationToken;
var prices = Substitute.For<IPriceService>(); prices.GetPriceAsync(Arg.Any<Guid>(), Arg.Any<CancellationToken>()).Returns(25m);
var total = await new OrderCalculator(prices).TotalAsync(Guid.NewGuid(), 4, ct);
Assert.Equal(100m, total); }}A test is a method with the Fact attribute. In the first lines of this test, I am creating a fake price service that always returns 25. That part comes from NSubstitute, which is free under the BSD license, and I find its syntax easy to read. The TestContext.Current.CancellationToken is new in xUnit v3, and it cancels your test when the test run is stopped.
There are three things worth knowing when you set up a v3 test project by hand on the .NET 10 SDK.
- The test project needs
<OutputType>Exe</OutputType>in its.csprojfile, because a v3 test project is an executable. - Add
<Using Include="Xunit" />to anItemGroupin the.csprojfile, so thatFactandAssertare available in every test file. - Add a
global.jsonfile next to your solution file with the content below, becausedotnet teston the .NET 10 SDK needs to be told to use the new test runner. Without this file, the command fails, and I have included the exact error in the Troubleshooting section.
{ "test": { "runner": "Microsoft.Testing.Platform" }}xUnit itself is free under Apache 2.0.
11. Testcontainers for Integration Tests
A lot of teams test their data access code against the EF Core in-memory provider. The trouble is that the in-memory provider does not behave like a real database. A query can pass in the test and still fail on PostgreSQL or SQL Server. Testcontainers solves this by starting a real database inside a Docker container for your tests.
dotnet add package Testcontainers.PostgreSql --version 4.15.0dotnet add package Microsoft.AspNetCore.Mvc.Testing --version 10.0.12public class ApiFixture : WebApplicationFactory<Program>, IAsyncLifetime{ private readonly PostgreSqlContainer _postgres = new PostgreSqlBuilder("postgres:17").Build();
public async ValueTask InitializeAsync() => await _postgres.StartAsync();
protected override void ConfigureWebHost(IWebHostBuilder builder) => builder.UseSetting("ConnectionStrings:shopdb", _postgres.GetConnectionString());
public override async ValueTask DisposeAsync() { await base.DisposeAsync(); await _postgres.DisposeAsync(); }}When the tests start, this fixture pulls the PostgreSQL image and starts a container. WebApplicationFactory then runs the whole API in memory, and the UseSetting line points its shopdb connection string to the container. The container is removed when the tests finish. The only thing you need on your machine or your build server is Docker.
public class ProductApiTests(ApiFixture fixture) : IClassFixture<ApiFixture>{    [Fact]    public async Task Created_product_can_be_read_back()    {        var ct = TestContext.Current.CancellationToken;        var client = fixture.CreateClient();
        var response = await client.PostAsJsonAsync(            "/products",            new CreateProductRequest("Mechanical Keyboard", "KEY-1001", 89.99m),            ct);
        Assert.Equal(HttpStatusCode.Created, response.StatusCode);
        var created = await response.Content.ReadFromJsonAsync<ProductDto>(ct);        var fetched = await client.GetFromJsonAsync<ProductDto>($"/products/{created!.Id}", ct);
        Assert.Equal(created, fetched);    }}
This test sends a real HTTP request to the API, which validates it with FluentValidation, saves it with EF Core to a real PostgreSQL database, and reads it back through HybridCache. In the sample project, dotnet test runs the unit test and the integration tests together in a few seconds once the PostgreSQL image is on the machine. Testcontainers is free under MIT.
12. Aspire for Running Everything Locally
Most APIs need a few other things to run, like a database, a cache, and maybe a second service. Usually, you would write a Docker Compose file for these, and then copy the connection strings into your settings by hand. With Aspire, you describe all of this in C#, in a small project called the AppHost. This is the complete .csproj file of the AppHost in the sample.
<Project Sdk="Aspire.AppHost.Sdk/13.6.0">
  <PropertyGroup>    <OutputType>Exe</OutputType>    <TargetFramework>net10.0</TargetFramework>    <Nullable>enable</Nullable>    <ImplicitUsings>enable</ImplicitUsings>  </PropertyGroup>
  <ItemGroup>    <PackageReference Include="Aspire.Hosting.PostgreSQL" Version="13.6.0" />    <PackageReference Include="Aspire.Hosting.Redis" Version="13.6.0" />  </ItemGroup>
  <ItemGroup>    <ProjectReference Include="..\Api\Api.csproj" />  </ItemGroup>
</Project>
And this is the AppHost.cs file.
var builder = DistributedApplication.CreateBuilder(args);
var database = builder.AddPostgres("postgres").AddDatabase("shopdb");var cache = builder.AddRedis("cache");
builder.AddProject<Projects.Api>("api")    .WithReference(database)    .WithReference(cache)    .WaitFor(database);
builder.Build().Run();
Here I am adding a PostgreSQL database and a Redis cache, and then my API project with a reference to both of them. The names shopdb and cache are the same connection string names that the API reads in packages 4 and 6. When you run the AppHost, Aspire starts the containers, waits for the database to be ready, starts your API, and passes the connection strings to it.
dotnet run --project src/AppHostSo a new developer on your team can clone the repository and run the whole system with one command. You also get a dashboard along with it, and its link is printed in the console when the AppHost starts.
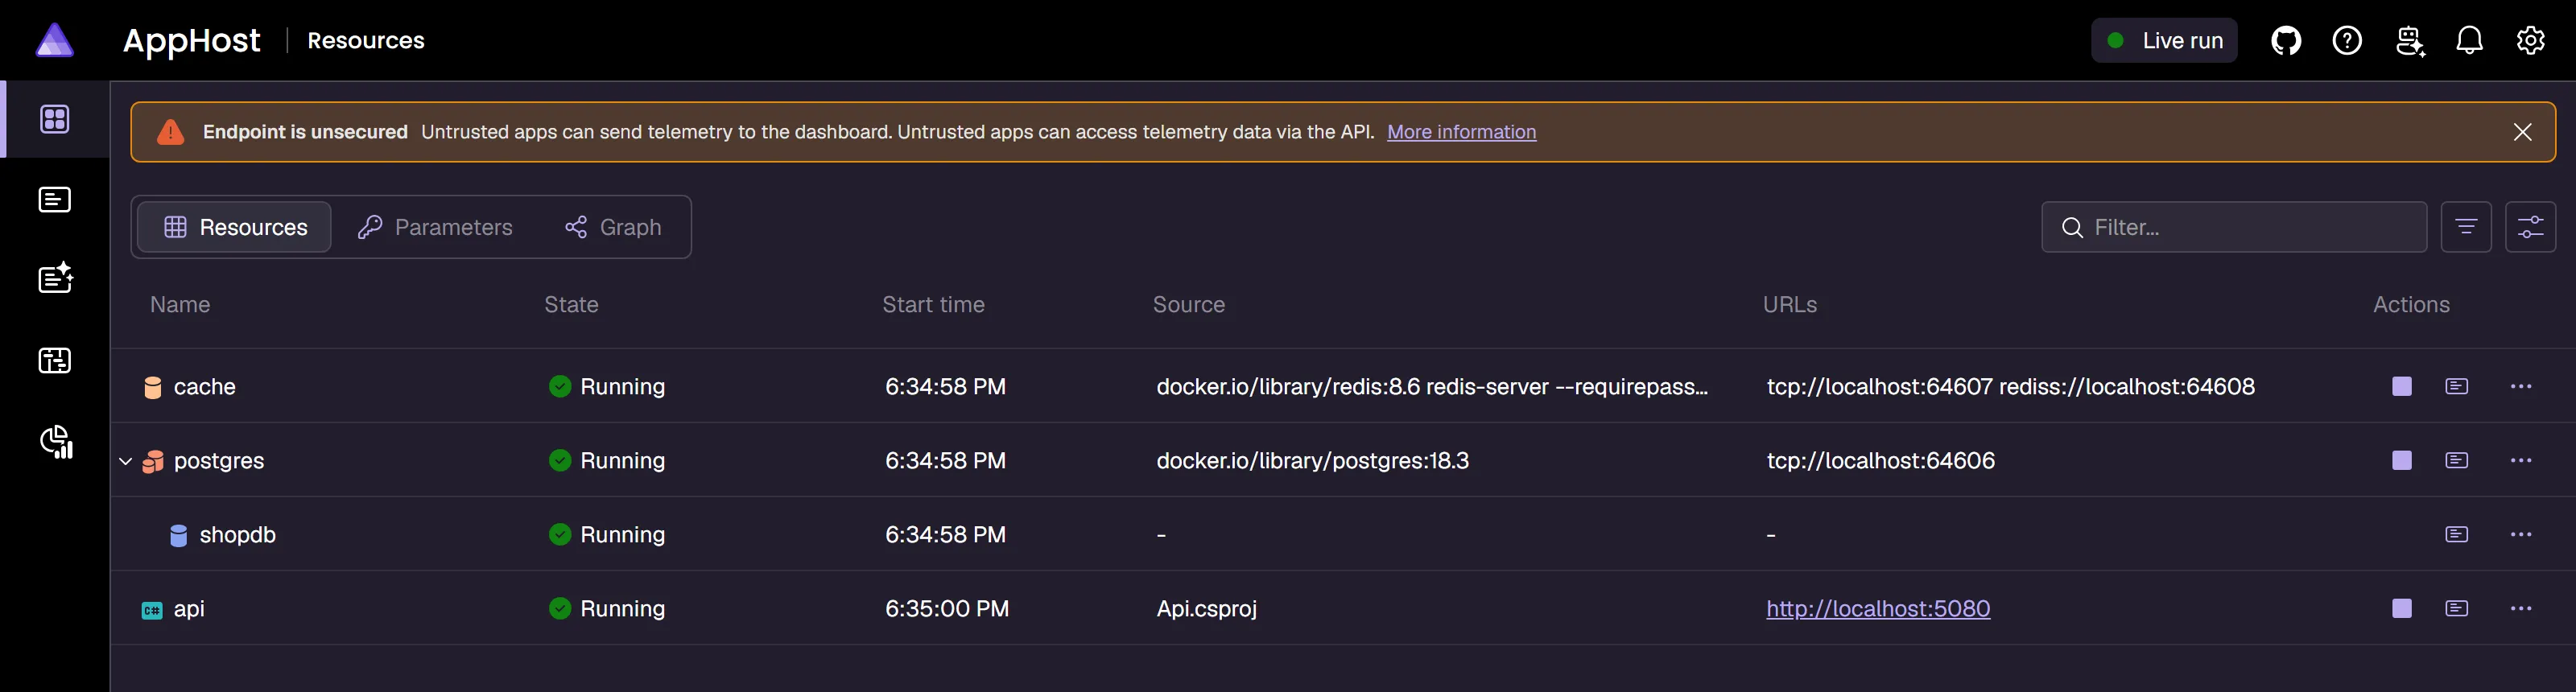
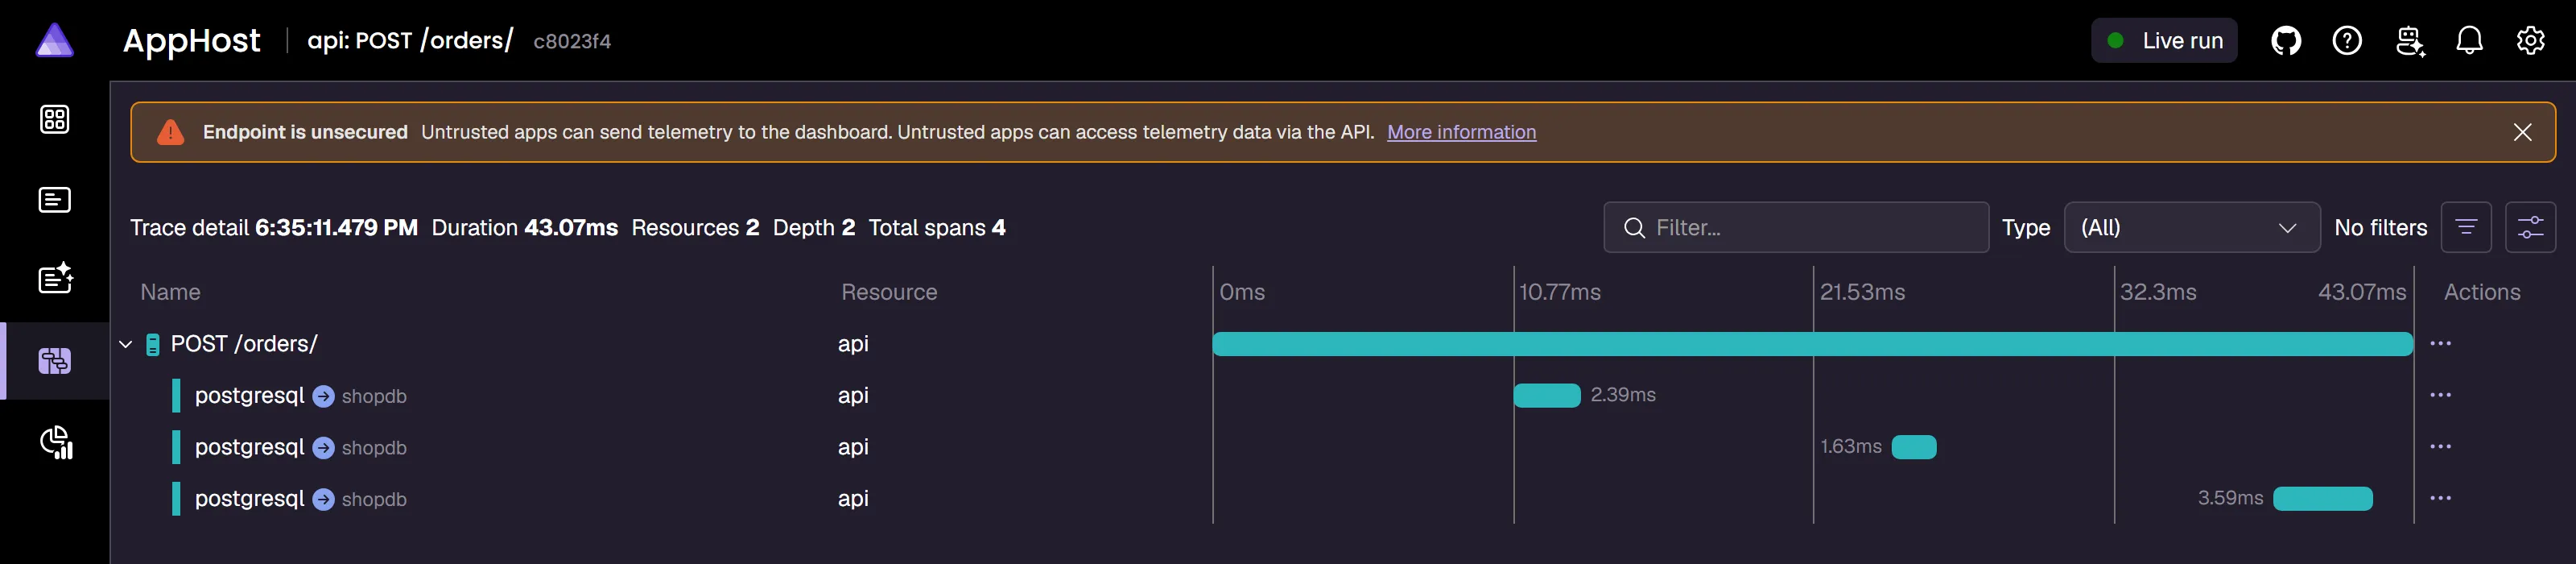
The traces that I set up with OpenTelemetry in package 9 show up in this dashboard without any extra work. This is the trace of one POST /orders request from the sample, and you can see the three PostgreSQL queries that ran inside it along with the time each one took.
One thing worth knowing is that the Serilog output of the API appears under the Console tab of the dashboard. The Structured logs tab stays empty with this setup, because Serilog has replaced the default logging providers, as I mentioned in package 1. Aspire comes from Microsoft, and it is free under the MIT license.
.NET Aspire Tutorial - Build Cloud-Ready Apps with .NET 10 and PostgreSQL
Service defaults, service discovery, health checks and the dashboard in detail.
Bonus: Two Free Tools That I Built
These two are a little different from the 12 packages above. Both are .NET tools that you install on your machine, so they never become a dependency of your project. I also built both of them myself, so I am telling you that upfront, and both are free under the MIT license.
CWM.RoslynNavigator for AI Coding Assistants
If you use an AI coding assistant like Claude Code on a .NET project, you might have noticed that it finds its way around your code by opening and reading files. On a large solution, that is slow, and it uses up a lot of tokens.
CWM.RoslynNavigator is an MCP (Model Context Protocol) server that lets the assistant ask the C# compiler directly, through Roslyn. So instead of reading ten files to find where a method is used, the assistant asks for the references of that method and gets back a short and exact answer.
dotnet tool install -g CWM.RoslynNavigatorYou install it once as a global tool. It can find symbols and their references, show the implementations of an interface, list your endpoints and your dependency injection registrations, and point out dead code. All of its tools are read-only, so it never changes your code. It is part of my dotnet-claude-kit, and inside a Claude Code session you can add the kit with these two commands.
/plugin marketplace add codewithmukesh/dotnet-claude-kit/plugin install dotnet-claude-kitHow I Use dotnet-claude-kit for Senior-Level .NET with Claude Code
What the kit contains, how the Roslyn MCP server works, and what a first session looks like.
FullStackHero CLI for Starting a New Project
Adding 12 packages one by one is a good way to learn what each of them does. But when you start a real project, you might prefer to begin with a solution where most of this is already wired up. FullStackHero is my free and open source .NET 10 starter kit, and the fsh command creates a new project from it.
dotnet tool install -g FullStackHero.CLIfsh doctorfsh new MyAppfsh doctor checks that your machine has the .NET 10 SDK, Git and Docker. fsh new MyApp then creates the solution with your project name, and it asks whether you want the Aspire AppHost and the React frontends. You can also skip those questions with fsh new MyApp --no-aspire --no-frontend.
The project that you get already uses many of the packages from this article, including EF Core, FluentValidation, Mediator, HybridCache, Serilog, OpenTelemetry, Scalar, Aspire, xUnit, NSubstitute and Testcontainers. One difference is that the kit uses Hangfire for background jobs, and the next section explains what to check before you use Hangfire at work.
FullStackHero: The Free, Open-Source .NET 10 Starter Kit
The full tour of the kit, including the modules, the stack and the Aspire setup.
The Popular Packages I Left Out
I left out four packages because their license has changed.
| Package | What changed | Last free version | What I use instead |
|---|---|---|---|
| AutoMapper | Commercial from version 15 | 14.0.0 (MIT) | Mapperly, or mapping by hand |
| MediatR | Commercial from version 13 | 12.5.0 (Apache-2.0) | Mediator, or your own handlers |
| MassTransit | Commercial from version 9 | 8.x (Apache-2.0) | Rebus (MIT) |
| FluentAssertions | Commercial from version 8 | 7.x (Apache-2.0) | The xUnit assertions, or AwesomeAssertions (Apache-2.0) |
AutoMapper and MediatR come from the same company, and their commercial editions launched on July 2, 2025. They are still free if your company makes less than 5 million dollars a year, but above that you need a paid license. Staying on the last free version is possible for MediatR. For AutoMapper, I would not do that, because version 14.0.0 has a high severity vulnerability that was fixed only in the commercial versions, and the .NET 10 SDK reports it as a NU1903 warning when you restore the package.
MassTransit is commercial from version 9. Version 8 remains under Apache 2.0, so a team that stays on it should check with the maintainers how long version 8 will keep receiving fixes, and plan for what comes after that. If you need a free message bus, Rebus is a mature option under the MIT license.
FluentAssertions is commercial from version 8. In this article, I used the assertions that come with xUnit, and if you prefer the Should style, AwesomeAssertions is a free community fork under Apache 2.0.
To be fair to the maintainers, these are all very good libraries, and paying for them is a reasonable option if your team depends on them. I am only saying that you should know about it before you install them.
There are two more that I left out for a different reason. I use both of them, but their terms need a closer look.
Hangfire is a very good library for background jobs, and it comes with a nice dashboard. Its core package is under the LGPL v3 license, and its advanced features are part of a paid version. LGPL is fine for most teams, but some companies have rules about it, so I picked Quartz.NET to keep this list simple.
The other one is Polly, which is used for retries and circuit breakers. Its license has not changed and it is still BSD-3-Clause. But from November 16, 2026, the Polly project asks organizations that earn at least 20,000 US dollars from a product that uses Polly to pay a maintenance fee of 20 US dollars a month. Individuals, students, nonprofits and smaller organizations do not have to pay anything. Microsoft’s own Microsoft.Extensions.Http.Resilience package also brings in Polly as a dependency, so it is worth reading the announcement even if you never installed Polly yourself.
If you use an AI coding assistant, please also remember that it learned from the older lists, so it will often add AutoMapper or MediatR to a new project. I have written about how to stop that in the AI agent NuGet package guardrails article.
How to Check the License of Any Package Yourself
Licenses can change again in the future, including for the packages on this list. So here is how you can check any package yourself, and it takes about a minute.
First, open the package page on nuget.org. On the right side, under About, you will see the license. If it says MIT, Apache 2.0 or BSD, you are fine for commercial use. If it only links to a license file, open that file and read it, because that is usually where the custom or commercial terms are.
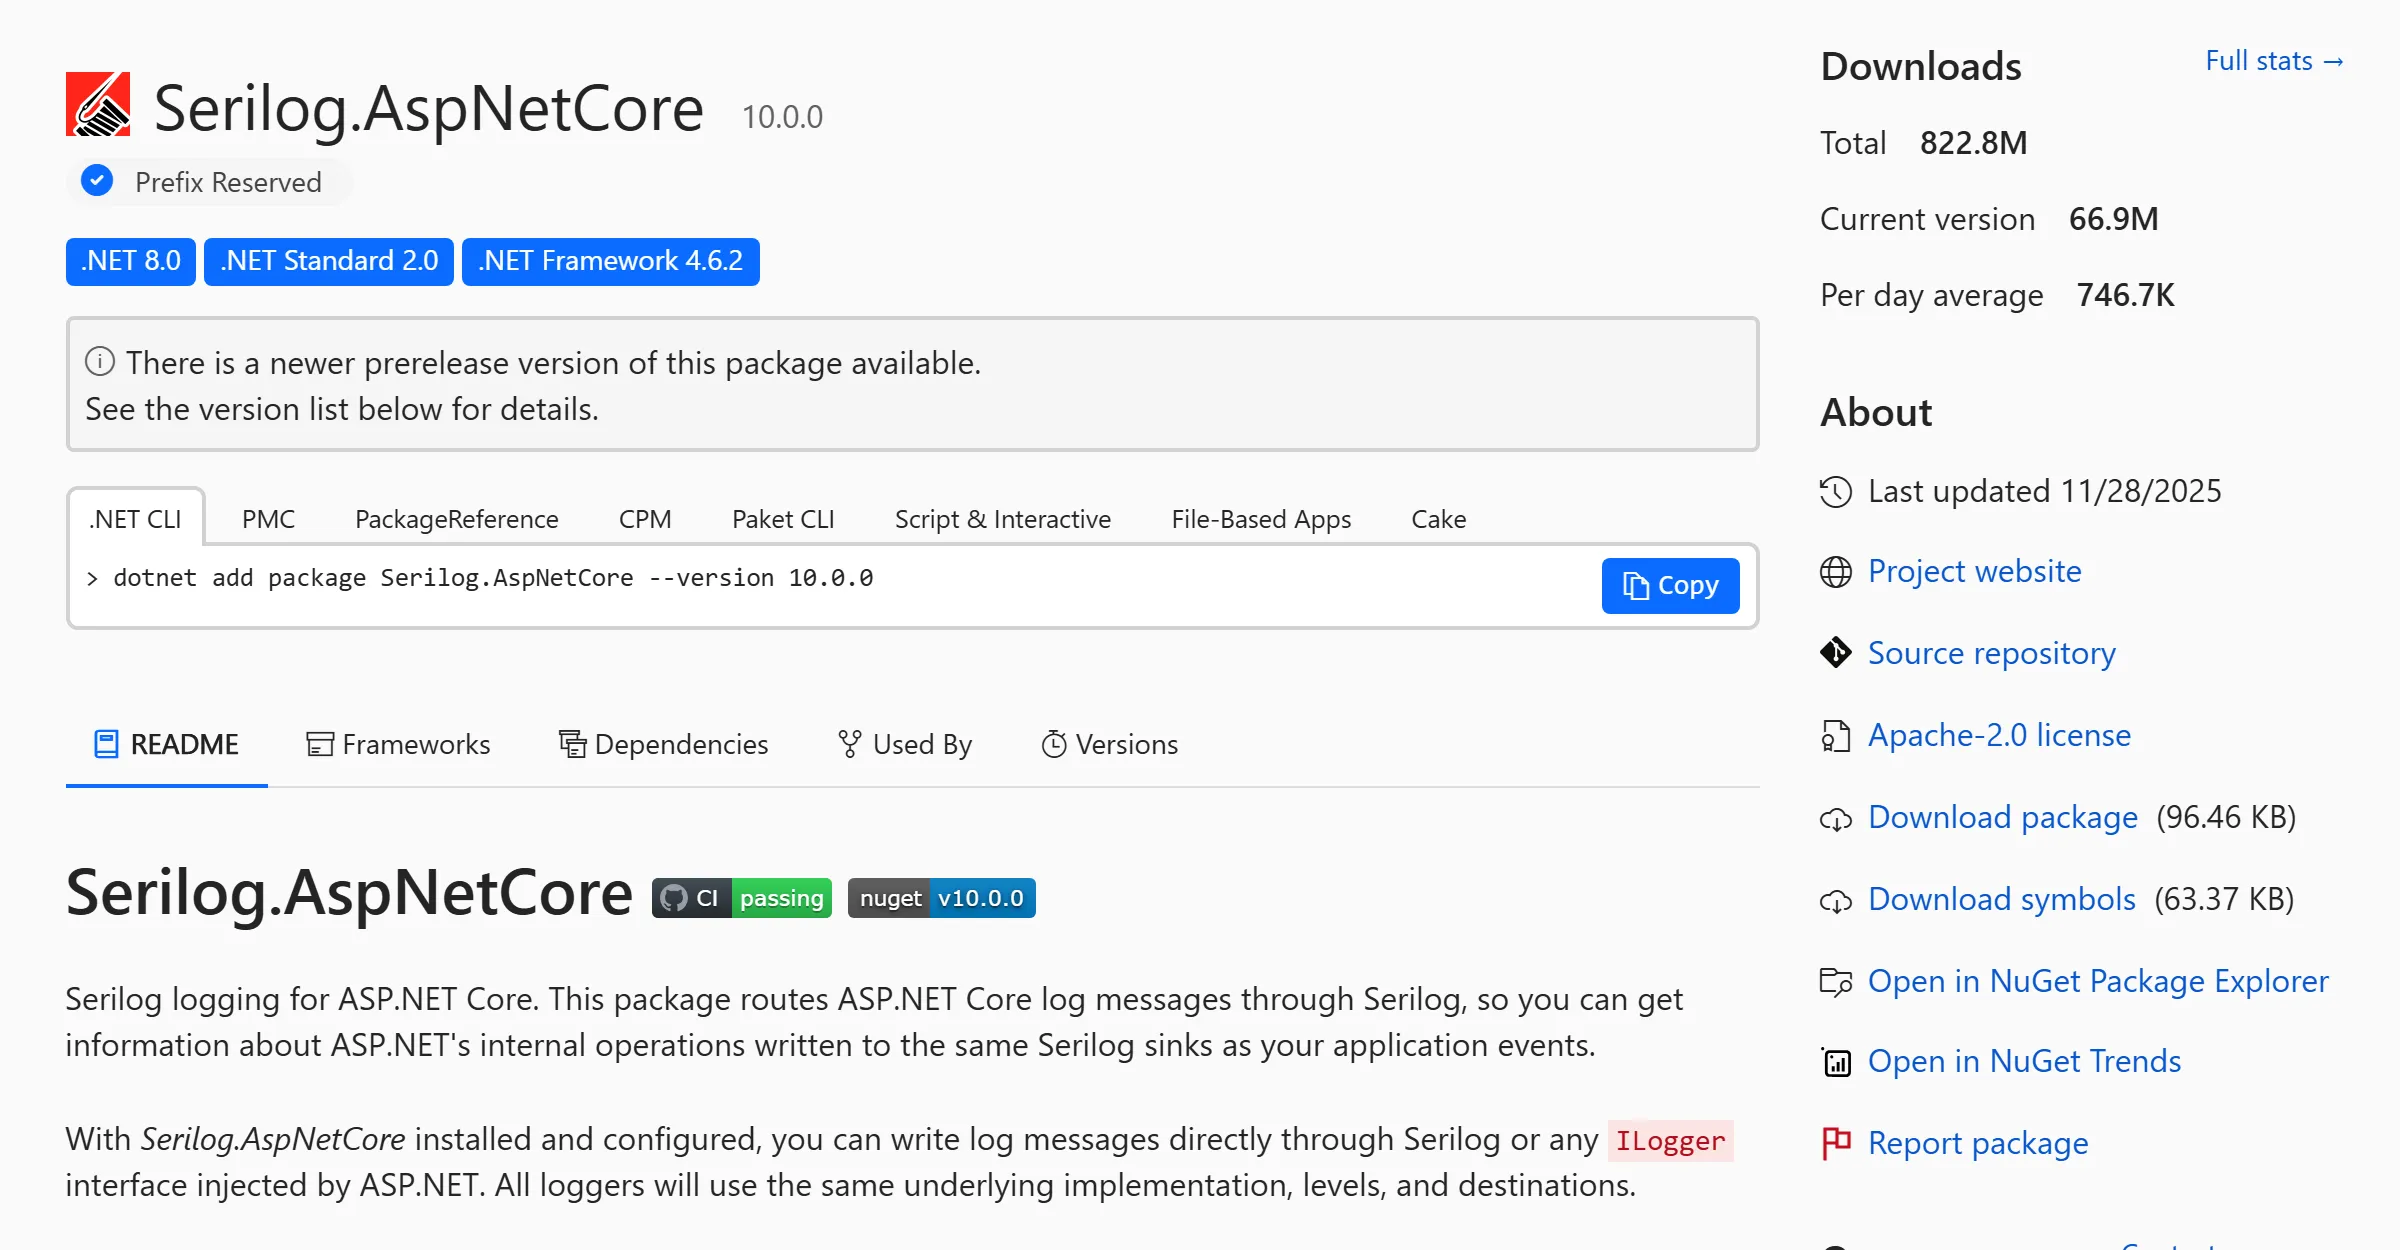
Second, look at this before every major version update. Almost all the changes I talked about in this article came with a new major version. The older versions that you already use stay under their old license.
Third, run this command in your project.
dotnet list package --include-transitiveThis shows the packages you installed, and also the packages that came along with them. A package can reach your project as a dependency of another one, and that is exactly how Polly ends up in many projects. You can also run dotnet list package --vulnerable to see the packages that have a known security issue, which is the same check that NuGet Audit does during a restore.
What to Install First
You do not have to install all 12 on day one. This is the order that I would follow for a new API.
| When | Packages |
|---|---|
| On day one | EF Core with your database provider, Serilog, FluentValidation, Scalar, xUnit v3 with NSubstitute, and Testcontainers |
| When the mapping code starts to repeat | Mapperly |
| When a report or dashboard needs raw SQL | Dapper |
| When the same data is read again and again | HybridCache, and Redis when you run more than one instance |
| When something has to run on a schedule | Quartz.NET |
| When the endpoints get crowded, or you need pipeline behaviors | Mediator, or your own handlers |
| When the API depends on a database, a cache or another service | Aspire for local development |
| Before the API goes to production | OpenTelemetry |
Troubleshooting
These are the problems that I ran into while building the sample project, along with what fixed each one.
dotnet test fails with “Testing with VSTest target is no longer supported by Microsoft.Testing.Platform on .NET 10 SDK and later”. xUnit v3 runs on the new Microsoft Testing Platform. Add the global.json file from package 10 next to your solution file, and run dotnet test again.
'OpenTelemetryBuilder' does not contain a definition for 'UseOtlpExporter' (CS1061). The method lives in the OpenTelemetry namespace. Add using OpenTelemetry; at the top of Program.cs, and make sure that the OpenTelemetry.Exporter.OpenTelemetryProtocol package is installed.
The build shows MSB3277: Found conflicts between different versions of "Microsoft.EntityFrameworkCore". This happened in the test project. The Design package is a private reference, so the test project received an older EF Core version through the PostgreSQL provider. Adding Microsoft.EntityFrameworkCore.Relational 10.0.12 to the API project fixed it.
The build shows RMG020 from Mapperly. A property on the source type has no matching property on the target type. Add [MapperIgnoreSource(nameof(Product.CreatedAt))] to the mapping method if that is what you want.
The AppHost build shows the ASPIRE010 warning. The warning says that the AppHost is not using the Aspire CLI bundle. The AppHost in the sample starts and runs correctly without it, so I suppressed the warning with <NoWarn>$(NoWarn);ASPIRE010</NoWarn> in the .csproj file.
The Quartz job does not compile. Check the signature of the Execute method. In version 4, it is ValueTask Execute(IJobExecutionContext context, CancellationToken ct).
Key Takeaways
- Before you add a package, check whether .NET 10 already does the job. JSON, the OpenAPI document, rate limiting, health checks, dependency injection and simple validation are all built in.
- All 12 packages in this article are free for commercial use, under the MIT, Apache 2.0, BSD or PostgreSQL license, as checked on October 3, 2026.
- AutoMapper, MediatR, MassTransit and FluentAssertions are now commercial. Mapperly, Mediator, Rebus and the xUnit assertions are the free options that I use in their place.
- Start a new API with EF Core, Serilog, FluentValidation, Scalar, xUnit v3 and Testcontainers, and add the other packages when the project needs them.
- Check the license on nuget.org before every major version update, and run
dotnet list package --include-transitiveto see what else came along.
Frequently Asked Questions
What are the best NuGet packages for ASP.NET Core in 2026?
For a .NET 10 Web API, I recommend one package per job: Serilog for logging, FluentValidation for validation, Mapperly for object mapping, EF Core and Dapper for data access, Scalar for API documentation, HybridCache for caching, Quartz.NET for scheduled jobs, Mediator for command and query handlers, OpenTelemetry for traces and metrics, xUnit v3 with NSubstitute for unit tests, Testcontainers for integration tests, and Aspire for running everything locally. All of them are free for commercial use.
Is AutoMapper still free to use?
AutoMapper is commercial from version 15, which was released in 2025. It is still free for companies that make less than 5 million dollars a year, and above that you need a paid license. Version 14.0.0 is the last one under the MIT license, but it has a high severity vulnerability that was fixed only in the commercial versions. For new projects, I use Mapperly, which is free under Apache 2.0, or I write the mapping by hand.
What can I use instead of MediatR?
MediatR is commercial from version 13. The open source Mediator library is a free alternative under the MIT license. It has almost the same request and handler interfaces, and it uses a source generator, so there is no reflection at runtime. You can also write plain handler classes yourself and register them in dependency injection, which is enough for many APIs.
Is FluentValidation still free?
Yes. FluentValidation is free under the Apache 2.0 license. It is often confused with FluentAssertions, which is a different package from a different team and is commercial from version 8. For a new project you need the FluentValidation and FluentValidation.DependencyInjectionExtensions packages. The older FluentValidation.AspNetCore package is no longer supported.
Do I still need Swagger in .NET 10?
No. Swashbuckle was removed from the ASP.NET Core templates in .NET 9, and .NET 10 generates the OpenAPI document on its own through the Microsoft.AspNetCore.OpenApi package. You only need a UI to display that document, and Scalar is a free option under the MIT license.
Should I use EF Core or Dapper?
Use EF Core as the default. It gives you migrations, change tracking and LINQ, and it is enough for most endpoints. Add Dapper for the few read-heavy endpoints, like reports and dashboards, where you already know the exact SQL that you want to run. Both can share the same database connection in one application.
Is Hangfire free for commercial use?
The core Hangfire package is under the LGPL v3 license, which can be used in commercial products, and its advanced features are part of a paid version. Some companies have their own rules about LGPL, so check with your team before you install it. Quartz.NET is an alternative under the Apache 2.0 license.
How do I check the license of a NuGet package?
Open the package page on nuget.org and look at the license in the About panel on the right side. MIT, Apache 2.0 and BSD are fine for commercial use. If the page only links to a license file, open the file and read it, because that is usually where custom or commercial terms are. Repeat this check before every major version update, and run dotnet list package --include-transitive to see the packages that came in as dependencies.
Summary
In this article, I went through 12 NuGet packages for ASP.NET Core on .NET 10, with one package for each job, along with the popular packages that changed their license and the way to check the license of any package yourself.
If you found this helpful, share it with your colleagues, especially if someone on your team is still installing AutoMapper or MediatR in new projects. Is there a package that you would add to this list? Let me know in the comments below.
Happy Coding :)




What's your take?
Push back, share a war story, or ask the obvious question someone else is wondering. I read every comment.