In this article, we will learn to deploy Blazor WebAssembly to AWS Amplify along with CI/CD with GitHub, providing you with a streamlined development workflow. You’ll learn how to set up your Amplify environment, configure hosting and authentication, and leverage Amplify’s robust infrastructure to ensure lightning-fast performance and effortless scalability.
Blazor WebAssembly, a cutting-edge framework from Microsoft, allows you to build interactive and feature-rich web applications using C# and .NET. By combining the power of Blazor with AWS Amplify, a cloud-based development platform, you can seamlessly deploy and manage your Blazor WebAssembly apps with ease. Blazor can be served as both server-side rendered as well as static files. These files can be hosted on static hosting services like AWS Amplify.
Whether you’re a seasoned developer or just starting your web development journey, this guide will equip you with the knowledge and tools to harness the full potential of Blazor WebAssembly and AWS Amplify. Let’s dive in!
This article is sponsored by AWS. Huge thanks for helping me produce more .NET on AWS content!
What is AWS Amplify?
AWS Amplify is a group of existing services of AWS that simplifies the process of building scalable and secure web and mobile applications. It offers a set of tools and services to streamline the entire development workflow, from creating the frontend user interface to managing the backend infrastructure. It allows you to deploy your apps in a fast, secure, and reliable manner in just a couple of clicks along with AWS Content Delivery Network with hundreds of presence points globally, making your application highly available.
In this article, we will specifically focus on Blazor as the front end. If you want me to write about hosting a full-stack .NET app (Blazor + ASP.NET Core WebAPI) on AWS Infrastructure, do let me know in the comments section below.
You can learn more about this AWS Service here: https://aws.amazon.com/amplify/
What we’ll build?
This is what we are going to build and deploy in this article.
- A simple Blazor WebAssembly application running on .NET 7
- Push the code to the GitHub repository.
- Create an AWS Amplify application.
- Host the Static File from Blazor WebAssembly
- Continuous Deployment to AWS Amplify with the built-in CI/CD
In a previous article, we deployed a Blazor WebAssembly to AWS S3! You can read through it here.
You can find the source code of the entire implementation here.
Prerequisites
As always, here are the prerequisites to deploy Blazor WebAssembly to AWS Amplify.
- AWS Account. Even a FREE Tier account is enough.
- .NET 7 SDK Installed.
- Git & CLI Installed.
- GitHub account.
Creating a Sample Blazor WebAssembly App
I will be using Visual Studio as my default IDE for this guide. However, have you tried the new C# DevKit extension for VS Code? It seems pretty neat, except for the licensing part of it!
Anyways, let’s open up our Visual Studio and create a new Blazor WASM Project.
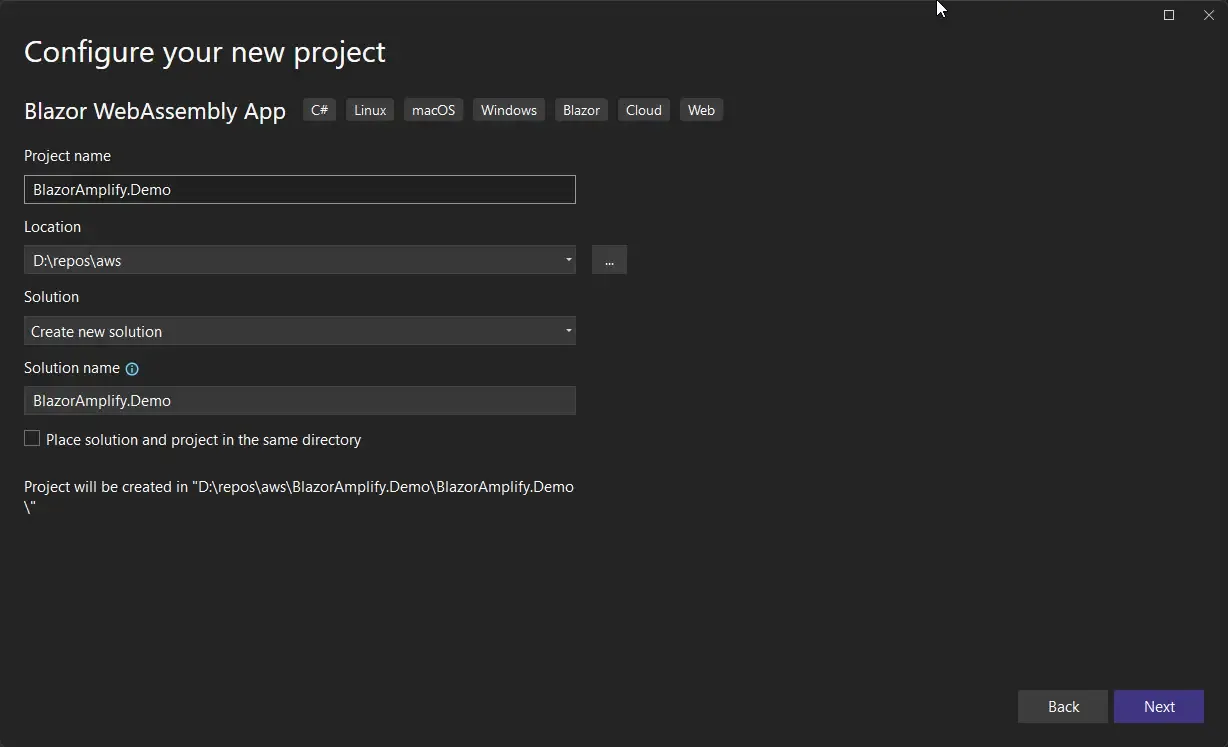
Here, I will be using the .NET 7 SDK. Ensure that you have it installed.
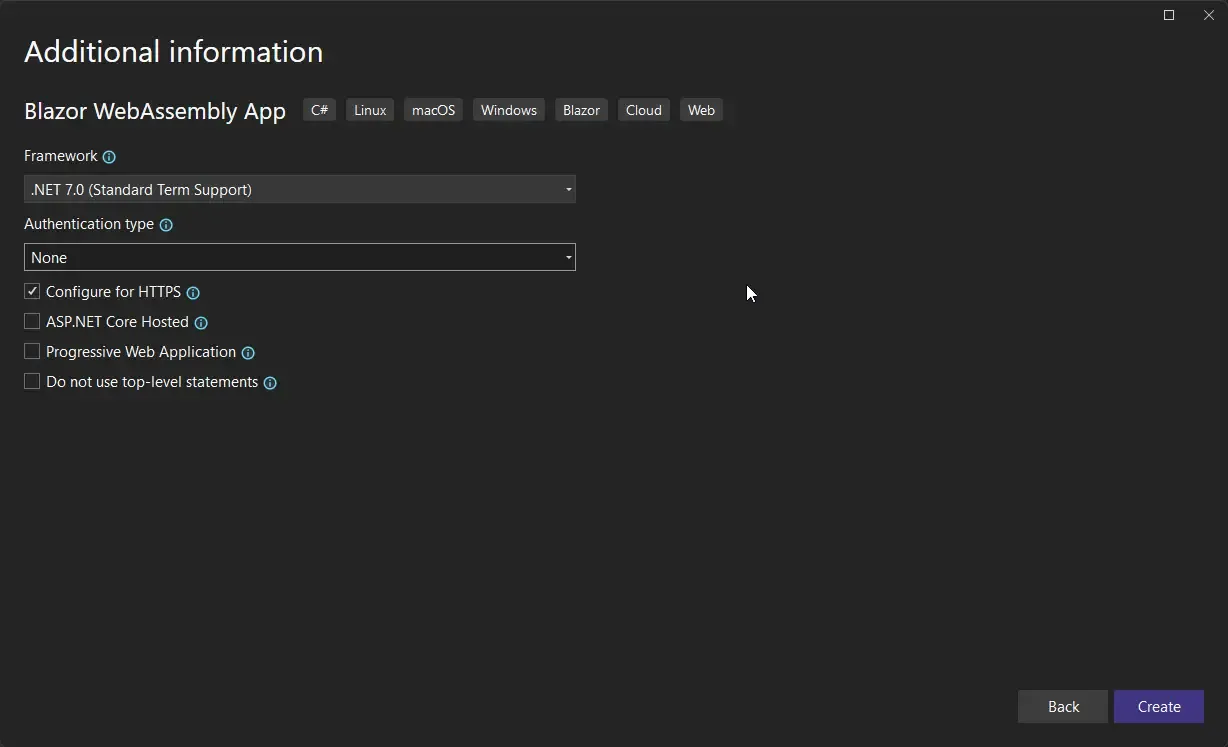
To keep this tutorial simple, I am not going to further customize my Blazor WASM application. In an upcoming article, I plan to write a detailed article where will be building a full-stack application on AWS & .NET with the following.
- Blazor WASM as Frontend on AWS Amplify
- ASP.NET Core Web API as Backend hosted on AWS AppRunner
- AWS Lambdas for Serverless Compute
- Amazon API Gateway for bringing together both the Lambda and the API Backend.
- DynamoDB as Database
- AWS Cognito for Security
- AWS CodePipeline & CodeBuild for CI/CD
- AWS S3 for image/file storage
- AWS CDK or Terraform for Infrastructure as code.
- CloudFront for CDN
Let me know in the comments section if you want this guide. I will start working on this ASAP if a lot of you want it.
Now, let’s continue with our guide.
Pushing the code to GitHub
Now that we have our Blazor application ready, let’s initialize GIT and push the code to a new GitHub repository. Open up the terminal at the root of your blazor solution and run the following to push it to your GitHub repository. Before that, make sure that you have created a new blank repository on GitHub, and have authenticated your local machine to perform actions on it.
git initdotnet new gitignoregit add .git commit -m "first commit"git branch -M maingit remote add origin <your git repo url>git push -u origin mainLet’s understand the commands line by line,
- Initializes GIT.
- Adds a .NET-specific .gitignore file that restricts pushing the unwanted .NET build and binaries to the repository.
- Stages all the eligible files for committing.
- Adds a new commit with a message as “first commit”.
- Sets the default branch as main.
- Adds a remote origin (which is our new GitHub repository)
- Pushes the commits onto the remote GitHub repository.
Setting up AWS Amplify
Now that our Blazor WASM Application is pushed to a publicly available GitHub repository, let’s set up AWS Amplify to get it hosted. You will be amazed at how easy it is to get our Blazor application hosted. Let’s log in to AWS Management Console and open up AWS Amplify.
Here is the landing page of AWS Amplify.
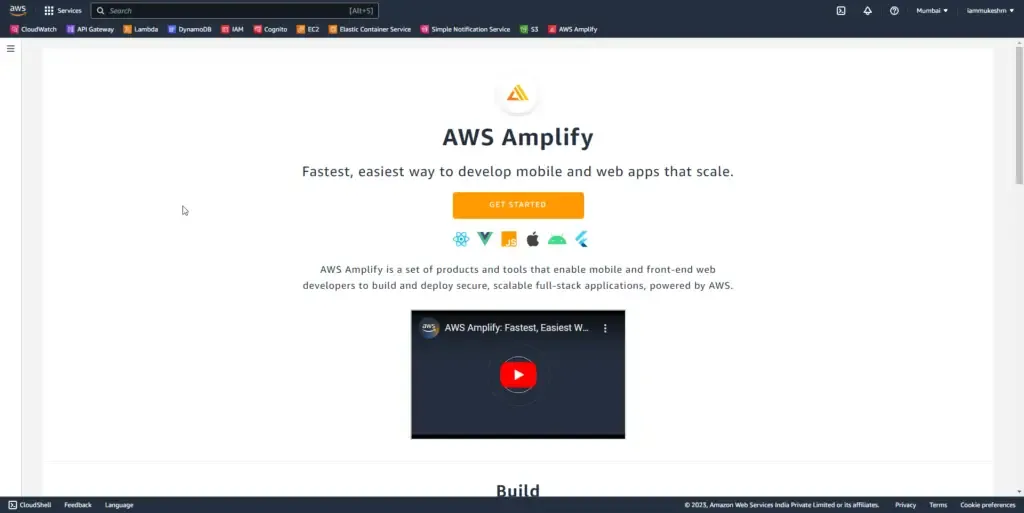
Click on Get Started. We are currently interested in Hosting our Blazor WASM app.
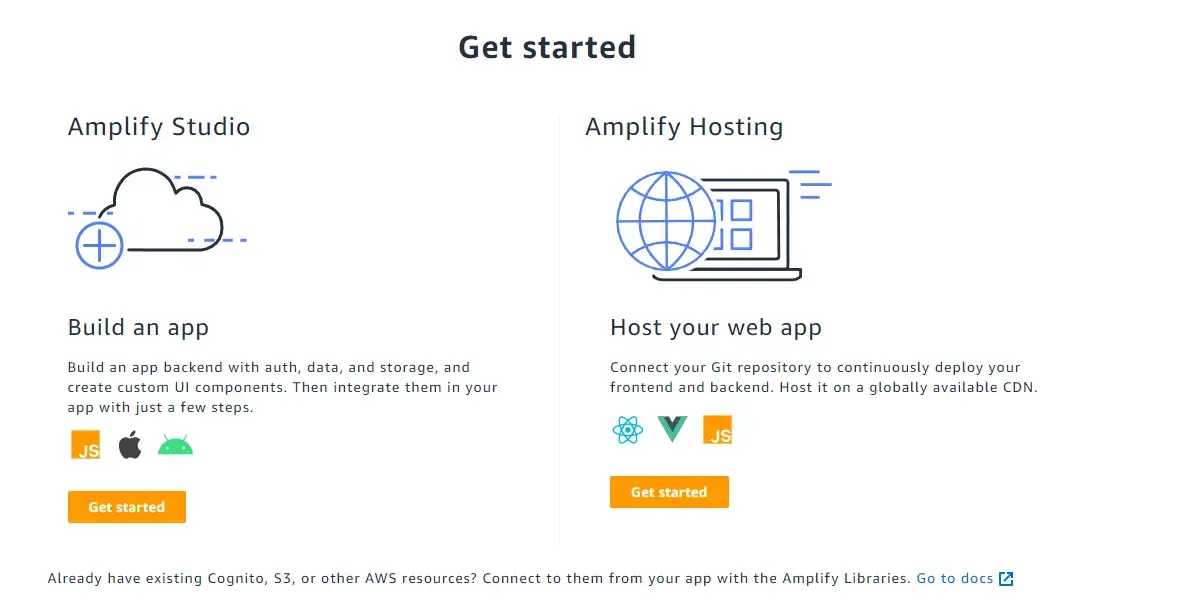
Click on the Get Started of Amplify Hosting.
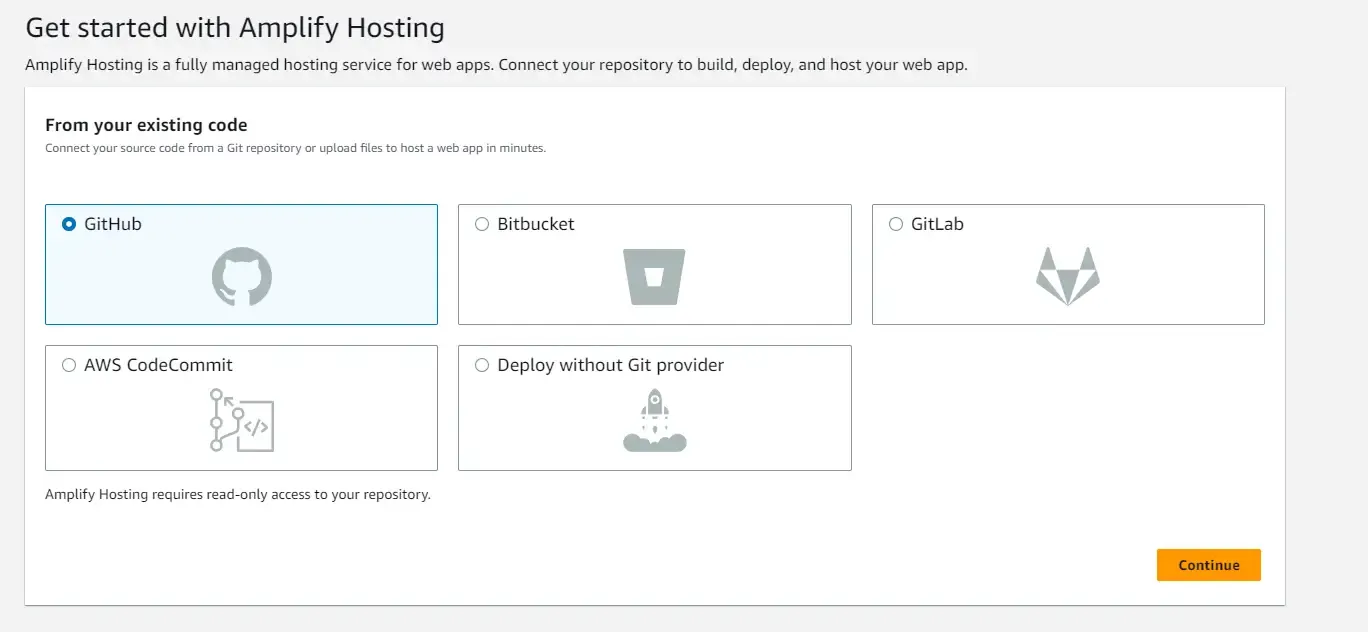
First up, you will have to connect your code repository to AWS Amplify. For instance, AWS allows you to connect to several platforms like GitHub, GitLab, Bitbucket, and even the AWS Code Commit. For our use case, let’s select GitHub and click on continue.
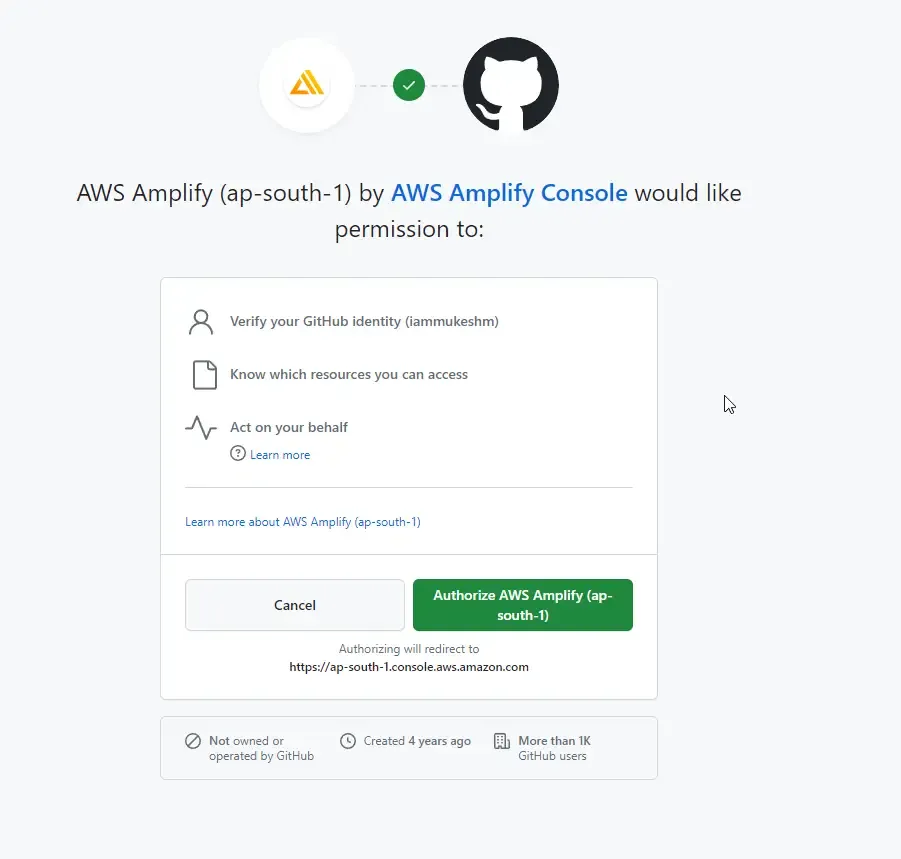
In the next screen, you will have to authorize AWS Amplify to read your GitHub account and repositories.
Here, select your personal account, or wherever your Blazor code is pushed to. Next, you will need to select the repositories that can be accessed by AWS Amplify. For now, I am selecting my new Blazor repository only. You can give access to all repositories as well, as per your needs.
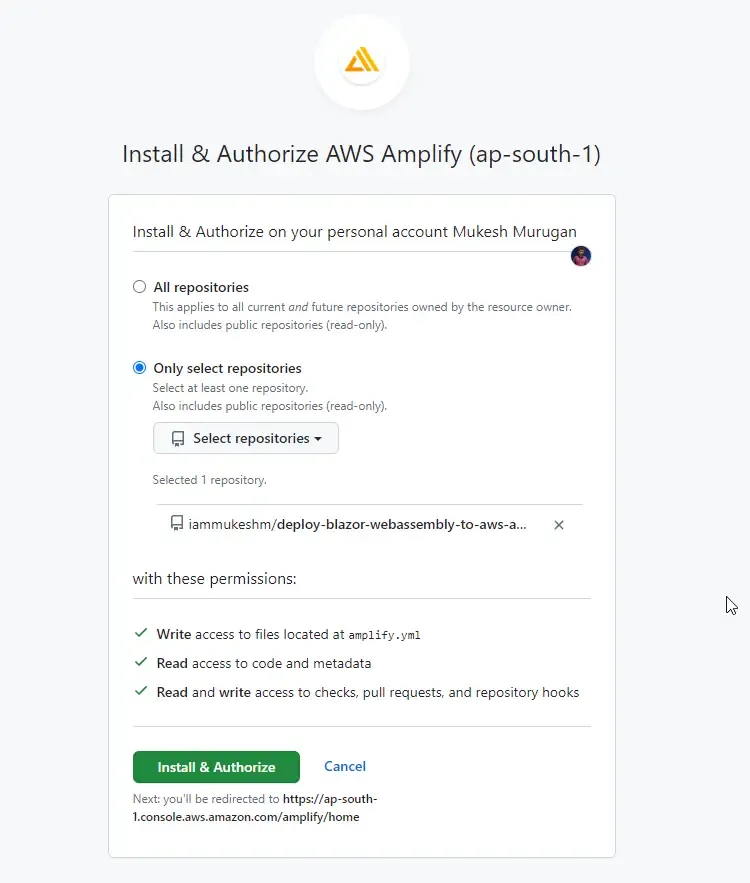
Click on Install and Authorize. I had to verify this with an OTP since I have enabled Multi-Factor Authentication on GitHub. You should also probably enable this to secure and protect your GitHub account.
Next, you will be re-directed to AWS Amplify, where you will see that GitHub authorization was successful, and you will be asked to choose the repository and branch. Since I just have a single branch on my repository, I will choose the main branch.
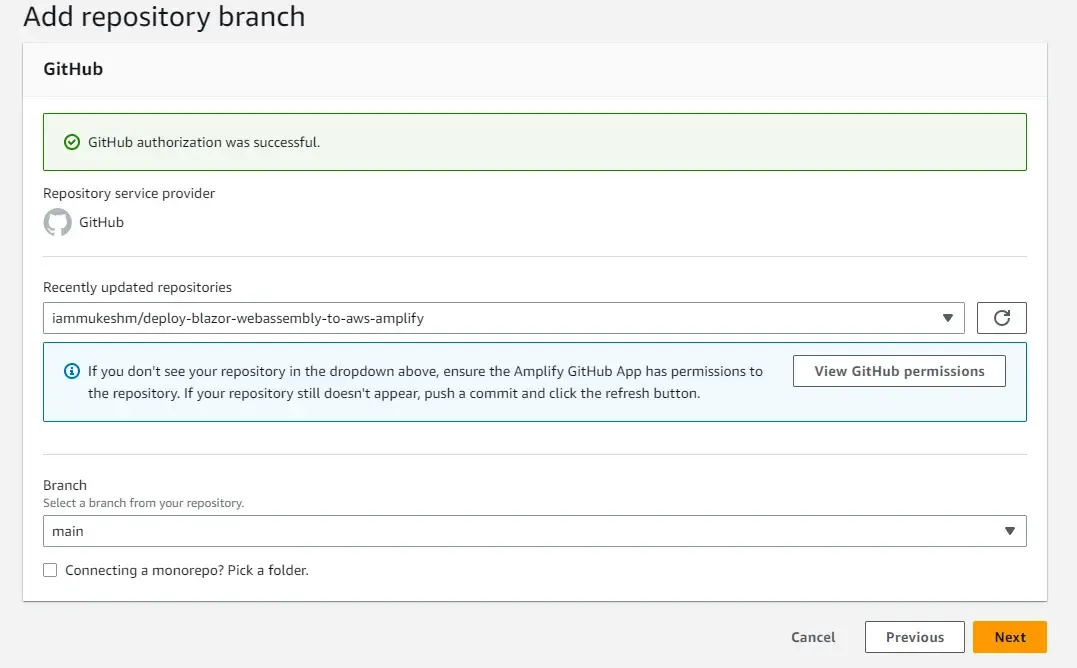
Now, we will have to write certain build scripts to publish the Blazor WASM Static files that will be hosted.
On the next screen, click on Edit to add your build commands. This is to ensure that we are using the correct .NET SDK version.
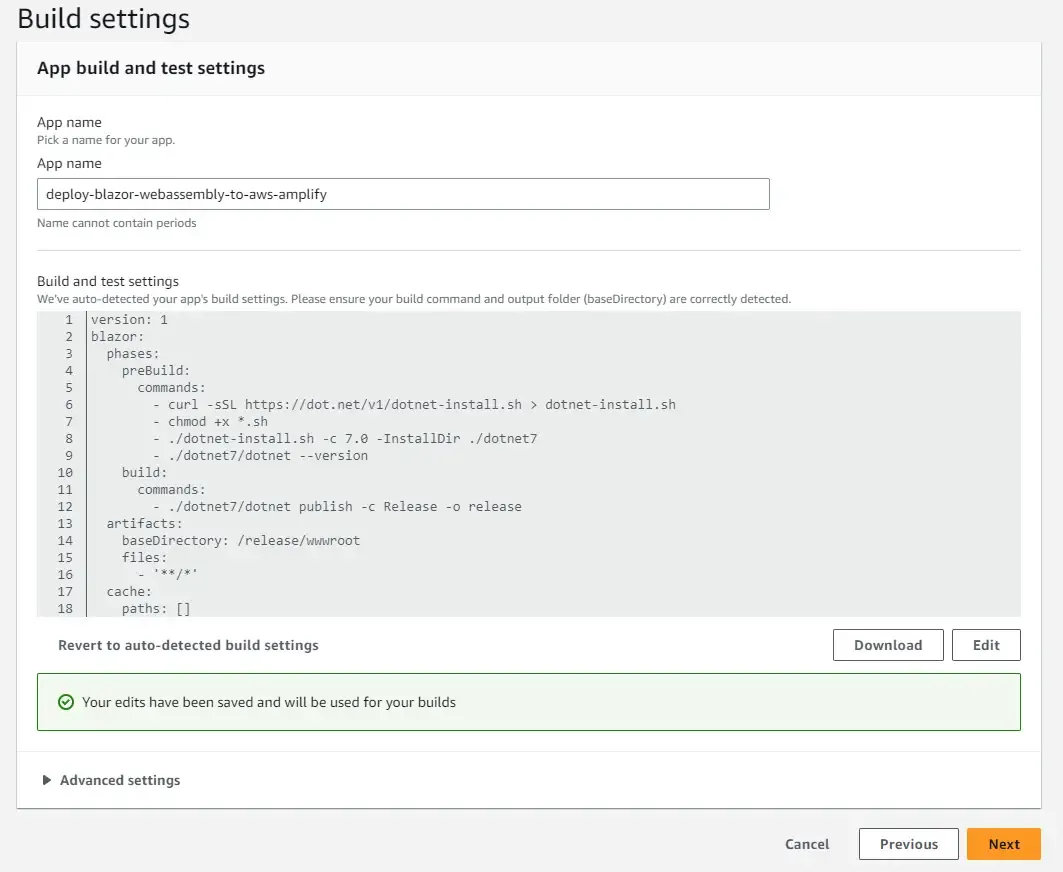
The following is the code you need.
version: 1frontend: phases: preBuild: commands: - curl -sSL https://dot.net/v1/dotnet-install.sh > dotnet-install.sh - chmod +x *.sh - ./dotnet-install.sh -c 7.0 -InstallDir ./dotnet7 - ./dotnet7/dotnet --version build: commands: - ./dotnet7/dotnet publish -c Release -o release artifacts: baseDirectory: /release/wwwroot files: - '**/*' cache: paths: []Note that you can also add this code into your repository at a file name amplify.yml. This helps you to maintain the build commands on your source code control. AWS Amplify would automatically pick up this file as soon as you connect your repository.
So, here what we are doing is pretty simple.
- Firstly, we are downloading the official dotnet script that allows us to install the required .NET SDK.
- The chmod command grants permission to execute the shell script file with extension sh.
- We are next using this script file to download and install the .NET 7 SDK to the /dotnet7 folder.
- Next, under the build command, we are going to publish the required blazor static files with the configuration set as Release and the output folder as Release.
- The required files to be hosted will be present under the release/wwwroot folder. Thus we are mentioning this directory as the base directory of artifacts. the **/** wildcard under files will ensure that all the files and folders under the release/wwwroot folder will be deployed by AWS Amplify.
Save the commands, and click on continue.
On the next screen, review your changes and hit Save and Deploy.
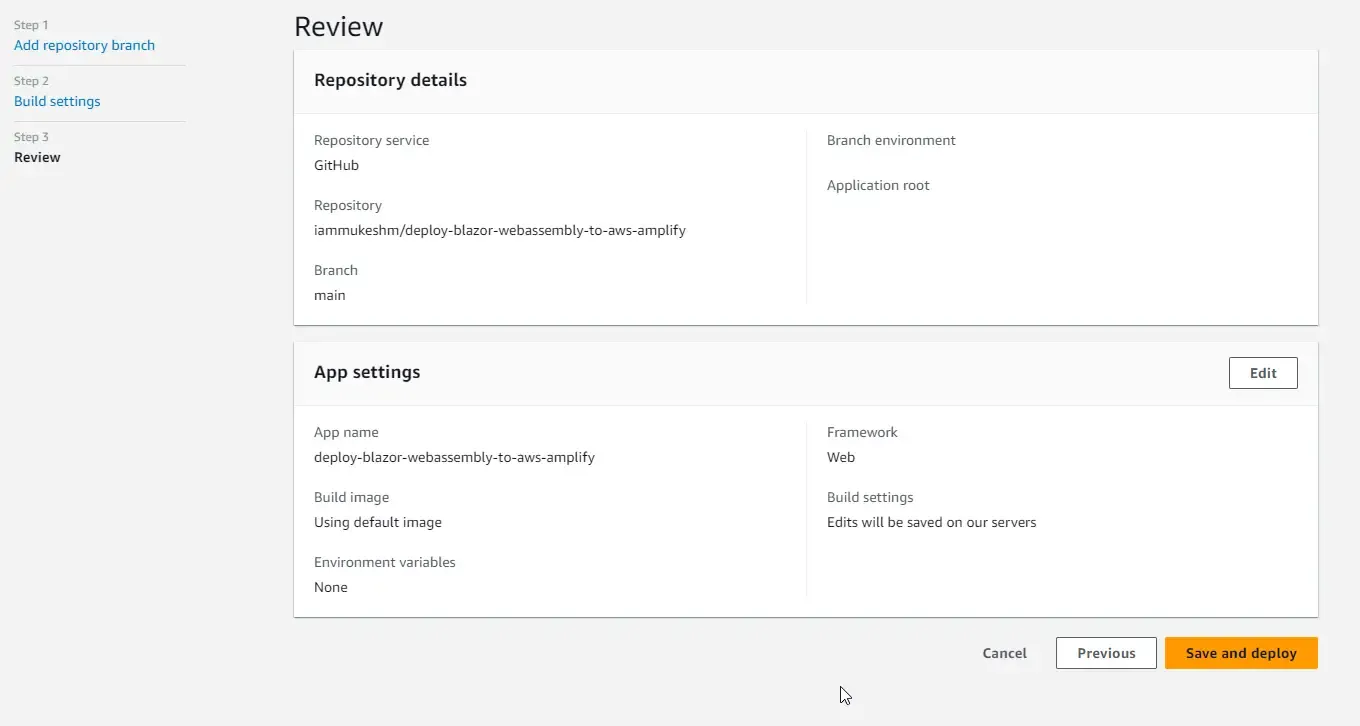
This will perform 3 Major steps as CI/CD.
- Provisioning - This step sets up the build environment with a sample docker image on the host with 4 vCPU and 7GB memory. Note that each of the build environments will get its own host instance to maintain isolation.
- Build - This stage will clone our Blazor repository onto the host instance, and start running the commands that we wrote earlier. So, as part of this, it downloads the .NET 7 SDK, installs it, and publishes the Blazor WebAssembly Static files as an artifact.
- Finally, the Deploy step, where the artifacts from the previous step are pulled and deployed by AWS Amplify.
Here is a screenshot, where all the 3 stages are completed and the application link is mentioned.
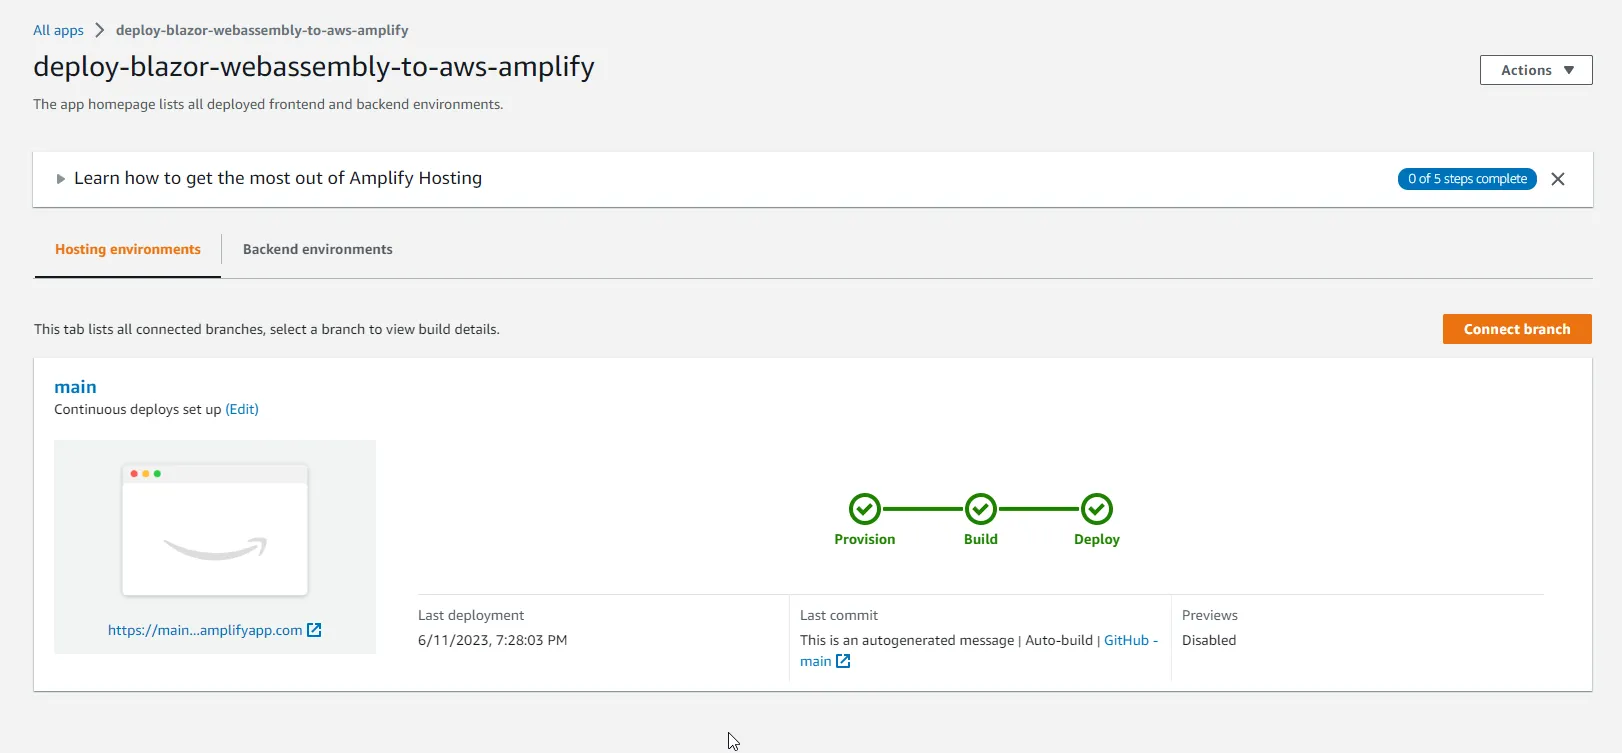
Let’s open up the hosted Blazor app by clicking the link.
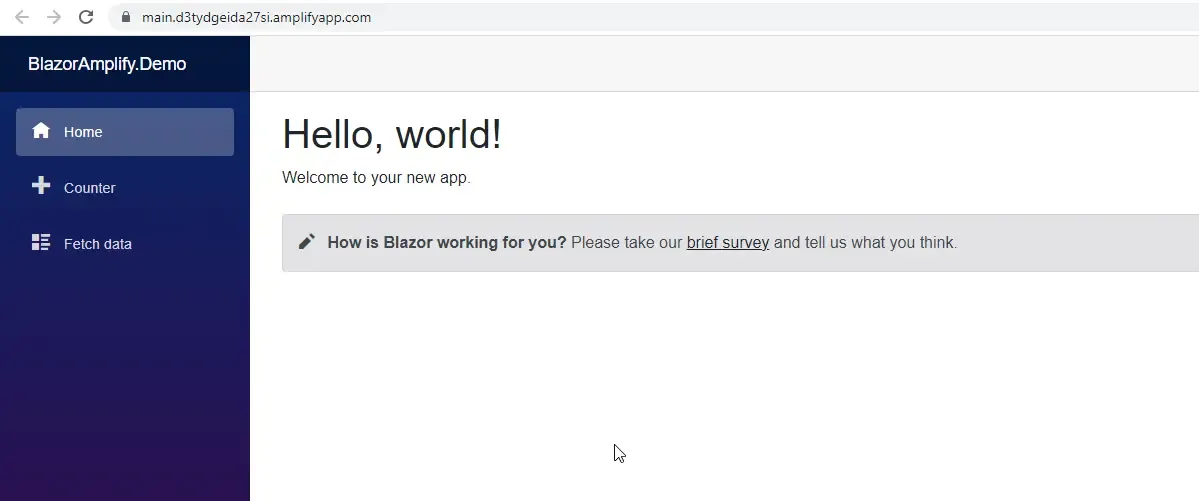
As you can see, a perfectly running Blazor WASM sample application. How easy was it to get it deployed?
Custom Domain
You might have noticed that the app is hosted on something like xxxxxxxxxx.amplifyapp.com. Here we are using the amplifyapp as the domain, and random string as the subdomain. You can switch this to a custom domain like www.myapp.com as well using AWS Amplify.
Open up AWS Amplify and select your app. On the sidebar click on Domain Management and hit Add Domain.

In the next screen, enter the domain that you already own. You can buy domains from services like GoDaddy, NameCheap, or even AWS Route 53. You can buy a .com domain starting from just around 9$. I normally use Namecheap for all domain purchases. Let me know if you want a separate guide around this.
So, once you own a domain, you will have to enter it here and click configure. On this screen, you will be able to select the address for your blazor application. Here, you can either select the root domain or even a subdomain.
- www.myapp.com or myapp.com - root domain
- blazor.myapp.com - is a subdomain.
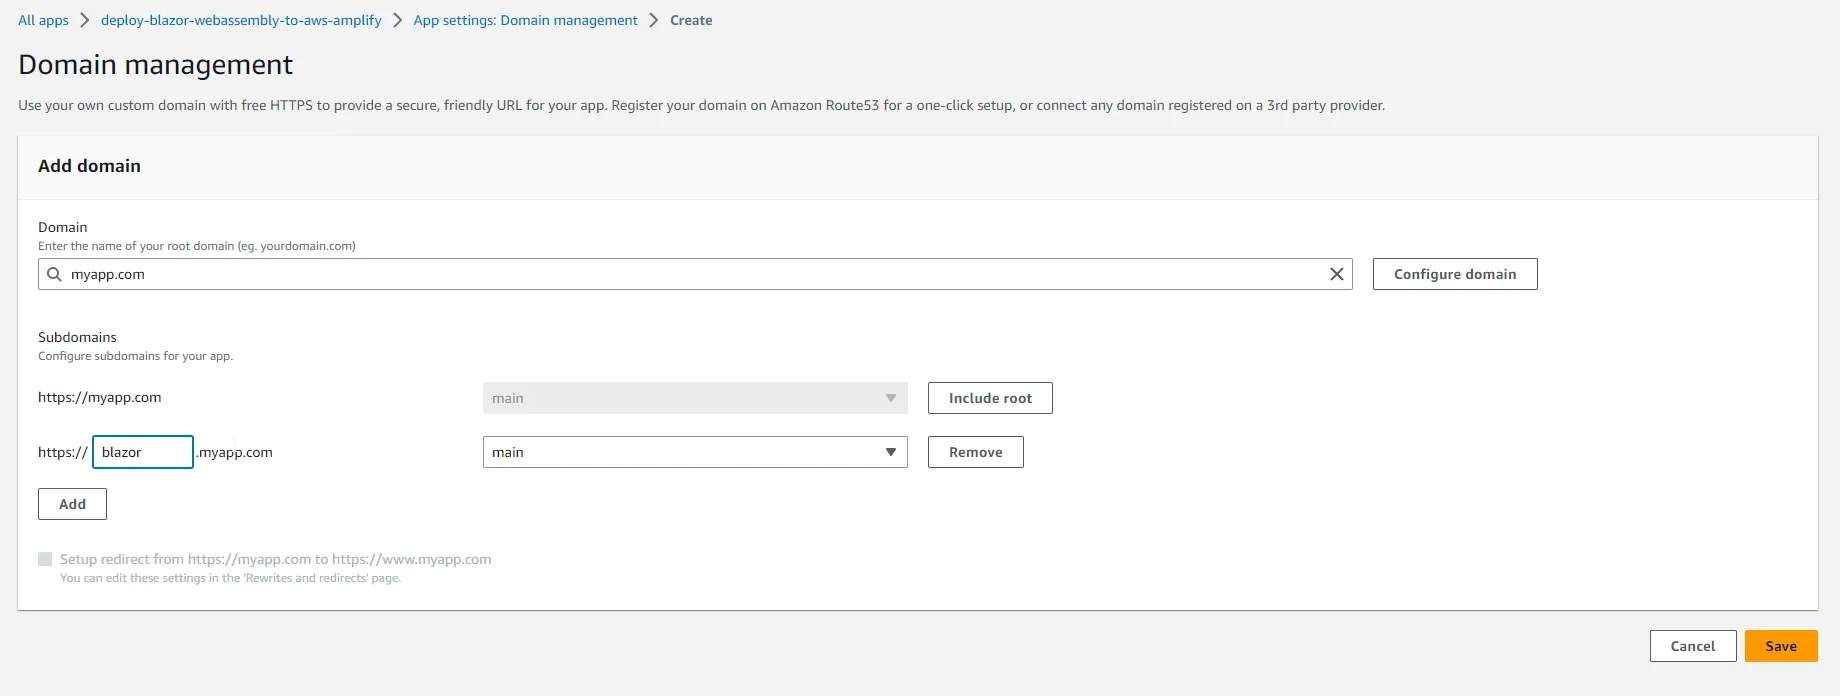
Once selected, click on save. AWS Amplify will now start provisioning SSL certificates and activating the domain. Note that during this process you will have to copy over certain domain records onto your domain registrar to verify that you own the domain. This also makes sure that your domain will redirect all the incoming traffic to AWS Amplify.
CI/CD
This is the whole point of using AWS Amplify, Continuous Deployment. So the idea is that whenever there is a new push to the main branch, (or the branch that we selected while configuring the amplify app) it will trigger a new provision-build-deploy job. This ensures that all your latest changes on the main branch are deployed as soon as possible without any human intervention.
For example, I just edited the Index.razor file and changed the heading of the application. This automatically triggered the deploy job.
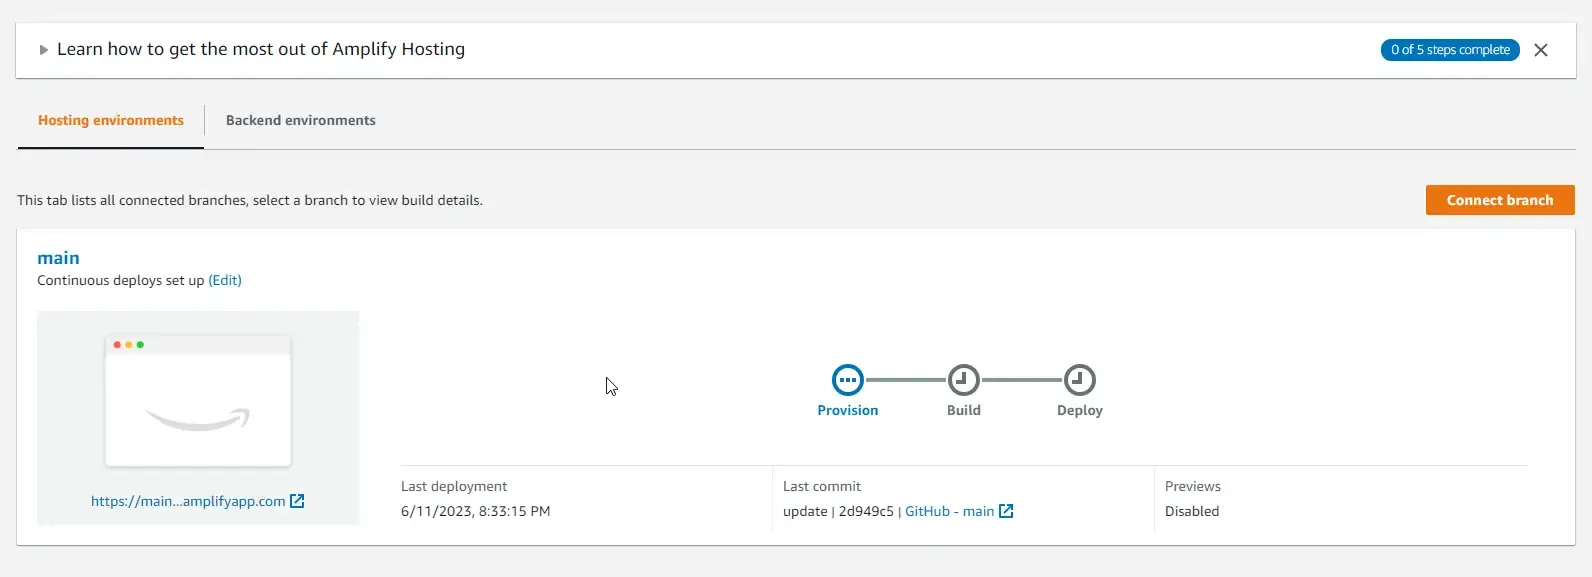
And in just a couple of minutes, I already have my changes available on my hosted application.

Pull Requests Preview
This is yet another interesting feature of AWS Amplify. It allows you to preview changes from Pull Requests even before getting them merged and deployed. This helps the team to conduct UI testing even before the changes are merged. Let’s explore this.
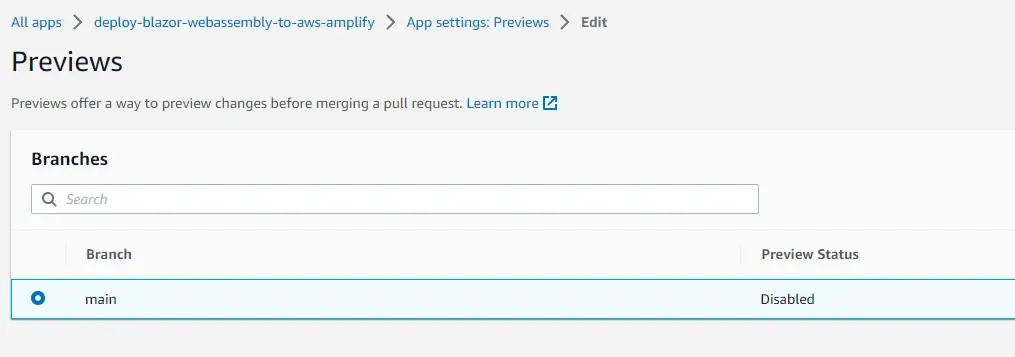
Again, open up AWS Amplify, choose your application, and select Previews from the side menu. Here, click on Enable previews.

This will prompt you to install a GitHub app to allow AWS Amplify to intercept PR builds. Install the app and give the required permission to your repository.
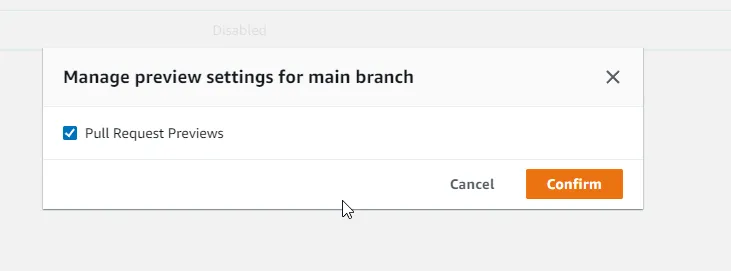
Once done, go back to your preview settings, choose the main branch, and click on Manage. By default, previews are disabled.
Tick the checkbox and click on confirm.
Now, to test this out let’s go back to your code editor and create a new pull request.
-
Create a new branch name it as “feature/title ” from the main branch and push your new branch as well.
-
Add a new change (I again changed the title), and push your changes.
-
Head over to GitHub. You will see a prompt saying that there are new changes on the new branch, and it will ask you to create a new pull request.

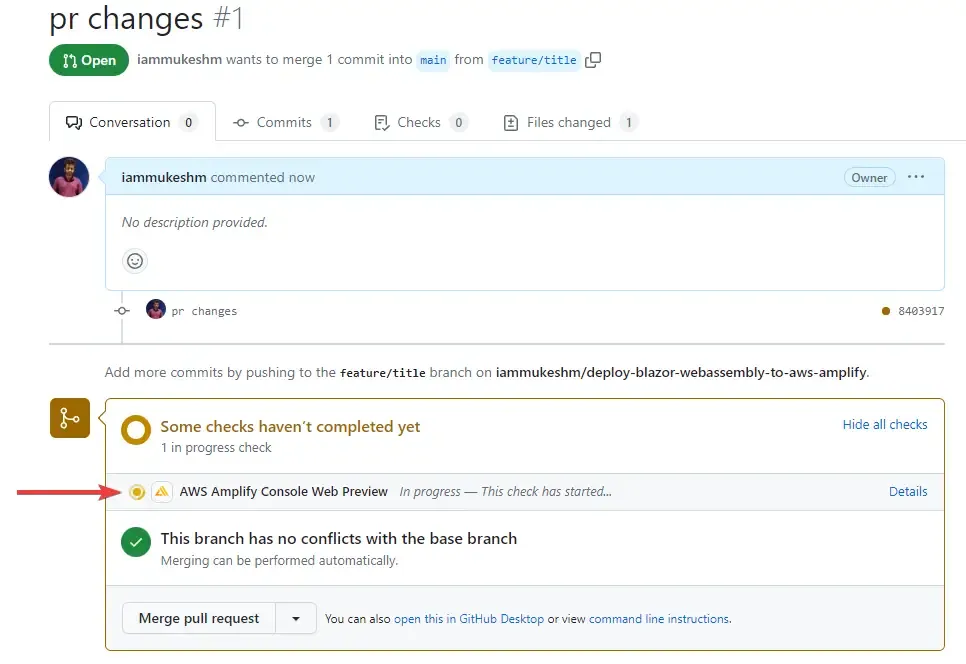
Follow the onscreen instructions to create a new pull request. Once the Pull Request is created, you will be able to see the AWS Amplify Console Preview app in the checks section. Here is a screenshot of it.
Now, go back to AWS Amplify and open up the app, and then the previews section.

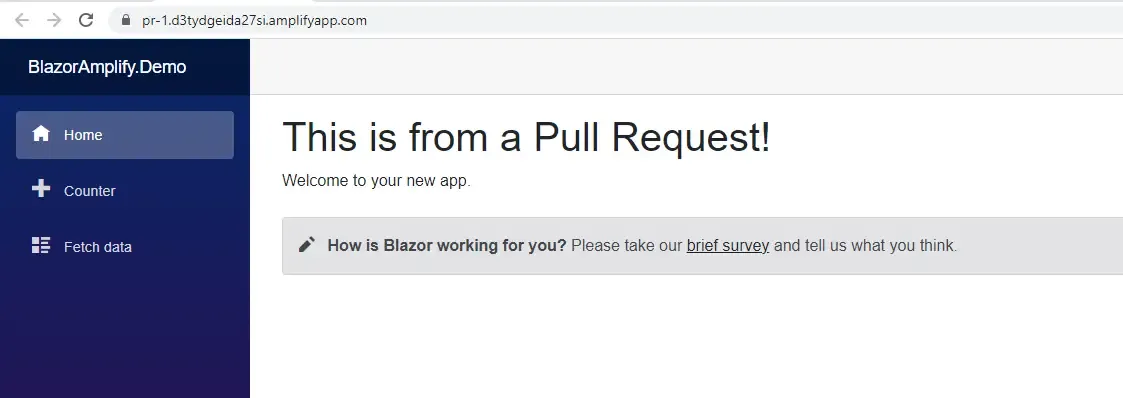
Simply click on the preview URL. And there you go, your changes are now deployed for testing. How helpful is this?
Other Features
AWS Amplify is not only about Static Web Hosting. It is capable of much more including hosting an entire backend, managing authentication using AWS Cognito and so much more.
As for the hosting mode, here are a couple of other features offered.
- Notification emails can be sent on the build statuses of your Amplify application.
- Rewrites and redirects
- Custom Headers
- Access Control
- Custom Environment Variables
- Monitoring Dashboards and Metrics
Cleanup
Ensure that you are cleaning up your AWS Resources soon after you test something out. This ensures that you don’t get charged additional. Be very diligent on this. As for AWS Amplify, you can simply delete the app using the 3 dot menu associated with the Amplify app.
That’s a wrap for this article. Hope you liked it!
Summary
So, in this article, we learnt about how to deploy Blazor WebAssembly to AWS Amplify in minutes! We had built a sample Blazor WASM application that we pushed to a new GitHub repository. Next, we setup an AWS Amplify app, to which we connected our new GitHub repository and wrote some build commands that will help us publish the required static blazor artifacts.
These files are then hosted automatically by AWS Amplify to globally available CDNs. We also saw that whenever a new change is pushed to the main branch, the build process is triggered and the new version of our blazor application is automatically deployed. Post this we explored a couple of other features like the custom domain management, pull request previews and so on.
You can find the source code of the entire implementation here.
Make sure to share this article with your colleagues if it helped you! Helps me get more eyes on my blog as well. Thanks!
Stay Tuned. You can follow this newsletter to get notifications when I publish new articles – https://newsletter.codewithmukesh.com. Do share this article with your colleagues and dev circles if you found this interesting. Thanks!


