In this article, let’s talk about the trending GraphQL, a super cool tech built by Facebook which is now open-sourced. We will compare with REST API and understand the use case of GraphQL. We will also build a small prototype that demonstrates the integration of GraphQL in ASP.NET Core. You can find the source code at the end of the article. Let’s get started!
What is GraphQL?
GraphQL or Graph Query Language is an API Standard that was invented and open-sourced by Facebook. It basically is an alternative to REST APIs. GraphQL unlike the tradional REST API, gives the control to the Client so that the Client App / user gets to request for the specific data he wants. In simple words, it is a technology that can replace REST API to build high performance APIs. That said, it doesn’t mean that REST API are going to be nulled anytime soon. But there are quite a lot of scenarios where GraphQL can outperform REST APIs.
GraphQL is a query language for APIs. It gives a definition to the data in your API (Somewhat similar to Swagger, but does more). It is essentially a technology that allows the client to ask for what they need. Nothing more, Nothing less. This gives a lot of power and flexibility to the client as well as developers.
The main goal behind designing the GraphQL was to make the query smarter. Till now, with the traditional REST API approach we might have experienced over-fetching (where the API returns 10 fields but we need only 2) or under-fetching (API return only the IDs but we need more related data which forces us make a second API Resource call) of data. This means that the request and response in always coded and remains static throughout the lifetime of the application, right? GraphQL makes your system smarter and delivers only what is needed , thus reducing the number of roundtrips to the server.
Let me make it more clear.
Here is how REST APIs work.
api/player/ - This gets all the Players in the database.
api/player/10 - This returns all the details of the Player 10. Upon receving the response, we will have to manually map / assign the properties that we need. The server doesnt do this for you.
Let’s take a scenaio. We need to get data of an user with id 10, specifically his name and age only.
How would RestAPI Request and Response look like.
Request - api/user/10
And the Response
{ "userName" : "Mukesh", "Name" : "Mukesh Murugan", "Destination" :"Trivandrum", "age" : 25, "something-else": "more data"}Now we get this response and have to process it later on to filter out only what is needed by our current requirement. It’s not a huge task or a resource killer, but imagine the effect of this with scaled up applications like Facebook. This can prove quite server expensive.
Let’s see how GraphQL queries look like. Here is the request. The client gets to ask for what he wants exactly.
PS, we will be going through the queries and how it is written later in the article. This is just an example.
{ user(id: 10) { name, age }}And the response. Nothing less. Nothing more.
{ "data": { "user": { "name" : "Mukesh Murugan", "age" : 25 } }}This is probably as aspect we never think of. We are so busy in making our code smarter, but never actually think about how static our API endpoint is. Again, this doesnot mean that you have to dump REST APIs and move on to GraphQL, but the amount of server resources / time GraphQL can save for a scaled up system like Facebook is quite huge.
You will need to understand what problems GraphQL solves and how does it compare to REST API, which we will cover in the later section.
GraphQL maintains quite a rich documentation over at https://graphql.org/learn
The Problem GraphQL Solves
Let’s start out with How GraphQL came into existence. We will look at a real world scenario. Back in 2012 or so, Facebook releases it’s own app for Android / iOS. With the complexity of a Customer Facing Service like Facebook, it was quickly noted that the apps were consuming too much bandwidth, memory, RAM usage and making about a dozen of API calls every now and then. You might have personally experienced this as well, if you were on Facebook at that particular time. This ultimately lead to bad reviews and UX.
Why did it make multiple API calls ? It was quite obvious, right? As an example, think about Facebook’s News feed on mobile. It had data related to your profile, notifications from your friends, updates / posts from your friends / pages / groups and about a million other things :P Facebook had an API endpoint for each of this. Now, on loading the newsfeed all of these endpoints are called, data is fetched (with about 40-50% unused fields), and drawn over the app. This created several round trips from and to the server. There is got to be a better way, right?
GraphQL was thus introduced that condenses all of this million API endpoints to just a single endpoint. Now the client can ask for exactly what he/she/it wants and gets the required response.
Here is Facebook’s documentation regarding their implementation of GraphQL - https://developers.facebook.com/docs/graph-api
GraphQL vs REST API
There are quite a lot of differences between GraphQL and RESTAPI. Let’s look at the major differences.
- With GraphQL you just need to work with ONE Endpoint unlike 100s of API endpoints with RestAPI. It is quite cool how the GraphQL tech works. This makes the performance of GraphQL comparitevly much better than REST API for Enterprise APIs. Also, since there is only ONE Endpoint in the game, it is much more easier to maintain GraphQL while the application scales.
- GraphQL does not need HTTP to function, whereas REST API needs HTTP.
- GraphQL supports only POST Requests unlike the REST Pattern followed by RESTAPIs.
- Both GraphQL and REST API have a JSON Response.
- GraphQL allows the clients / consumers to shape the data in the required format. It gives complete control to the client to define both the request and response. With REST API, as you know, the Response and Requests are always defined in the Server Side in code. Basically GraphQL allows you to have what you want in terms of data.
- Building up on the previous point, With GraphQL you essentially are not going to receive a data that you won’t use. For example, let’s say you POST a request to api/product/2 and the response has all the fields of the Product entity. In 9 out of 10 cases, you will not be using all the fields of Product, right? Now with GraphQL, you get the option to design your request so that only the requested response is received. This makes the entire system efficient and reduces the bandwidth consumption considerably.
- With all these awesome features, you really don’t have to worry about API Versioning. Every client gets to keep their own version! It’s a bit restricted using REST APIs.
Getting Started with GraphQL in ASP.NET Core
Create a new ASP.NET Core WebAPI Solution. For this demonstration, we will have a simple Entity. Create a new Class and name it Models/Customer. This is how the blueprint looks like
public class Customer{ public int Id { get; set; } public string FirstName { get; set; } public string LastName { get; set; } public string Contact { get; set; } public string Email { get; set; } public DateTime DateOfBirth { get; set; }}Since this project is more focused on the implementaion on GraphQL in ASP.NET Core,, I will skip the steps where we connect to a database using Entity Framework Core and fetch Customer Records. Remember that we are not going to Create any API Controller here. I am also putting in bunch of sample customer data to my database for testing purposes.
If you are new to Entity Framework Core, I highly recommend you to go through the following article to get a good grasp on EF Core - Entity Framework Core in ASP.NET Core – Getting Started
Installing the Required Packages
Open up Package Manager Console and install the following packages
Install-Package GraphQLInstall-Package GraphQL.Server.Transports.AspNetCoreInstall-Package GraphQL.Server.Ui.PlaygroundInstall-Package Newtonsoft.JsonHere is an explanation of Why we installed the above packages.
- GraphQL - Core Packacge for Enabling GraphQL Related Services for .NET
- GraphQL.Server.Transports.AspNetCore - HTTP Middleware for GraphQL
- GraphQL.Server.Ui.Playground - Now we need a kind of UI to work with GraphQL and do some tests. This is more like Swagger where you get to access the POST methods of the API. Rather Playground supports Intellisense too, with smart suggestions and much more.
We will have to configure the services of the ASP.NET Core container. But we will do this at the end once we have setup the required GraphQL classes.
Types in GraphQL
GraphQL does not understand Models / Entities or any C# POCO. Rather it needs types. As mentioned earlier, we already have a class with a definition for Customer at the Models folder. To get data from a graphql endpoint, we will have to use types that extends **ObjectGraphType<T>** where T is the Customer in our case.
Let’s create a new class and name it GraphQL/Types/CustomerGraphType.cs
class CustomerGraphType : ObjectGraphType<Customer>{ public CustomerGraphType() { Name = "Customer"; Field(x => x.Id, type: typeof(IdGraphType)).Description("Customer Id"); Field(x => x.FirstName).Description("Customer's First Name"); Field(x => x.LastName).Description("Customer's Last Name"); Field(x => x.Contact).Description("Customer's Contact"); Field(x => x.Email).Description("Customer's Email"); }}You can see that we are defining the class as ObjectGraphType of Customer. Here we are mapping all the fields that are supposed to be exposed to the client. This also adds a nice layer of abstraction . security to the API. We can also add descriptions to the property which may help the client to understand the GraphQL better.
Next we need to define the Queries that are supported. These queries will essentialy return a list of customers or a single customer entity.
Create a new class and name it GraphQL/Queries/CustomerQuery.cs
public class CustomerQuery : ObjectGraphType{ private readonly ApplicationDbContext _appContext; public CustomerQuery(ApplicationDbContext appContext) { this._appContext = appContext; Name = "Query"; Field<ListGraphType<CustomerGraphType>>("customers", "Returns a list of Customer", resolve: context => _appContext.Customers.ToList()); Field<CustomerGraphType>("customer", "Returns a Single Customer", new QueryArguments(new QueryArgument<NonNullGraphType<IntGraphType>> { Name = "id", Description = "Customer Id" }), context => _appContext.Customers.Single(x => x.Id == context.Arguments["id"].GetPropertyValue<int>())); }}Line #3 - 6 - Injecting ApplicationDB Context for data access.
Line #7 - Here we are setting the name property of the Query.
In the above Query class, we are basically defining two Queries.
Line #8 - Query to return all customers as a list. We are using context to attach the dbContext variable that is responsible to get data.
Line #9 - Query to return a specific Customer based on the ID (int).
GraphQL Schema
Since we have already defined the Query, it is important to include this query in GraphQL instance Schema. A graphQL schema contains the following Properties.
- Query - A Query class that can only fetch the data.
- Mutations - A way to change the data (Edit/Delete/Add)
- Subscriptions - To notify the clients on a change. This is more of a Event based Subscription.
For this tutorial, we will just be concentrating on the Query part of the Schema. Let’s add a new class and name it GraphQL/DemoSchema.cs
public class DemoSchema : Schema{ public DemoSchema(IDependencyResolver resolver) : base(resolver) { Query = resolver.Resolve<CustomerQuery>(); }}With that out of the way, Let’s finally Register our servies in the ASP.NET Core Service Container. Open up Startup,cs and add in the following to the ConfigureServices Method.
services.AddTransient<IDependencyResolver>(x =>new FuncDependencyResolver(x.GetRequiredService));services.AddTransient<DemoSchema>();services.AddGraphQL(o => o.ExposeExceptions = true) .AddGraphTypes(ServiceLifetime.Transient);services.Configure<KestrelServerOptions>(options => options.AllowSynchronousIO = true);services.Configure<IISServerOptions>(options => options.AllowSynchronousIO = true);Next, add the following to the Configure method. Here we will be registering our Schema and also configuring GraphQLPlayground. We will learn more about GraphQL Playground when we execute the application.
app.UseGraphQL<DemoSchema>();app.UseGraphQLPlayground(options: new GraphQLPlaygroundOptions());That’s all we have to do with ASP.NET Core. Let’s run the application and navigate to localhost:xxx/ui/playground
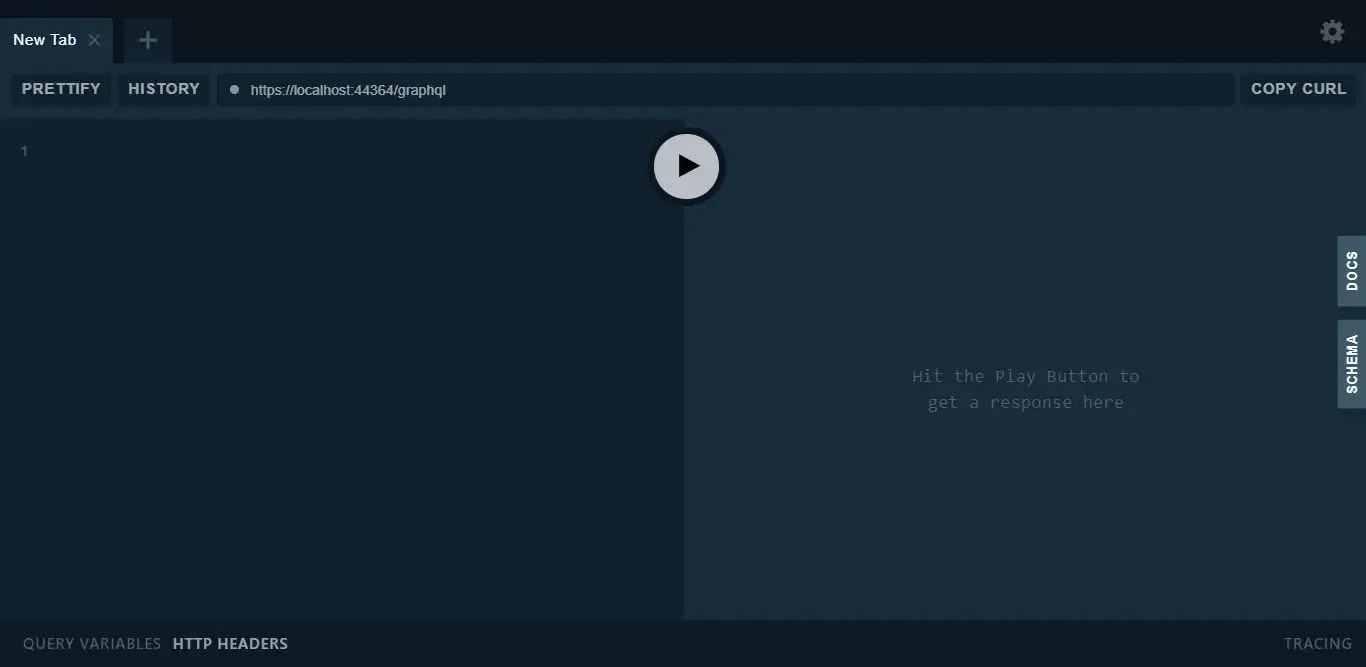
Reminds quite a lot of POSTMAN, yeah? Let’s explore it a bit more.
About GraphQL Playground
GraphQL Playground is more like an UI to your GraphQL API. It provides various awesome features like intellisense, smart suggestions, realtime syntax error notification, prettify the request and much more.
Click on the Schema tab. Remeber creating a Schema for GraphQL ? You can find the definition here. We had just defined the Query of the Schema , right? Under Query, you can see the supported methods, which is GetALLCustomer and GetCustomerById.
The Type of Customer is also mentioned. This is quite similar to Swagger UI.
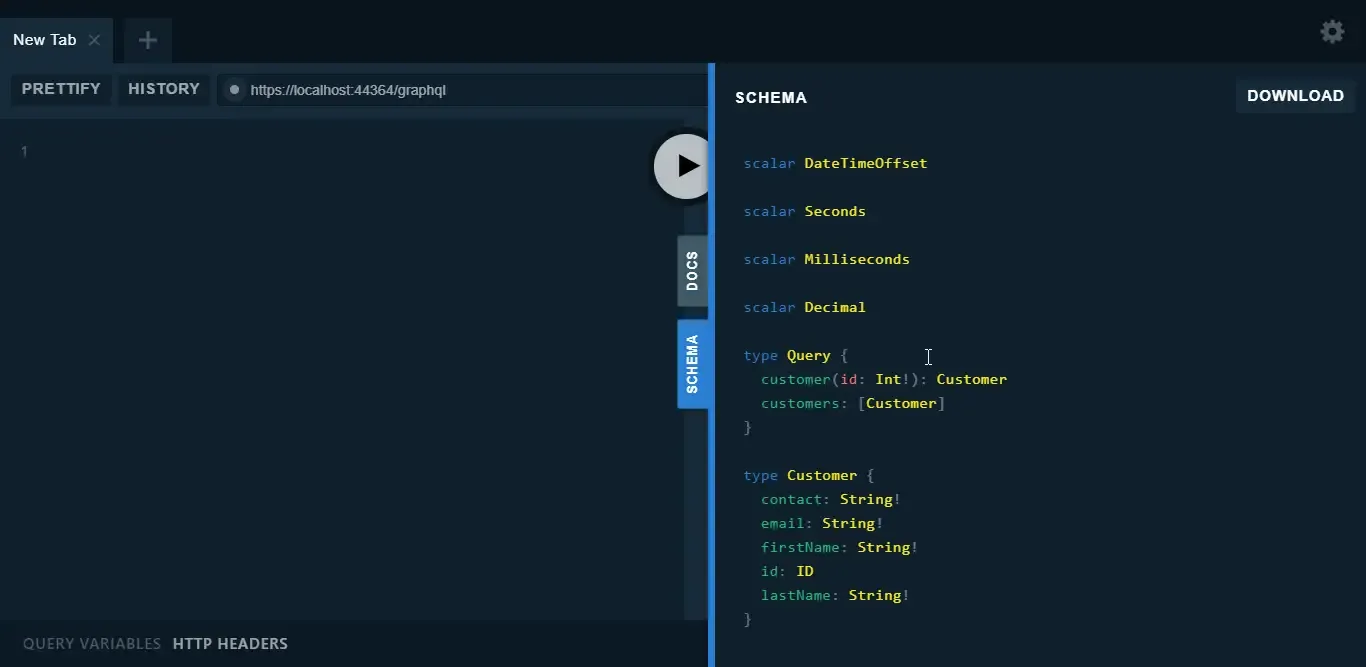
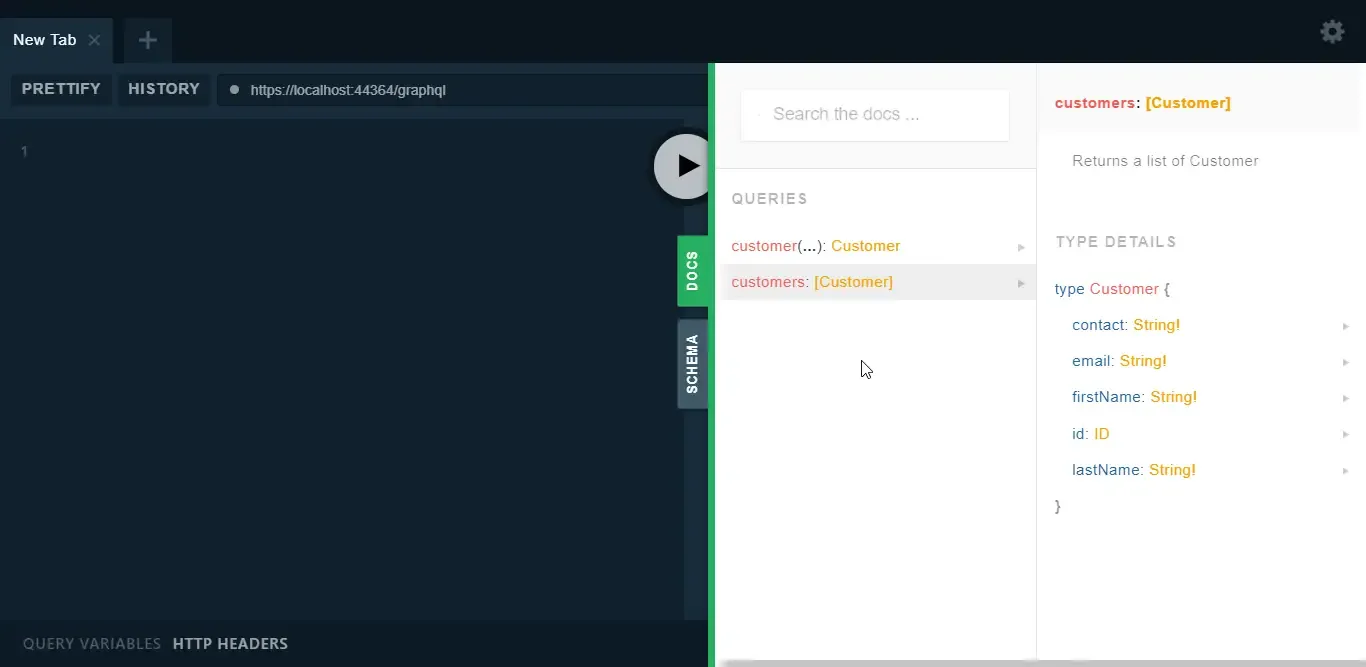
Next, to view the definition / fields of each query, click on the docs. You can find more details on the query such as query name, description, type. Clients can use these docs as the blueprint to understand the GraphQL Features.
Testing GraphQL
Let’s test each of the two queries that we built.
Getting all the customers.
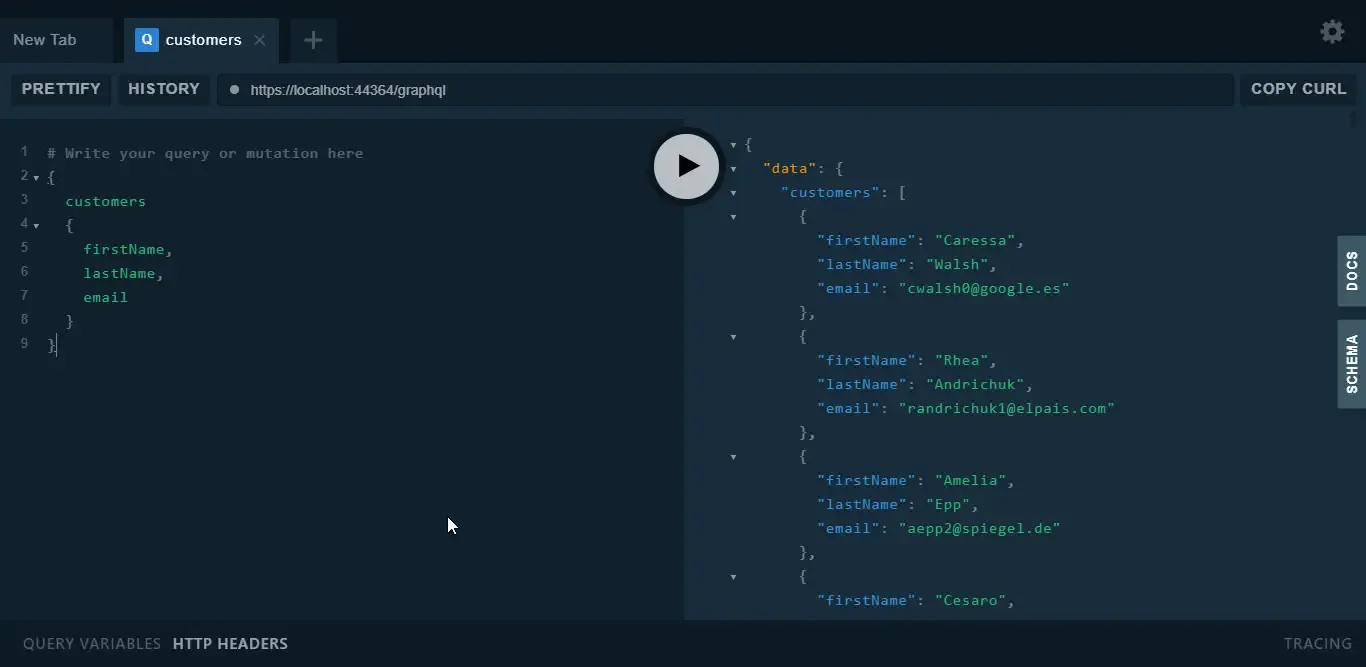
Let’s say we need to get all the customers, but only certain fields like firstName,lastName,email. GraphQL is built for this purpose , remember?
Here is how your request would look like.
{ customers{ firstName, lastName, email }}Once you have added the request, simply press the play button. This will execute your request against the database. You can see that you are getting the response as you wanted it :D You can try around by adding new fields to the request object.
Get a Customer by ID
Next, let’s test the query that can return a single customer based on the ID parameter we pass. Here is the request where we are passing 20 as the ID param.
{ customer(id: 20) { id, firstName, lastName, email }}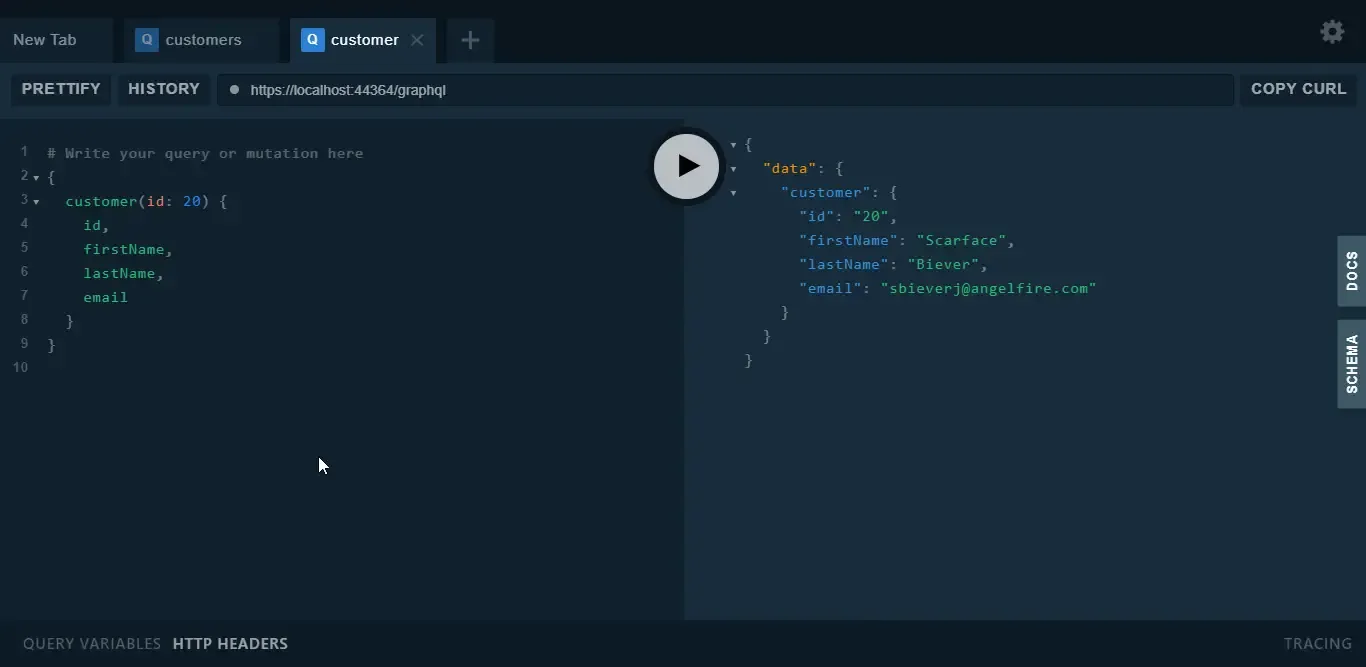
Great! It woeks just as we expected. Quite a cool tech, yeah? Let’s wrap up the article for now. We will talk about more advamced concepts of GraphQL in ASP.NET Core in an another article.
Summary
In this article, we have gone through a really cool tech - GraphQL. We have understood the basics of GraphQL, it’s purpose, how it compares to RESTAPI, Graph Type and Schema, and much more. Finally we also built a prototype application which demonstrated integration of GraphQL in ASP.NET Core WebAPI in a very simple manner. You can find the entire source code here.
Leave behind your valuable queries, suggestions in the comment section below. Also, if you think that you learned something new from this article, do not forget to share this within your developer community. Happy Coding!

