In this article, let’s learn about Hangfire in ASP.NET Core 3.1 and how to integrate it with your Core Applications. A common programming task that we face regularly is running jobs in the background. And running these jobs properly without messing up your code is not an easy task but it isn’t hard either. I used to work with Windows services for scheduling various tasks within my C# application. Then, I come across this close-to awesome library - Hangfire, and I never left.
Background Jobs in ASP.NET Core
Essentially, Background jobs are those methods or functions that may take up a lot of time to execute (unknown amount of time). These jobs if run in the main thread of our application, may / may not block the user interaction and may seem as if our .NET Core Application has hanged and is not responding. This is quite critical for client-facing applications. Hence, we have background jobs, similar to multithreading , these jobs run in another thread, making our application seem quite asynchronous.
We should also have the possibility to schedule them in the near future so that it is completely automated. A developer’s life would be so tough without these awesome possibilities.
What is Hangfire?
Hangfire is an open-sourced library that enables the developers to schedule events in the background with the utmost ease. It is a highly flexible library offering various features needed to make the job scheduling task a cake-walk. Hangfire in ASP.NET Core is the one library that you can’t miss out on.
Integrating Hangfire in ASP.NET Core 3.1
For this tutorial, let’s have a specific scenario so that we can explain Hangfire and it’s complete potential. Let’s say we are developing an API that is responsible for sending mails to the User for different scenarios. It makes more sense to explain Hangfire this way. Hangfire is one of the easiest libraries to adapt to, yet a very powerful one too. It is one of the packages that entirely helps build applications in an asynchronous de-coupled manner.
As I have mentioned earlier, Hangfire uses a database to store the Job Data. We will use the MSSQL Server Database in this demonstration. Hangfire automatically creates the required tables during the first run.
Setting up the ASP.NET Core Project
We will begin by creating a new ASP.NET Core Project with the API Template Selected. Now create an empty API Controller. Let’s call it HangfireController. I am using Visual Studio 2019 Community as my IDE and POSTMAN to test the APIs.
Installing the Hangfire Packages
Installing the only package you would need to set-up Hangfire.
Install-Package HangfireConfiguring Hangfire
Once you have installed the package, we are now ready to configure it so as to be supported by our ASP.NET Core API application. This is quite a straight forward step, besides once you install the package you will be shown a quick Readme that shows you the step to complete the configuration.
Navigate to Startup.cs / ConfigureServices so that it looks like the below code snippet.
public void ConfigureServices(IServiceCollection services){ services.AddHangfire(x => x.UseSqlServerStorage("<connection string>")); services.AddHangfireServer(); services.AddControllers();}Explanation.
Line #3 Adds Hangfire service to our application. We have also mentioned the Storage to be used, MSSQL Server, along with the connection string/name.
Line #4 Actually Fires up the Hangfire Server, which is responsible for job processing.
Once that is done, let us go to Configure method add the following line.
app.UseHangfireDashboard("/mydashboard");Explanation.
What this line does is, It allows us to access the hangfire dashboard in our ASP.NET Core Application. The dashboard will be available by going to /mydashboard URL. Let’s fire up the application.
Hangfire Database Schema
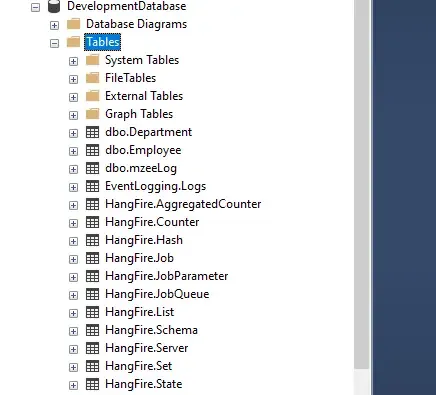
When you start your ASP.NET Core Application for the time, Hangfire checks if you have an associated Hangfire Schema available in your database. If not, It will create a bunch of tables for you. Here is how your database would look like.
Hangfire Dashboard
After the application load, navigate to <localhost>/mydashboard. You will be able to view the Hangfire dashboard.
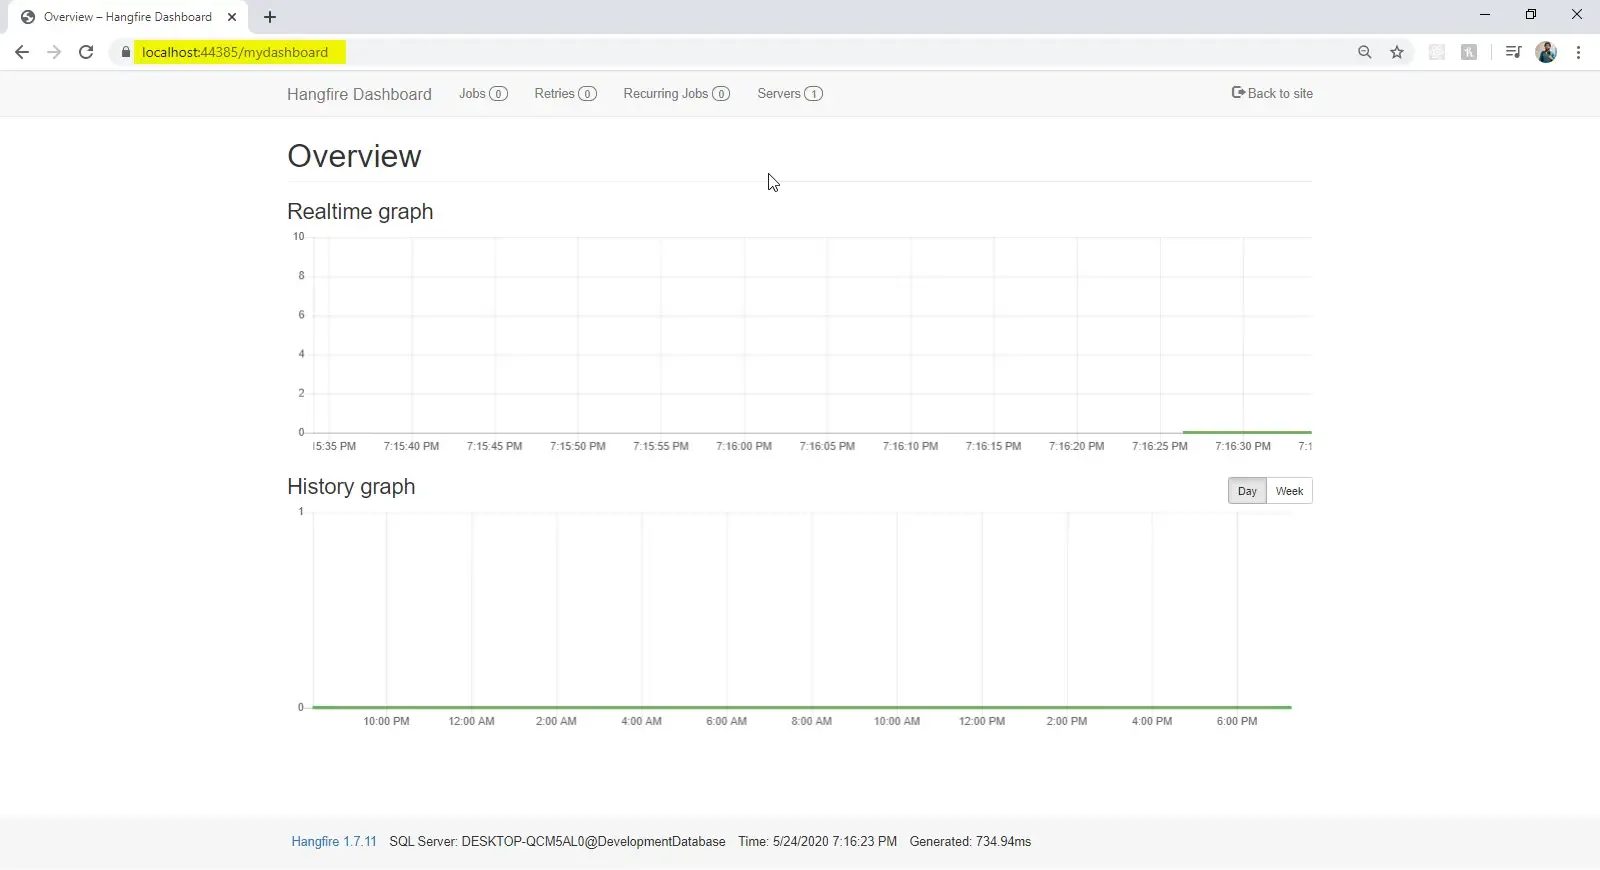
From the dashboard you will be able to monitor the jobs and their statuses. It also allows you to manually trigger available jobs. This is the ONE feature that sets Hangfire apart from other Schedulers. Built-in dashboard. How cool is that? The above screenshot is that of the Dashboard overview. Let’s explore the other tabs as well.
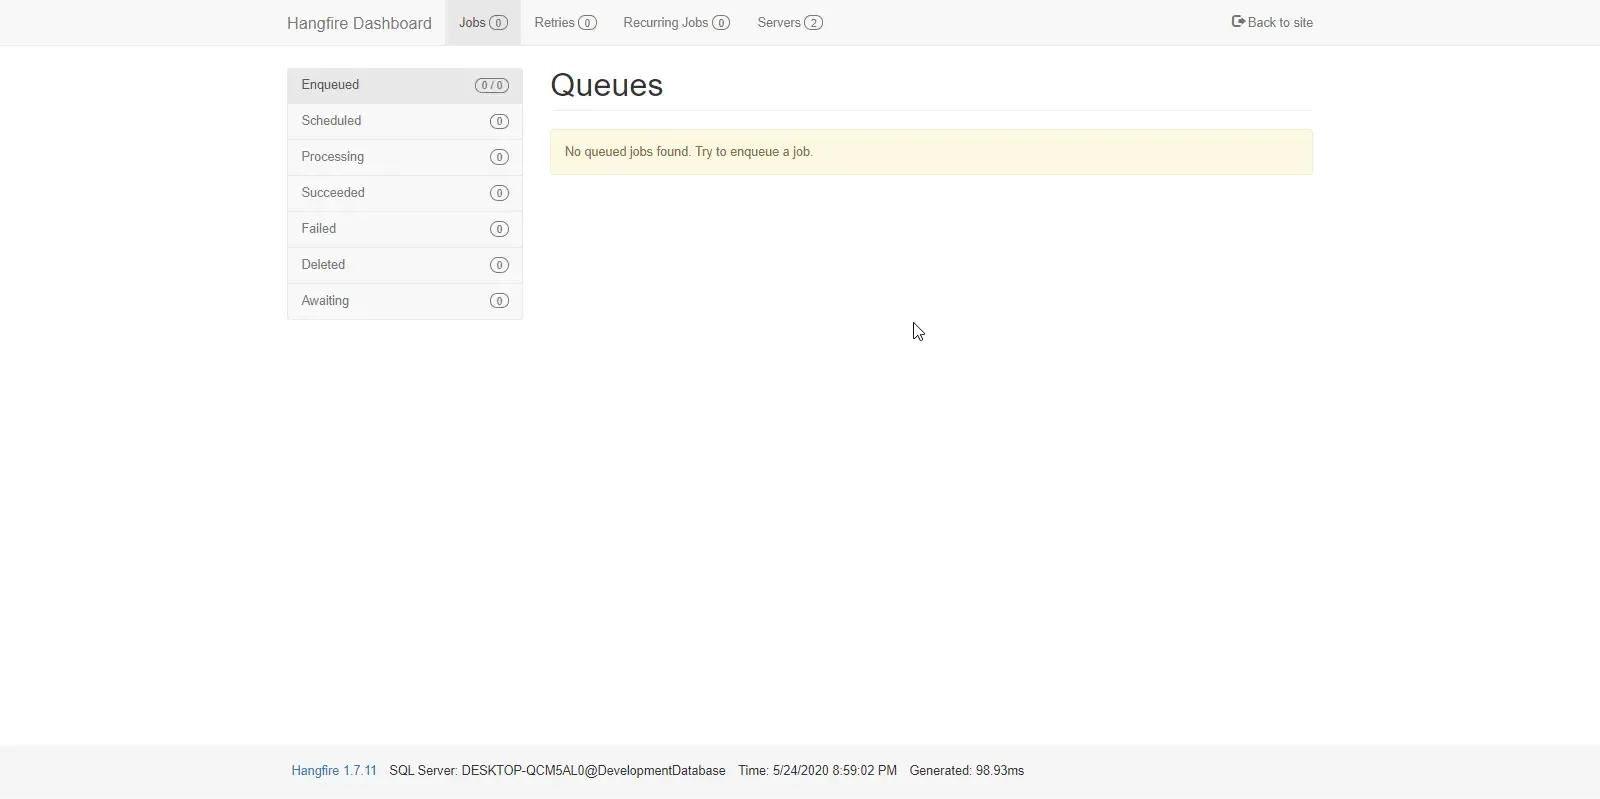
Jobs Tab.
All the jobs that are available in the datastore ( our MSSQL Server) will be listed here. You will get a complete idea of the state of each job (Enqueued, Succeeded, Processing, Failed, etc) on this screen.
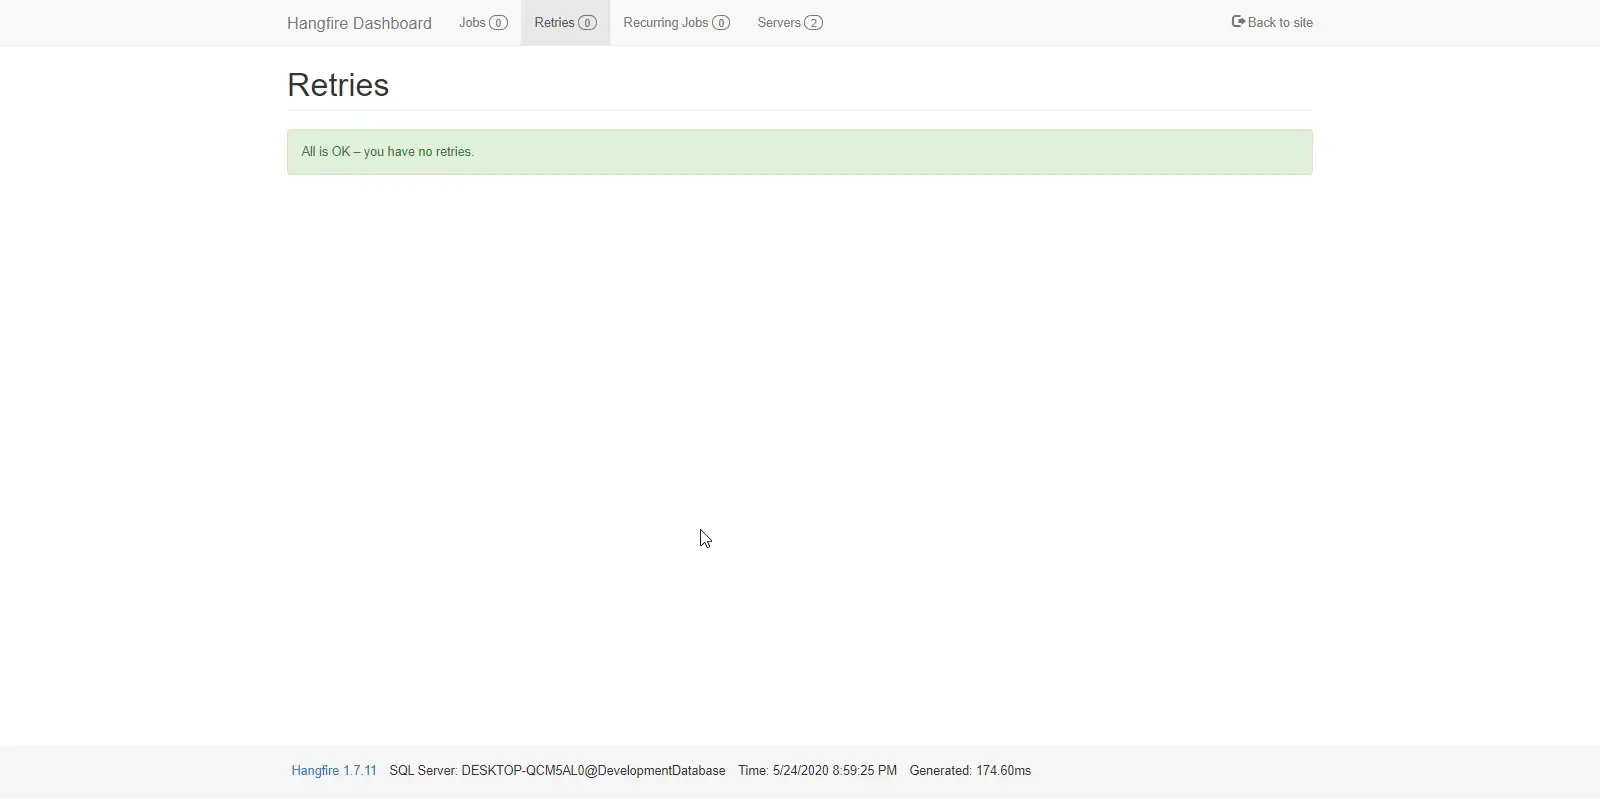
Retries Tab.
Jobs tend to fail once in a while due to external factors. In our case, our api tries to send a mail to the user, but there is a internal connection issue , which fails the job to be executed. When a job fails, Hangfire keeps on retrying it, till it passes. ( configurable)
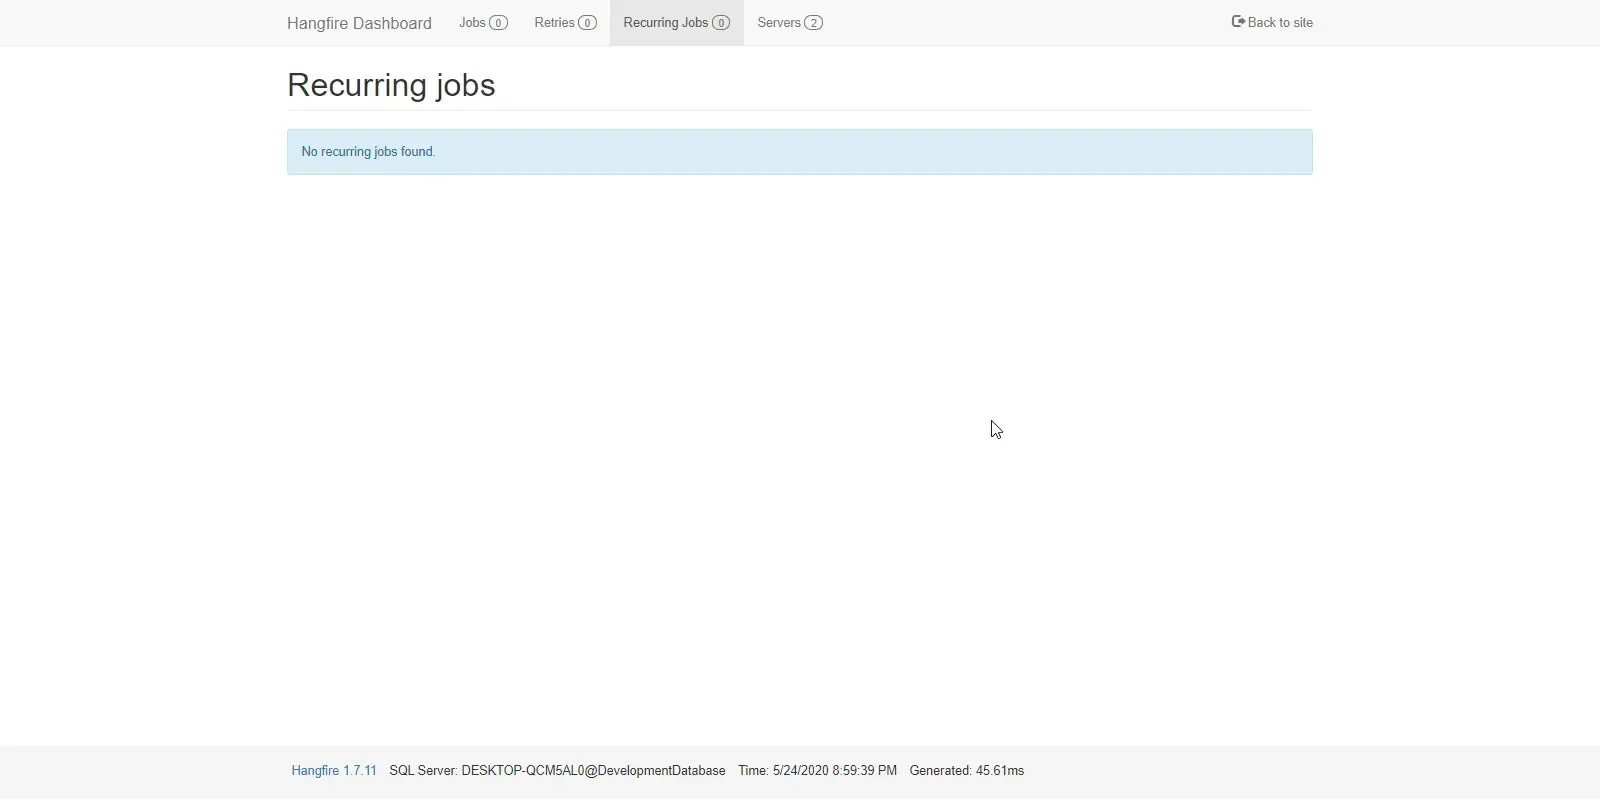
Recurring Jobs Tab.
What if you need to mail the use his invoice on a monthly basis. This is the core feature of Hangfire, recurring jobs. This tab allows you to monitor all the configured jobs.
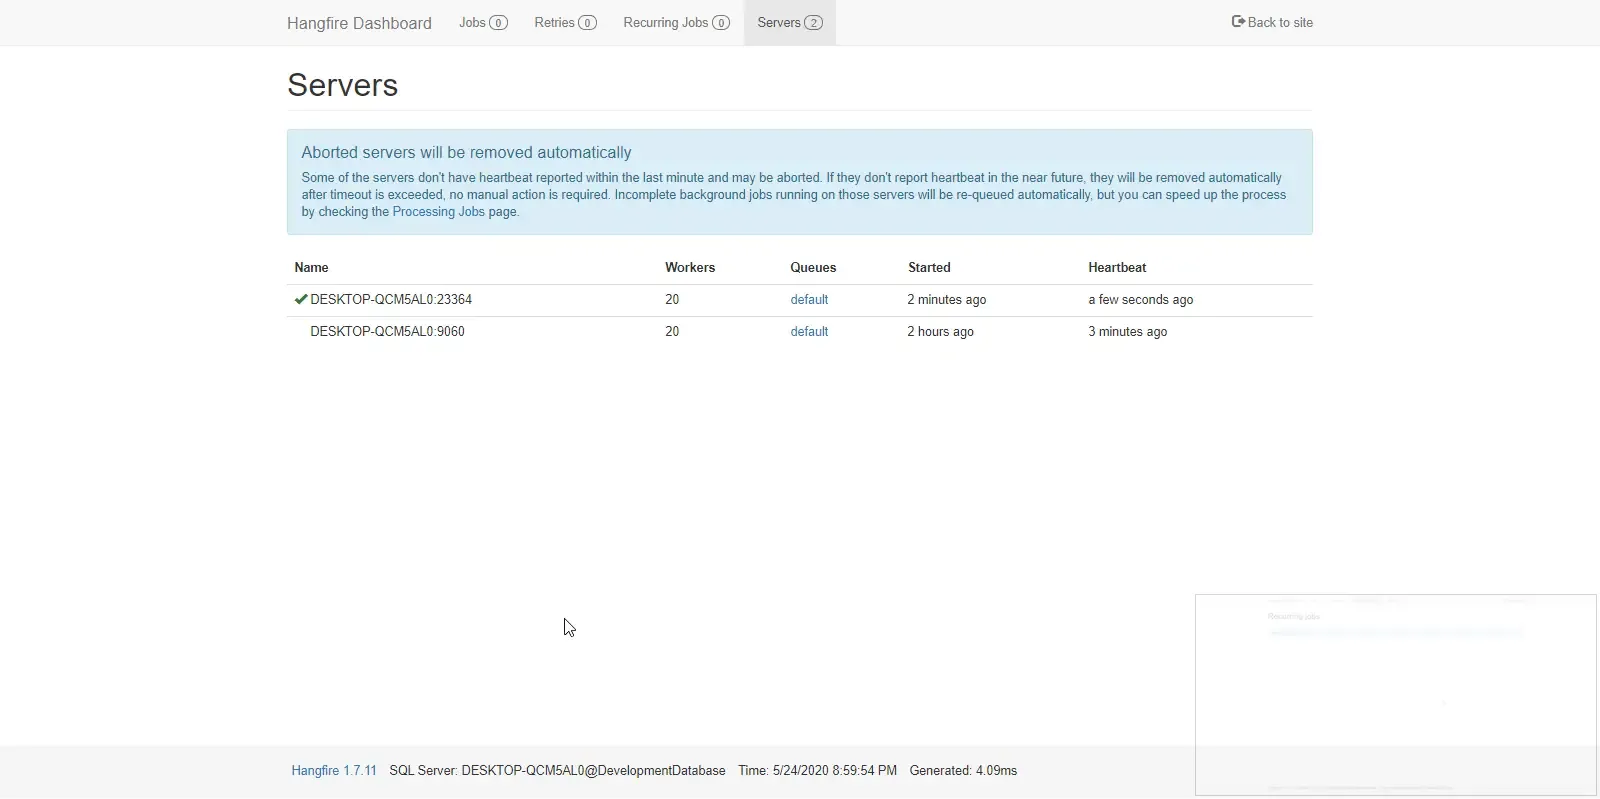
Servers Tab.
Remember, while configuring Hangfire in the Startup.cs class, we have mentioned. services.AddHangfireServer().. This is the tab where it shows all the active Hangfire Server. These servers are responsible for processing jobs. Say, you haven’t added the services.AddHangfireServer() in the Startup class, you would still be able to add Hangfire Jobs to the Database, But they won’t be executed until you fire up a Hangfire Server.
Securing the Hangfire Dashboard
This is quite an obvious feature. Since the dashboard may expose very sensitive data like method names, parameter values, email-ids, it is highly important that we secure/restrict this endpoint. Hangfire, out of the box makes the dashboard secure by allowing only local requests. However, you can change this by implementing your own version of IDashboardAuthorizationFilter. If you have already implemented Authorization in your API, you can implement it for Hangfire. Refer to these steps to secure the dashboard.
Job Types in Hangfire
Background Jobs in ASP.NET Core (or say any technology) can be of many types depending on the requirements. Let’s go through the Job Types available with Hangfire with proper implementation and explanation on our ASP.NET Core API Project. Let’s get coding.
Fire-and-forget Jobs
Fire-and-forget jobs are executed only once and almost immediately after creation. We will create our first background Job. Open up the Hangfire Controller that we had created. We will create a POST endpoint that welcomes a user with an email (ideally). Add in these codes.
[HttpPost][Route("welcome")]public IActionResult Welcome(string userName){    var jobId = BackgroundJob.Enqueue(() => SendWelcomeMail(userName));    return Ok($"Job Id {jobId} Completed. Welcome Mail Sent!");}
public void SendWelcomeMail(string userName){    //Logic to Mail the user    Console.WriteLine($"Welcome to our application, {userName}");}
Explanation.
Line #5 stores the JobId into a variable. You can see that we are actually adding a Background job represented by a dummy function SendWelcomeMail. The JobId is later posted back to the Hangfire Dashboard. Build the application and run it. Let’s test it with Postman.
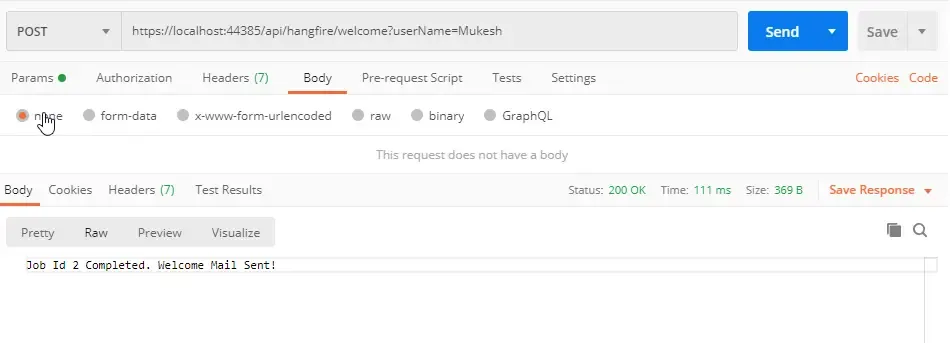
Note the URL and how I am passing the username to the controller. Once you execute it, you will get our required response. “Job Id 2 Completed. Welcome Mail Sent!”. Now let’s check on the Hangfire dashboard.
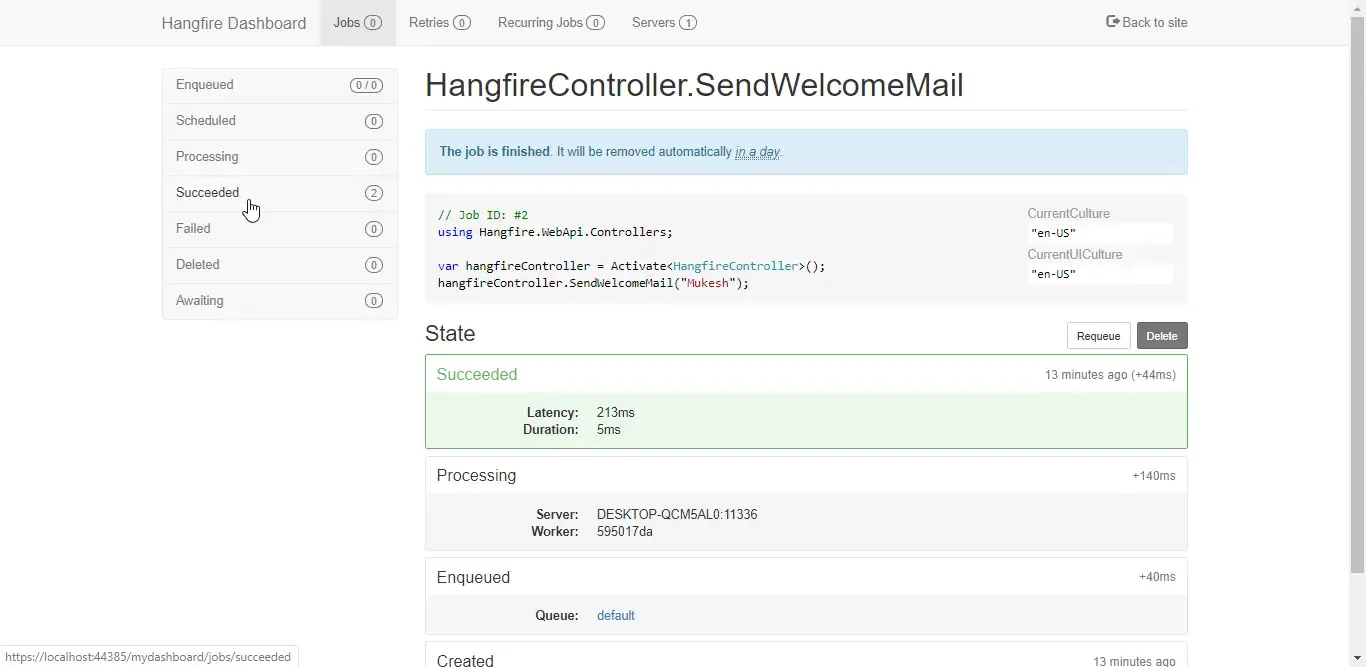
Under the Succeeded Tab, you can see the count of completed jobs. You also get to see the details of each job, similar to the above screenshot. All the parameters and function Names are exposed here. Want to run this job again with the same parameters? Press on the Requeue button. It re-adds your job in the queue for Hangfire to process. It happens almost immediately.
Delayed Jobs
Now, what if we want to send a mail to a user, not immediately, but after 10 mins. In such cases, we use delayed Jobs. Let’s see it’s implementation after which I will explain in detail. In the same controller, add these lines of code. It is quite similar to the previous variant, but we introduce a delay factor to it.
[HttpPost][Route("delayedWelcome")]public IActionResult DelayedWelcome(string userName){    var jobId = BackgroundJob.Schedule(() => SendDelayedWelcomeMail(userName),TimeSpan.FromMinutes(2));    return Ok($"Job Id {jobId} Completed. Delayed Welcome Mail Sent!");}
public void SendDelayedWelcomeMail(string userName){    //Logic to Mail the user    Console.WriteLine($"Welcome to our application, {userName}");}
Explanation.
Line #5 scheduled the job to a defined timespan, in our case it is 2 minutes. That means, our job will be executed 2 minutes after the action has been called from Postman. Let’s open up Postman again and test.
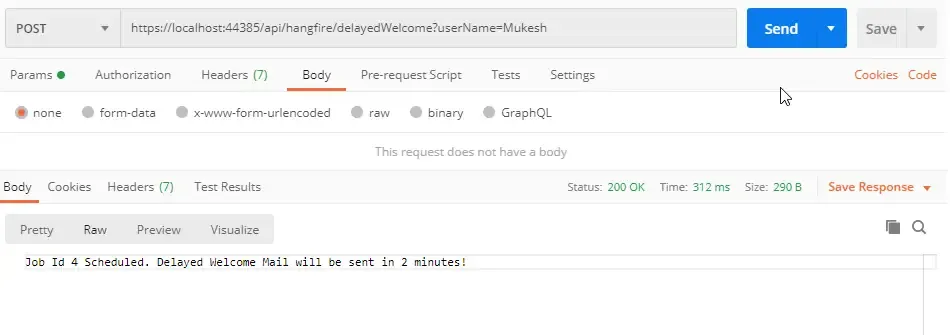
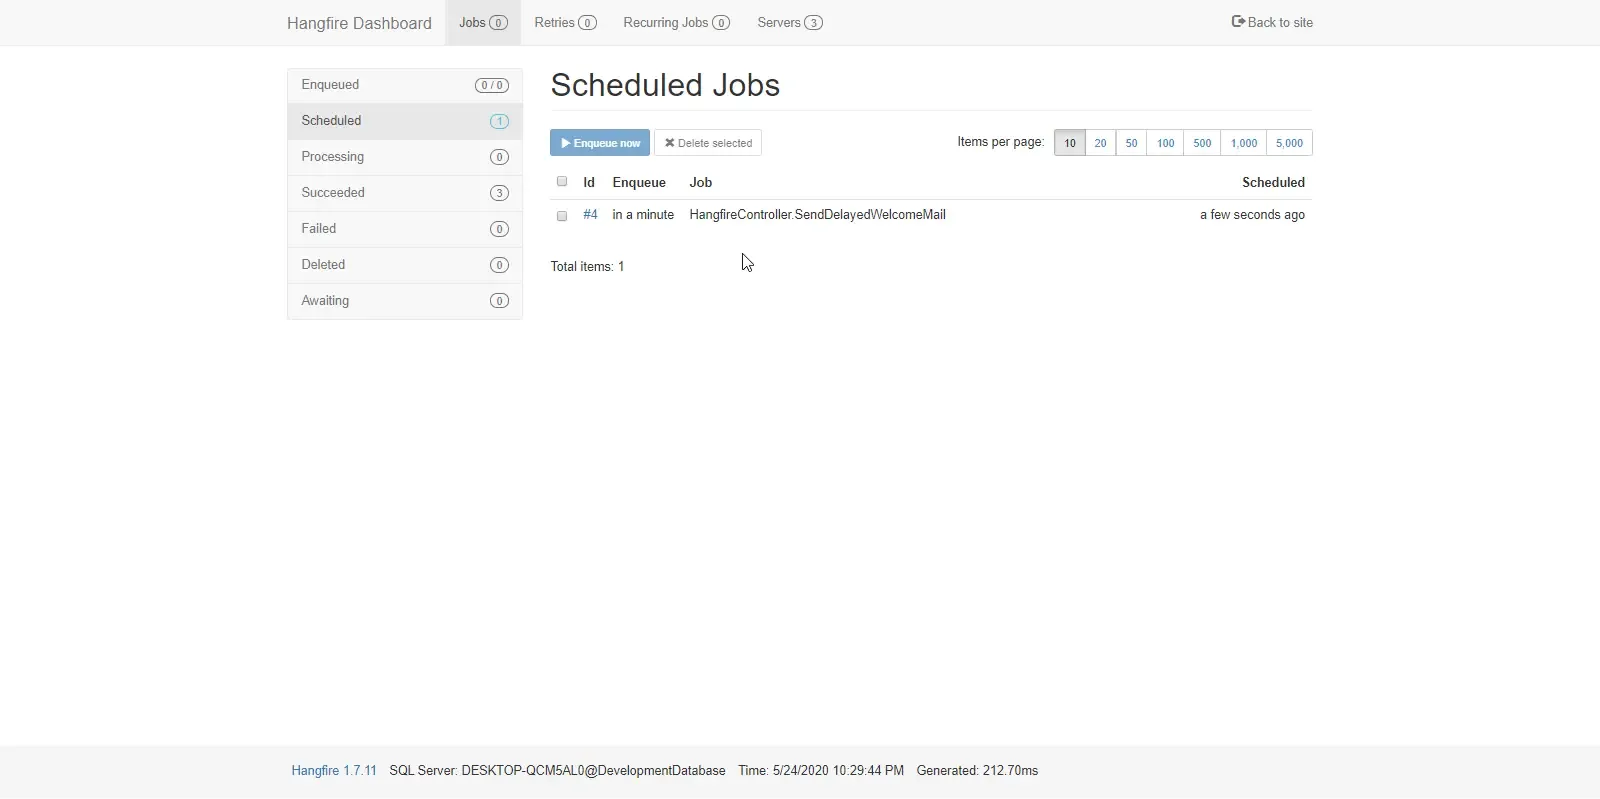
You can see that we receive the expected response from Postman. Now. quickly switch back to the Hangfire Dashboard and click on the Jobs/Scheduled Tab. It would say that the job will run in a minute. There you fo. You have created your first Scheduled Job using Hangfire with ease.
Recurring jobs
Our Customer has a subscription to our service. We would obviously have to send him/her a reminder about payment or the invoice itself. This calls the need for a Recurring Job, where I can send my customer emails on a monthly basis. This is supported in Hangfire using CRON schedule.
What is CRON? CRON is a time-based utility that can define time intervals. Let’s see how to achieve such a requirement.
[HttpPost][Route("invoice")]public IActionResult Invoice(string userName){    RecurringJob.AddOrUpdate(() => SendInvoiceMail(userName), Cron.Monthly);    return Ok($"Recurring Job Scheduled. Invoice will be mailed Monthly for {userName}!");}
public void SendInvoiceMail(string userName){    //Logic to Mail the user    Console.WriteLine($"Here is your invoice, {userName}");}
Line #5 clearly states that we are trying to add/update a Recurring Job, that call a function as many times as defined by the CRON scheme. Here we will be mail the invoice to the customer on a monthly basis on the first of every month. Let’s run the application and switch to Postman. I am executing this code on the 24th of May, 2020. According to our requirement, this job should be fired on June 1, 2020 which is 7 days away. Let’ see.

So, this worked . Let’s switch to Hangfire Dashboard and go to the Recurring Jobs Tab.
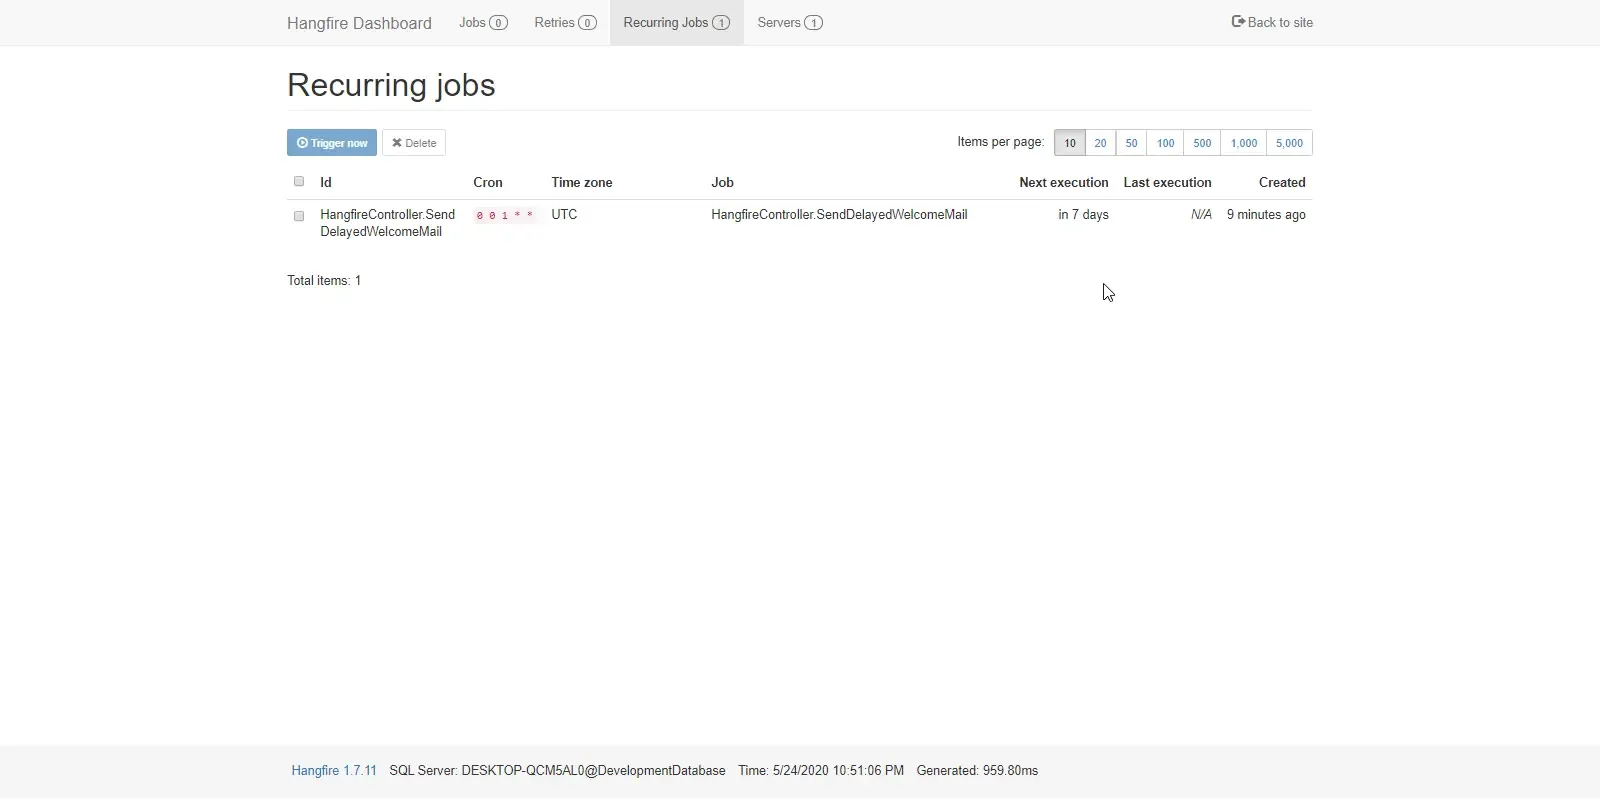
Perfect! Works as excepted. You can go through various CRON schemes here that may match your requirement. Here is a nice little documentation to understand various CRON expressions are its usage.
Continuations
This is a more complicated scenario. Let me try to keep it very simple. A user decides to unsubscribe from your service. After he confirms his action (Maybe clicking the unsubscribe button), we (the application) have to unsubscribe him from the system and send him a confirmation mail after that as well. So, the First job is to actually unsubscribe the user. The second job is to send a mail confirming the action. The second job should be executed only after the first job is completed properly. Get the scenario?
[HttpPost][Route("unsubscribe")]public IActionResult Unsubscribe(string userName){    var jobId = BackgroundJob.Enqueue(() => UnsubscribeUser(userName));    BackgroundJob.ContinueJobWith(jobId, () => Console.WriteLine($"Sent Confirmation Mail to {userName}"));    return Ok($"Unsubscribed");}
public void UnsubscribeUser(string userName){    //Logic to Unsubscribe the user    Console.WriteLine($"Unsubscribed {userName}");}
Explanation.
Line #5 The first job which actually contains logics to remove the user’s subscription.
Line #6 Our Second Job that will continue after the First job gets executed. This is done by passing the Job Id of the Parent Job to the Child Jobs.
Let’s fire up the application and go to Postman.


Now, go to the Dashboard and check the succeeded job. You will see 2 new jobs executed in the exact order we wanted it to. That’s it for this tutorial. I hope you guys are clear with these concepts and find it easy to integrate Hangfire in ASP.NET Core Applications.
Summary
In this in-depth guide, we have gone through the concepts of Background Jobs, Features, and Implementation of Hangfire in ASP.NET Core Applications and various Job Types in Hangfire. The source code used to demonstrate this tutorial is posted on GitHub. I will leave the link below for you to refer to. Do you have experience with Hangfire? Do you have any queries/suggestions? Feel free to leave below in the comments section. Happy Coding :)
Frequently Asked Questions
Is Hangfire free?
Yes, hangfire is open sourced library free for commercial uses. However, there is an upgrade available to access few more features of Hangfire. But the core features of the library remain in the free tier as well.
What is Hangfire?
Hangfire is an open-sourced library that enables the developers to schedule events in the background with the utmost ease. It is a highly flexible library offering various features needed to make the job scheduling task a cake-walk.

