In this article, we will be Integrating Tailwind CSS With Blazor Applications. This is a guide exclusively for the .NET devs like me who are not much into CSS, yet want to build clean-looking UIs. We will get started with building great UI components with just half (or even less than half) of the CSS knowledge you already have. You can find the source code of the implementation here.
Trust me, I find it confusing to even center a button or element within a div at times. Although Blazor claims to free the devs from JS, there is still CSS out there sucking out half of the time, unless you have a dedicated UI team. I will introduce you to an awesome CSS Framework that makes quite a lot of sense and lives easier for us. TailwindCSS - the framework that makes it easier and smarter to build elegant components.
What is Tailwind CSS?
Tailwind CSS is a utility first CSS framework that allows you to build beautiful-looking websites even without leaving the HTML code. This means that you can achieve cool looks by just using pre-built CSS classes within your HTML object definition. For the first time, CSS class names actually make sense. Here is a small example of what Tailwind CSS can actually do:
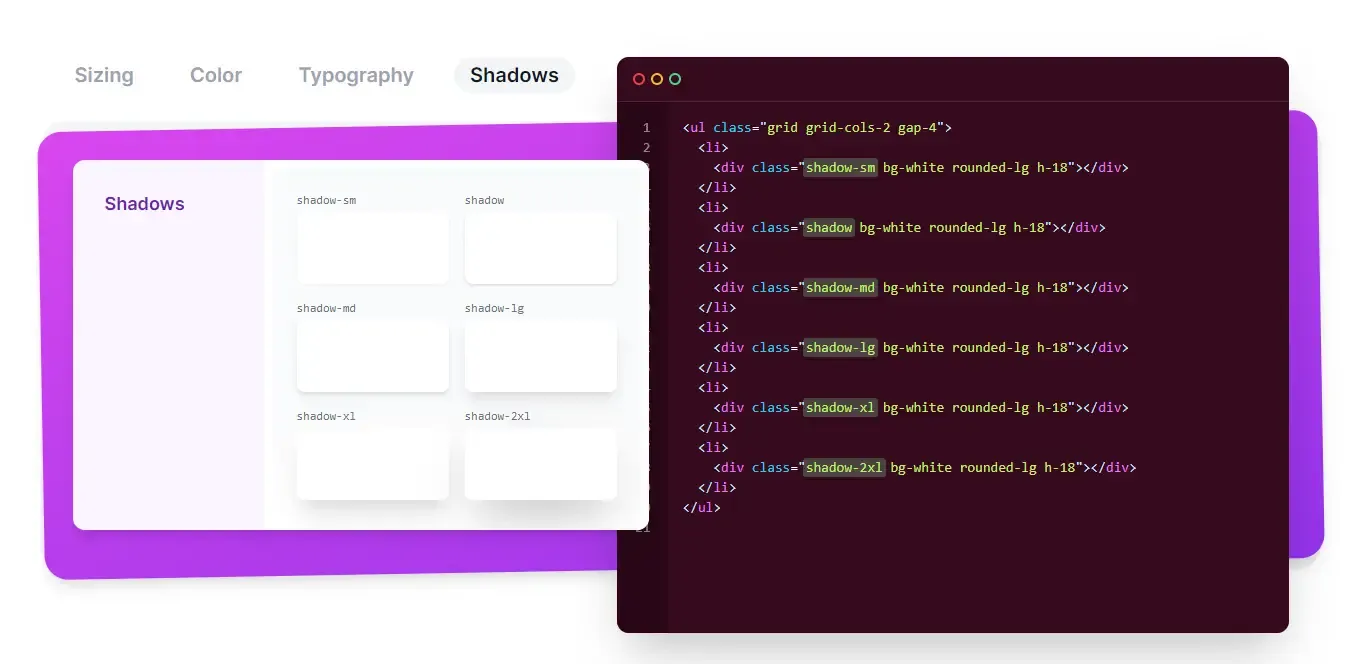
The above screenshot illustrates various types of pre-built shadows you can apply for HTML elements as classes. You would need way more code than this when you use other frameworks like Bootstrap, Bulma, etc. Get my point? This is pretty sweet at first glance. Tailwind CSS covers various other aspects like borders, hover/focus states, typography, font weights, and really everything you would ever need. Here is another example of how you would be setting font weights with Tailwind CSS.
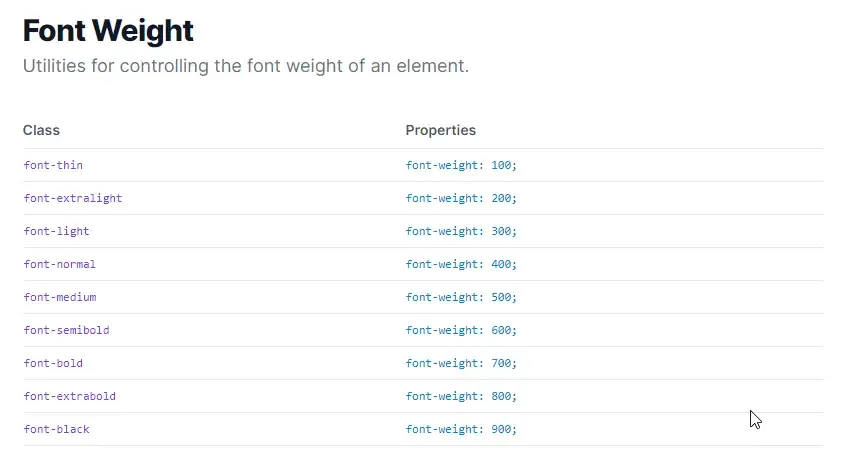
Useful, yeah? This is what I think would make a cool UI framework for Blazor. Blazor with TailwindCSS means that you have to deal with no JS and a smarter way to handle CSS. Before learning how to integrate Tailwind CSS with Blazor, let’s see a small demo on how to to build components with Tailwind CSS. Here is a Playground for TailwindCSS, where you can build quick prototypes - Tailwind CSS Playground.
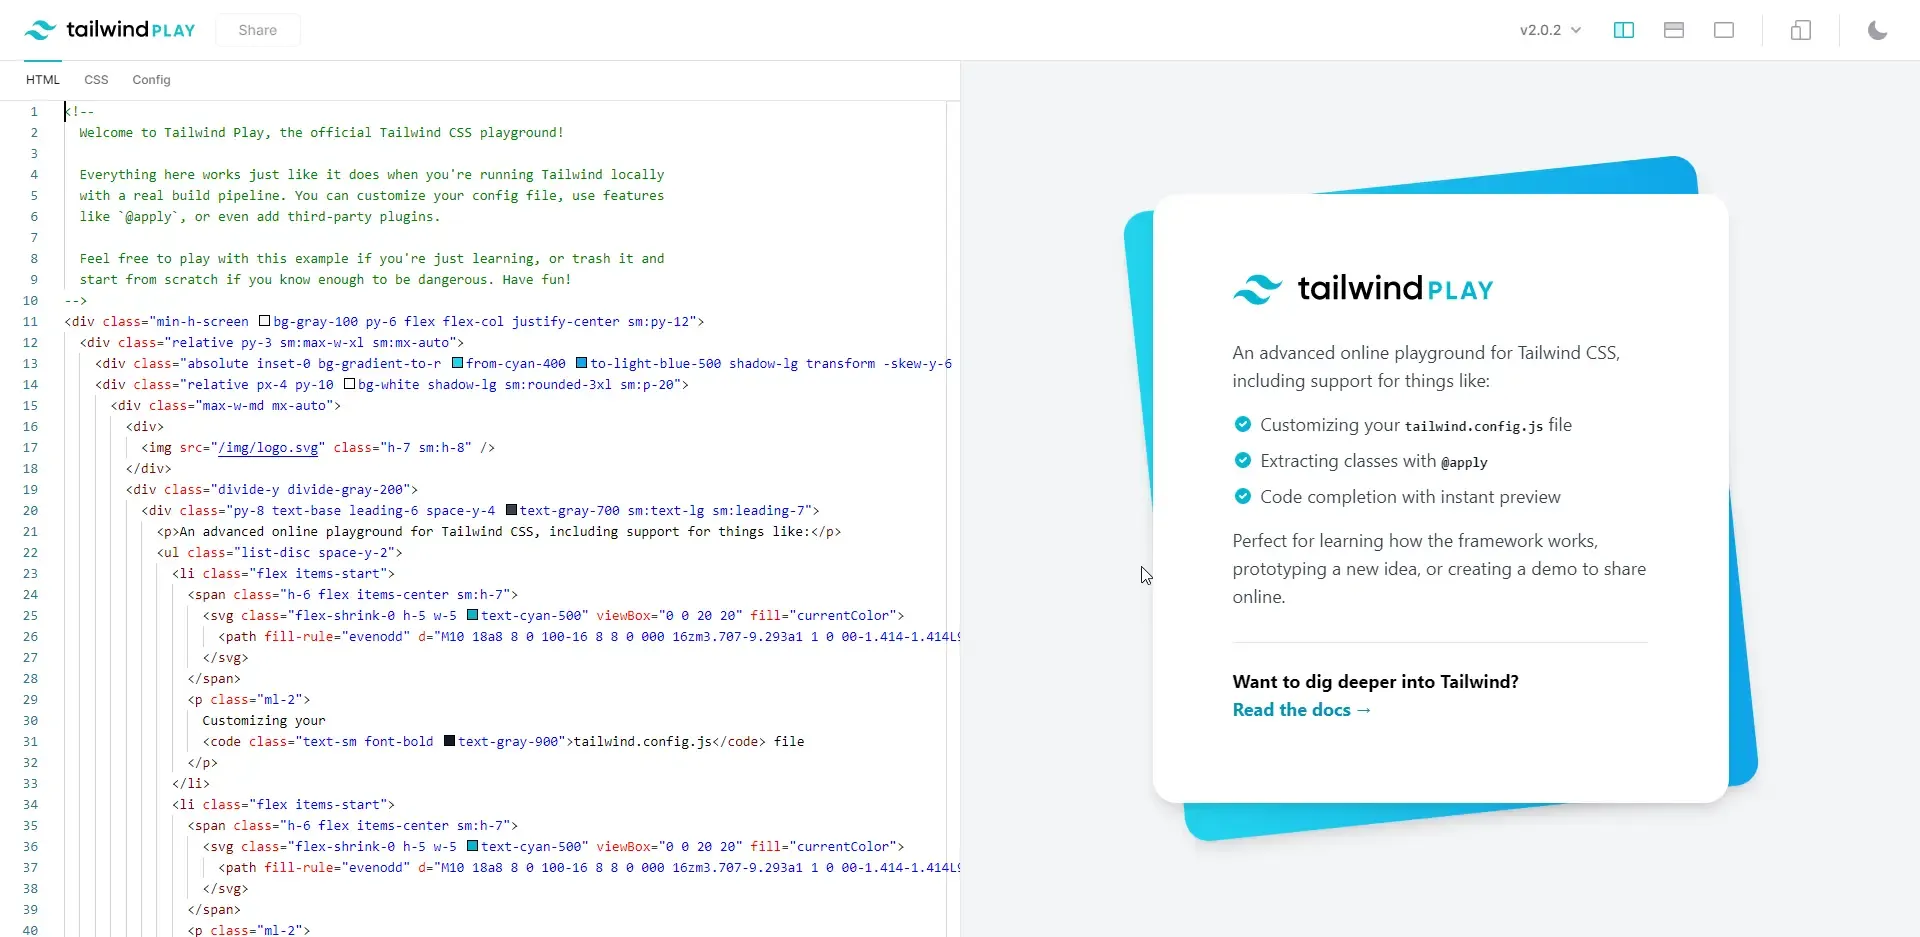
You can find some prebuilt components here - https://tailwindui.com/components.
Getting started: Integrating Tailwind CSS with Blazor
Now that we have seen the awesomeness and flexibility that Tailwind CSS can achieve, doesn’t it make sense to integrate Tailwind CSS with Blazor to ease the life of the C# developers? Especially for those like me who are quite ignorant about CSS and stuff! As of now, it’s quite a bit of ONE-TIME work to get Tailwind CSS running with Blazor as it requires installing npm, certain packages, configuring build-time events, and so on. Although these terms may sound hectic at the beginning, it’s pretty easy to get over with and enjoy a rapid development experience with Tailwind CSS in Blazor.
Alternatively, there’s another way to integrate TailwindCSS with Blazor. It’s as simple as adding the CSS CDN Reference to the _Host or Index pages of your Blazor Applications. Although this is a quick and fairly easy way, there are certain limitations associated with this approach. The major issue Is that the references CSS is going to be huge which is not very ideal for the production environment, and the flexibility/features are drastically reduced as well. Thus, we will be taking the harder way around to integrate Tailwind CSS with Blazor (not that hard though).
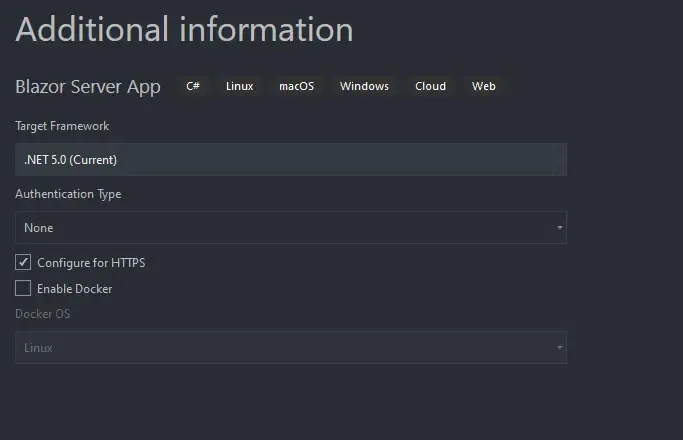
Let’s get started by creating a new Blazor Server Project. You could use a WASM Project as well.
Creating an npm Project
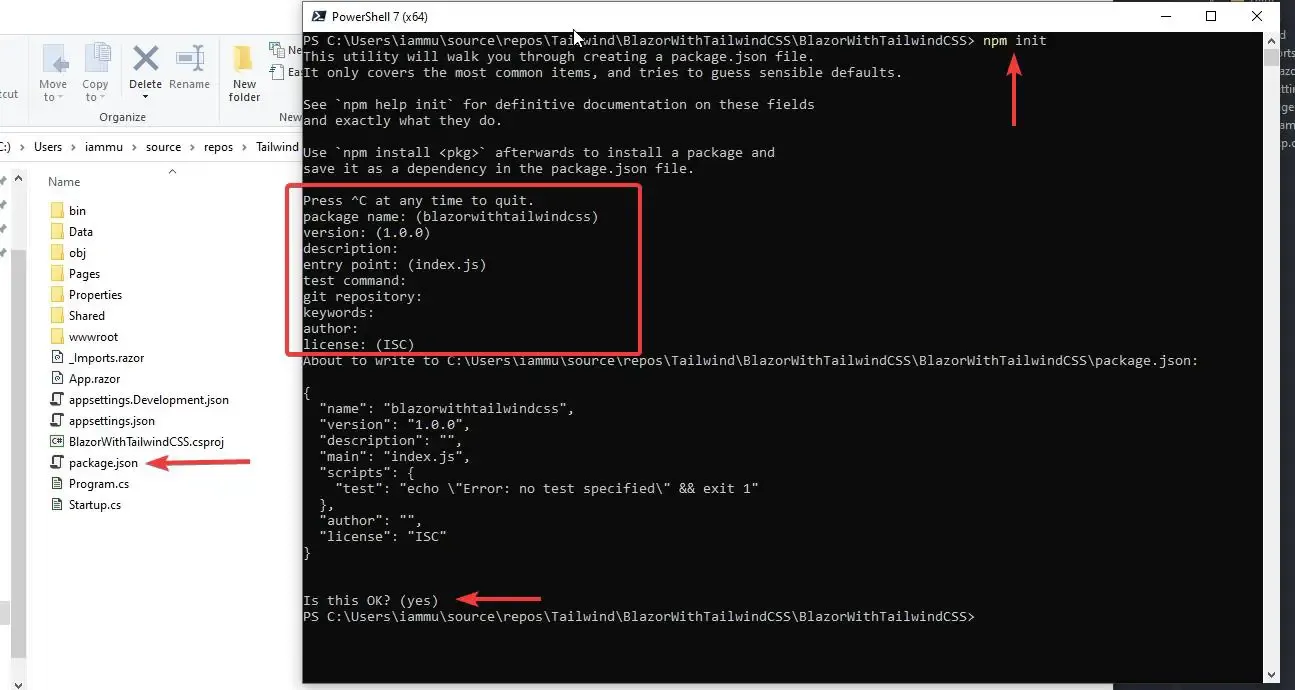
Make sure that you have Node.js and npm CLI tools installed on your machine. You can get it from here. With that done, open the root directory of your Blazor Project. Here, open the command prompt / cli / windows shell and type in the following command.
npm init
This creates a new package.json file in your Blazor’s root directory. Here is your newly creating JSON file. The idea behind this is that we will be adding tailwindcss as a package via npm along with certain other libraries as well.
Adding Tailwind CSS & other packages
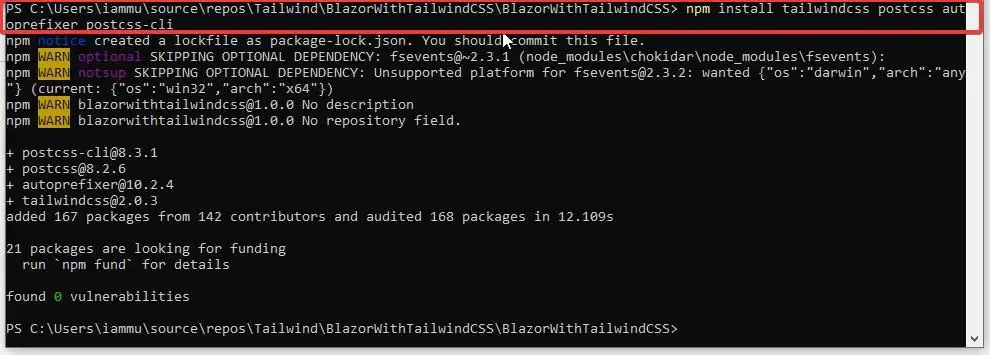
In the terminal, run the following command. This installs few packages for you.
tailwindcss: the latest version of tailwind CSS
autoprefixer: a part of the postcss package.
postcss & cli: a cool tool to compress CSS and remove the CSS portions that are not being used. Helps to drastically reduce the CSS files, especially TailwindCSS which is over 500Kb.
npm install tailwindcss postcss autoprefixer postcss-cli
Configuring PostCSS
As mentioned earlier, POSTCSS will be responsible for transforming the tailwind.css to your own version. Create a new JS file in the root directory of the project and name it postcss.config.js.
module.exports = { plugins: { tailwindcss: {}, autoprefixer: {}, }}Configuring Tailwind CSS
Next, to add a Tailwind configuration file, let’s run the following command in the terminal within the application’s root folder :
npx tailwindcss initThis will create you a tailwind.config.js file.
const colors = require('tailwindcss/colors');module.exports = { purge: [], darkMode: false, theme:[], variants: { extend: {}, }, plugins: [],}In the wwwroot folder add a new CSS file and name it app.css. ( You could name it anything). This is what POSTCSS will use to generate your site’s CSS resource. Here we will be adding imports from the tailwind CSS library.
@tailwind base;@tailwind components;@tailwind utilities;Building CSS with PostCSS CLI
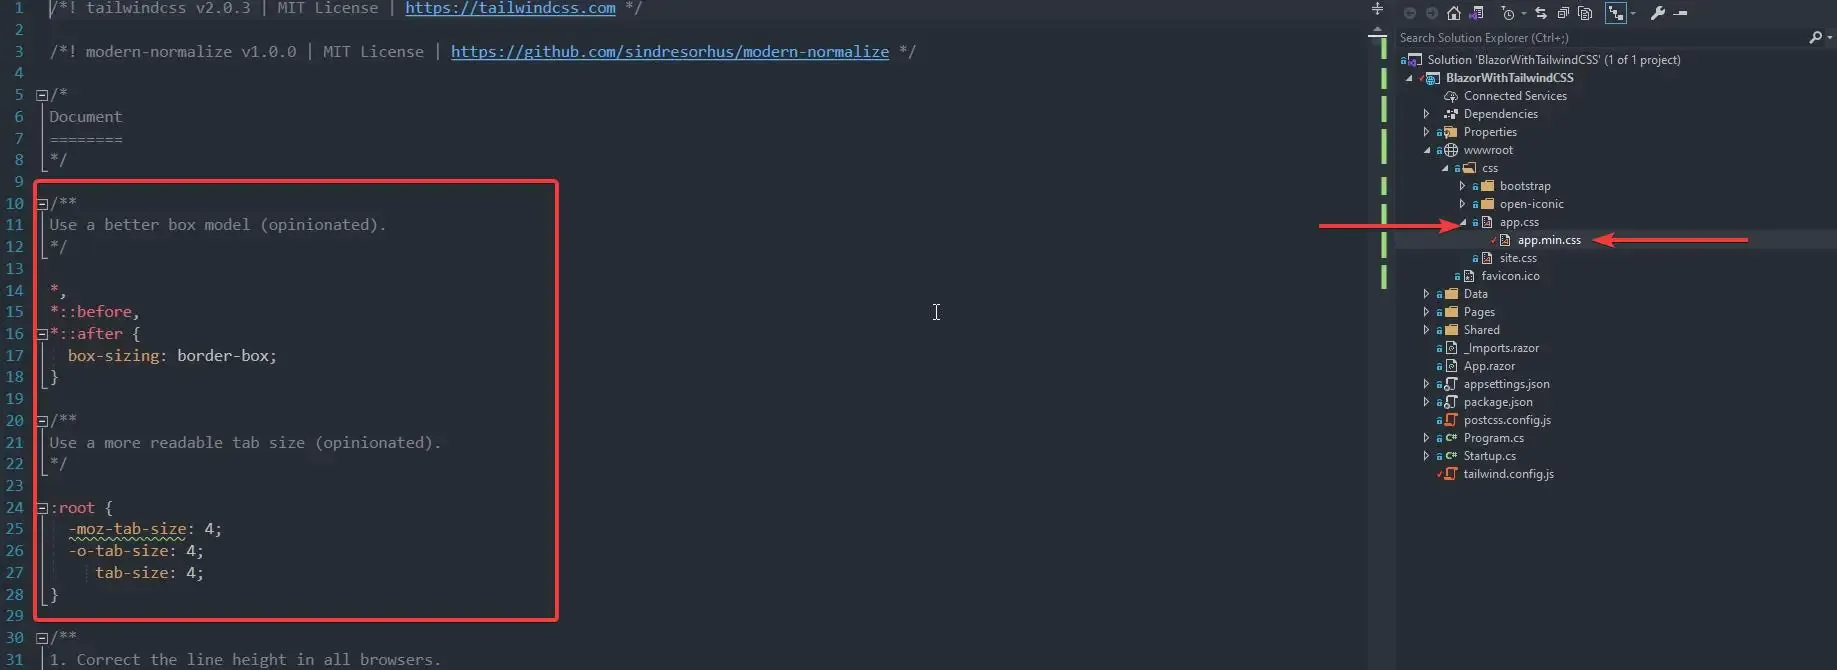
Now, we need to build a script that can automate the postcss processing. Add the highlighted lines to your package.json file. What this script/command does is simple - It takes in app.css as the input and generates an app.min.css file in the same path. The newly generated file contains the complete tailwindcss content.
{ "name": "blazorwithtailwindcss", "version": "1.0.0", "description": "", "main": "index.js", "scripts": { "buildcss": "postcss wwwroot/css/app.css -o wwwroot/css/app.min.css" }, "author": "", "license": "ISC", "devDependencies": { "autoprefixer": "^10.2.4", "postcss": "^8.2.6", "postcss-cli": "^8.3.1", "tailwindcss": "^2.0.3" }}With that done, open up your terminal and run the following command.
npm run buildcss
This would have generated an app.min.css file in your root directory. You can notice that all the TailwindCSS styles are generated here.
Removing unused CSS
Why do you need this? Simple, to save the bandwidth usage of the client. Let me show you how much bandwidth the Tailwind CSS uses if not optimized.

That’s a whooping 500+ kB worth of data that has to be passed on the client . Is it ideal for production? Totally NO. Here is a simple way by which you can remove all the unused CSS content from app.min.cs and save tones of bandwidth.
Open up your tailwind.config.js and modify it to match the following.
const colors = require('tailwindcss/colors');module.exports = { purge: { enabled: true, content: [ './**/*.html', './**/*.razor' ], }, darkMode: false, variants: { extend: {}, }, plugins: [],}PS, Make sure that you run the npm run buildcss command every time you make changes in any of the related js or CSS files. (In the next section, we will discuss post-build events that could automate running the npm command every time you build or rebuild the project.)

Configuring Post Build Events
Here is a simple way to make Visual Studio run the NPM build command as soon as you build/rebuild the project. This will come in handy when you do some changes to your app.css or even tailwind.css and don’t prefer running the npm command every time.
Open your solution file and paste in the following highlighted snippet. This ensures that the dotnet build system runs the npm command once the project is built.
<Project Sdk="Microsoft.NET.Sdk.Web"> <Target Name="PostBuild" AfterTargets="PostBuildEvent"> <Exec Command="npm run buildcss" /> </Target> <PropertyGroup> <TargetFramework>net5.0</TargetFramework> </PropertyGroup></Project>This is what I get to see when I build my Blazor Application.

Adding the Stylesheet reference
Finally, add the referend of the generated CSS file to your Blazor application. Since we have Server Project, you would probably want to add the following snippet to the _Host.cshml file. If you are on a WebAssembly project, Index.html is where you need to add the following.
PS, for the sake of demonstration I have removed all the references to the existing stylesheets that come out of the box with Blazor, to keep the project completely on TailwindCSS.
Tailwind CSS with Blazor: Demonstration
As for the start, let’s create a couple of buttons. Here is a sample code. Is quite self-explanatory, yeah?
@page "/"<div class="bg-gray-50"> <div class="mx-auto py-12 px-4"> <div class="mt-8 flex"> <button class="bg-gray-500 hover:bg-purple-600 p-4 shadow-md rounded-md text-white m-10"> Download </button> <button class="bg-gray-500 hover:bg-red-600 p-4 shadow-md rounded-md text-white m-10"> Visit </button> </div> </div></div>
That’s how easy it is, to create cool and simple buttons (and of course, bring them to the center too! :P ). As for something advanced, here it is in the below screenshot. You can find other prebuilt components here - https://tailwindui.com/components

Summary
In this article, we learned about implementing Integrating Tailwind CSS with Blazor. You can find the source code of the complete implementation here. If you enjoyed this article, make sure that you share it with your colleagues and blazor developers. This helps me reach a wider audience and stay motivated to produce more content regularly.
Leave behind your valuable queries, suggestions in the comment section below. Also, if you think that you learned something new from this article, do not forget to share this within your developer community. Happy Coding!


