In this article, we will go through Healthchecks in ASP.NET Core, it’s uses, variations and implementing your own custom health-checks. This is one of the integral parts to consider while building ASP.NET Core Applications for production. You can find the source code of the implementaion on my GitHub for reference.
Why Do you need Healthchecks?
Usually, to monitor the uptime ( this is a term used to define the availability of a particular resource online ) of various components of a Solution like Database, APIs and so on, HealthChecks come in handy. Checking the health of your application components is quite vital for Microservices Architecture based Solutions, where you can have N number of sub-project / services.
Traditionally, this is done by simply the pinging the specific resource using tools like Pingdom and Uptime. But this is quite a lot of manual work. Imagine having to ping each and every component to monitor it’s status. Not very much practical, yeah? How about pinging a single endpoint and retreiving the health status of all your components? Introducing Healthchecks for ASP.NET Core!
What are Healthchecks in ASP.NET Core?
Healthchecks is yet another addition to the long list of features / Middleware offered by ASP.NET Core. This one is specifically to report the health status of your application components. In ASP.NET Core, healthcheck reports are usually exposed as a HTTP endpoint. Meaning, you would have to ping to www.api.com/healths to get the entire report. ASP.NET Core makes it really easy to integrate healthchecks for databases, cache, external services and even create your own custom health-checks.
Healthchecks are quite handy for
- Solutions following a microservice Architecture with tons of sub-projcts or services.
- Fully scaled applications with load balancers that can re-route the traffic away from un-healthy API to a Backup API.
- Testing application dependecies like databases or external resource to check availability.
Implementing Healthchecks in ASP.NET Core
We will implement Healthchecks on an ASP.NET Core 3.1 WebApi Project. I use Visual Studio 2019 Community as my go-to IDE for C# development.
Once the ASP.NET Core Application is created, we will first install the package via package manager console.
Install-Package Microsoft.Extensions.Diagnostics.HealthChecks Install-Package Newtonsoft.Json
Once that is done, navigate to Startup.cs to register the HealthCheck Middleware into our ASP.NET Core Application. Add this line to the ConfigureServices Method.
services.AddHealthChecks();Next, go the Configure method. Here we will have to specify the health-check endpoint path. For now, we will use the endpoint at /health.
app.UseHealthChecks("/health");This means that, if you navigate to localhost:xxx/health, you would get the health-check status.
That’s actually how simple it is to get the basic healthcheck up and running. Let’s build the application and navigate to ../health.
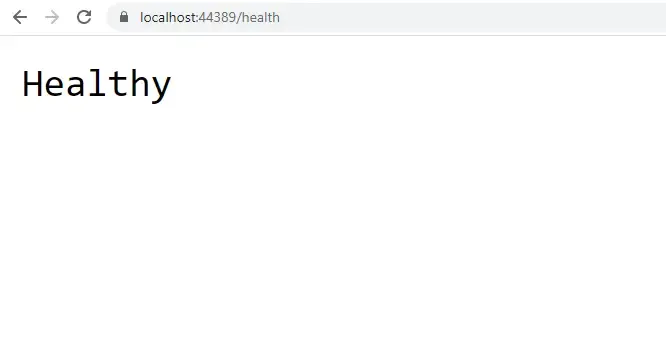
Out of the box, Health checks are quite basic without much of the bells and whistles. So, what is healthy? Here, Healthy means that our entire API Application is healthy. But this is not quite a lot of helpful information. Is it?
Better Healthcheck Reponse.
In order to generate a more readable response that makes sense, let’s add a bunch of reponse classes.
- Response Class for Overall Health
- Response Class for Component-wise Health
Let’s add a new class to hold the health-status data of each component. Make a new class at Models/IndividualHealthCheckResponse.cs
public class IndividualHealthCheckResponse{ public string Status { get; set; } public string Component { get; set; } public string Description { get; set; }}Now, we need another class that hold a list of IndividualHealthCheckResponses . Add a new class at Models/HealthCheckReponse.cs
public class HealthCheckReponse{ public string Status { get; set; } public IEnumerable<IndividualHealthCheckResponse> HealthChecks { get; set; } public TimeSpan HealthCheckDuration { get; set; }}Now that we have your reponse classes in place, we will configure HealthChecks to write the status data to these classes and return the reponse in a JSON format. For this, Navigate to the Startup.cs/Configure method. Here we will extend the already added line of code with a new overload, HealthCheckOptions.
app.UseHealthChecks("/health", new HealthCheckOptions{    ResponseWriter = async (context, report) =>    {        context.Response.ContentType = "application/json";        var response = new HealthCheckReponse        {            Status = report.Status.ToString(),            HealthChecks = report.Entries.Select(x => new IndividualHealthCheckResponse            {                Components = x.Key,                Status = x.Value.Status.ToString(),                Description = x.Value.Description
            }),            HealthCheckDuration = report.TotalDuration        };        await context.Response.WriteAsync(JsonConvert.SerializeObject(response));    }});
Here we are adding an overload to the UseHealthChecks method, HealthCheckOptions.
Line #3 - This accepts a HttpContext and the HealthReport. We use these variables to write to our HealthCheckReponse classes.
Line #5 - Here we define that the type of response should be JSON
Line #6 - Creating a new HealthCheckReponse object
Line #9 - Filling the Individual component class from the Entires of Health Check Report.
Line #18 - Serializes the class to jSON and writes it to the result. PS, we have already installed the Newtonsoft Package.
That’s it. Now what happens is that, all the needed data is mapped in our new response class. Let’s build the application and RUN it.
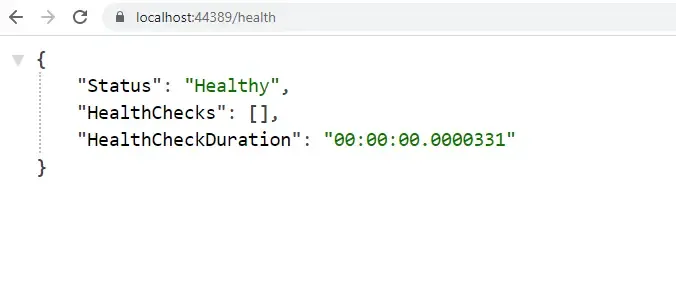
Looks better right? Health Check Duration is the actual time duration to run the healthcheck. For now, the health check endpoint only returns the health check report of the actual API. Let’s add a couple of components to this report.
Entity Framework Core HealthCheck
Ideally, a well built application would have multiple DbContext classes to access the data source. In such scenarious you can hook up healthchecks with each of these DbContext classes to monitor the interface and ultimately the data-source related. Now, I will add a dummy DBContext class within our ASP.NET Core Application and connect it to a SQL Database.
If you want to read more about Entity Framework - Code First Approach in ASP.NET Core Application, I have written a detailed guide covering all that you would want to know to get started. Read it here.
I will skip through all the steps and reach a point where I have EFCore installed and integrated with my application. Now, let’s add the DBContext to HealthCheck Services. For this, we need to install a package to support EFCore withing HealthChecks.
Install-Package Microsoft.Extensions.Diagnostics.HealthChecks.EntityFrameworkCoreservices.AddHealthChecks() .AddDbContextCheck<DataContext>();Line #2 - Here we are adding our DBContext Class ‘DataContext’ to the HealthCheck Services. Let’s run the application now.
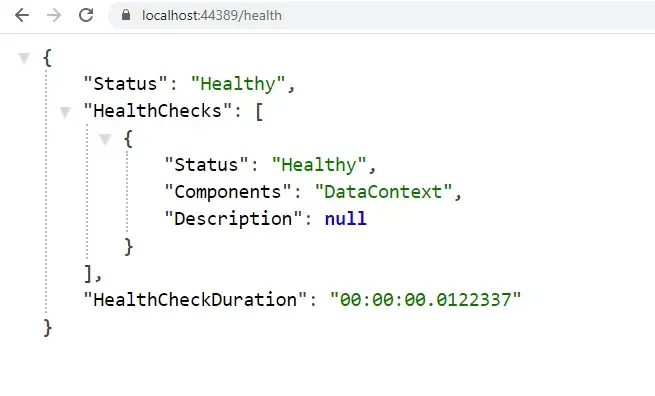
A much better response right? I will change my appsettings.JSON’s connection string to an invalid database. Let’s see what happens.
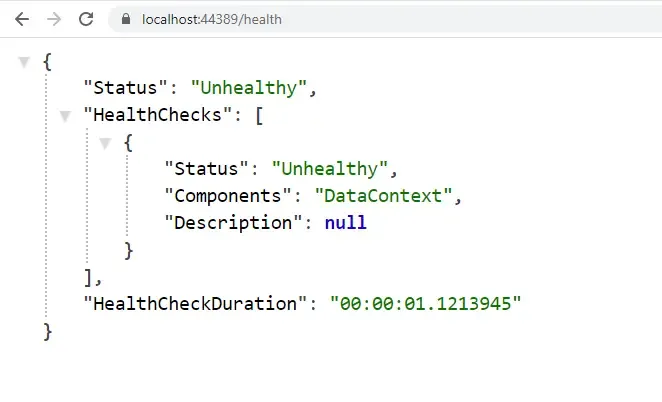
There you go.
URL Health Check
Now there can be other requirements where you need to check the health/availability of an external URL or file. For this, there is one more package that we have to install.
Install-Package AspNetCore.HealthChecks.UrisLet’s modify our service registration again to accomadate URI checks.
services.AddHealthChecks() .AddDbContextCheck<DataContext>() .AddUrlGroup(new Uri("https://codewithmukesh.com"), name: "CodewithMukesh");In Line #3, we will check if this Blog is up and running :D
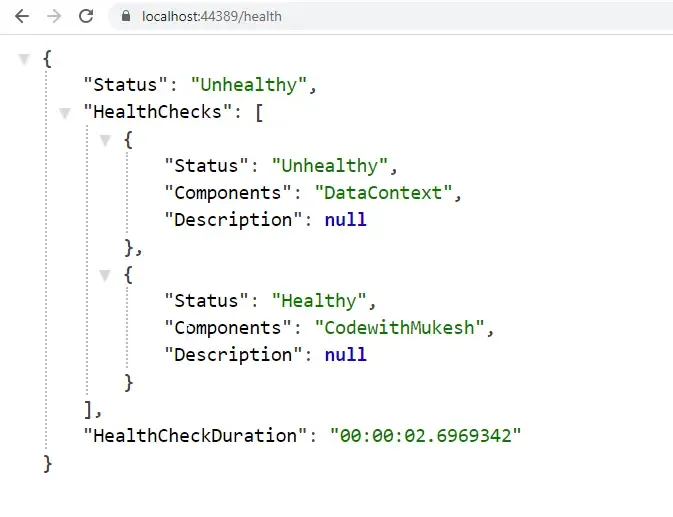
You can see that we have an additional entry in the component list. Here, the URL is healthy, but since our DbContext is failing, the entire application would be seen as unhealthy. Get the point?
Now we will talk about creating our own Custom healthCheck logics.
Custom Healthcheck
It’s quite straight forward to add databases and services to the healthchecks. But what if we need an entirely custom health, with your logics? Well, that’s what we will do now. Create a new Folder, HealthChecks and add a class CustomHealthCheck.cs
public class CustomHealthCheck : IHealthCheck{  public Task<HealthCheckResult> CheckHealthAsync(HealthCheckContext context, CancellationToken cancellationToken = default)  {    try    {      throw new Exception("Random Error Caught!");    }    catch (Exception ex)    {
      return Task.FromResult(HealthCheckResult.Unhealthy(ex.Message));    }  }}
Line #1 - We implement from the interface, IHealthCheck
Line #3 - By default, we will have to implement the CheckHealthAsync method.
Line #7 - Here we mimic a random exception.
Line #12 - We return the error message and status of the health report as unhealthy. PS, you have another option to set the health as degrading as well.
Now we will have to wire up this custom health check to the service registration. Navigate back to Startup/ConfigureServices and modify as below.
services.AddHealthChecks() .AddDbContextCheck<DataContext>() .AddUrlGroup(new Uri("https://codewithmukesh.com"), name: "CodewithMukesh") .AddCheck<CustomHealthCheck>(name: "New Custom Check");Line #4 - We pass the Health check class that we created along with a name for the component. Let’s build and check.
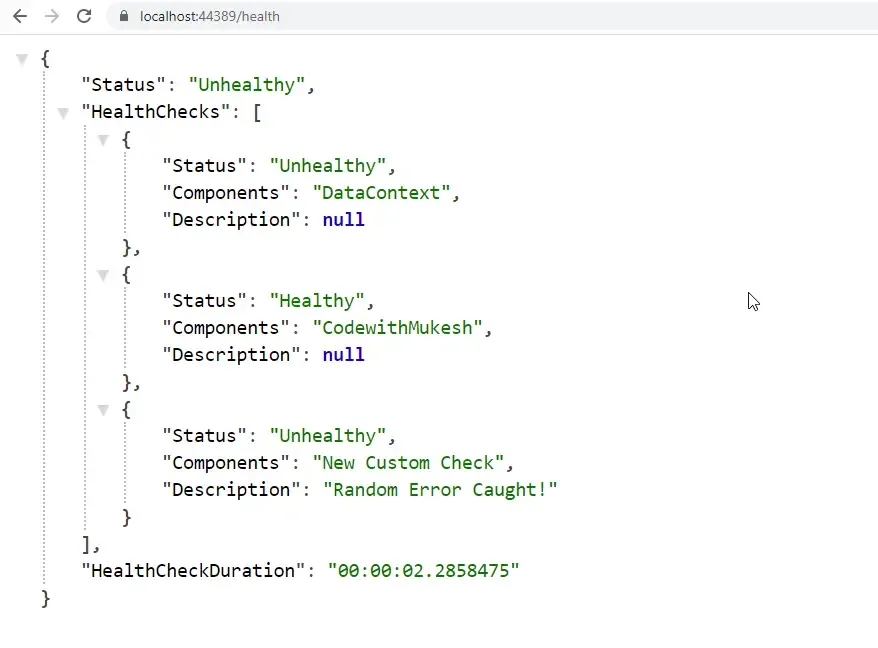
Wasn’t it quite interesting and easy to implement? :D
Summary
You can see how simple and cool it is to have Healthchecks in ASP.NET Core 3.1 Applications. We have learnt all the required aspects of integrating Healthchecks in ASP.NET Core. Did you find this guide informative? Leave a comment down below with what custom health checks you have made for your projects. Also, the source code of the implementation is on my Github. Thanks and Happy Coding :)

